# LaTeX_OCR_PRO
**Repository Path**: arthasking/LaTeX_OCR_PRO
## Basic Information
- **Project Name**: LaTeX_OCR_PRO
- **Description**: 数学公式识别,增强:中文公式、手写公式
- **Primary Language**: Unknown
- **License**: GPL-3.0
- **Default Branch**: master
- **Homepage**: None
- **GVP Project**: No
## Statistics
- **Stars**: 0
- **Forks**: 7
- **Created**: 2021-06-01
- **Last Updated**: 2021-06-01
## Categories & Tags
**Categories**: Uncategorized
**Tags**: None
## README
# LaTeX_OCR_PRO
数学公式识别,增强:中文公式、手写公式
Seq2Seq + Attention + Beam Search。结构如下:
* [1. 搭建环境](#1-搭建环境)
* [2. 开始训练](#2-开始训练)
* [3. 可视化](#3-可视化)
* [4. 部署](#4-部署)
* [5. 评价](#5-评价)
* [6. 更多细节](#6-更多细节)
* [模型实现细节](./doc/How-it-work.md)
* [解决方案](./doc/Solution.md)
* [7. 致谢](#7-致谢)
## 1. 搭建环境
1. python3.5 + tensorflow1.12.2
2. latex (latex 转 pdf)
3. ghostscript (图片处理)
4. magick (pdf 转 png)
Linux
一键安装
```shell
make install-linux
```
或
1. 安装本项目依赖
```shell
virtualenv env35 --python=python3.5
source env35/bin/activate
pip install -r requirements.txt
```
2. 安装 latex (latex 转 pdf)
```shell
sudo apt-get install texlive-latex-base
sudo apt-get install texlive-latex-extra
```
3. 安装 ghostscript
```shell
sudo apt-get update
sudo apt-get install ghostscript
sudo apt-get install libgs-dev
```
4. 安装[magick](https://www.imagemagick.org/script/install-source.php) (pdf 转 png)
```shell
wget http://www.imagemagick.org/download/ImageMagick.tar.gz
tar -xvf ImageMagick.tar.gz
cd ImageMagick-7.*; \
./configure --with-gslib=yes; \
make; \
sudo make install; \
sudo ldconfig /usr/local/lib
rm ImageMagick.tar.gz
rm -r ImageMagick-7.*
```
Mac
一键安装
```shell
make install-mac
```
或
1. 安装本项目依赖
```shell
sudo pip install -r requirements.txt
```
2. LaTeX
我们需要 pdflatex,可以傻瓜式一键安装:[http://www.tug.org/mactex/mactex-download.html](http://www.tug.org/mactex/mactex-download.html)
3. 安装[magick](https://www.imagemagick.org/script/install-source.php) (pdf 转 png)
```shell
wget http://www.imagemagick.org/download/ImageMagick.tar.gz
tar -xvf ImageMagick.tar.gz
cd ImageMagick-7.*; \
./configure --with-gslib=yes; \
make;\
sudo make install; \
rm ImageMagick.tar.gz
rm -r ImageMagick-7.*
```
## 2. 开始训练
生成小数据集、训练、评价
提供了样本量为 100 的小数据集,方便测试。只需 2 分钟就可以根据 `./data/small.formulas/` 下的公式生成用于训练的图片。
一步训练
```
make small
```
或
1. 生成数据集
用 LaTeX 公式生成图片,同时保存公式-图片映射文件,生成字典 __只用运行一次__
```shell
# 默认
python build.py
# 或者
python build.py --data=configs/data_small.json --vocab=configs/vocab_small.json
```
2. 训练
```
# 默认
python train.py
# 或者
python train.py --data=configs/data_small.json --vocab=configs/vocab_small.json --training=configs/training_small.json --model=configs/model.json --output=results/small/
```
3. 评价预测的公式
```
# 默认
python evaluate_txt.py
# 或者
python evaluate_txt.py --results=results/small/
```
4. 评价数学公式图片
```
# 默认
python evaluate_img.py
# 或者
python evaluate_img.py --results=results/small/
```
生成完整数据集、训练、评价
根据公式生成 70,000+ 数学公式图片需要 `2`-`3` 个小时
一步训练
```
make full
```
或
1. 生成数据集
用 LaTeX 公式生成图片,同时保存公式-图片映射文件,生成字典 __只用运行一次__
```
python build.py --data=configs/data.json --vocab=configs/vocab.json
```
2. 训练
```
python train.py --data=configs/data.json --vocab=configs/vocab.json --training=configs/training.json --model=configs/model.json --output=results/full/
```
3. 评价预测的公式
```
python evaluate_txt.py --results=results/full/
```
4. 评价数学公式图片
```
python evaluate_img.py --results=results/full/
```
## 3. 可视化
可视化训练过程
用 tensorboard 可视化训练过程
小数据集
```
cd results/small
tensorboard --logdir ./
```
完整数据集
```
cd results/full
tensorboard --logdir ./
```
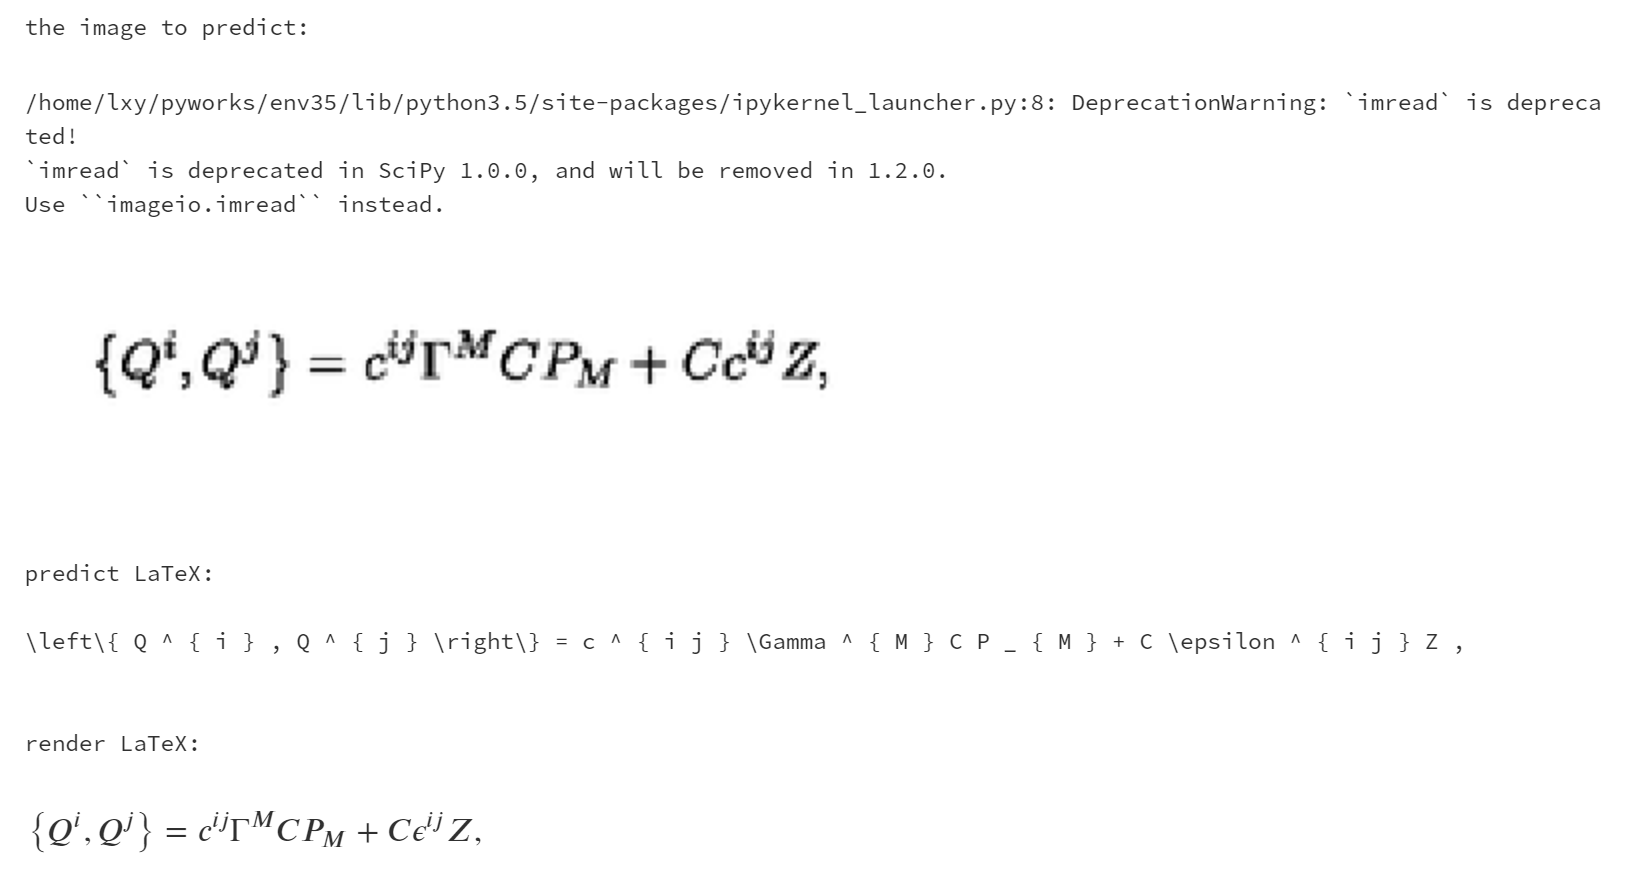
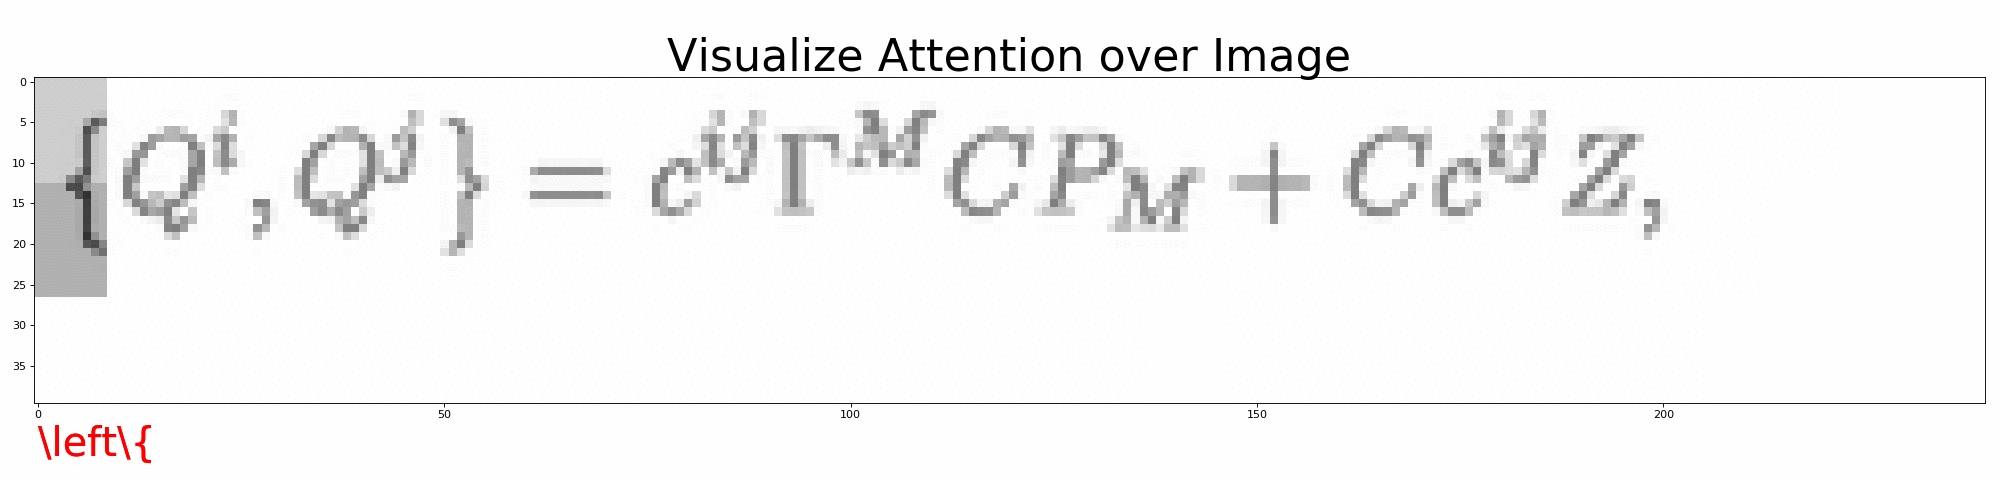
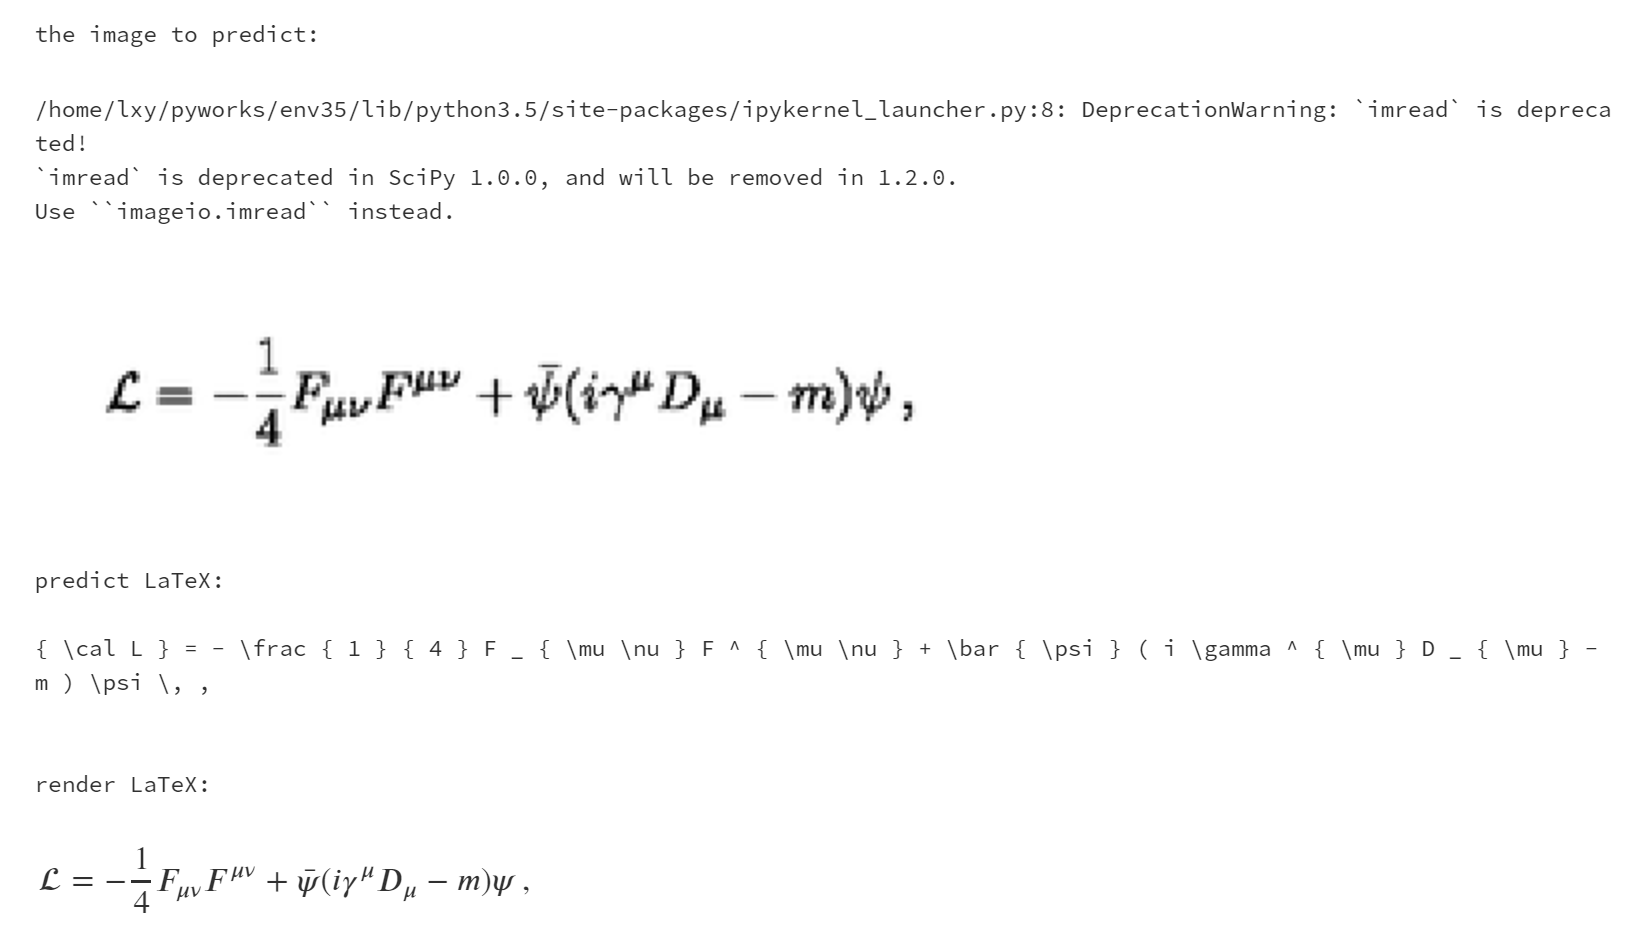
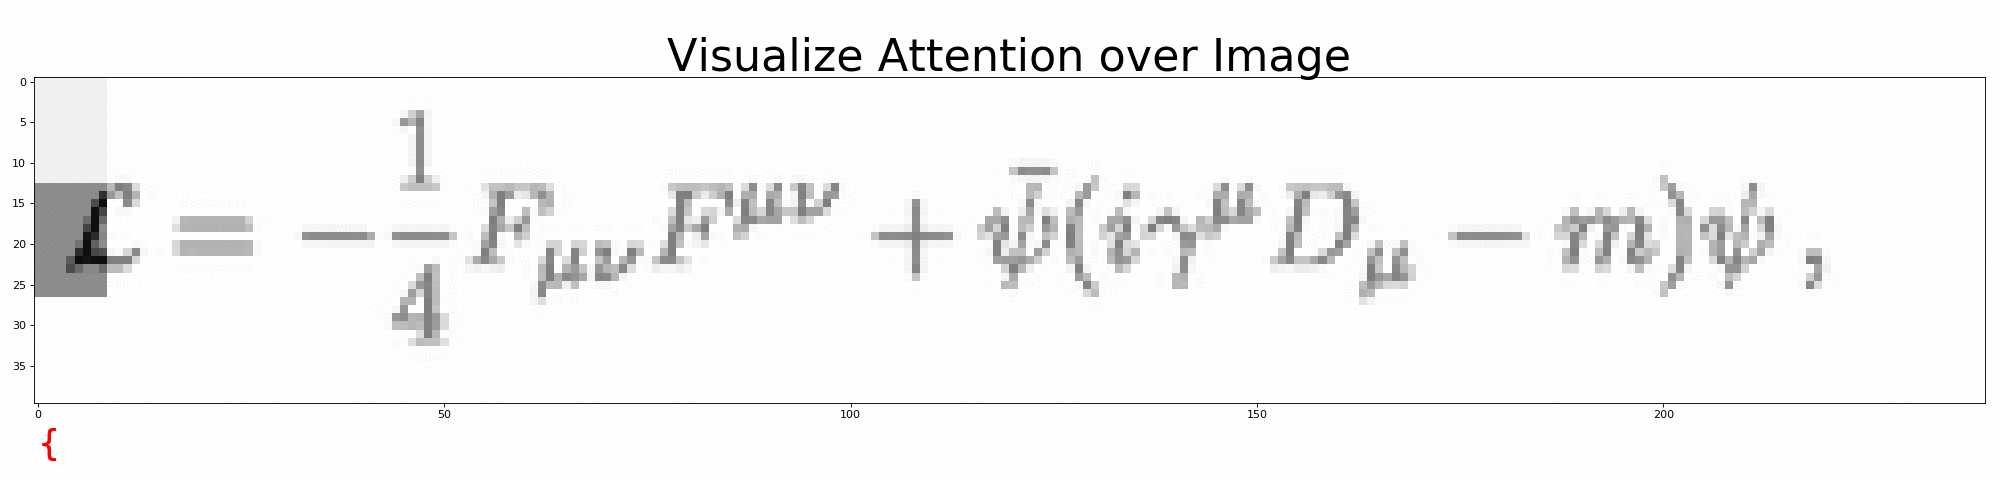
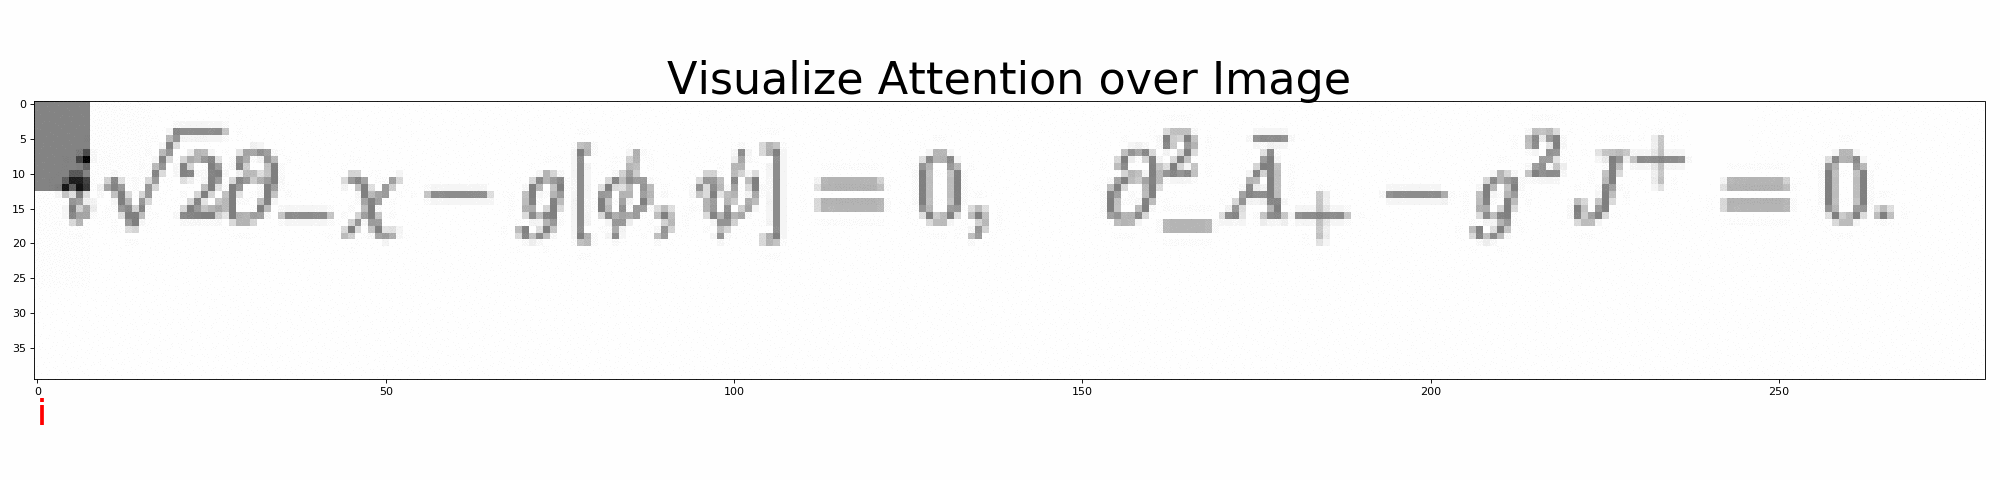
可视化预测过程
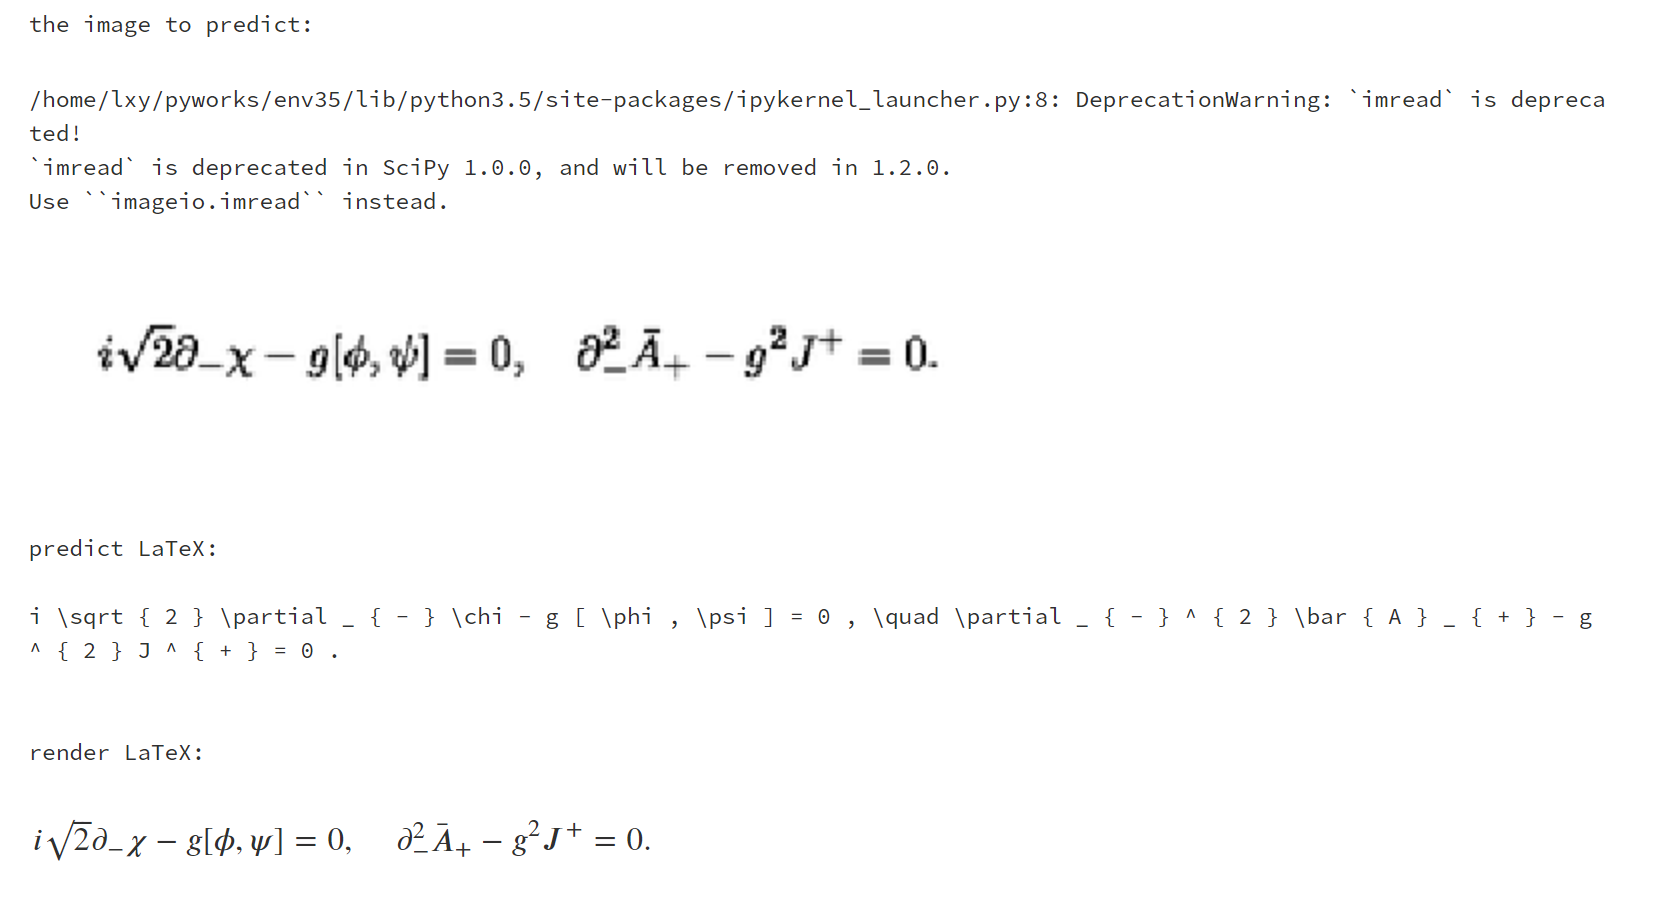
打开 `visualize_attention.ipynb`,一步步观察模型是如何预测 LaTeX 公式的。
或者运行
```shell
# 默认
python visualize_attention.py
# 或者
python visualize_attention.py --image=data/images_test/6.png --vocab=configs/vocab.json --model=configs/model.json --output=results/full/
```
可在 `--output` 下生成预测过程的注意力图。
## 4. 部署
部署为 Django 应用
1. 安装部署需要的环境
```bash
pip install django
```
2. 开启服务
```bash
python manage.py runserver 0.0.0.0:8010
```
3. 开启图片服务
```bash
cd data/images_train
python -m SimpleHTTPServer 8020
```
4. 使用方法
在输入框里依次输入 `0.png`, `1.png` 等等,即可看到结果
## 5. 评价
| 指标 | 训练分数 | 测试分数 |
| :-------------: | :------: | :------: |
| perplexity | 1.12 | 1.13 |
| EditDistance | 94.16 | 93.36 |
| BLEU-4 | 91.03 | 90.47 |
| ExactMatchScore | 49.30 | 46.22 |
perplexity 是越接近1越好,其余3个指标是越大越好。
其中 EditDistance 和 BLEU-4 已达到业内先进水平
将 perplexity 训练到 1.03 左右,ExactMatchScore 还可以再升,应该可以到 70 以上。
机器不太好,训练太费时间了。
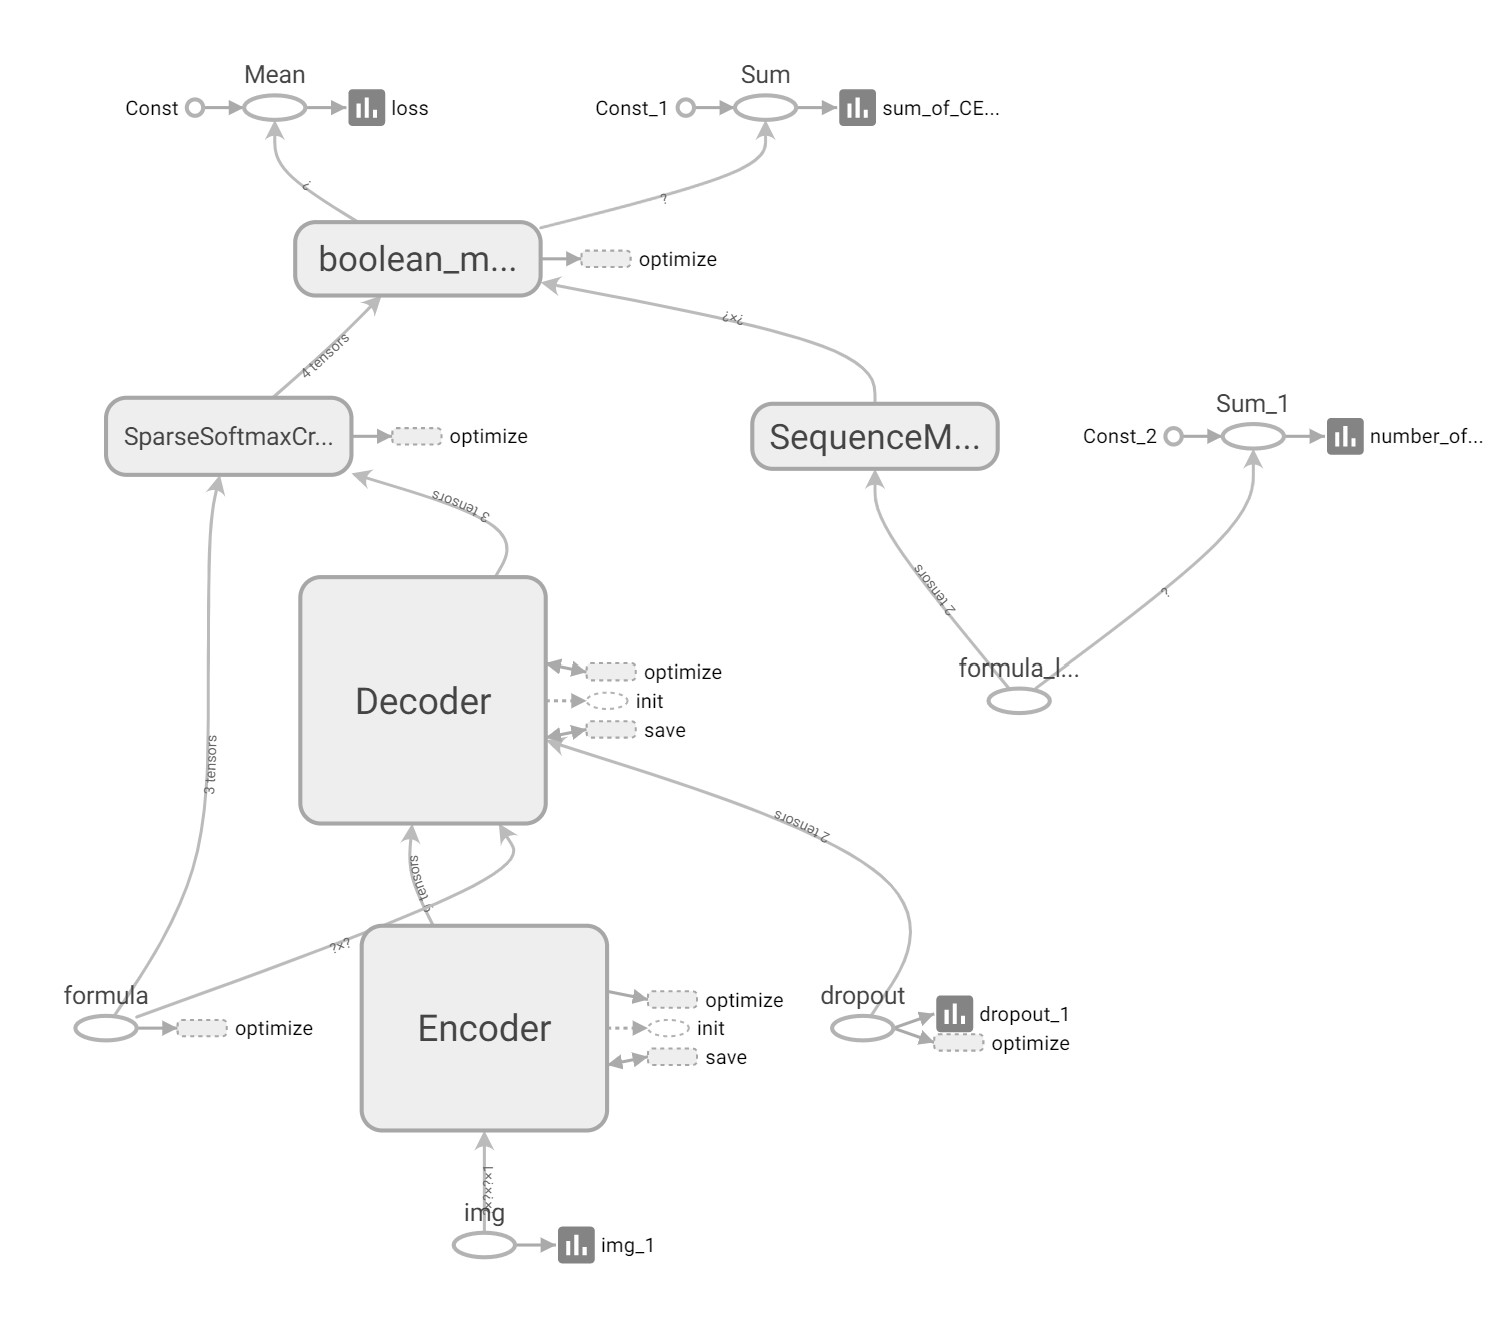
## 6. 更多细节
1. [模型实现细节](./doc/How-it-work.md)
包括数据获取、数据处理、模型架构、训练细节
2. [解决方案](./doc/Solution.md)
包括 “如何可视化 Attention 层”、“在 win10 用 GPU 加速训练” 等等
## 7. 致谢
十分感谢 Harvard 和 Guillaume Genthial 、Kelvin Xu 等人提供巨人的肩膀。
论文:
1. [Show, Attend and Tell(Kelvin Xu...)](https://arxiv.org/abs/1502.03044)
2. [Harvard's paper and dataset](http://lstm.seas.harvard.edu/latex/)
3. [Seq2Seq for LaTeX generation](https://guillaumegenthial.github.io/image-to-latex.html).