 **
**效果展示
** --- ## 准备工作 1. [登录](https://login.bce.baidu.com/) / [注册](https://passport.baidu.com/v2/?reg) 百度账号 2. 创建 [通用场景OCR](https://console.bce.baidu.com/ai/?_=1654272722032&fromai=1#/ai/ocr/app/create) ,*应用归属* 选择个人 ,*应用名称* 和 *应用描述* **自定义**
3. 填完以上信息后,点击 立即创建 **(注意要实名认证)**
4. 此时,*应用列表* 会出现 **刚创建好的应用** ,分别把 AppID 、 API Key 和 Secret Key **记录好** 等下用
---
## 使用教程
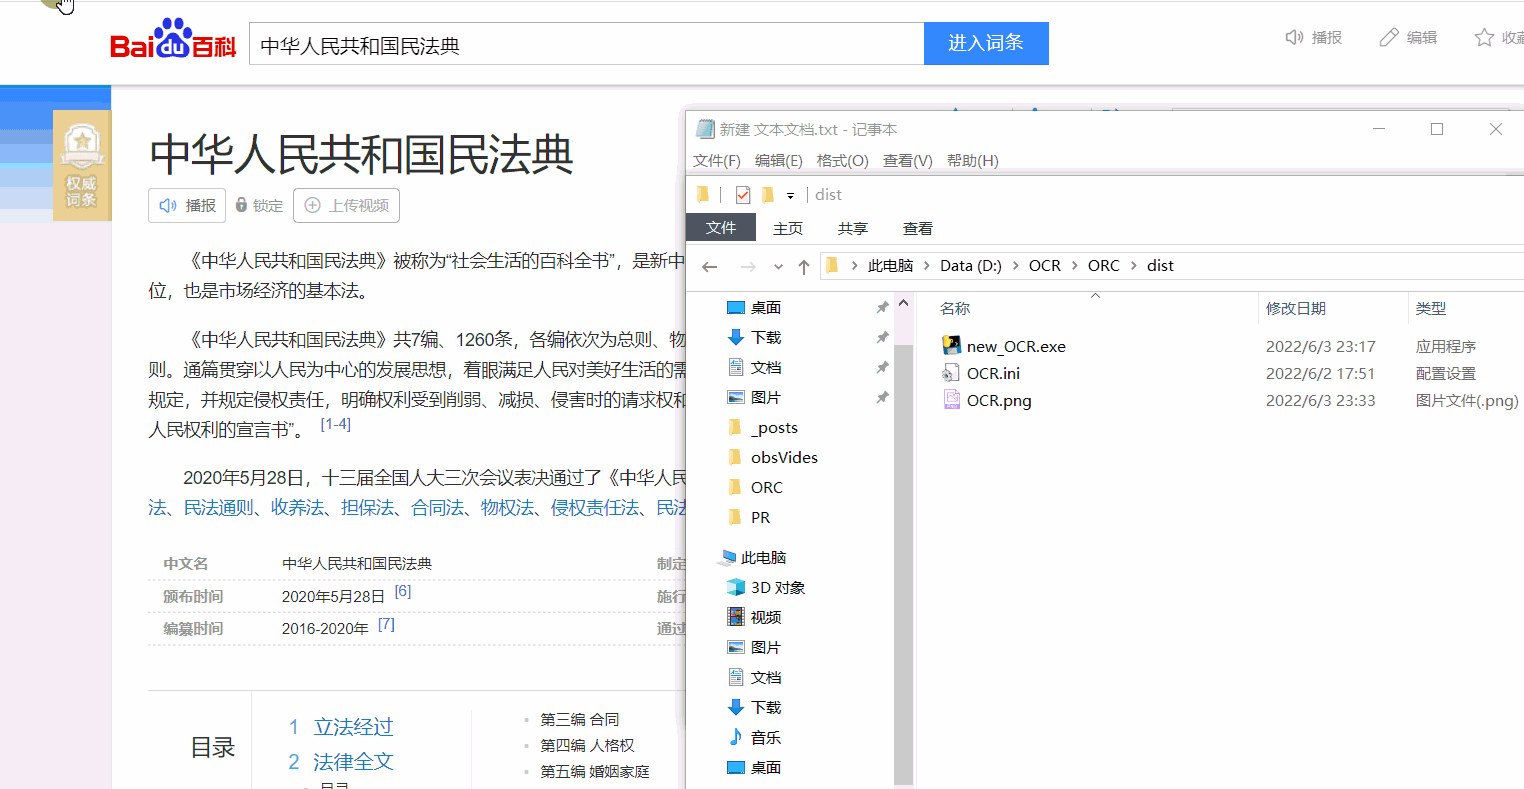
- 打开 new_OCR\dist\OCR.ini 文件,把在 **准备工作** 获取的 AppID 、 API Key 和 Secret Key 对应填入 , **运行exe文件** 即可
```ini
[aip]
APP_ID =
API_KEY =
SECRET_KEY =
```
---
- 如出现闪退 / 想换成自己的 , 请 / 可 更换以下内容
```ini
[config]
User-Agent =
Cookie =
bv =
```
- 方法如下
1. **F12** 打开 **开发者工具** ,选择 **Network** , 然后选择 **XHR**
2. 在 **翻译框** 输入任意 **文字** ,**页面** 会出现 **translate_** (如有多个选最新)
3. 点击 translate_ ,在 Headers 页面可以找到 User-Agent 和 Cookie ,在 Payload 页面可以找到bv **(火狐浏览器的 bv 在请求页面)**
4. 把找到的内容 **替换 ini 文件内容** ,**重新运行** 即可
5. 如不清楚文字描述可按 **如图 1 所示** 步骤 即可

图 1
--- # 补充 > github 开源:https://github.com/12thstan/baidu-OCR-fanyi > gitee 开源:https://gitee.com/c12th/baidu-OCR-fanyi > 原文:https://blog.c12th.cn/archives/7.html