# tensorrt_demos
**Repository Path**: chaucerg/tensorrt_demos
## Basic Information
- **Project Name**: tensorrt_demos
- **Description**: TensorRT YOLOv4, YOLOv3, SSD, MTCNN, and GoogLeNet
- **Primary Language**: Unknown
- **License**: MIT
- **Default Branch**: master
- **Homepage**: None
- **GVP Project**: No
## Statistics
- **Stars**: 0
- **Forks**: 3
- **Created**: 2020-10-12
- **Last Updated**: 2022-06-06
## Categories & Tags
**Categories**: Uncategorized
**Tags**: None
## README
# tensorrt_demos
Examples demonstrating how to optimize caffe/tensorflow/darknet models with TensorRT and run inferencing on NVIDIA Jetson or x86_64 PC platforms. Highlights: (The FPS numbers in this README are test results against JetPack 4.3, i.e. TensorRT 6, on Jetson Nano.)
* Run an optimized **"yolov4-416"** object detector at ~3 FPS on Jetson Nano.
* Run an optimized "yolov3-416" object detector at ~3 FPS on Jetson Nano.
* Run an optimized "ssd_mobilenet_v1_coco" object detector ("trt_ssd_async.py") at 27~28 FPS on Jetson Nano.
* Run a very accurate optimized "MTCNN" face detector at 6~11 FPS on Jetson Nano.
* Run an optimized "GoogLeNet" image classifier at ~60 FPS on Jetson Nano.
* All demos work on Jetson TX2, AGX Xavier, Xavier NX ([link](https://github.com/jkjung-avt/tensorrt_demos/issues/19#issue-517897927) and [link](https://github.com/jkjung-avt/tensorrt_demos/issues/30)), and run much faster!
* Furthermore, all demos should work on x86_64 PC with NVIDIA GPU(s) as well. Some minor tweaks would be needed. Please refer to [README_x86.md](https://github.com/jkjung-avt/tensorrt_demos/blob/master/README_x86.md) for more information.
Table of contents
-----------------
* [Prerequisite](#prerequisite)
* [Demo #1: GoogLeNet](#googlenet)
* [Demo #2: MTCNN](#mtcnn)
* [Demo #3: SSD](#ssd)
* [Demo #4: YOLOv3](#yolov3)
* [Demo #5: YOLOv4](#yolov4)
Prerequisite
------------
The code in this repository was tested on both Jetson Nano and Jetson TX2 Devkits. In order to run the demos below, first make sure you have the proper version of image (JetPack) installed on the target Jetson system. For example, this is my blog post about setting up a Jetson Nano: [Setting up Jetson Nano: The Basics](https://jkjung-avt.github.io/setting-up-nano/).
More specifically, the target Jetson system must have TensorRT libraries installed. **Demo #1 and Demo #2 should work for TensorRT 3.x ~ 7.x, while Demo #3 and Demo #4 would require TensorRT 5.x ~ 7.x.**
You could check which version of TensorRT has been installed on your Jetson system by looking at file names of the libraries. For example, TensorRT v5.1.6 (from JetPack-4.2.2) was present on one of my Jetson Nano DevKits.
```shell
$ ls /usr/lib/aarch64-linux-gnu/libnvinfer.so*
/usr/lib/aarch64-linux-gnu/libnvinfer.so
/usr/lib/aarch64-linux-gnu/libnvinfer.so.5
/usr/lib/aarch64-linux-gnu/libnvinfer.so.5.1.6
```
Furthermore, the demo programs require "cv2" (OpenCV) module for python3. You could use the "cv2" module which came in the JetPack. Or, if you'd prefer building your own, refer to [Installing OpenCV 3.4.6 on Jetson Nano](https://jkjung-avt.github.io/opencv-on-nano/) for how to build from source and install opencv-3.4.6 on your Jetson system.
Lastly, if you plan to run Demo #3 (SSD), you'd also need to have "tensorflowi-1.x" installed. You could probably use the [official tensorflow wheels provided by NVIDIA](https://docs.nvidia.com/deeplearning/frameworks/pdf/Install-TensorFlow-Jetson-Platform.pdf), or refer to [Building TensorFlow 1.12.2 on Jetson Nano](https://jkjung-avt.github.io/build-tensorflow-1.12.2/) for how to install tensorflow-1.12.2 on the Jetson system.
In case you are setting up a Jetson Nano or Jetson Xavier NX from scratch to run these demos, you could refer to the following blog posts. They contain the exact steps I applied when I did the testing of JetPack-4.3 and JetPack-4.4.
* [JetPack-4.3 for Jetson Nano](https://jkjung-avt.github.io/jetpack-4.3/)
* [JetPack-4.4 for Jetson Nano](https://jkjung-avt.github.io/jetpack-4.4/)
* [Setting up Jetson Xavier NX](https://jkjung-avt.github.io/setting-up-xavier-nx/)
Demo #1: GoogLeNet
------------------
This demo illustrates how to convert a prototxt file and a caffemodel file into a tensorrt engine file, and to classify images with the optimized tensorrt engine.
Step-by-step:
1. Clone this repository.
```shell
$ cd ${HOME}/project
$ git clone https://github.com/jkjung-avt/tensorrt_demos
$ cd tensorrt_demos
```
2. Build the TensorRT engine from the pre-trained googlenet (ILSVRC2012) model. Note that I downloaded the pre-trained model files from [BVLC caffe](https://github.com/BVLC/caffe/tree/master/models/bvlc_googlenet) and have put a copy of all necessary files in this repository.
```shell
$ cd ${HOME}/project/tensorrt_demos/googlenet
$ make
$ ./create_engine
```
3. Build the Cython code. Install Cython if not previously installed.
```shell
$ sudo pip3 install Cython
$ cd ${HOME}/project/tensorrt_demos
$ make
```
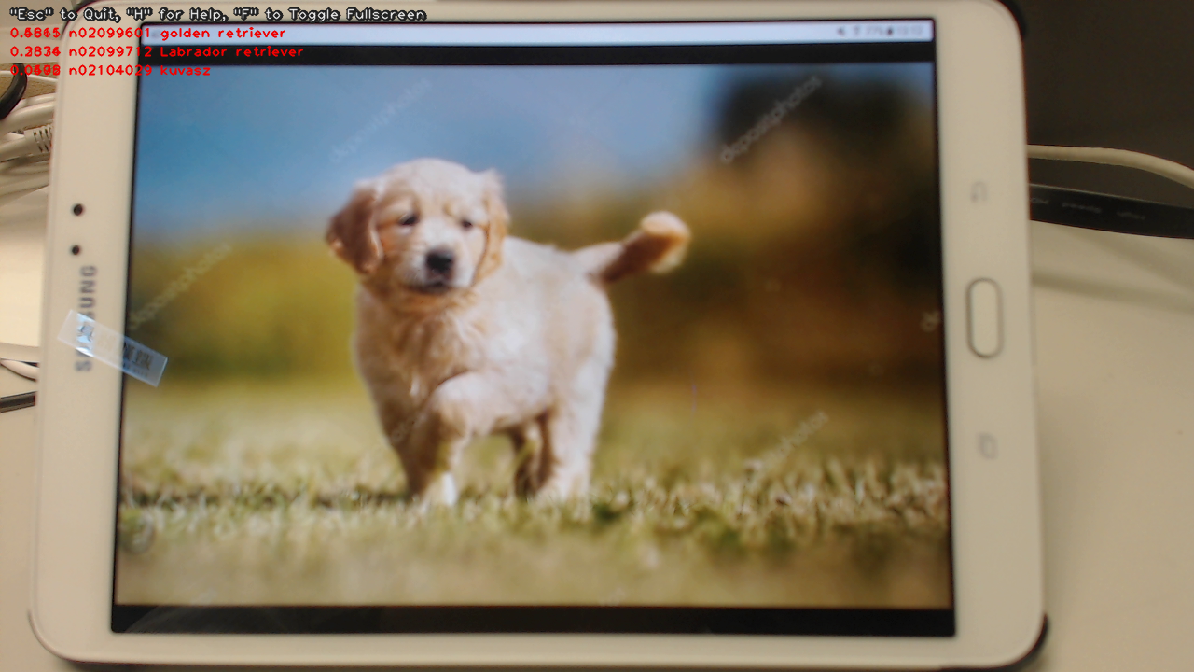
4. Run the "trt_googlenet.py" demo program. For example, run the demo using a USB webcam (/dev/video0) as the input.
```shell
$ cd ${HOME}/project/tensorrt_demos
$ python3 trt_googlenet.py --usb --vid 0 --width 1280 --height 720
```
Here's a screenshot of the demo (JetPack-4.2.2, i.e. TensorRT 5).
5. The demo program supports a number of different image inputs. You could do `python3 trt_googlenet.py --help` to read the help messages. Or more specifically, the following inputs could be specified:
* `--file --filename test_video.mp4`: a video file, e.g. mp4 or ts.
* `--image --filename test_image.jpg`: an image file, e.g. jpg or png.
* `--usb --vid 0`: USB webcam (/dev/video0).
* `--rtsp --uri rtsp://admin:123456@192.168.1.1/live.sdp`: RTSP source, e.g. an IP cam.
6. Check out my blog post for implementation details:
* [Running TensorRT Optimized GoogLeNet on Jetson Nano](https://jkjung-avt.github.io/tensorrt-googlenet/)
Demo #2: MTCNN
--------------
This demo builds upon the previous one. It converts 3 sets of prototxt and caffemodel files into 3 tensorrt engines, namely the PNet, RNet and ONet. Then it combines the 3 engine files to implement MTCNN, a very good face detector.
Assuming this repository has been cloned at "${HOME}/project/tensorrt_demos", follow these steps:
1. Build the TensorRT engines from the pre-trained MTCNN model. (Refer to [mtcnn/README.md](https://github.com/jkjung-avt/tensorrt_demos/blob/master/mtcnn/README.md) for more information about the prototxt and caffemodel files.)
```shell
$ cd ${HOME}/project/tensorrt_demos/mtcnn
$ make
$ ./create_engines
```
2. Build the Cython code if it has not been done yet. Refer to step 3 in Demo #1.
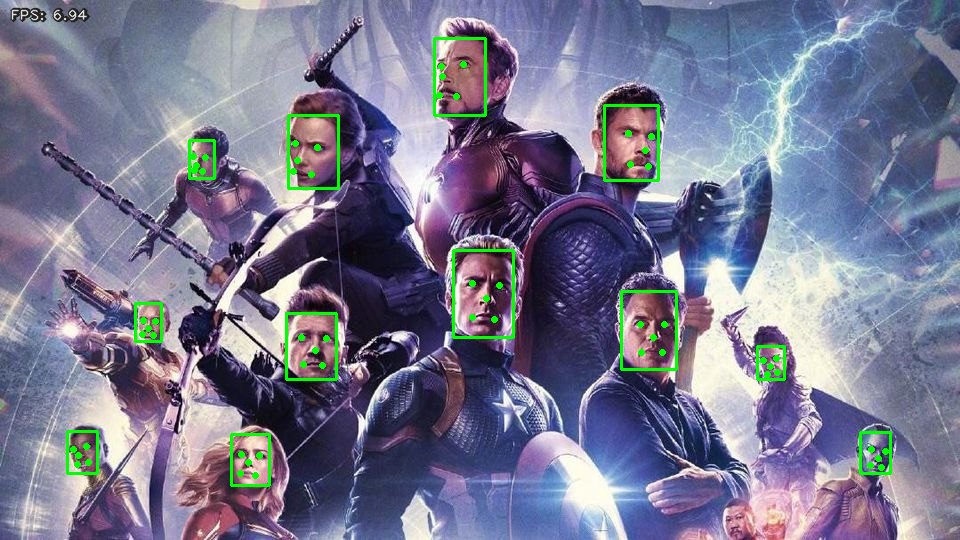
3. Run the "trt_mtcnn.py" demo program. For example, I grabbed from the internet a poster of The Avengers for testing.
```shell
$ cd ${HOME}/project/tensorrt_demos
$ python3 trt_mtcnn.py --image --filename ${HOME}/Pictures/avengers.jpg
```
Here's the result (JetPack-4.2.2, i.e. TensorRT 5).
4. The "trt_mtcnn.py" demo program could also take various image inputs. Refer to step 5 in Demo #1 for details.
5. Check out my related blog posts:
* [TensorRT MTCNN Face Detector](https://jkjung-avt.github.io/tensorrt-mtcnn/)
* [Optimizing TensorRT MTCNN](https://jkjung-avt.github.io/optimize-mtcnn/)
Demo #3: SSD
------------
This demo shows how to convert pre-trained tensorflow Single-Shot Multibox Detector (SSD) models through UFF to TensorRT engines, and to do real-time object detection with the TensorRT engines.
NOTE: This particular demo requires TensorRT "Python API", which is only available in TensorRT 5.x+ on the Jetson systems. In other words, this demo only works on Jetson systems properly set up with JetPack-4.2+, but **not** JetPack-3.x or earlier versions.
Assuming this repository has been cloned at "${HOME}/project/tensorrt_demos", follow these steps:
1. Install requirements (pycuda, etc.) and build TensorRT engines from the pre-trained SSD models.
```shell
$ cd ${HOME}/project/tensorrt_demos/ssd
$ ./install.sh
$ ./build_engines.sh
```
NOTE: On my Jetson Nano DevKit with TensorRT 5.1.6, the version number of UFF converter was "0.6.3". When I ran "build_engine.py", the UFF library actually printed out: `UFF has been tested with tensorflow 1.12.0. Other versions are not guaranteed to work.` So I would strongly suggest you to use **tensorflow 1.12.x** (or whatever matching version for the UFF library installed on your system) when converting pb to uff.
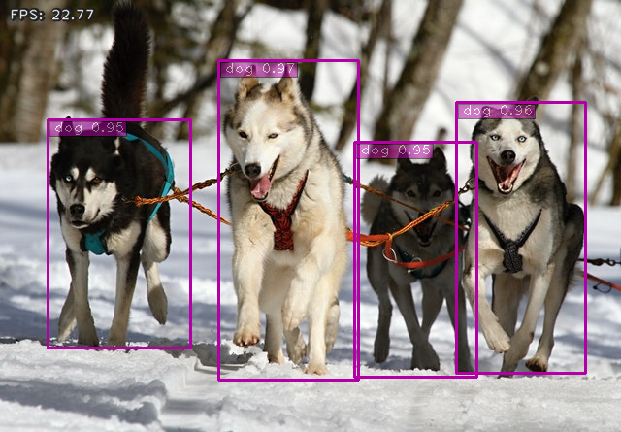
2. Run the "trt_ssd.py" demo program. The demo supports 4 models: "ssd_mobilenet_v1_coco", "ssd_mobilenet_v1_egohands", "ssd_mobilenet_v2_coco", or "ssd_mobilenet_v2_egohands". For example, I tested the "ssd_mobilenet_v1_coco" model with the "huskies" picture.
```shell
$ cd ${HOME}/project/tensorrt_demos
$ python3 trt_ssd.py --model ssd_mobilenet_v1_coco \
--image \
--filename ${HOME}/project/tf_trt_models/examples/detection/data/huskies.jpg
```
Here's the result (JetPack-4.2.2, i.e. TensorRT 5). Frame rate was good (over 20 FPS).
NOTE: When running this demo with TensorRT 6 (JetPack-4.3) on the Jetson Nano, I encountered the following error message which could probably be ignored for now. Quote from [NVIDIA's NVES_R](https://devtalk.nvidia.com/default/topic/1065233/tensorrt/-tensorrt-error-could-not-register-plugin-creator-flattenconcat_trt-in-namespace-/post/5394191/#5394191): `This is a known issue and will be fixed in a future version.`
```
[TensorRT] ERROR: Could not register plugin creator: FlattenConcat_TRT in namespace
```
I also tested the "ssd_mobilenet_v1_egohands" (hand detector) model with a video clip from YouTube, and got the following result. Again, frame rate was pretty good. But the detection didn't seem very accurate though :-(
```shell
$ python3 trt_ssd.py --model ssd_mobilenet_v1_egohands \
--file \
--filename ${HOME}/Videos/Nonverbal_Communication.mp4
```
(Click on the image below to see the whole video clip...)
[](https://youtu.be/3ieN5BBdDF0)
3. The "trt_ssd.py" demo program could also take various image inputs. Refer to step 5 in Demo #1 again.
4. Referring to this comment, ["#TODO enable video pipeline"](https://github.com/AastaNV/TRT_object_detection/blob/master/main.py#L78), in the original TRT_object_detection code, I did implement an "async" version of ssd detection code to do just that. When I tested "ssd_mobilenet_v1_coco" on the same huskies image with the async demo program on the Jetson Nano DevKit, frame rate improved 3~4 FPS.
```shell
$ cd ${HOME}/project/tensorrt_demos
$ python3 trt_ssd_async.py --model ssd_mobilenet_v1_coco \
--image \
--filename ${HOME}/project/tf_trt_models/examples/detection/data/huskies.jpg
```
5. To verify accuracy (mAP) of the optimized TensorRT engines and make sure they do not degrade too much (due to reduced floating-point precision of "FP16") from the original TensorFlow frozen inference graphs, you could prepare validation data and run "eval_ssd.py". Refer to [README_eval_ssd.md](README_eval_ssd.md) for details.
I compared mAP of the TensorRT engine and the original tensorflow model for both "ssd_mobilenet_v1_coco" and "ssd_mobilenet_v2_coco" using COCO "val2017" data. The results were good. In both cases, mAP of the optimized TensorRT engine matched the original tensorflow model. The FPS (frames per second) numbers in the table were measured using "trt_ssd_async.py" on my Jetson Nano DevKit with JetPack-4.3.
| TensorRT engine | mAP @
IoU=0.5:0.95 | mAP @
IoU=0.5 | FPS on Nano |
|:------------------------|:---------------------:|:------------------:|:-----------:|
| mobilenet_v1 TF | 0.232 | 0.351 | -- |
| mobilenet_v1 TRT (FP16) | 0.232 | 0.351 | 27.7 |
| mobilenet_v2 TF | 0.248 | 0.375 | -- |
| mobilenet_v2 TRT (FP16) | 0.248 | 0.375 | 22.7 |
6. Check out my blog posts for implementation details:
* [TensorRT UFF SSD](https://jkjung-avt.github.io/tensorrt-ssd/)
* [Speeding Up TensorRT UFF SSD](https://jkjung-avt.github.io/speed-up-trt-ssd/)
* [Verifying mAP of TensorRT Optimized SSD and YOLOv3 Models](https://jkjung-avt.github.io/trt-detection-map/)
* Or if you'd like to learn how to train your own custom object detectors which could be easily converted to TensorRT engines and inferenced with "trt_ssd.py" and "trt_ssd_async.py": [Training a Hand Detector with TensorFlow Object Detection API](https://jkjung-avt.github.io/hand-detection-tutorial/)
Demo #4: YOLOv3
---------------
Along the same line as Demo #3, this demo showcases how to convert pre-trained YOLOv3 models through ONNX to TensorRT engines. This demo also requires TensorRT "Python API" and has been verified working against TensorRT 5.x+.
Assuming this repository has been cloned at "${HOME}/project/tensorrt_demos", follow these steps:
1. Install "pycuda" in case you have not done so in Demo #3. Note that installation script resides in the "ssd" folder.
```shell
$ cd ${HOME}/project/tensorrt_demos/ssd
$ ./install_pycuda.sh
```
2. Install version "1.4.1" (**not the latest version**) of python3 "onnx" module. Reference: [information provided by NVIDIA](https://devtalk.nvidia.com/default/topic/1052153/jetson-nano/tensorrt-backend-for-onnx-on-jetson-nano/post/5347666/#5347666).
```shell
$ sudo pip3 install onnx==1.4.1
```
3. Download the pre-trained YOLOv3 COCO models and convert the targeted model to ONNX and then to TensorRT engine. This demo supports 5 models: "yolov3-tiny-288", "yolov3-tiny-416", "yolov3-288", "yolov3-416", and "yolov3-608". In addition, the code should also work for custom YOLOv3 models, or even models with different width and height for the input, e.g. yolov3-416x256. Refer to my [TensorRT YOLOv3 For Custom Trained Models](https://jkjung-avt.github.io/trt-yolov3-custom/) blog post for more information.
I use "yolov3-416" as example below.
```shell
$ cd ${HOME}/project/tensorrt_demos/yolo
$ ./download_yolov3.sh
$ python3 yolo_to_onnx.py --model yolov3-416
$ python3 onnx_to_tensorrt.py --model yolov3-416
```
The last step ("onnx_to_tensorrt.py") takes a little bit more than half an hour to complete on my Jetson Nano DevKit. When that is done, the optimized TensorRT engine would be saved as "yolov3-416.trt".
4. Test the YOLOv3 TensorRT engine with the "dog.jpg" image.
```shell
$ wget https://raw.githubusercontent.com/pjreddie/darknet/master/data/dog.jpg -O ${HOME}/Pictures/dog.jpg
$ python3 trt_yolo.py --model yolov3-416 \
--image --filename ${HOME}/Pictures/dog.jpg
```
This was tested against JetPack-4.3, i.e. TensorRT 6.

5. The "trt_yolo.py" demo program could also take various image inputs. Refer to step 5 in Demo #1 again.
6. Similar to step 5 of Demo #3, I also created "eval_yolo.py" for evaluating mAP of the optimized YOLOv3 engines.
```shell
$ python3 eval_yolo.py --model yolov3-tiny-288
$ python3 eval_yolo.py --model yolov3-tiny-416
$ python3 eval_yolo.py --model yolov3-288
$ python3 eval_yolo.py --model yolov3-416
$ python3 eval_yolo.py --model yolov3-608
```
I evaluated all of yolov3-tiny-288, yolov3-tiny-416, yolov3-288, yolov3-416 and yolov3-608 TensorRT engines with COCO "val2017" data and got the following results. The FPS (frames per second) numbers were measured using "trt_yolov3.py" on my Jetson Nano DevKit with JetPack-4.3.
| TensorRT engine | mAP @
IoU=0.5:0.95 | mAP @
IoU=0.5 | FPS on Nano |
|:-----------------------|:---------------------:|:------------------:|:-----------:|
| yolov3-tiny-288 (FP16) | 0.077 | 0.158 | 20.9 |
| yolov3-tiny-416 (FP16) | 0.096 | 0.202 | 14.2 |
| yolov3-288 (FP16) | 0.331 | 0.600 | 5.42 |
| yolov3-416 (FP16) | 0.373 | 0.664 | 3.07 |
| yolov3-608 (FP16) | 0.376 | 0.665 | 1.53 |
| yolov3-608 (FP32) | 0.376 | 0.665 | -- |
7. Check out my blog posts for implementation details:
* [TensorRT ONNX YOLOv3](https://jkjung-avt.github.io/tensorrt-yolov3/)
* [Verifying mAP of TensorRT Optimized SSD and YOLOv3 Models](https://jkjung-avt.github.io/trt-detection-map/)
* For adapting the code to your own custom trained YOLOv3 models: [TensorRT YOLOv3 For Custom Trained Models](https://jkjung-avt.github.io/trt-yolov3-custom/)
Demo #5: YOLOv4
---------------
Following up on Demo #4, this demo is for YOLOv4 models. This demo also requires TensorRT "Python API" and has been verified working against TensorRT 5.x+.
Here are the steps:
1. Install "pycuda" and "onnx==1.4.1". Refer to steps 1 and 2 in Demo #4 for details.
2. Download the pre-trained YOLOv4 COCO models and convert, say, "yolov4-416" to a TensorRT engine.
```shell
$ cd ${HOME}/project/tensorrt_demos/yolo
$ ./download_yolov4.sh
$ python3 yolo_to_onnx.py --model yolov4-416
$ python3 onnx_to_tensorrt.py --model yolov4-416
```
The last step ("onnx_to_tensorrt.py") would take quite a while. When that is done, the optimized TensorRT engine would be saved as "yolov4-416.trt".
3. Test the YOLOv4 TensorRT engine with the "dog.jpg" image.
```shell
$ wget https://raw.githubusercontent.com/pjreddie/darknet/master/data/dog.jpg -O ${HOME}/Pictures/dog.jpg
$ python3 trt_yolo.py --model yolov4-416 \
--image --filename ${HOME}/Pictures/dog.jpg
```
4. (Optional) Test the YOLOv4 TensorRT engine with other kinds of video inputs. Refer to step 5 in Demo #4.
5. Use "eval_yolo.py" to evaluate mAP of the optimized YOLOv4 engines.
```shell
$ python3 eval_yolo.py --model yolov4-tiny-288
$ python3 eval_yolo.py --model yolov4-tiny-416
$ python3 eval_yolo.py --model yolov4-288
$ python3 eval_yolo.py --model yolov4-416
$ python3 eval_yolo.py --model yolov4-608
```
The results are summarized as follows. Note the FPS (frames per second) numbers were measured on my Jetson Nano DevKit with JetPack-4.4 (TensorRT 7).
| TensorRT engine | mAP @
IoU=0.5:0.95 | mAP @
IoU=0.5 | FPS on Nano |
|:-----------------------|:---------------------:|:------------------:|:-----------:|
| yolov4-tiny-288 (FP16) | 0.179 | 0.344 | 23.8 |
| yolov4-tiny-416 (FP16) | 0.196 | 0.386 | 16.5 |
| yolov4-288 (FP16) | 0.372 | 0.590 | 6.18 |
| yolov4-416 (FP16) | 0.454 | 0.698 | 3.50 |
| yolov4-608 (FP16) | 0.484 | 0.735 | 1.77 |
6. Check out my corresponding blog post:
* [TensorRT YOLOv4](https://jkjung-avt.github.io/tensorrt-yolov4/)
Licenses
--------
I referenced source code of [NVIDIA/TensorRT](https://github.com/NVIDIA/TensorRT) samples to develop most of the demos in this repository. Those NVIDIA samples are under [Apache License 2.0](https://github.com/NVIDIA/TensorRT/blob/master/LICENSE).