# docker-compose
**Repository Path**: tanoo/docker-compose
## Basic Information
- **Project Name**: docker-compose
- **Description**: docker-compose集成环境系列
- **Primary Language**: Docker
- **License**: Apache-2.0
- **Default Branch**: tn
- **Homepage**: None
- **GVP Project**: No
## Statistics
- **Stars**: 2
- **Forks**: 2533
- **Created**: 2021-03-10
- **Last Updated**: 2026-04-28
## Categories & Tags
**Categories**: Uncategorized
**Tags**: None
## README
# 卸载docker
> https://docs.docker.com/engine/install/centos/#uninstall-old-versions
## centos
```SHELL
sudo yum remove docker \
docker-client \
docker-client-latest \
docker-common \
docker-latest \
docker-latest-logrotate \
docker-logrotate \
docker-engine
```
## 方法二
1. 查看已安装的 Docker 包 `sudo yum list installed | grep docker`
2. 卸载相关包 `sudo yum remove -y 'docker*'` `sudo yum remove -y containerd.io.x86_64`
# 安装docker
## centos
> [也可以参考官网](https://docs.docker.com/engine/install/centos/)
> 建议官网操作或者下面的换源,因为yum安装的不新
```shell
# 更新源
sudo yum update
# update 出现问题可以清下缓存
sudo yum clean all
# 通过yum源安装docker
sudo yum -y install docker
# 启动docker
sudo systemctl start docker
# 开机自启
sudo systemctl enable docker
# 检查日志
journalctl -u docker --no-pager -n 50
```
### 添加源安装
> 删除添加的源 `cd /etc/yum.repos.d/ && rm -rf docker-ce.repo`
```shell
# 更新源
sudo yum update
# 安装软件包
sudo yum install -y yum-utils device-mapper-persistent-data lvm2
# 下载 docker yum 源
sudo yum-config-manager --add-repo https://download.docker.com/linux/centos/docker-ce.repo
# 按版本降序列出 docker 版本
sudo yum list docker-ce --showduplicates | sort -r
# 选择版本下载
sudo yum install docker-ce-19.03.5
# 启动 docker
sudo systemctl start docker
# 查看 docker 版本
sudo docker version
```
```SHELL
[root@localhost ~]# sudo yum list docker-ce --showduplicates | sort -r
* updates: mirrors.ustc.edu.cn
This system is not registered with an entitlement server. You can use subscription-manager to register.
: subscription-manager
* remi-safe: mirrors.tuna.tsinghua.edu.cn
Loading mirror speeds from cached hostfile
Loaded plugins: fastestmirror, langpacks, product-id, search-disabled-repos,
* extras: mirrors.ustc.edu.cn
* epel: mirrors.bfsu.edu.cn
docker-ce.x86_64 3:25.0.3-1.el7 docker-ce-stable
docker-ce.x86_64 3:25.0.2-1.el7 docker-ce-stable
docker-ce.x86_64 3:25.0.1-1.el7 docker-ce-stable
docker-ce.x86_64 3:25.0.0-1.el7 docker-ce-stable
[root@localhost ~]# sudo yum install docker-ce-25.0.3
Loaded plugins: fastestmirror, langpacks, product-id, search-disabled-repos, subscription-manager
This system is not registered with an entitlement server. You can use subscription-manager to register.
Loading mirror speeds from cached hostfile
* base: mirrors.aliyun.com
```
#### 错误处理
1. Error: 为仓库 'docker-ce-stable' 下载元数据失败 : Cannot download repomd.xml: Cannot download repodata/repomd.xml: All mirrors were tried
> /etc/yum.repos.d/docker-ce.repo
```text
把 [docker-ce-stable] 下 的 enabled=1 修改成 enabled=0
```
2. 为什么会出现 PostgreSQL 的 GPG 密钥
- yum list 会检查 所有已启用的仓库,而你的系统可能启用了 PostgreSQL 的仓库(pgdg-redhat-repo)。
- 由于 Docker 的仓库未正确配置,yum 扫描了其他仓库(如 PostgreSQL),导致导入了它的 GPG 密钥。
替代方法:临时禁用 PostgreSQL 仓库`sudo yum --disablerepo=pgdg* list docker-ce --showduplicates | sort -r`
3. failed to start daemon: Error initializing network controller: error creating default "bridge" network: Failed to program NAT chain: INVALID_ZONE: docker
> https://mhsj.net/240.html
```json
{
"iptables": false
}
```
4. networks have same bridge name
删除所有 Docker 网络(重置网络配置)`sudo rm -rf /var/lib/docker/network`
## 欧拉系统
> 1. 原文 https://www.yuque.com/tanning/mbquef/ay4lst885i4wr6h0
> 2. 官方:https://www.hiascend.com/doc_center/source/zh/quick-installation/23.0.RC2/quickinstg/900_PoD_A2/quickinstg_900_PoD_A2_0031.html
> 3. 系统详情: openEuler release 22.03 (LTS-SP1)
> 4. 网络情况:在线
### 配置软件源
#### 配置CentOS软件源
1. 新增CentOS软件源
```shell
wget -O /etc/yum.repos.d/CentOS-Base.repo https://mirrors.huaweicloud.com/repository/conf/CentOS-7-reg.repo
```
2. 修改CentOS-7-reg.repo
```shell
sed -i 's/$releasever/7/g' /etc/yum.repos.d/CentOS-Base.repo
```
3. 查看以下修改效果
> 应该所有的$releasever都变成7才对
>
```shell
cat /etc/yum.repos.d/CentOS-Base.repo
```
#### 配置Docker CE软件源
1. 添加Docker-CE软件源
> 源博主使用时华为: [https://repo.huaweicloud.com/docker-ce/linux/centos/docker-ce.repo](https://repo.huaweicloud.com/docker-ce/linux/centos/docker-ce.repo)
>
> 我使用会发现里面的源地址是 docker的官方地址导致我下载很慢所以改成了阿里的
>
```shell
wget -O /etc/yum.repos.d/docker-ce.repo http://mirrors.aliyun.com/docker-ce/linux/centos/docker-ce.repo
```
2. 修改docker-ce.repo
```shell
sed -i 's/$releasever/7/g' /etc/yum.repos.d/docker-ce.repo
```
3. 查看以下修改效果
> 应该所有的$releasever都变成7才对
>
```shell
cat /etc/yum.repos.d/docker-ce.repo
```
#### 刷新软件源
```shell
yum clean all && yum makecache
```
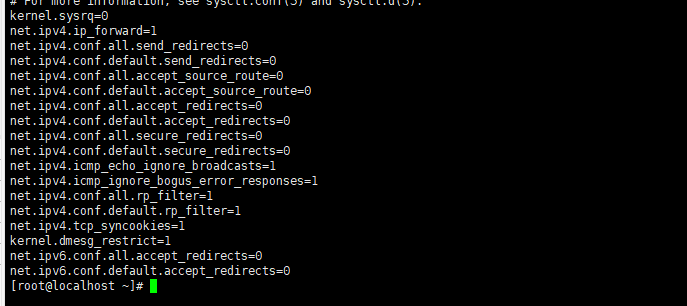
### 允许IPv4转发
> 这一步很重要,最开始我是使用yum安装的,然后发现容器之间无法通信,所以才找到的这篇文章
>
Docker运行需要允许网络转发
```shell
nano /etc/sysctl.conf
```
将其中的net.ipv4.ip_forward修改为1
```shell
net.ipv4.ip_forward=1
```
### 安装Docker CE
1. 删除旧版本
```shell
sudo yum remove docker \
docker-client \
docker-client-latest \
docker-common \
docker-latest \
docker-latest-logrotate \
docker-logrotate \
docker-engine
```
2. 安装
```shell
sudo yum install docker-ce docker-ce-cli containerd.io docker-compose-plugin
```
3. 启动
```shell
sudo systemctl start docker
```
4. 开机运行
```shell
sudo systemctl enable docker
```
#### 测试
```shell
sudo docker run hello-world
```
#### Docker免Root运行
```shell
usermod -aG docker ${USER}
```
#### 移除软件源
保持系统干净,因为非官方指定的软件源,故还是选择避免污染
Docker
```shell
mv /etc/yum.repos.d/docker-ce.repo /etc/yum.repos.d/docker-ce.repo.bak
```
CentOS
```shell
mv /etc/yum.repos.d/CentOS-Base.repo /etc/yum.repos.d/CentOS-Base.repo.bak
```
刷新
```shell
yum clean all && yum makecache
```
## debian
> 参考:https://docs.docker.com/engine/install/debian/
> 参考:https://www.runoob.com/docker/debian-docker-install.html
### 1. 卸载冲突包
```shell
for pkg in docker.io docker-doc docker-compose podman-docker containerd runc; do sudo apt-get remove $pkg; done
```
### 2. 使用apt安装
#### a. 设置 Docker 的 apt 仓库
```shell
# 清理现有配置
sudo rm -f /etc/apt/sources.list.d/docker.list
sudo apt-get update
```
```shell
# Add Docker's official GPG key:
sudo apt-get update
sudo apt-get upgrade
sudo apt-get install ca-certificates curl gnupg apt-transport-https software-properties-common
# 创建密钥目录并设置权限
sudo install -m 0755 -d /etc/apt/keyrings
# 官方
# sudo curl -fsSL https://download.docker.com/linux/debian/gpg -o /etc/apt/keyrings/docker.asc
# 阿里云
# 添加阿里云GPG密钥
# sudo mkdir -p /etc/apt/keyrings
# 使用阿里云镜像源(适合中国用户)
sudo curl -fsSL https://mirrors.aliyun.com/docker-ce/linux/debian/gpg -o /etc/apt/keyrings/docker.asc
sudo chmod a+r /etc/apt/keyrings/docker.asc
# Add the repository to Apt sources:
## 官方
echo \
"deb [arch=$(dpkg --print-architecture) signed-by=/etc/apt/keyrings/docker.asc] https://download.docker.com/linux/debian \
$(. /etc/os-release && echo "$VERSION_CODENAME") stable" | \
sudo tee /etc/apt/sources.list.d/docker.list > /dev/null
## 阿里云镜像源
echo \
"deb [arch=$(dpkg --print-architecture) signed-by=/etc/apt/keyrings/docker.asc] https://mirrors.aliyun.com/docker-ce/linux/debian \
$(. /etc/os-release && echo "$VERSION_CODENAME") stable" | \
sudo tee /etc/apt/sources.list.d/docker.list > /dev/null
# 更新软件包索引
sudo apt-get update
```
如果您使用的是衍生发行版,例如 Kali Linux,您可能需要替换该命令中预期打印版本代号的部分`$(. /etc/os-release && echo "$VERSION_CODENAME")`替换为相应 Debian 版本的代号,例如 bookworm 。
```shell
# 可以使用这个差
root@THTF-pc:~# cat /etc/debian_version
bullseye/sid
```
#### b. 安装 Docker 软件包
```shell
sudo apt-get install docker-ce docker-ce-cli containerd.io docker-buildx-plugin docker-compose-plugin
# 强制安装
sudo apt-get install -y --allow-unauthenticated docker-ce docker-ce-cli containerd.io docker-buildx-plugin docker-compose-plugin
```
#### c. 通过运行 hello-world 镜像来验证安装是否成功
```shell
sudo docker run hello-world
```
## Kylin V10 SP1
> static版本
> 桌面版注意,安全中心->应用保护->关闭一些保护
> 参考 https://juejin.cn/post/7349189143799611419
1. 下载docker-28.3.2.tgz https://download.docker.com/linux/static/stable/aarch64/
2. 将下载好的docker-28.3.2.tgz上传到服务器并解压`tar zxvf docker-28.3.2.tgz`
3. 拷贝可执行文件
```shell
cd docker/
cp * /usr/bin/
```
4. 编辑服务
```shell
# vim /usr/lib/systemd/system/docker.service
# cat /usr/lib/systemd/system/docker.service
# chmod +x /usr/lib/systemd/system/docker.service
# systemctl daemon-reload
# systemctl enable docker
# systemctl start docker
# systemctl status docker
[Unit]
Description=Docker Application Container Engine
Documentation=https://docs.docker.com
After=network-online.target firewalld.service
Wants=network-online.target
[Service]
Type=notify
ExecStart=/usr/bin/dockerd
ExecReload=/bin/kill -s HUP $MAINPID
LimitNOFILE=infinity
LimitNPROC=infinity
TimeoutStartSec=0
Delegate=yes
KillMode=process
Restart=on-failure
StartLimitBurst=3
StartLimitInterval=60s
[Install]
WantedBy=multi-user.target
```
5. docker compose安装
```shell
# 创建插件目录
sudo mkdir -p /usr/libexec/docker/cli-plugins
# 下载静态编译的 Compose(适配麒麟系统)
sudo curl -L "https://github.com/docker/compose/releases/download/v2.38.2/docker-compose-linux-$(uname -m)" \
-o /usr/libexec/docker/cli-plugins/docker-compose
# 设置执行权限
sudo chmod +x /usr/libexec/docker/cli-plugins/docker-compose
# 验证安装
docker compose version
```
## 离线安装
> 所有系统都差不多,镜像不一样而已,yum apt
### 在有网的机器上面下载好docker离线数据
> https://yeasy.gitbook.io/docker_practice/install/offline
#### 下载清华的镜像源文件
```shell
#下载清华的镜像源文件
wget -O /etc/yum.repos.d/docker-ce.repo https://download.docker.com/linux/centos/docker-ce.repo
sudo sed -i 's+download.docker.com+mirrors.tuna.tsinghua.edu.cn/docker-ce+' /etc/yum.repos.d/docker-ce.repo
yum update
## 查看源里的版本
sudo yum list docker-ce --showduplicates|sort -r
Loading mirror speeds from cached hostfile
Loaded plugins: fastestmirror
docker-ce.x86_64 3:20.10.9-3.el7 docker-ce-stable
docker-ce.x86_64 3:20.10.8-3.el7 docker-ce-stable
docker-ce.x86_64 3:20.10.8-3.el7 @/docker-ce-20.10.8-3.el7.x86_64
docker-ce.x86_64 3:20.10.7-3.el7 docker-ce-stable
docker-ce.x86_64 3:20.10.6-3.el7 docker-ce-stable
docker-ce.x86_64 3:20.10.5-3.el7 docker-ce-stable
docker-ce.x86_64 3:20.10.4-3.el7 docker-ce-stable
docker-ce.x86_64 3:20.10.3-3.el7 docker-ce-stable
....
```
#### 下载到指定文件夹
```shell
sudo yum install --downloadonly --downloaddir=/tmp/docker-20.10 docker-ce-20.10.8-3.el7 docker-ce-cli-20.10.8-3.el7
```
#### 复制到目标服务器之后进入文件夹安装
```shell
cd /tmp/docker-20.10
yum install *.rpm
```
#### 启动
> 1. 启动Docker
>
> ```shell
> systemctl start docker
> ```
> 2. 停止Docker
> ```shell
> systemctl stop docker
> ```
> 3. 重启Docker
> ```shell
> systemctl restart docker
> ```
> 3. 查看Docker状态
> ```shell
> systemctl status docker
> ```
> 3. 开机自启Docker
> ```shell
> systemctl enable docker
> ```
# `docker-compose`安装
> docker 高版本默认集成了, 命令由 docker-componse 改成了 docker componse
## 错误集合
### `unix /var/run/docker.sock: connect: permission denied`
> 权限组不对,修改一下
```shell
## docker-compose 这是路径看下面你安装在哪儿的一般`/usr/local/bin/` 或 `/usr/bin` 下
sudo chown root:root docker-compose
```
## 官方安装
> https://www.runoob.com/docker/docker-compose.html
> 版本在:https://github.com/docker/compose/releases/ 查看
```shell
$ sudo curl -L "https://github.com/docker/compose/releases/download/v2.15.0/docker-compose-$(uname -s)-$(uname -m)" -o /usr/local/bin/docker-compose
# 设置权限
$ sudo chmod 777 /usr/local/bin/docker-compose
# 测试
$ docker-compose --version
# sudo: docker-compose: command not found 解决方法
$ sudo cp -r /usr/local/bin/docker-compose /usr/bin/docker-compose
```
## pip3安装
> 不建议使用
```shell
# 安装EPEL软件包
sudo yum -y install epel-release
# 安装pip3
sudo yum install -y python36-pip
# 升级
sudo pip3 install --upgrade pip
# 验证pip3版本
pip3 --version
# docker-compose安装
sudo pip3 install -U docker-compose
# 验证docker-compose版本
docker-compose --version
# 安装补全插件
# curl -L https://raw.githubusercontent.com/docker/compose/1.25.0/contrib/completion/bash/docker-compose > /etc/bash_completion.d/docker-compose
```
## 离线安装
```shell
#查看系统型号
uname -s
uname -m
# 拿到之后去 https://github.com/docker/compose/releases/ 找 文件下载 docker-compose-$(uname -s)-$(uname -m)
# 下载之后手动上传上去
## 上传到 /usr/local/bin/
$ cd /usr/local/bin/
# 修改名字
$ mv docker-compose-linux-x86_64 docker-compose
# 设置权限
$ sudo chmod +x /usr/local/bin/docker-compose
# 测试
$ docker-compose --version
# sudo: docker-compose: command not found 解决方法
$ sudo cp -r /usr/local/bin/docker-compose /usr/bin/docker-compose
```
# 更换docker源
> 没有就创建一个
```yml
vim /etc/docker/daemon.json
{
"registry-mirrors" : [
"https://docker.1panel.live",
"http://registry.docker-cn.com",
"http://docker.mirrors.ustc.edu.cn",
"http://hub-mirror.c.163.com"
]
# 我常用的
"registry-mirrors" : [
"https://dockerproxy.1panel.live",
"https://docker.1panel.live",
"https://docker.1panelproxy.com",
"https://proxy.1panel.live"
]
}
systemctl daemon-reload
systemctl restart docker
```
## daemon.json 配置
1. 修改默认数据目录
```json
{
"data-root": "/opt/docker/data"
}
```
2. 修改日志
```json
{
"log-driver":"json-file",
"log-opts": {"max-size":"500m", "max-file":"3"}
}
```
3. 修改网段
```json
{
"default-address-pools":[
{"base":"172.21.0.0/16","size":24},
{"base":"172.22.0.0/16","size":24},
{"base":"172.23.0.0/16","size":24}
]
}
```
# 开启远程访问
> https://www.itshangxp.com/docker/docker-remote/
## 1. 编辑 docker.service 文件
```shell
vim /usr/lib/systemd/system/docker.service
```
找到 [Service] 节点,修改 ExecStart 属性,增加 -H tcp://0.0.0.0:2375
```shell
[Service]
Type=notify
# the default is not to use systemd for cgroups because the delegate issues still
# exists and systemd currently does not support the cgroup feature set required
# for containers run by docker
ExecStart=/usr/bin/dockerd -H fd:// --containerd=/run/containerd/containerd.sock -H tcp://0.0.0.0:2375
ExecReload=/bin/kill -s HUP $MAINPID
TimeoutStartSec=0
RestartSec=2
Restart=always
```
## 2. 重启 Docker 服务,使配置生效
```shell
systemctl daemon-reload
systemctl restart docker
```
## 3. 配置 Docker 安全访问
> [CA证书的加密方法](https://docs.docker.com/engine/security/protect-access/)
https://www.itshangxp.com/docker/docker-remote/#toc-heading-3
# docker镜像导入导出
> https://www.cnblogs.com/dotnet261010/p/13283176.html
## 导出镜像
```shell
# docker save -o 导出的文件名 镜像名 [:version 可为空]
docker save -o nginx.tar openresty/openresty
# 👆等同👇
docker save > nginx.tar openresty/openresty
```
ps: 注意一定要用镜像名,如果使用ImageId的话导入的时候会出现``的镜像名情况
## 导入镜像
```shell
# docker load -i 文件名
docker load -i nginx.tar
# 👆等同👇
docker load < nginx.tar
```
ps: 处理``镜像名情况,手动打标签
```shell
# docker tag 的镜像ID 镜像名:tag
docker tag dd34e67e3371 redis:7.4.1
```
# 将容器打包成镜像
> https://blog.csdn.net/github_38924695/article/details/110531410
## 打包
> docker commit 135a0d19f757 tt:vserion
```shell
命令:docker commit [OPTIONS] CONTAINER [REPOSITORY[:TAG]]
options选项:-a :提交的镜像作者;
-c :使用Dockerfile指令来创建镜像;
-m :提交时的说明文字;
-p :在commit时,将容器暂停。
```
# 备注
## docker-compose
> -p:项目名称
> -f:指定docker-compose.yml文件路径
> -d:后台启动
## docker compose 和 docker-compose
> https://blog.csdn.net/weixin_41196185/article/details/140731049
1. docker compose 是 docker 的一部分,docker-compose 是一个独立的二进制文件
2. 大多数情况下可以互换使用,但 docker compose 是更新的版本,也是 Docker 官方推荐的使用方式
# 配置环境变量
> 1. https://simi.studio/ways-to-set-environment-variables-with-docker-compose/
> 2. https://yeasy.gitbook.io/docker_practice/compose/compose_file#environment
> 3. 使用`docker compose config` 验证
## 默认值语法
```shell
${MY_VAR:-default_value}
```
## 命令传递变量
```shell
# --env-file
docker-compose --env-file custom.env up
# 临时变量 (linux)
DB_HOST=localhost DB_PORT=5432 docker-compose up
## windows CMD
set DB_PORT=3306 && docker-compose -f docker-compose-mysql.yml -p mysql up -d
## windows powershell
$env:MYSQL_PORT="3306"; docker-compose -f docker-compose-mysql.yml -p mysql up -d
# 自动加载 .env 文件
docker-compose up
```
## .env文件
1. `.env` 文件应与 compose.yaml 文件放在项目目录的根目录下
```shell
$ cat .env
TAG=v1.5
$ cat compose.yml
services:
web:
image: "webapp:${TAG}"
```
## env_file属性
1. env_file 属性 使你可以在 Compose 应用程序中使用多个 .env 文件.
2. 如果同时使用 env_file 和 environment 属性,则由 environment 设置的环境变量优先
3. 在 Docker Compose 版本 2.24.0 中,可以通过使用 required 字段,将 .env 文件设置为可选
```shell
web:
env_file:
- web-variables.env
```
```shell
env_file:
- path: ./default.env
required: true # default
- path: ./override.env
required: false
```
# 网络设置
> 建议如下.
## 使用外部网络 (推荐
```shell
docker network create --driver bridge --subnet=172.18.0.0/16 --gateway=172.18.0.1 mynetwork
```
```shell
services:
# 服务 mysql 主库
mysql:
# 镜像名
image: mysql:8.0.40
privileged: true
networks:
- mynetwork
# mynetwork:
# ipv4_address: 172.18.0.3
networks:
mynetwork:
external: true
```
## 使用 name 属性指定固定网络名
```shell
networks:
my-network:
name: my-network
driver: bridge
ipam:
config:
- subnet: 172.18.0.0/16
gateway: 172.18.0.1
services:
service1:
image: nginx
networks:
- my-network
```
## subnet 和 gatway 如何获取
```shell
# Linux 系统
ip addr show
# 或者
ifconfig
# Windows 系统
ipconfig /all
```
### 常用私有 IP 地址范围
```shell
Class A: 10.0.0.0 - 10.255.255.255 (10.0.0.0/8)
Class B: 172.16.0.0 - 172.31.255.255 (172.16.0.0/12)
Class C: 192.168.0.0 - 192.168.255.255 (192.168.0.0/16)
```
### 检查现有网络以避免冲突
```shell
# 查看现有 Docker 网络
docker network ls
# 查看网络详细信息
docker network inspect bridge
```
### 示例
```shell
version: "3"
networks:
my-network:
driver: bridge
name: my-network
ipam:
config:
- subnet: 172.20.0.0/16 # 选择一个不太常用的 Class B 网段
gateway: 172.20.0.1 # 网关通常设置为该网段的第一个可用地址
# ip_range: 172.20.10.0/24 # 限制IP分配范围
```
# 问题集
## windows环境问题
1. mysql 配置文件必须要放到 C:\Users 下 要不然会不生效
# start_docker_compose.sh
> 1. 设置权限 chmod 777 start_docker_compose.sh
> 2. 检查编码 vim start_docker_compose.sh
> 1. :set ff
> 2. :set ff=unix
> 3. wq!
> 3. 如果使用的非root账户,请在下方的命令中添加sudo
> 1. 如果提示需要输入密码可以用 `echo` 规避(`echo "sudo时可能会出现输入密码这里就时填的密码" | sudo -S docker stop library`)
> 4. 如果配置文件被修改 `start_docker_compose.sh start`还有重建的功能
```shell
#!/bin/bash
echo .
echo ===========================
echo option docker-compose.yml
echo 如果非root用户使用,请在命令前加入sudo (sudo docker ps)
echo ============================
PS3="your choice is [7 for quit ]: "
while :
do
select choice in start stop restart remove rmi dps quit
do
case "$choice" in
start)
docker-compose -f docker-compose-xxx.yml -p xx up -d
break;
;;
stop)
docker stop container_name
break;
;;
restart)
docker restart container_name
break;
;;
remove)
docker stop container_name
docker rm container_name
break;
;;
dps)
docker ps
break;
;;
rmi)
docker stop container_name
docker rm container_name
docker rmi $(docker images -q --filter reference=容器名:tag)
break;
;;
quit)
exit
;;
*)
echo "invalid option!!!"
;;
esac
echo "------------------------------------------"
done
done
```
# 属性配置文档
1. [nacos 属性配置列表](https://github.com/nacos-group/nacos-docker/blob/master/README_ZH.md#%E5%B1%9E%E6%80%A7%E9%85%8D%E7%BD%AE%E5%88%97%E8%A1%A8)
2. [docker 属性配置列表](https://www.elastic.co/guide/en/elasticsearch/reference/current/docker.html)
3. [redis 属性配置列表](https://redis.io/docs/stack/get-started/install/docker/)
4. [mysql 属性配置列表](https://hub.docker.com/_/mysql)
# docker-compose-perter-basics-module.yml
> docker-compose -f docker-compose-perter-basics-module.yml -p perter_basics_module up -d
## xxl_job
> 端口:8500
> http://localhost:8500/job
> admin / 123456
## nacos
> 端口:8502
> 访问:http://localhost:8502/nacos/#/login
> 账密:nacos / nacos
## mysql
> 端口:3316
> 连接地址:http://localhost:3316
> 账户密码:root / detabespeter
### 备注
1. 初始化sql
> 映射`docker-entrypoint-initdb.d` e.g `- ./mysql/init:/docker-entrypoint-initdb.d/`
> init文件夹中可以放置多个sql文件,根据名字排序执行
> 所有sql只要一处报错就会导致整个初始化工作被中断
## redis
> 端口:6378
> 连接地址:http://localhost:6378
> 账户密码:123456
## minio
> 端口:8502
> console: http://localhost:9100/
> minio31415926 / minio31415926
> 文件访问地址(代理地址): http://localhost:9000/
# portainer
> docker-compose -f docker-compose-portainer.yml -p portainer up -d
- 端口:8502
- 访问地址:http://localhost:8400
1. 第一次会让你设置账户密码
# prometheus and node-exporter
> docker-compose -f docker-compose-prometheus.yml -p prometheus up -d
- 端口:
- 8402 : node-exporter
- 8403 : prometheus
- prometheus访问:http://localhost:8403
## 备注
- config.yml 是prometheus的加密配置
```python
# 加密方式
## https://prometheus.io/docs/guides/basic-auth/
# 将该脚本另存为gen-pass.py并运行它,这应该会提示您输入密码:
# python3 gen-pass.py
import getpass
import bcrypt
password = getpass.getpass("password: ")
hashed_password = bcrypt.hashpw(password.encode("utf-8"), bcrypt.gensalt())
print(hashed_password.decode())
```
- prometheus.yml 是prometheus的监控配置
## 故障处理
### permission denied
> chmod -R 777 ./prometheus/
# elasticsearch
# cloud 微服务基础开发用组件
> docker-compose -f docker-compose-cloud.yml -p peter-cloud up -d
1. 包含了 单机mysql , 单机redis, 单机nacos, 单机es, rocketmq
2. mysql 会自动创建nacos账户和赋权,同时会自定构建nacos的数据结构表
## 配置注意
1. rocketmq
> 修改/cloud/rocketmq/broker/conf/broker.conf文件中的namesrvAddr节点为服务名(默认就不改)
> 修改/cloud/rocketmq/broker/conf/broker.conf文件中的brokerIP1节点为物理机IP(必须改)
2. mysql
> window部署时将./cloud/mysql/conf中的配置文件复制到 /C/users 目录下在映射到 /C/users 目录(linux不用)
## 端口注释
1. es
http通信端口:9201
Tcp通信端口: 9301
# dinkly
> docker-compose -f docker-compose-dinky.yml -p dinky up -d
1. 如果挂载了 plugins的话需要下载 ftp://192.168.1.71 下的 flink/1.16我目前用的所有依赖.zip
1.1 内置的注册flink地址可以写:jobmanager:8081
# logstash进行数据同步
> docker-compose -f docker-compose-logstash.yml -p logstash up -d
1. 在做新英雄项目时做 redshift 到 elasticsearch 数据同步用的
## 文档
1. [logstash 定时](https://www.elastic.co/guide/en/logstash/current/plugins-inputs-jdbc.html#_scheduling_2)
2. [logstash参数](https://www.alibabacloud.com/help/zh/elasticsearch/latest/logstash-rds-es)
3. [logstash-input-jdbc增量、全量数据同步](https://blog.csdn.net/w_linux/article/details/84570248)
4. [settings中文件可以在这儿抄](https://github.com/elastic/logstash/blob/7.16/config/)
5. [自定义插件](https://blog.csdn.net/m0_37911384/article/details/105220250)
## 注意
1. tracking_column_type 只认 numeric, timestamp
2. 注意 schedule 属性最好写,要不然执行完成之后就会退出了
## redshift 到 elasticsearch
1. 下载 [redshift-jdbc42-2.1.0.14.jar](windows%2Flogstash%2Fjar%2Fredshift-jdbc42-2.1.0.14.jar)
2. 构建input JDBC
3. 构建output ES