# SpringBoot
**Repository Path**: hzjsj/spring-boot
## Basic Information
- **Project Name**: SpringBoot
- **Description**: spring-boot 使用阿里云 https://ide.aliyun.com/ 在线开发,仓库镜像到 GitHub
- **Primary Language**: Unknown
- **License**: Not specified
- **Default Branch**: main
- **Homepage**: None
- **GVP Project**: No
## Statistics
- **Stars**: 0
- **Forks**: 0
- **Created**: 2022-10-15
- **Last Updated**: 2023-02-03
## Categories & Tags
**Categories**: Uncategorized
**Tags**: None
## README
# SpringBoot + Mybatis 入门 CURD 操作
本文主要内容是,创建 SpringBoot 项目,配置数据库,使用 MyBatisX 插件生成代码,最后编写 UserController,实现 CURD 操作。
## 一、新建项目
文件—新建—项目

点击下一步
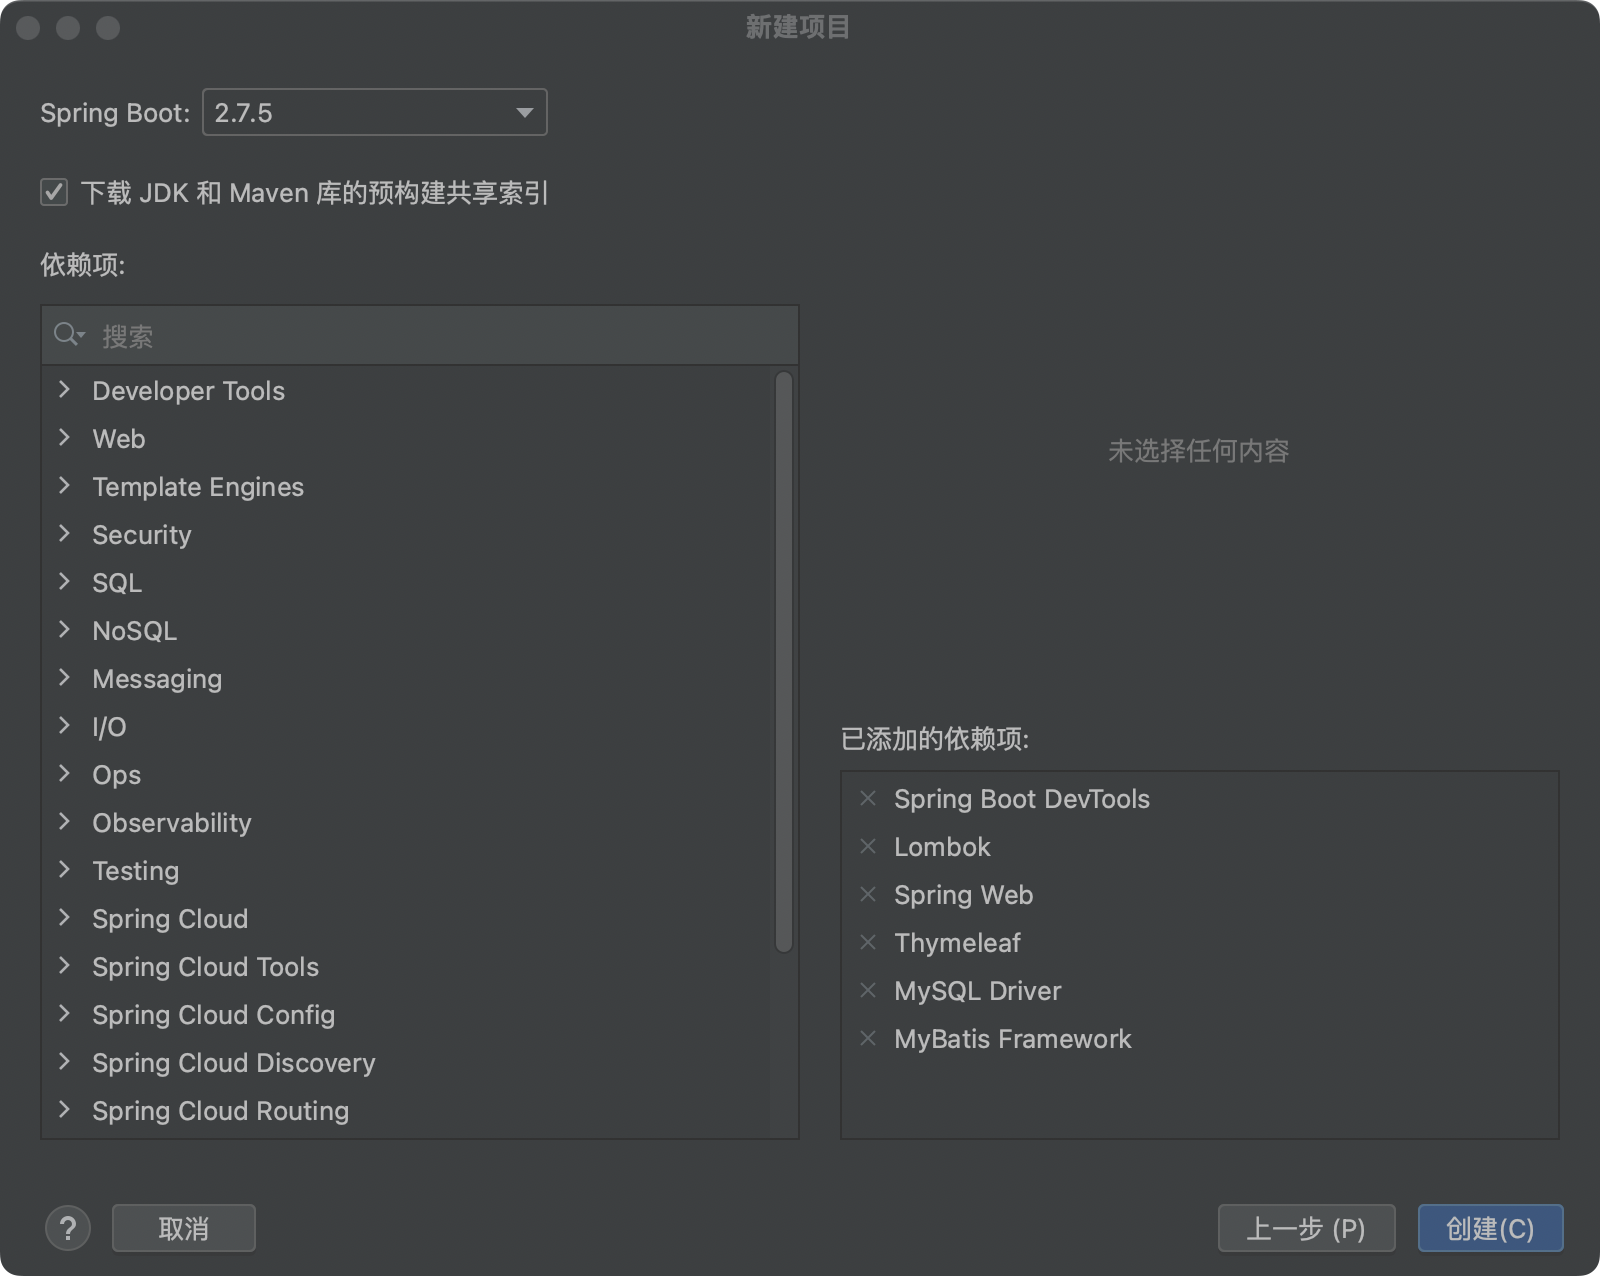
创建成功后,在 pom.xml 文件中添加依赖
```xml
com.baomidou
mybatis-plus-boot-starter
3.5.2
junit
junit
4.13.2
test
```
可以在这个地址,查找需要的依赖
```
https://mvnrepository.com/
```
## 数据库配置
创建和配置 application.yml 文件
```yml
spring:
application:
name: manage
# DataSource Config
datasource:
driver-class-name: com.mysql.jdbc.Driver
url: jdbc:mysql://localhost:3306/manage
username: root
password: 12345678
server:
port: 8080
```
创建数据表
```sql
DROP TABLE IF EXISTS user;
CREATE TABLE user
(
id BIGINT(20) NOT NULL COMMENT '主键ID',
name VARCHAR(30) NULL DEFAULT NULL COMMENT '姓名',
age INT(11) NULL DEFAULT NULL COMMENT '年龄',
email VARCHAR(50) NULL DEFAULT NULL COMMENT '邮箱',
PRIMARY KEY (id)
);
```
插入表数据
```sql
DELETE FROM user;
INSERT INTO user (id, name, age, email) VALUES
(1, 'Jone', 18, 'test1@baomidou.com'),
(2, 'Jack', 20, 'test2@baomidou.com'),
(3, 'Tom', 28, 'test3@baomidou.com'),
(4, 'Sandy', 21, 'test4@baomidou.com'),
(5, 'Billie', 24, 'test5@baomidou.com');
```
### MyBatis
MyBatis-Plus 官网地址
```
https://baomidou.com/
```
使用 MyBatisX 插件
右键单击,数据表 user ,选择 MybatisX-Generator
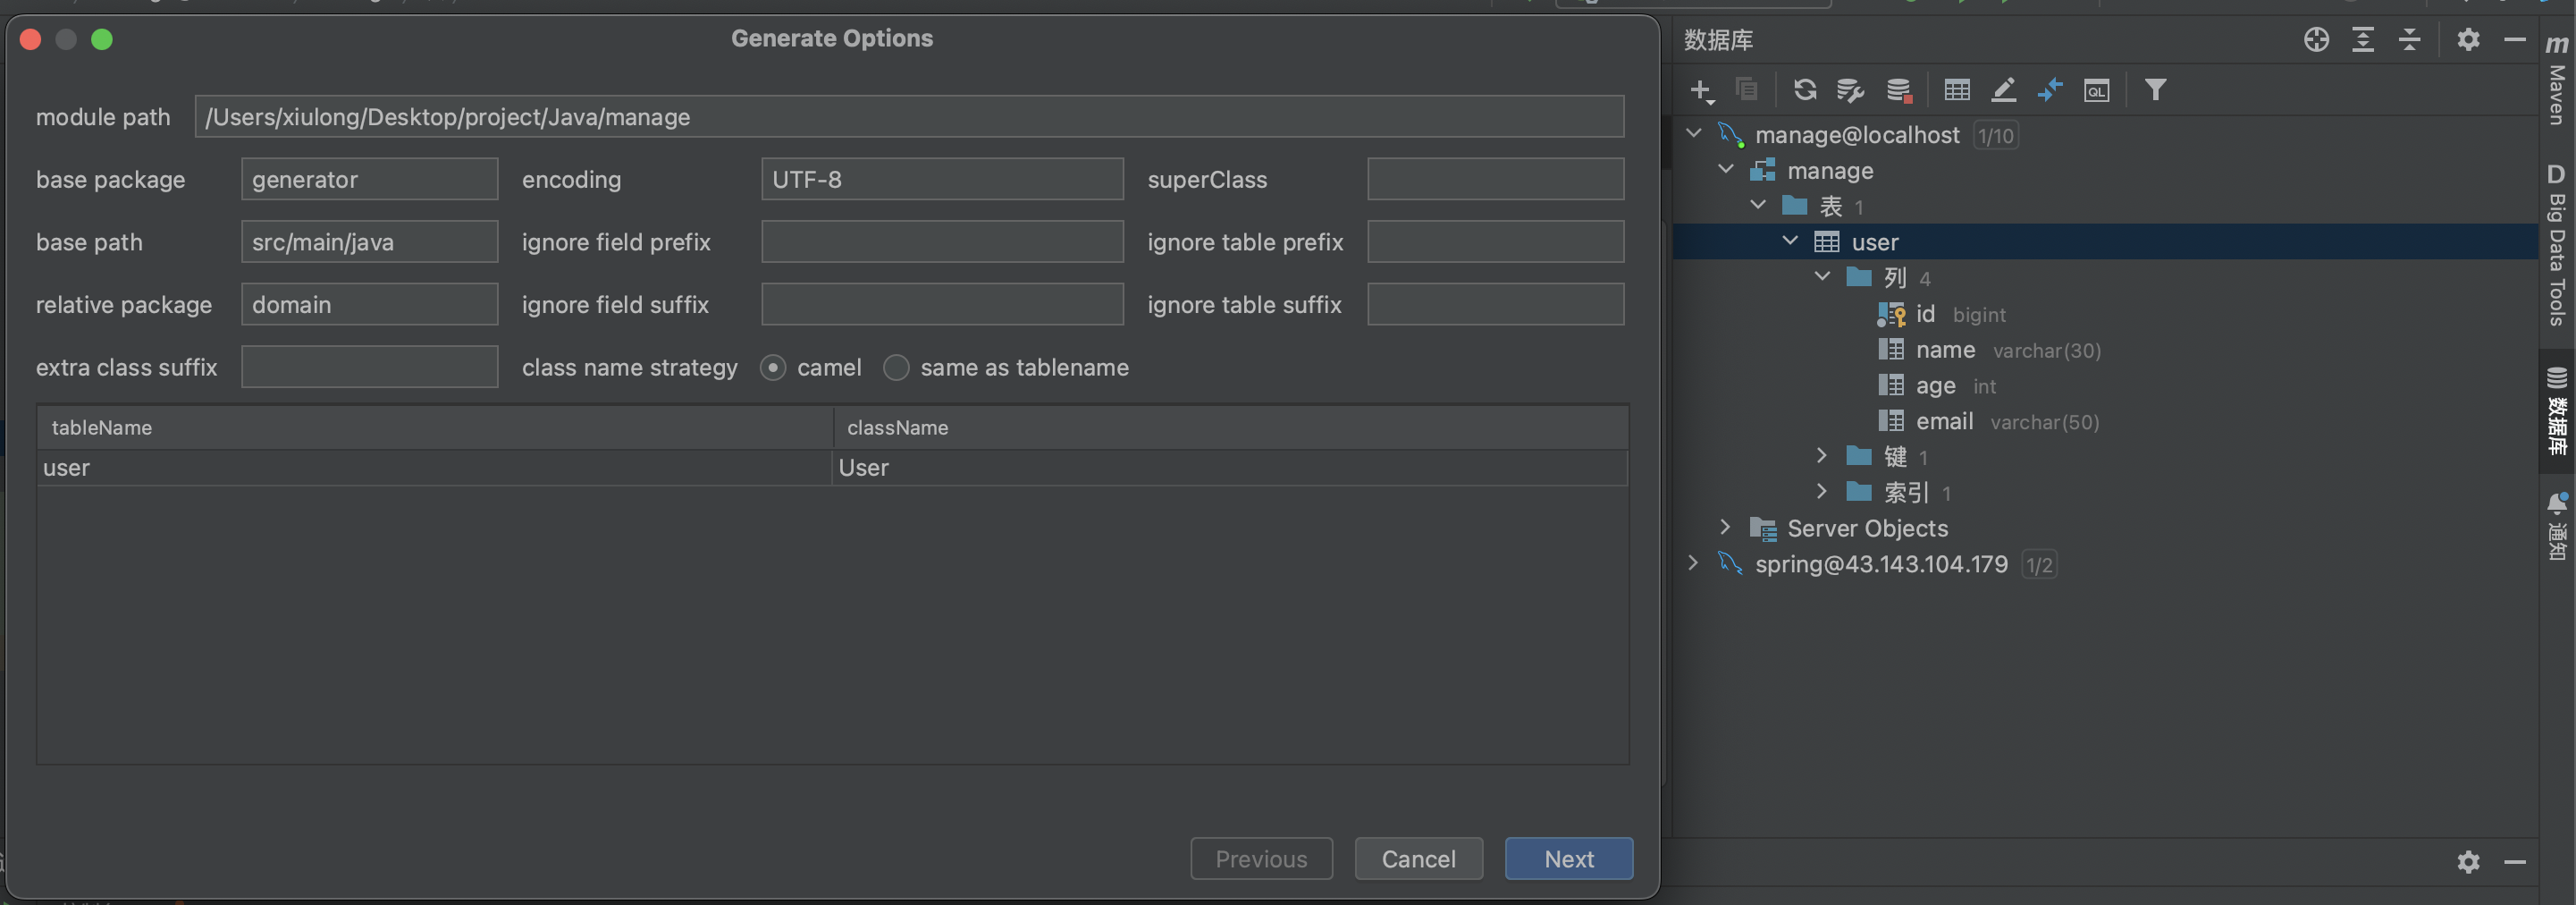
点击 Next
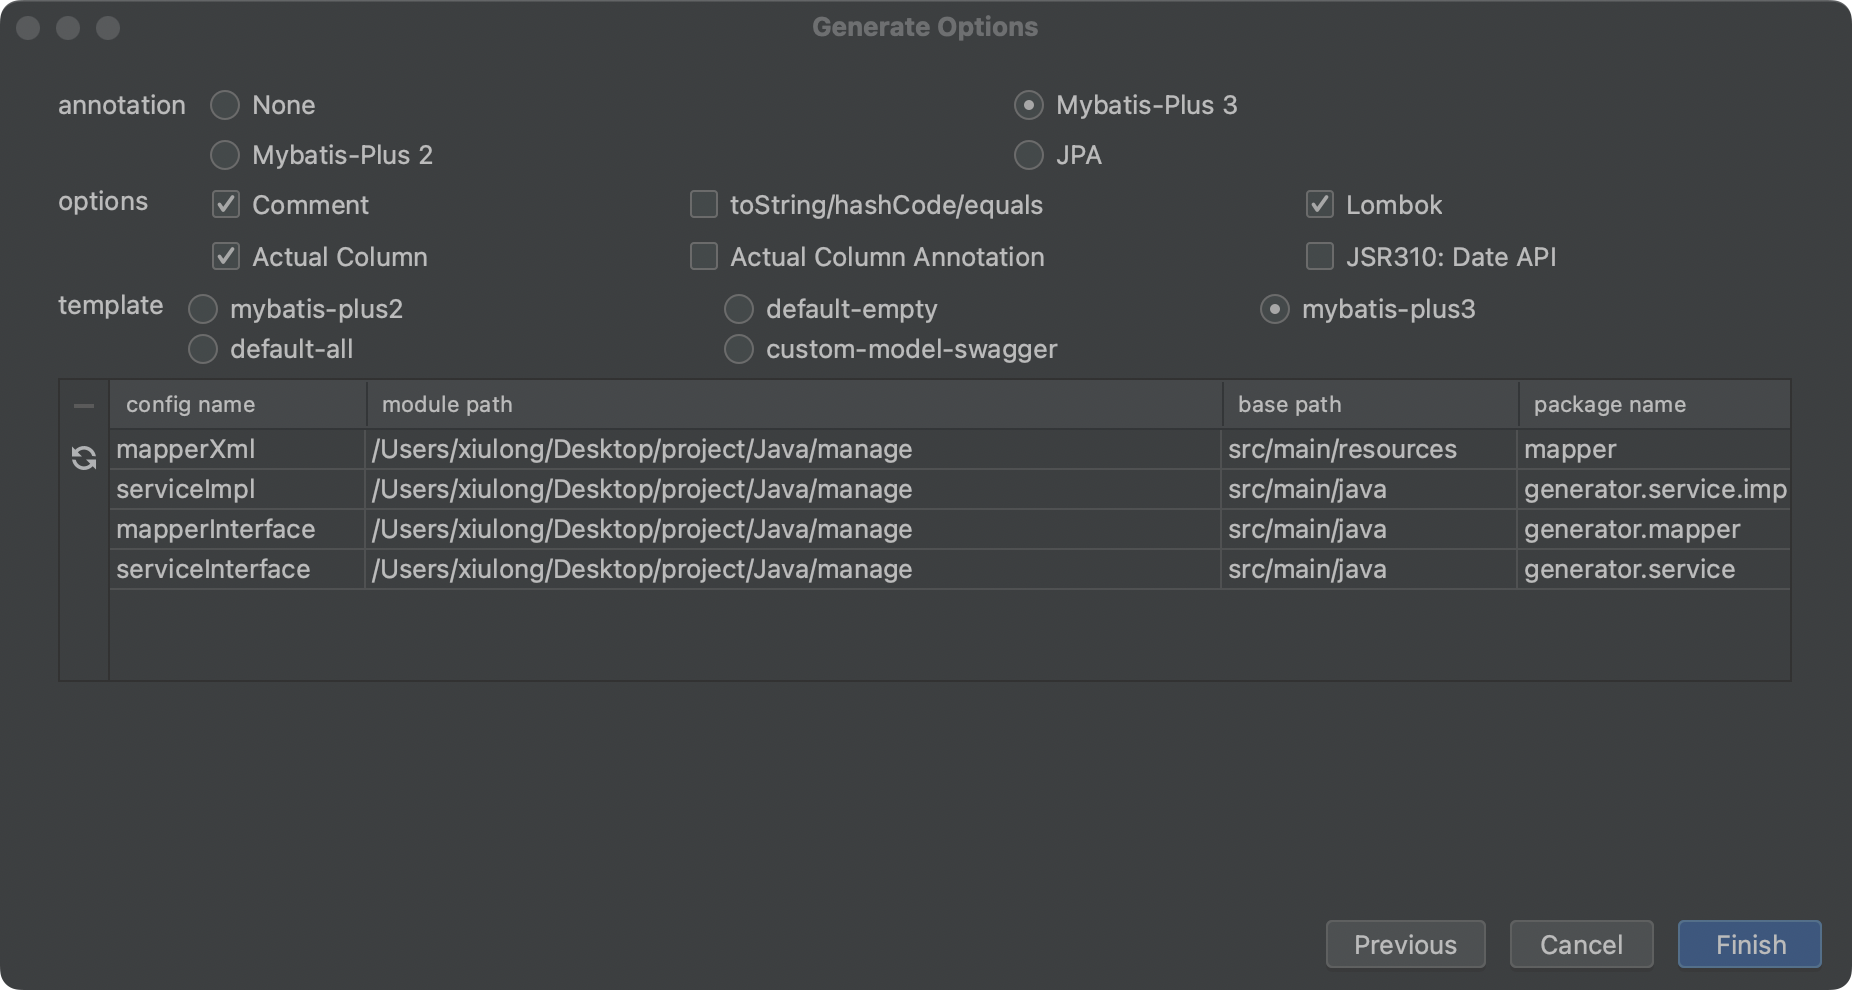
点击 Finish 会生成相关代码
在 generator 文件夹下,可以看到生成的代码
将生成的代码,移动到项目名称目录下,结构如下
```
.
└── manage
├── ManageApplication.java // 项目启动文件
├── controller
│ └── UserController.java // 控制层
├── mapper
│ └── UserMapper.java // 接口
├── model
│ └── domain
│ └── User.java // 实体类
└── service
├── UserService.java
└── impl
└── UserServiceImpl.java
```
其中 UserController 是我们自己创建和需要修改的
下面这段代码,包含了基本的 CURD 操作
```java
@RestController
@RequestMapping("/user")
public class UserController {
@Resource
private UserService userService;
@RequestMapping("/")
public String index() {
return "this is a spring web!";
}
/**
* 查询数据
*/
@GetMapping("/get")
public List get(){
List userList = userService.list(null);
return userList;
}
/**
* 插入数据
* @param user
*/
@PostMapping("/")
public String create(User user){
boolean result = userService.save(user);
return result ? "success" : "fail";
}
/**
* 根据 id 修改数据
* @param user
*/
@PutMapping("/")
public String update(User user){
boolean result = userService.updateById(user);
return result ? "success" : "fail";
}
/**
* 根据 id 删除数据
* @param request
*/
@DeleteMapping("/")
public String delete(HttpServletRequest request){
String id = request.getParameter("id");
boolean result = userService.removeById(id);
return result ? "success" : "fail";
}
}
```
最后进入 ManageApplication 文件,添加注解,启动项目。
```
@MapperScan("xyz.hzpc.manage.mapper")
```
访问下面地址,可以看到查询的数据
```
http://localhost:8080/user/get
```
其它接口方法需要使用 Api 调试工具访问。
以上就是今天分享的内容,后面学习过程中,会继续补充完善。。。。。。