# cache-spring-boot-starter
**Repository Path**: kdyzm/cache-spring-boot-starter
## Basic Information
- **Project Name**: cache-spring-boot-starter
- **Description**: Caffeine+Redis二级缓存实现
- **Primary Language**: Unknown
- **License**: Apache-2.0
- **Default Branch**: master
- **Homepage**: None
- **GVP Project**: No
## Statistics
- **Stars**: 0
- **Forks**: 0
- **Created**: 2025-08-20
- **Last Updated**: 2025-10-17
## Categories & Tags
**Categories**: Uncategorized
**Tags**: None
## README
该项目是一个基于`Java21`+`Springboot3.5.4`的SpringBoot Starter缓存组件,可独立开启Caffeine、Redis或者二级缓存三种功能模式,三种模式下均支持SpringCache基于注解的缓存架构。
引入依赖:
```xml
cn.kdyzm
cache-spring-boot-starter
1.0.0
```
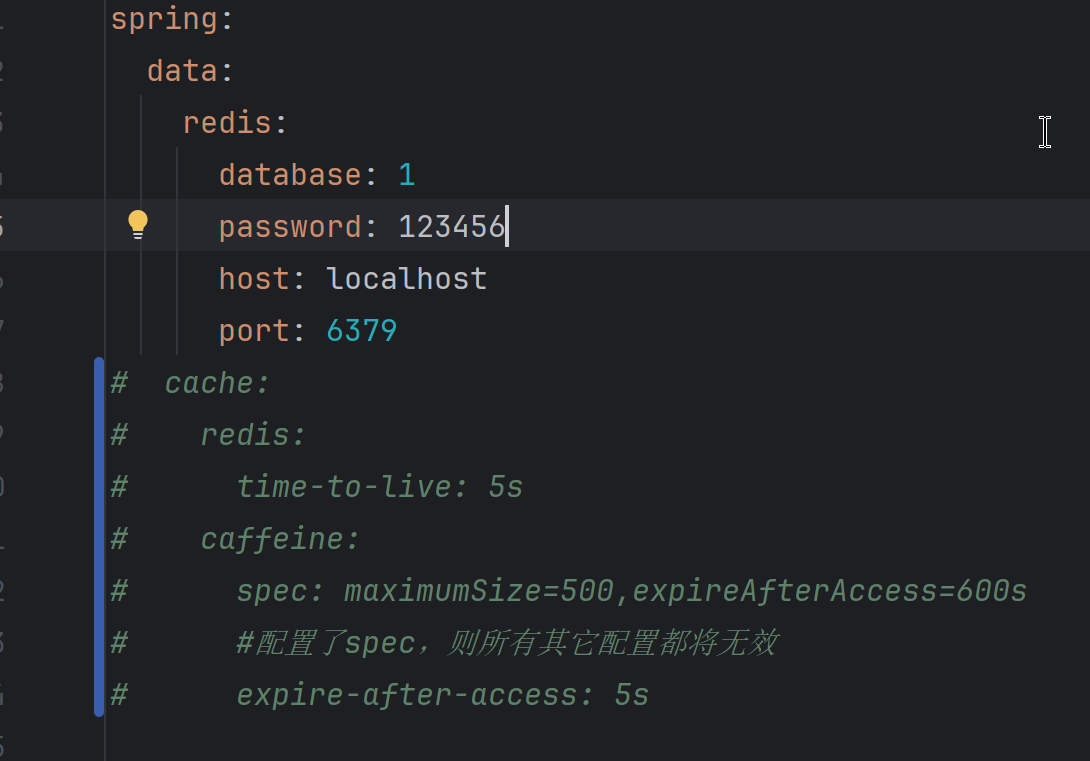
### 1、配置文件
在pom.xml中引入cache-spring-boot-starter的依赖后,配置下配置文件如下:
``` yaml
spring:
data:
redis:
database: 1
password: 123456
host: localhost
port: 6379
cache:
redis:
time-to-live: 5s
caffeine:
spec: maximumSize=500,expireAfterAccess=600s
#配置了spec,则所有其它配置都将无效
expire-after-access: 5s
#caffeine其它配置
logging:
level:
cn.kdyzm.component.cache: DEBUG
# org.springframework.cache: TRACE
# org.springframework.data.redis: DEBUG
```
其配置和原生spring-boot-starter-cache和spring-boot-starter-data-redis是一模一样的,特别需要注意的是spring.cache.caffeine的spec配置,它原生的配置是一段字符串,格式是这样的:`maximumSize=500,expireAfterAccess=600s,...`,为了方便使用,我将其抽离出来形成一个个单独的配置,格式如下:
``` yaml
spring:
cache:
caffeine:
expire-after-access: 5s
maximum-size: 500
......
```
这样配置就和spec配置冲突了,所以**代码里有约定:如果spec有值,则完全使用spec的配置;否则将使用其它独立的配置。**
### 2、激活缓存配置
这里提供了三种不同的注解,用于激活不同的功能项:
`@EnableCaffeineCache`:仅使用Caffeine本地缓存。
`@EnableRedisCache`:仅使用Redis缓存
`@EnableMultipleCache`:使用Caffeine+Redis二级缓存。
将注解加在启动类上即可:
``` java
@SpringBootApplication
//@EnableMultipleCache
//@EnableCaffeineCache
//@EnableRedisCache
public class Application {
public static void main(String[] args) {
SpringApplication.run(Application.class, args);
}
}
```
项目启动后会打印当前使用的CacheManager:
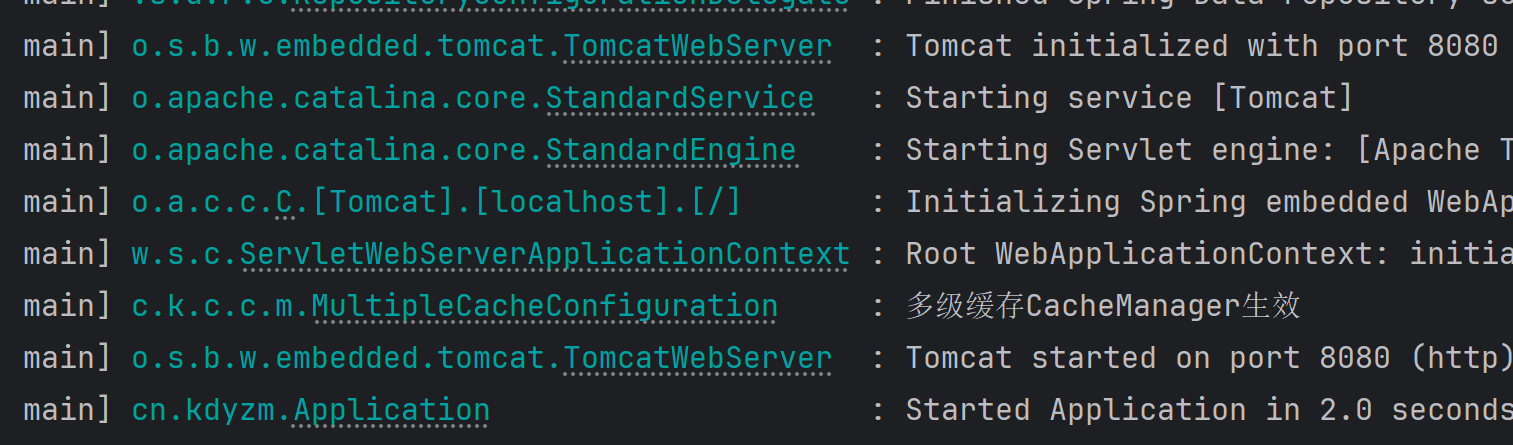 需要注意的是,如果不使用以上三种自定义注解,使用`@EnableCaching`注解,则会退回使用原生spring-cache相关功能。
### 3、业务代码中使用
配置完成之后,就可以在代码中使用了,使用方式和spring-cache注解方式是一模一样的,案例如下:
``` java
import lombok.AllArgsConstructor;
import lombok.Data;
import lombok.NoArgsConstructor;
import org.springframework.cache.annotation.CacheEvict;
import org.springframework.cache.annotation.Cacheable;
import org.springframework.stereotype.Service;
/**
* @author kdyzm
* @date 2025/9/24
*/
@Service
public class UserService {
private static final String CACHE_NAME = "users";
@Data
@AllArgsConstructor
@NoArgsConstructor
public static class User {
private Long id;
private String name;
}
@Cacheable(value = CACHE_NAME, key = "#id", unless = "#result == null")
public User getUserById(Long id) {
System.out.println("从数据库查询用户: " + id);
return new User(id, "用户");
}
/**
* 更新操作 - 清除缓存
*/
@CacheEvict(value = CACHE_NAME, key = "#user.id")
public User updateUser(User user) {
System.out.println("更新用户并清除缓存: " + user.getId());
return user;
}
/**
* 删除操作 - 清除缓存
*/
@CacheEvict(value = CACHE_NAME, key = "#id")
public void deleteUser(Long id) {
System.out.println("删除用户并清除缓存: " + id);
}
}
```
### 4、测试二级缓存功能
拉取代码仓库代码:https://gitee.com/kdyzm/cache-spring-boot-demo,使用`@EnableMultipleCache`注解激活二级缓存功能,配置好配置文件中redis的链接,之后就可以测试二级缓存功能了。
在正式测试前,将spring.cache的ttl的配置先全部注释掉,以方便测试。
需要注意的是,如果不使用以上三种自定义注解,使用`@EnableCaching`注解,则会退回使用原生spring-cache相关功能。
### 3、业务代码中使用
配置完成之后,就可以在代码中使用了,使用方式和spring-cache注解方式是一模一样的,案例如下:
``` java
import lombok.AllArgsConstructor;
import lombok.Data;
import lombok.NoArgsConstructor;
import org.springframework.cache.annotation.CacheEvict;
import org.springframework.cache.annotation.Cacheable;
import org.springframework.stereotype.Service;
/**
* @author kdyzm
* @date 2025/9/24
*/
@Service
public class UserService {
private static final String CACHE_NAME = "users";
@Data
@AllArgsConstructor
@NoArgsConstructor
public static class User {
private Long id;
private String name;
}
@Cacheable(value = CACHE_NAME, key = "#id", unless = "#result == null")
public User getUserById(Long id) {
System.out.println("从数据库查询用户: " + id);
return new User(id, "用户");
}
/**
* 更新操作 - 清除缓存
*/
@CacheEvict(value = CACHE_NAME, key = "#user.id")
public User updateUser(User user) {
System.out.println("更新用户并清除缓存: " + user.getId());
return user;
}
/**
* 删除操作 - 清除缓存
*/
@CacheEvict(value = CACHE_NAME, key = "#id")
public void deleteUser(Long id) {
System.out.println("删除用户并清除缓存: " + id);
}
}
```
### 4、测试二级缓存功能
拉取代码仓库代码:https://gitee.com/kdyzm/cache-spring-boot-demo,使用`@EnableMultipleCache`注解激活二级缓存功能,配置好配置文件中redis的链接,之后就可以测试二级缓存功能了。
在正式测试前,将spring.cache的ttl的配置先全部注释掉,以方便测试。
 **第一步:测试缓存保存功能**
调用接口:http://localhost:8080/test/testGet ,观察日志输出
**第一步:测试缓存保存功能**
调用接口:http://localhost:8080/test/testGet ,观察日志输出
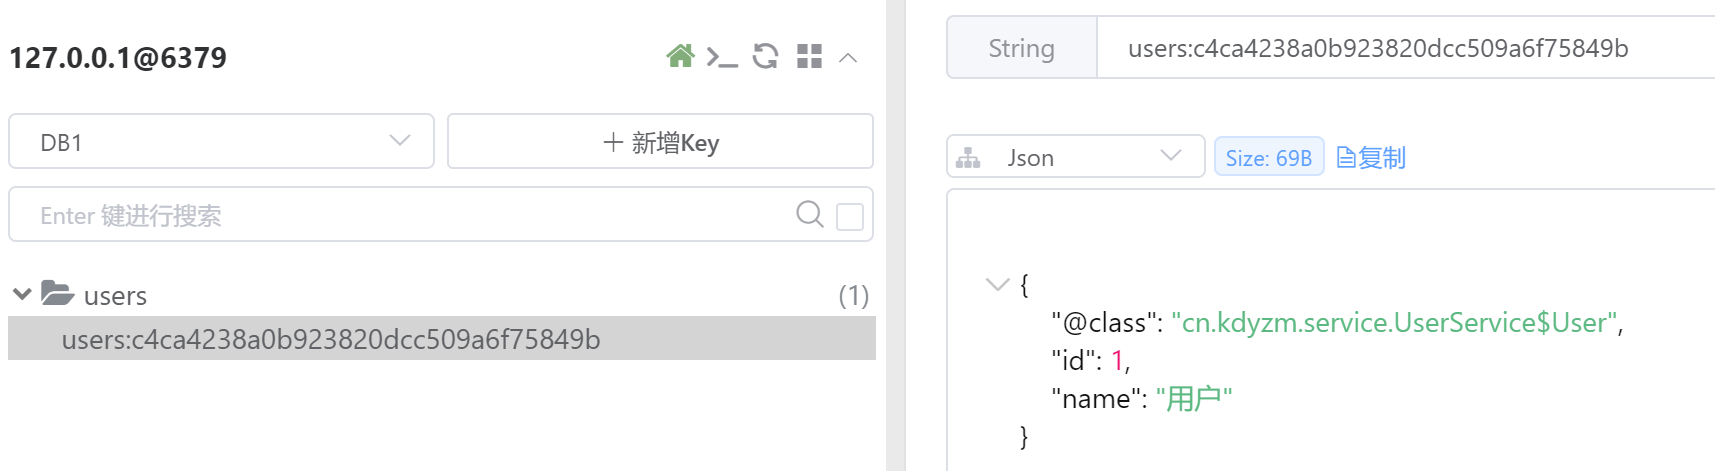
 可以看到,由于没有缓存,所以会去查询数据库,之后再调用Cache的put方法将数据保存到一级缓存、二级缓存,同时触发Redis消息队列发消息,通知其它服务缓存变更,更新一级缓存(二级缓存已经由本服务更新)。
**第二步:重复调用,测试缓存是否生效**
再次调用接口:http://localhost:8080/test/testGet ,观察日志输出
可以看到,由于没有缓存,所以会去查询数据库,之后再调用Cache的put方法将数据保存到一级缓存、二级缓存,同时触发Redis消息队列发消息,通知其它服务缓存变更,更新一级缓存(二级缓存已经由本服务更新)。
**第二步:重复调用,测试缓存是否生效**
再次调用接口:http://localhost:8080/test/testGet ,观察日志输出
 可以看到,没有再查询数据库,直接从缓存中查询到了数据并返回了,缓存生效了。
**第三步:验证二级缓存**
前一步缓存已经生效了,如何验证它获取的是一级缓存的数据还是二级缓存的数据呢?当然可以debug代码,其实还有个更简单的方法,那就是重启服务。由于caffeine使用的是本地缓存,重启后将会失效,所以理论上来说重启后再次调用接口,服务不会从数据库获取,而是从redis一级缓存中获取数据。
重启服务后,重新请求接口:http://localhost:8080/test/testGet ,观察日志输出:
可以看到,没有再查询数据库,直接从缓存中查询到了数据并返回了,缓存生效了。
**第三步:验证二级缓存**
前一步缓存已经生效了,如何验证它获取的是一级缓存的数据还是二级缓存的数据呢?当然可以debug代码,其实还有个更简单的方法,那就是重启服务。由于caffeine使用的是本地缓存,重启后将会失效,所以理论上来说重启后再次调用接口,服务不会从数据库获取,而是从redis一级缓存中获取数据。
重启服务后,重新请求接口:http://localhost:8080/test/testGet ,观察日志输出:
 可以看到,并没有请求数据库。caffein从redis二级缓存中获取到了数据。
为了更直观的看到使用的是一级缓存,将redis中的数据删除:
可以看到,并没有请求数据库。caffein从redis二级缓存中获取到了数据。
为了更直观的看到使用的是一级缓存,将redis中的数据删除:
 删除后,重新请求 http://localhost:8080/test/testGet ,观察日志:
 可以看到还是从缓存中获取了,观察redis,却没有新增key,说明当前缓存使用的是一级缓存caffeine。