# Vue+Spring Boot图书管理系统
**Repository Path**: kejiboy/vue-SpringBoot
## Basic Information
- **Project Name**: Vue+Spring Boot图书管理系统
- **Description**: No description available
- **Primary Language**: Unknown
- **License**: Not specified
- **Default Branch**: master
- **Homepage**: None
- **GVP Project**: No
## Statistics
- **Stars**: 0
- **Forks**: 4
- **Created**: 2022-10-21
- **Last Updated**: 2022-10-21
## Categories & Tags
**Categories**: Uncategorized
**Tags**: None
## README
# 一、效果展示
##### 主界面:

##### 添加图书:

##### 修改界面:

# 二、前端实现
## 1、Vue.cli建立项目
命令行输入vue ui(vue版本在3.0以上的UI界面)
> vue ui
手动创建项目选择以下要用配置:

等待项目创建完成,因为也要写后端,我用idea打开(idea需要下载Vue.js扩展)
可在终端输入
> npm run serve
运行官方初始的项目,项目创建完成
## 2、vue+elementUI快速构建前端页面
### (1)安装elementUI
打开elementUI官网
[https://element.eleme.cn/#/zh-CN/component/installation](https://element.eleme.cn/#/zh-CN/component/installation)
推荐用npm安装,它能更好地和 webpack 打包工具配合使用。
> npm i element-ui -S
在 main.js 中写入以下内容:
```js
import Vue from 'vue';
import ElementUI from 'element-ui';
import 'element-ui/lib/theme-chalk/index.css';
import App from './App.vue';
Vue.use(ElementUI);
new Vue({
el: '#app',
render: h => h(App)
});
```
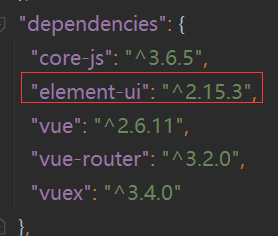
查看目录下package.json文件,若已经有elementUI版本号则安装成功
### (2)使用elementUI
打开elementUI官网
[https://element.eleme.cn/#/zh-CN/component/installation](https://element.eleme.cn/#/zh-CN/component/installation)
找到相应组件代码,按需选取即可。
如本项目选用布局容器中的官方示例再加以修改

把静态页面结合vue改成动态页面,主要代码如下index.vue:
```html
{{ item.name }}
{{item2.name}}
```
其中
修改
删除
```
添加
重置
```
修改图书界面BookUpdate.vue:
```html
修改
重置
```
### (3)前端测试
前端页面并不是一开始就是动态页面,没有后端数据接口时,可以先在前端用假数据和静态页面测试,搭建好页面后再等待后端接口的实现,用Ajax获取后端数据再动态设置页面。
# 二、后端实现
## 1、用idea中Spring Initializr快速创建spring boot项目
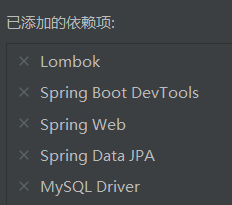
选好以上依赖。Lombok中有很多方便的注解,如@Data等,DevTools实现热部署,本次项目用JPA链接MySQL。
## 2、编写配置文件

要更改端口,因为前端服务默认端口也是8080
## 3、准备好数据库

## 4、编写实体类
```java
@Entity
@Data
public class Book {
@Id
@GeneratedValue(strategy = GenerationType.IDENTITY)
private Integer id;
private String name;
private String author;
}
```
其中id设置为主键并且设置为自增。
## 5、Dao层
```java
public interface BookRepository extends JpaRepository {
}
```
该接口只需要继承 JpaRepository 接口即可。JpaRepository
中封装了基本的数据操作方法,有基本的增删改查、分页、排序等。
## 6、测试
```java
@SpringBootTest
class BookRepositoryTest {
@Autowired
private BookRepository bookRepository;
@Test
void findAll(){
System.out.println(bookRepository.findAll());
}
@Test
void save(){
Book book =new Book();
book.setName("springboot");
book.setAuthor("张三");
Book book1=bookRepository.save(book);
System.out.println(book1);
}
@Test
void findById(){
Book book=bookRepository.findById(1).get();
System.out.println(book);
}
@Test
void update(){
Book book=new Book();
book.setId(18);
book.setName("测试");
Book book1=bookRepository.save(book);
System.out.println(book1);
}
@Test
void delete(){
bookRepository.deleteById(18);
}
}
```
分别测试crud功能,确定可用再完成接口。
## 7、编写Controller
简化操作省略 service 层
```java
@RestController
@RequestMapping("/book")
public class BookController {
@Autowired
private BookRepository bookRepository;
@GetMapping("/findAll/{page}/{size}")
public Page findAll(@PathVariable("page") Integer page,@PathVariable("size") Integer size){
Pageable pageable= PageRequest.of(page-1,size);
return bookRepository.findAll(pageable);
}
@PostMapping("/save")
public String save(@RequestBody Book book){
Book result=bookRepository.save(book);
if (result!=null){
return "success";
}else {
return "error";
}
}
@GetMapping("/findById/{id}")
public Book findById(@PathVariable("id") Integer id){
return bookRepository.findById(id).get();
}
@PutMapping("/update")
public String update(@RequestBody Book book){
Book result=bookRepository.save(book);
if (result!=null){
return "success";
}else {
return "error";
}
}
@DeleteMapping("/deleteById/{id}")
public void deleteById(@PathVariable("id") Integer id){
bookRepository.deleteById(id);
}
}
```
其中实现CRUD功能符合RESTful风格
## 8、解决跨域问题
由于前端8080访问后端8181构成跨域问题,此处在后端解决跨域问题,编写配置类如下:
```java
@Configuration
public class CrosConfig implements WebMvcConfigurer {
@Override
public void addCorsMappings(CorsRegistry registry) {
registry.addMapping("/**")
.allowedOrigins("*")
.allowedMethods("GET","HEAD","POST","PUT","DELETE","OPTIONS")
.allowCredentials(false)
.maxAge(3600)
.allowedHeaders("*");
}
}
```
# 三、前后端数据联通
## 1、前端安装axios
首先添加axios ,命令如下:
> vue add axios
项目目录多出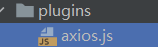
## 2、前端连接后端接口
获取后端数据库数据,以及分页操作:
```js
page(currentPage){
this.$axios.get('http://localhost:8181/book/findAll/'+currentPage+'/10').then(resp => {
this.tableData = resp.data.content;
this.total=resp.data.totalElements
})
}
},
created(){
this.$axios.get('http://localhost:8181/book/findAll/1/10').then(resp => {
this.tableData = resp.data.content;
this.total=resp.data.totalElements
})
},
```
删除操作:
```js
deleteBook(row){
this.$axios.delete('http://localhost:8181/book/deleteById/'+row.id).then(resp => {
this.$message('删除成功!');
window.location.reload();
})
}
```
添加操作:
```js
submitForm(formName) {
this.$refs[formName].validate((valid) => {
if (valid) {
this.$axios.post('http://localhost:8181/book/save',this.ruleForm).then(resp => {
if(resp.data =='success'){
this.$message('添加成功!');
this.$router.push('/BookManage')
}
})
} else {
return false;
}
});
}
```
修改操作:
```js
submitForm(formName) {
this.$refs[formName].validate((valid) => {
if (valid) {
this.$axios.put('http://localhost:8181/book/update',this.ruleForm).then(resp => {
if(resp.data =='success'){
this.$message('修改成功!');
this.$router.push('/BookManage')
}
})
} else {
return false;
}
});
}
```
**以上均是部分代码 详细代码见源码**