# 在线音乐播放器
**Repository Path**: linyuxb/OnlineMusic
## Basic Information
- **Project Name**: 在线音乐播放器
- **Description**: SSM 版本的在线音乐播放器
本来实现的 JDK 17 版本的 , 但是忘记了云服务器上版本是 JDK 8 的 , 所以又实现了 JDK 1.8 版本的
- **Primary Language**: Unknown
- **License**: Not specified
- **Default Branch**: master
- **Homepage**: None
- **GVP Project**: No
## Statistics
- **Stars**: 0
- **Forks**: 1
- **Created**: 2024-03-06
- **Last Updated**: 2024-03-06
## Categories & Tags
**Categories**: Uncategorized
**Tags**: None
## README
# 一 . 准备工作
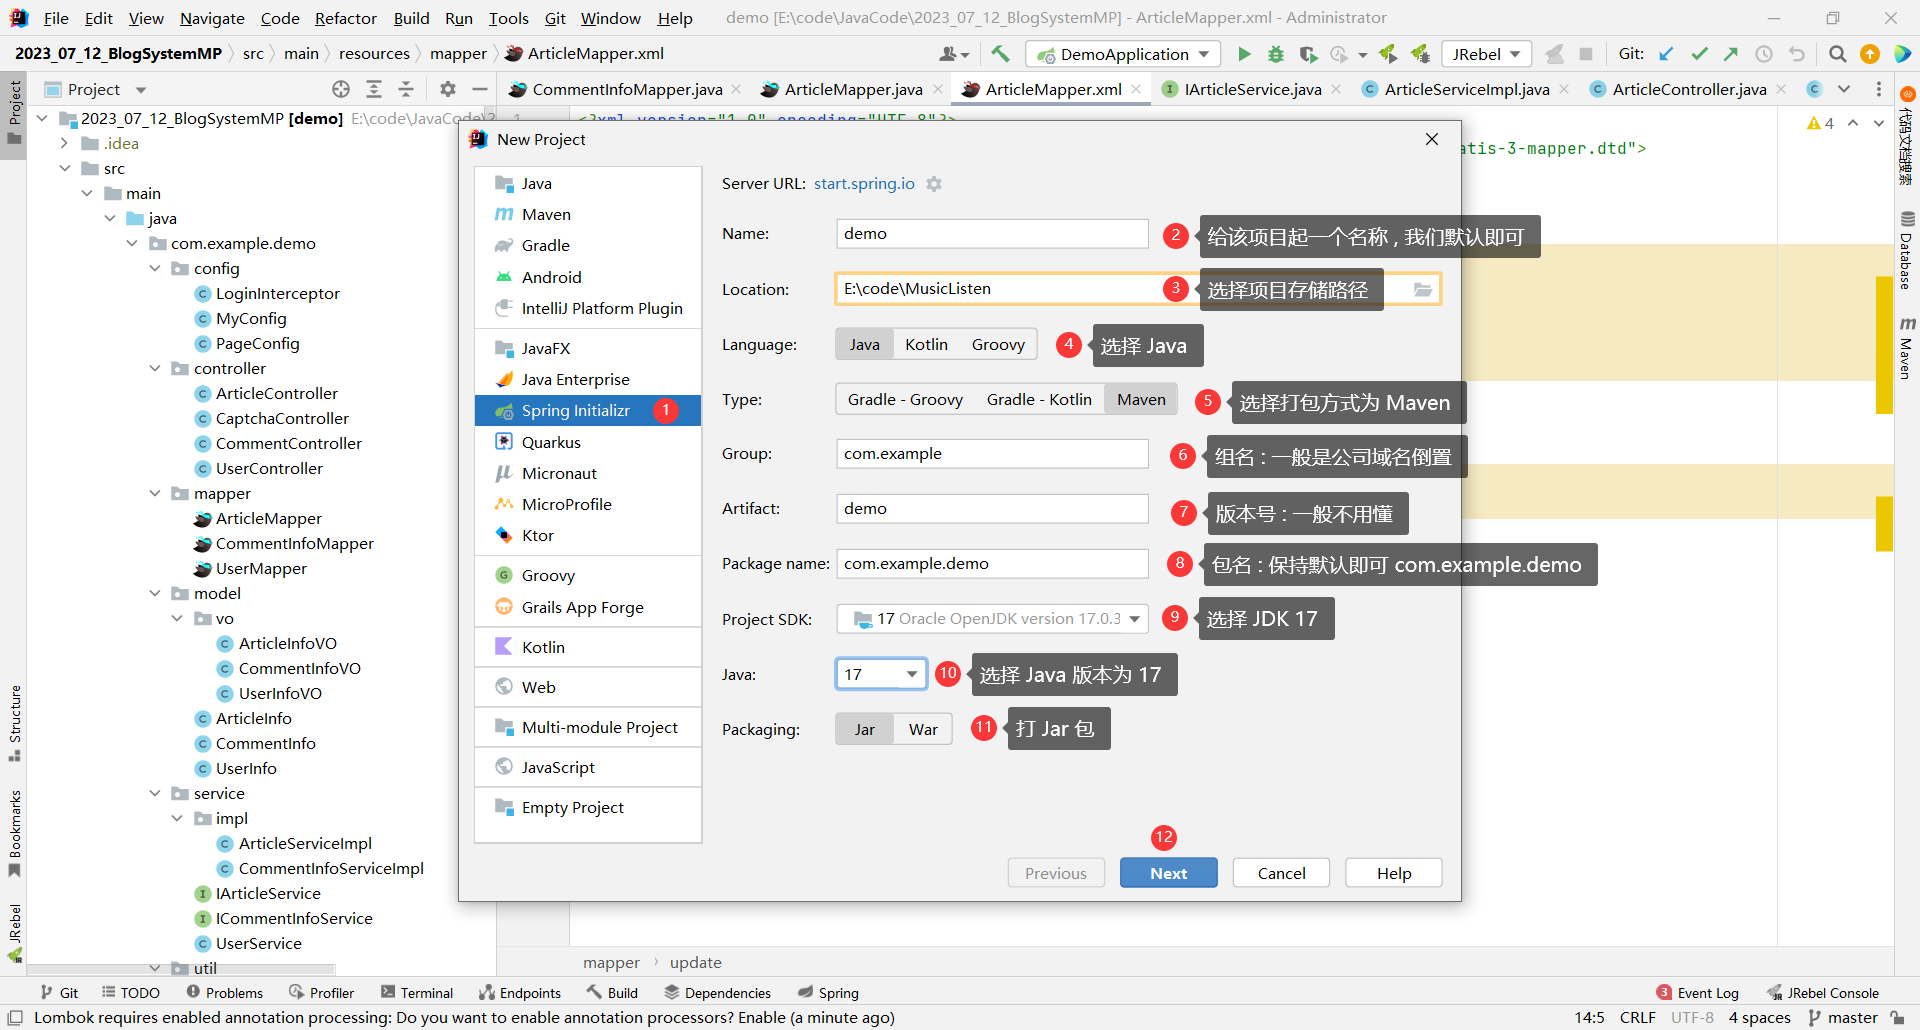
## 1.1 创建项目
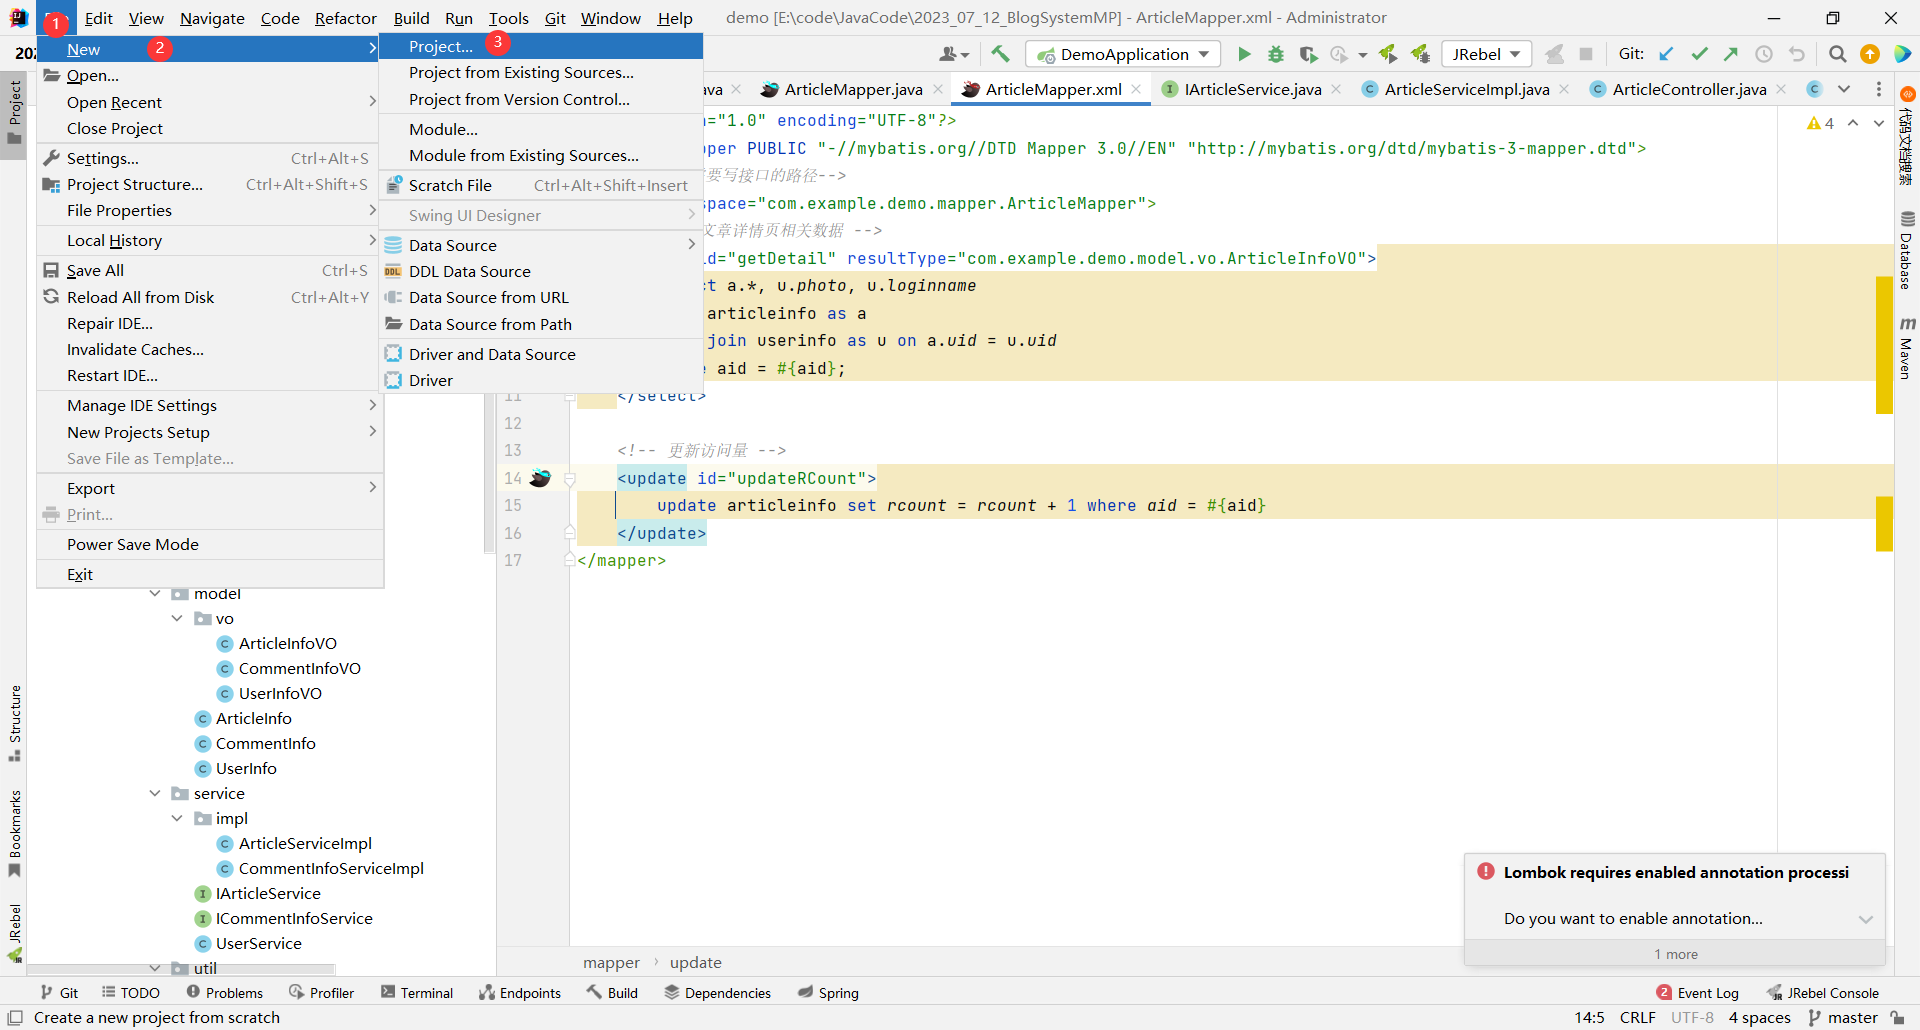
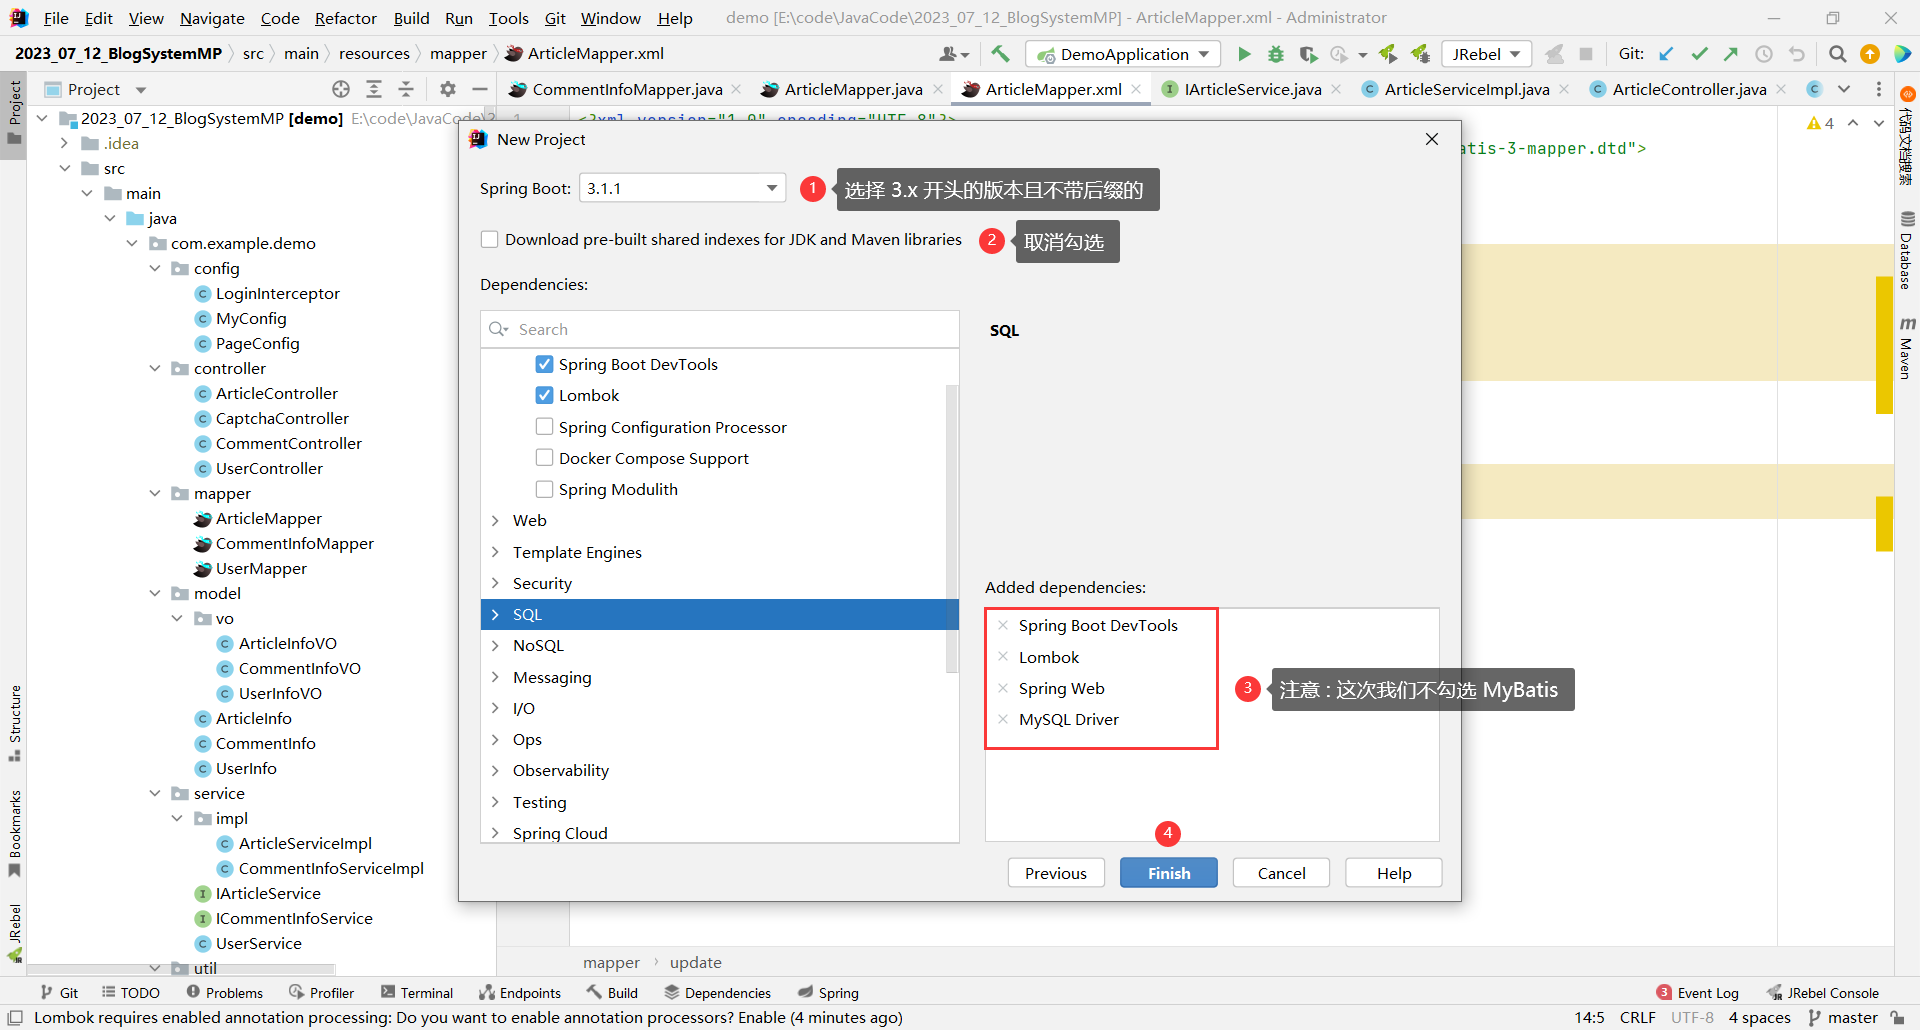
> 注意 : 我们不勾选 MyBatis 依赖 , 因为我们一会要引入 MP , MP 内置 MyBatis
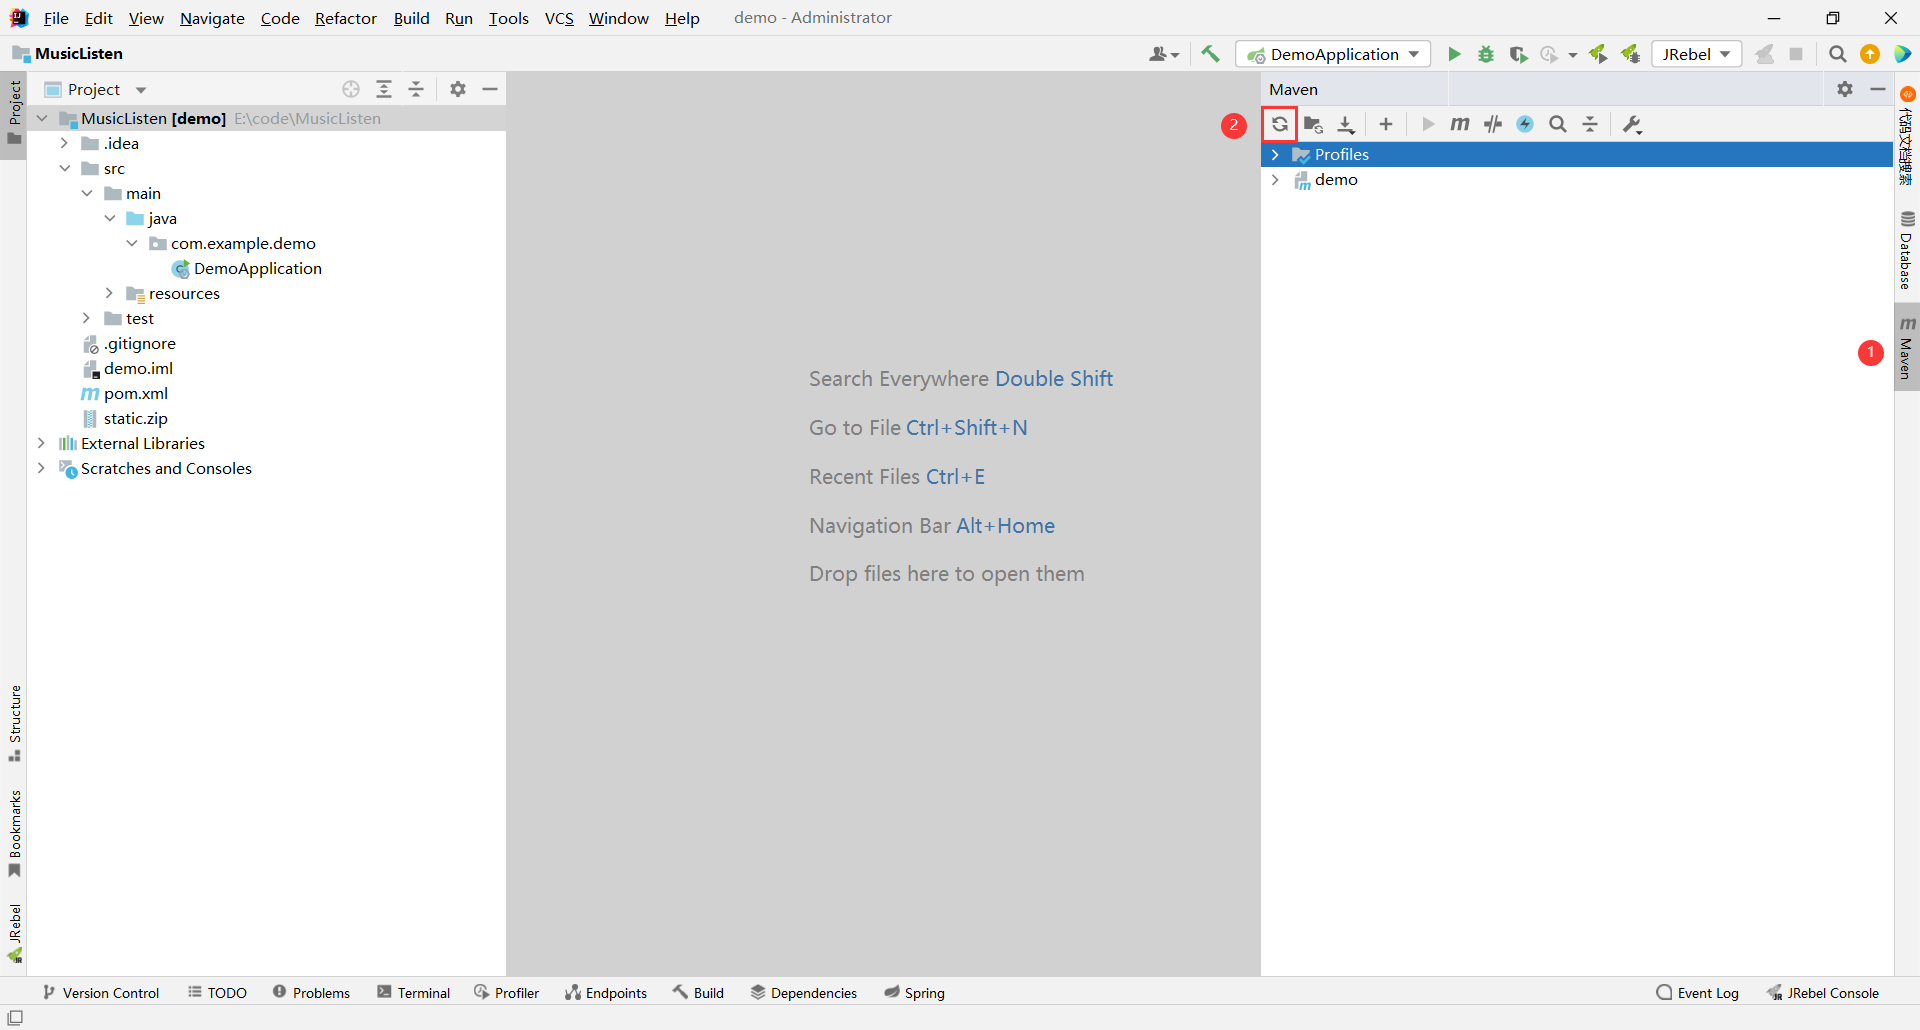
等到启动类图标变蓝 , 我们项目就创建结束了
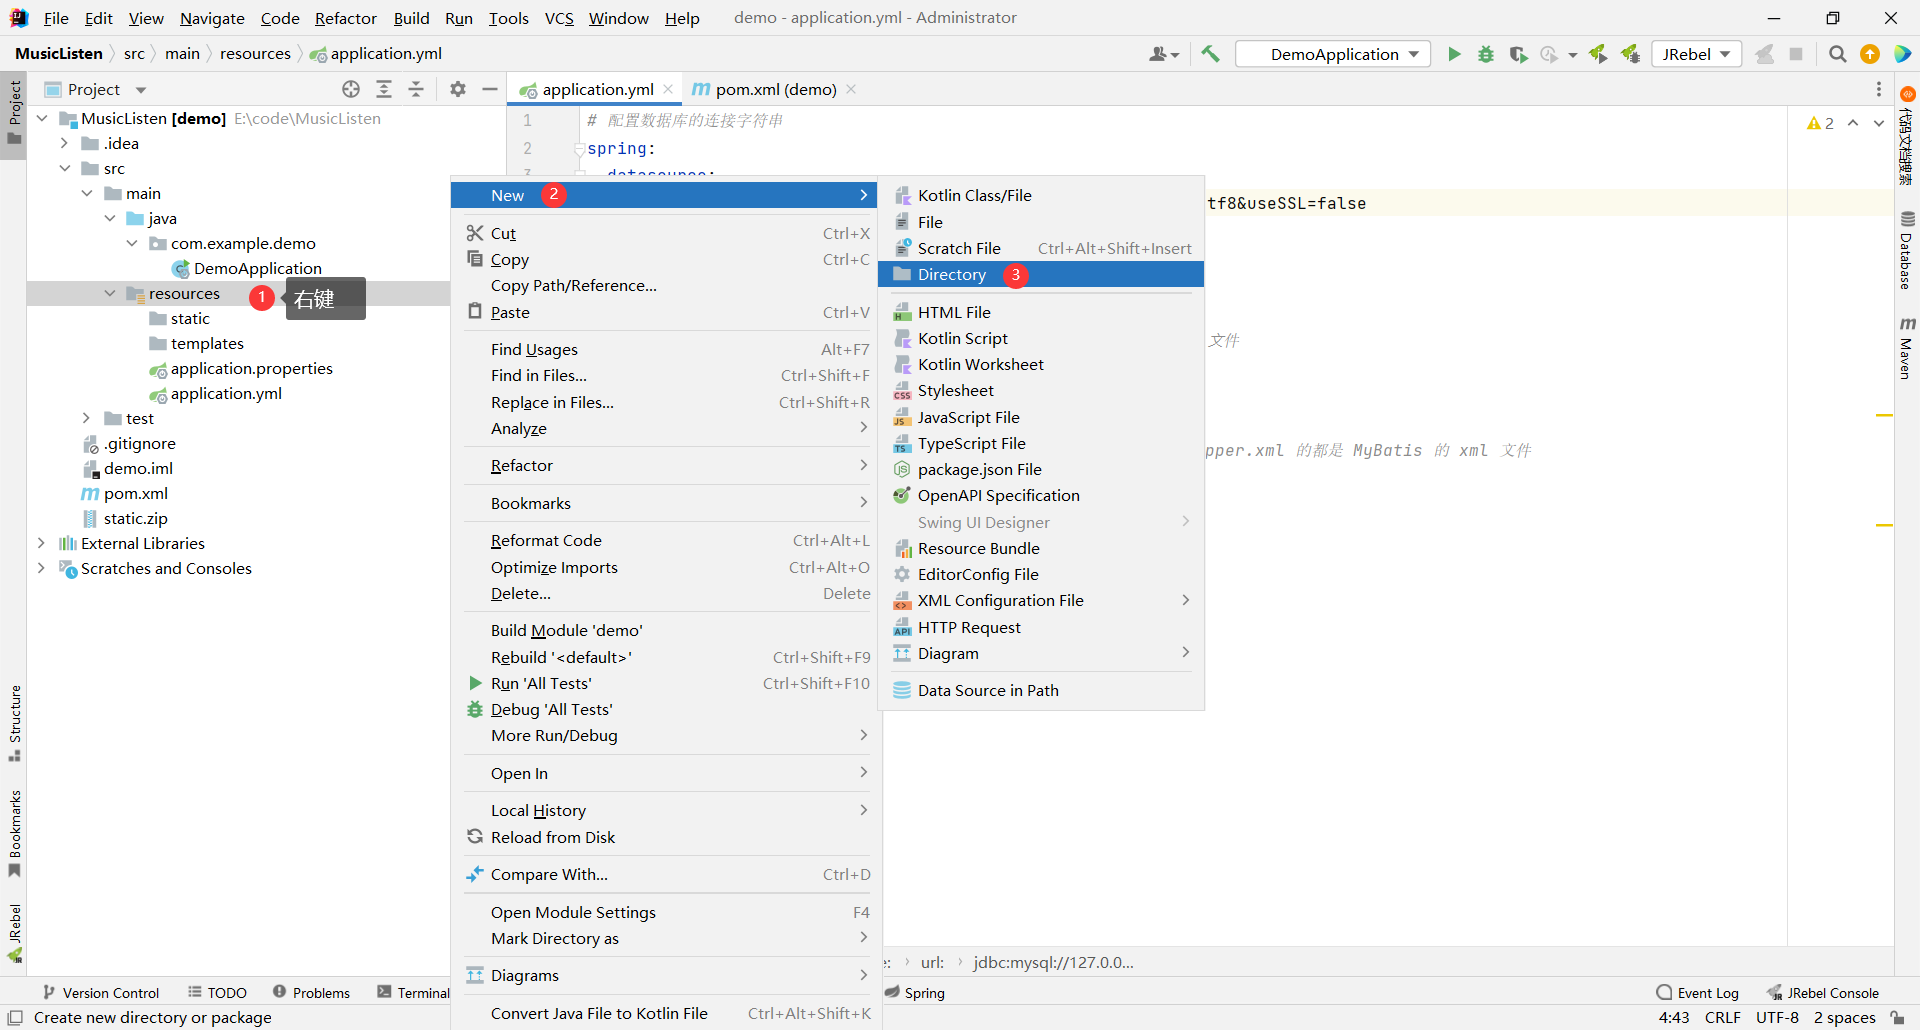
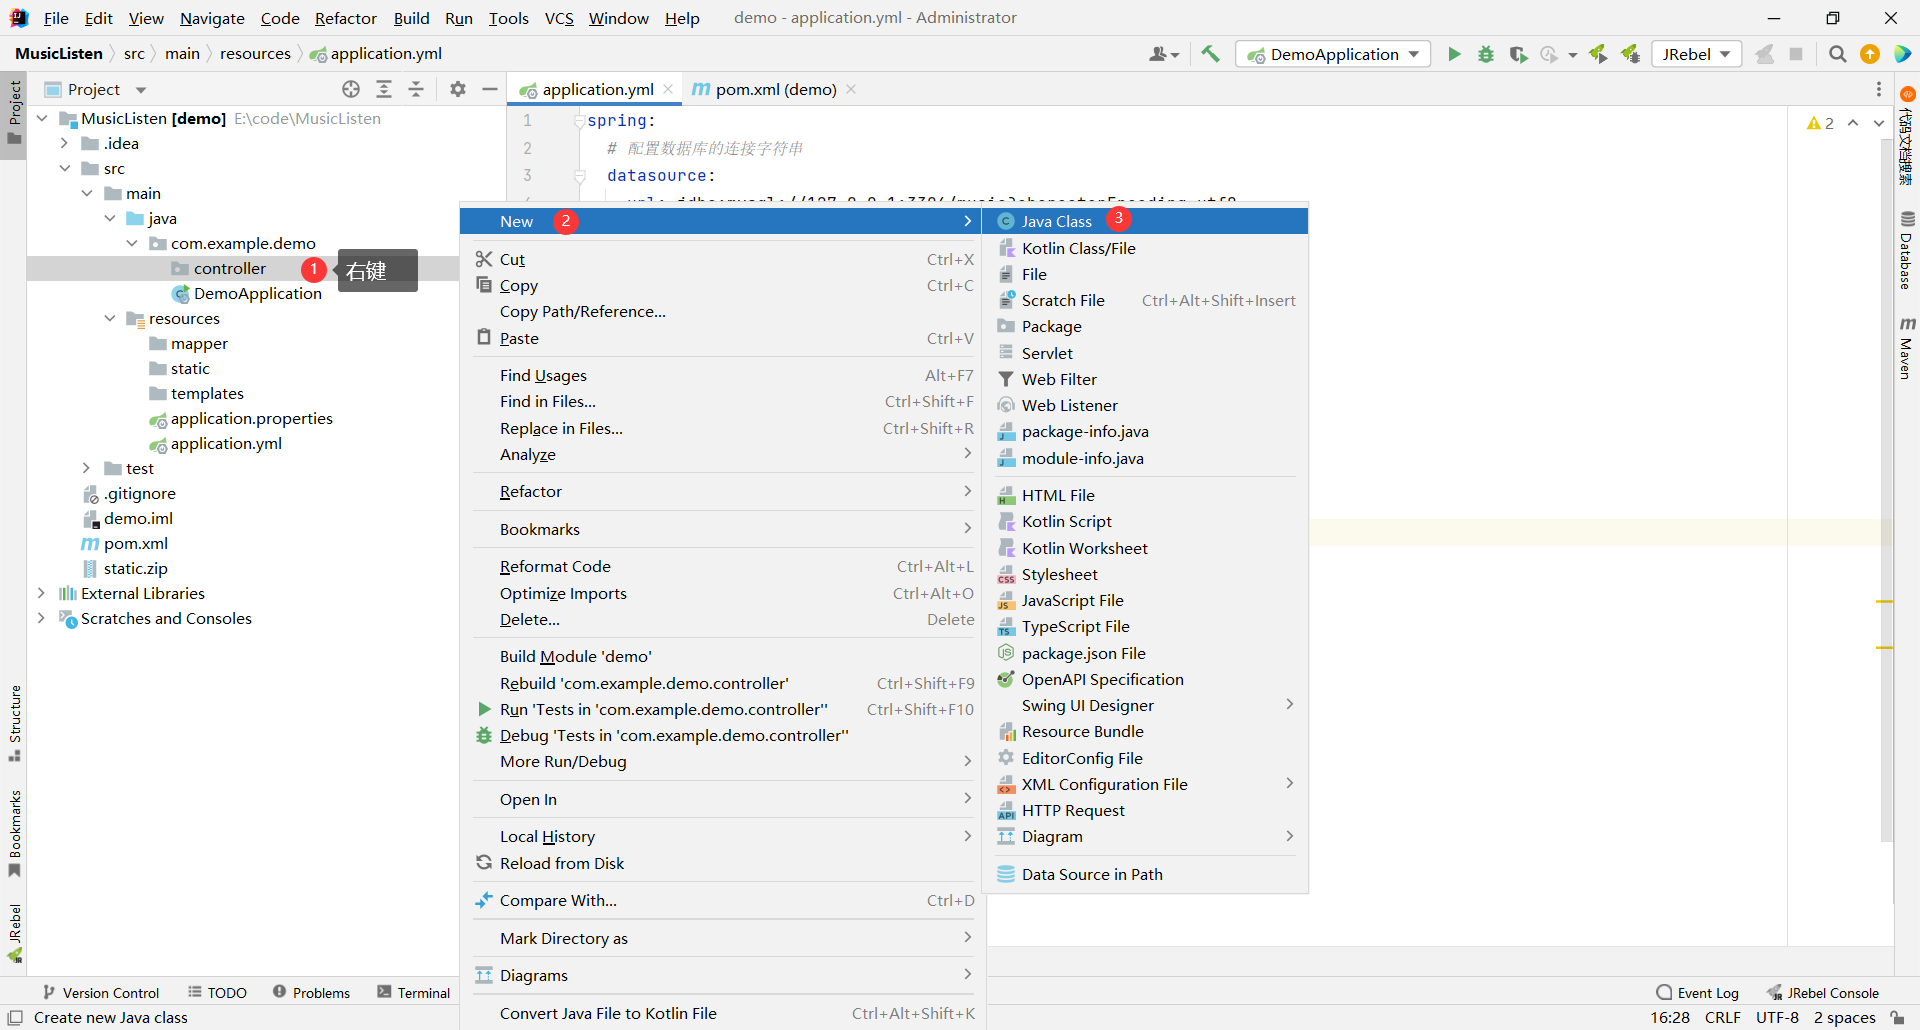
粘贴进这段代码
```yaml
spring:
# 配置数据库的连接字符串
datasource:
url: jdbc:mysql://127.0.0.1:3306/onlinemusic?characterEncoding=utf8
username: root
password: root
driver-class-name: com.mysql.cj.jdbc.Driver
# 配置 Spring Boot 上传文件的大小
# 默认每个文件的配置最大为 10MB,单次请求的文件的总数不能超过 10MB
servlet:
multipart:
enabled: true
max-file-size: 100MB # 设置最大文件大小
max-request-size: 100MB # 设置最大请求大小
# 配置 Spring Boot 日志调试模式是否开启
debug: true
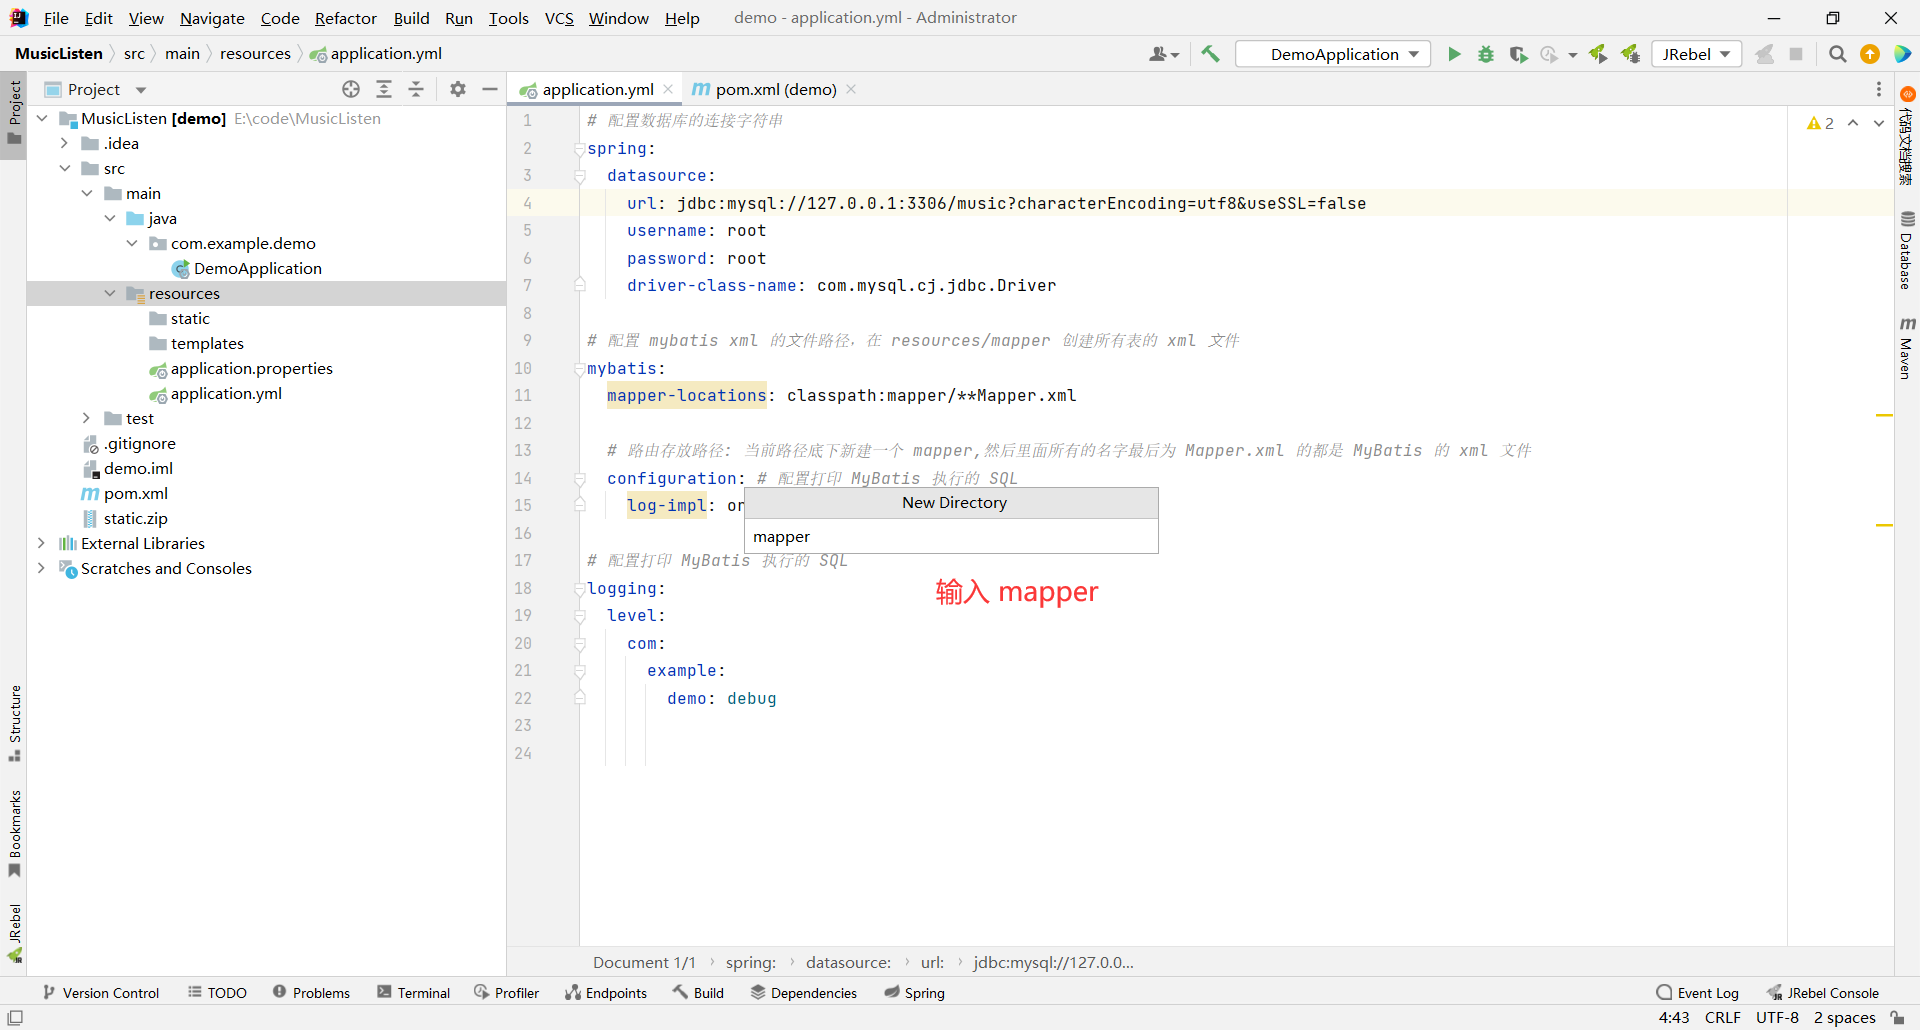
# 设置 Mybatis 的 xml 保存路径
mybatis:
mapper-locations: classpath:mapper/**Mapper.xml
configuration: # 配置打印 MyBatis 执行的 SQL
log-impl: org.apache.ibatis.logging.stdout.StdOutImpl
# 配置打印 MyBatis 执行的 SQL
logging:
level:
com:
example:
demo: debug
# 关闭 Spring Boot 的条件评估报告
logging.level.org.springframework.boot.autoconfigure: ERROR
```
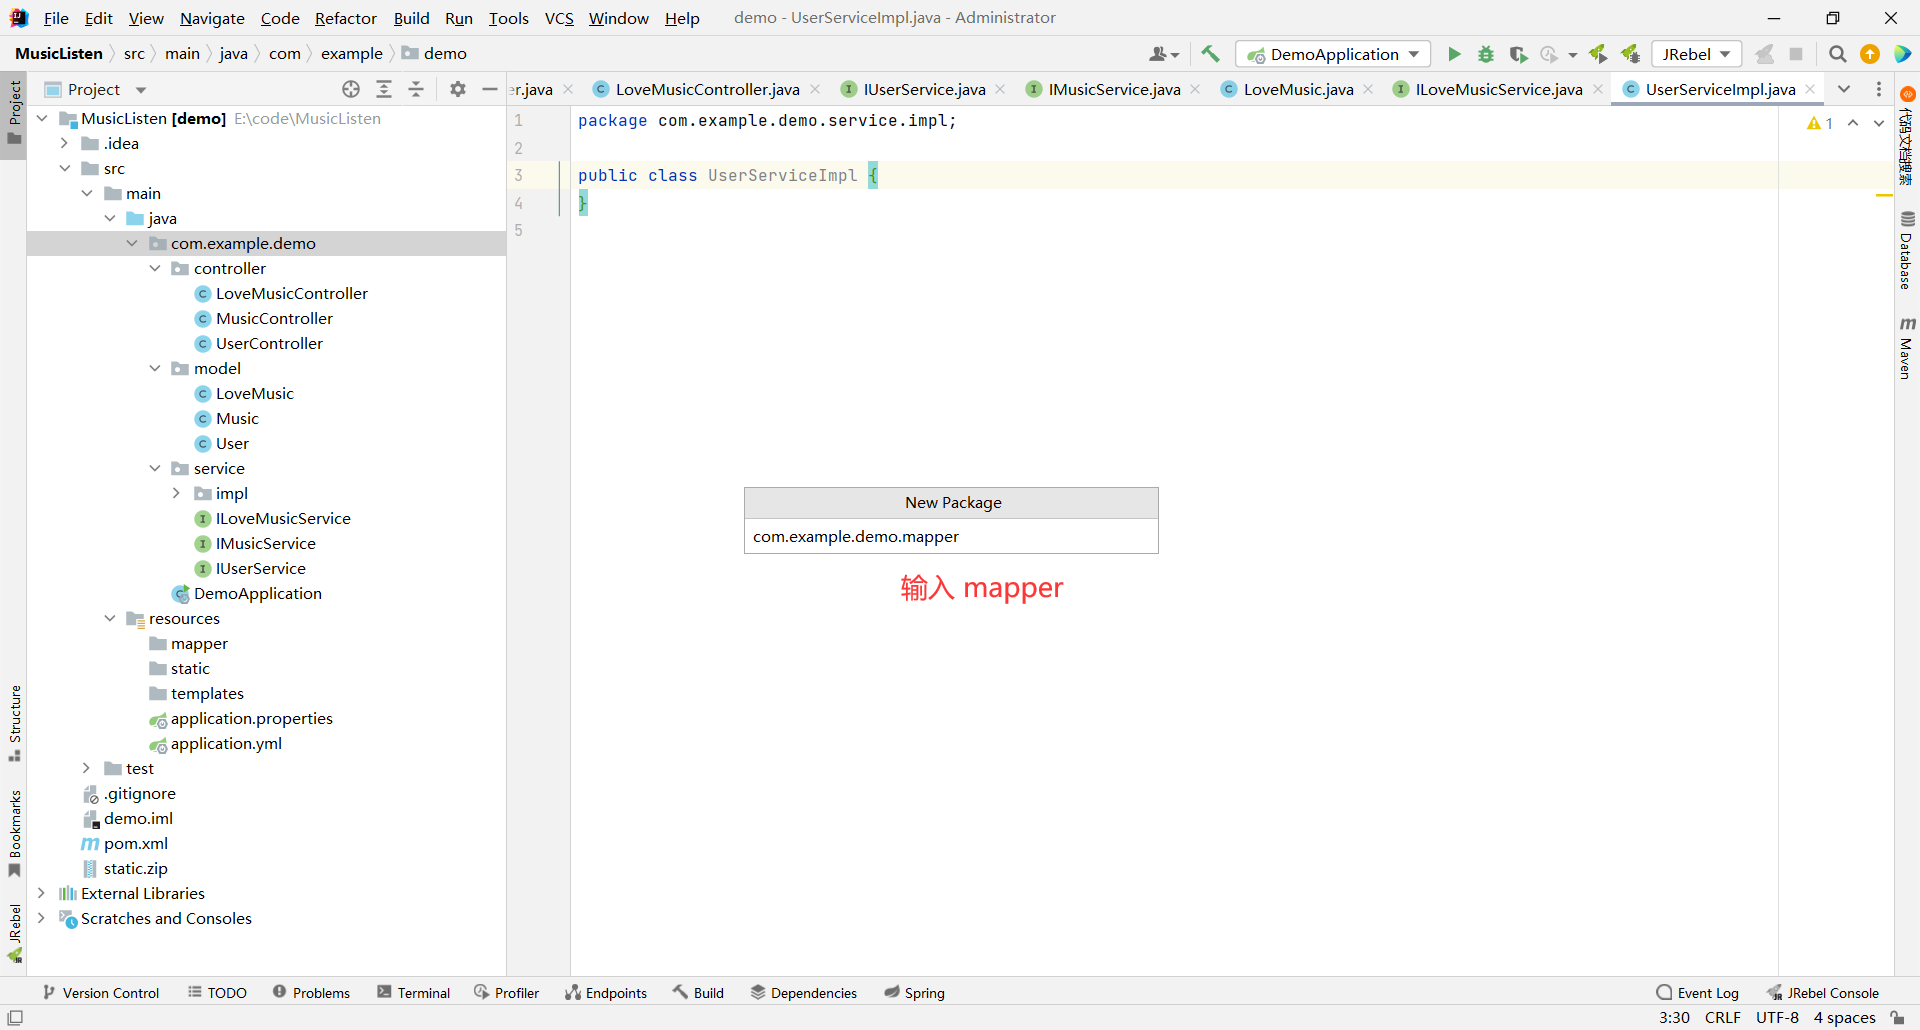
然后根据 application.yml 文件中 xxxMapper.xml 的存放规则 , 我们需要新建一个 mapper 文件夹 , 将 xxxMapper.xml 文件放到此文件夹中
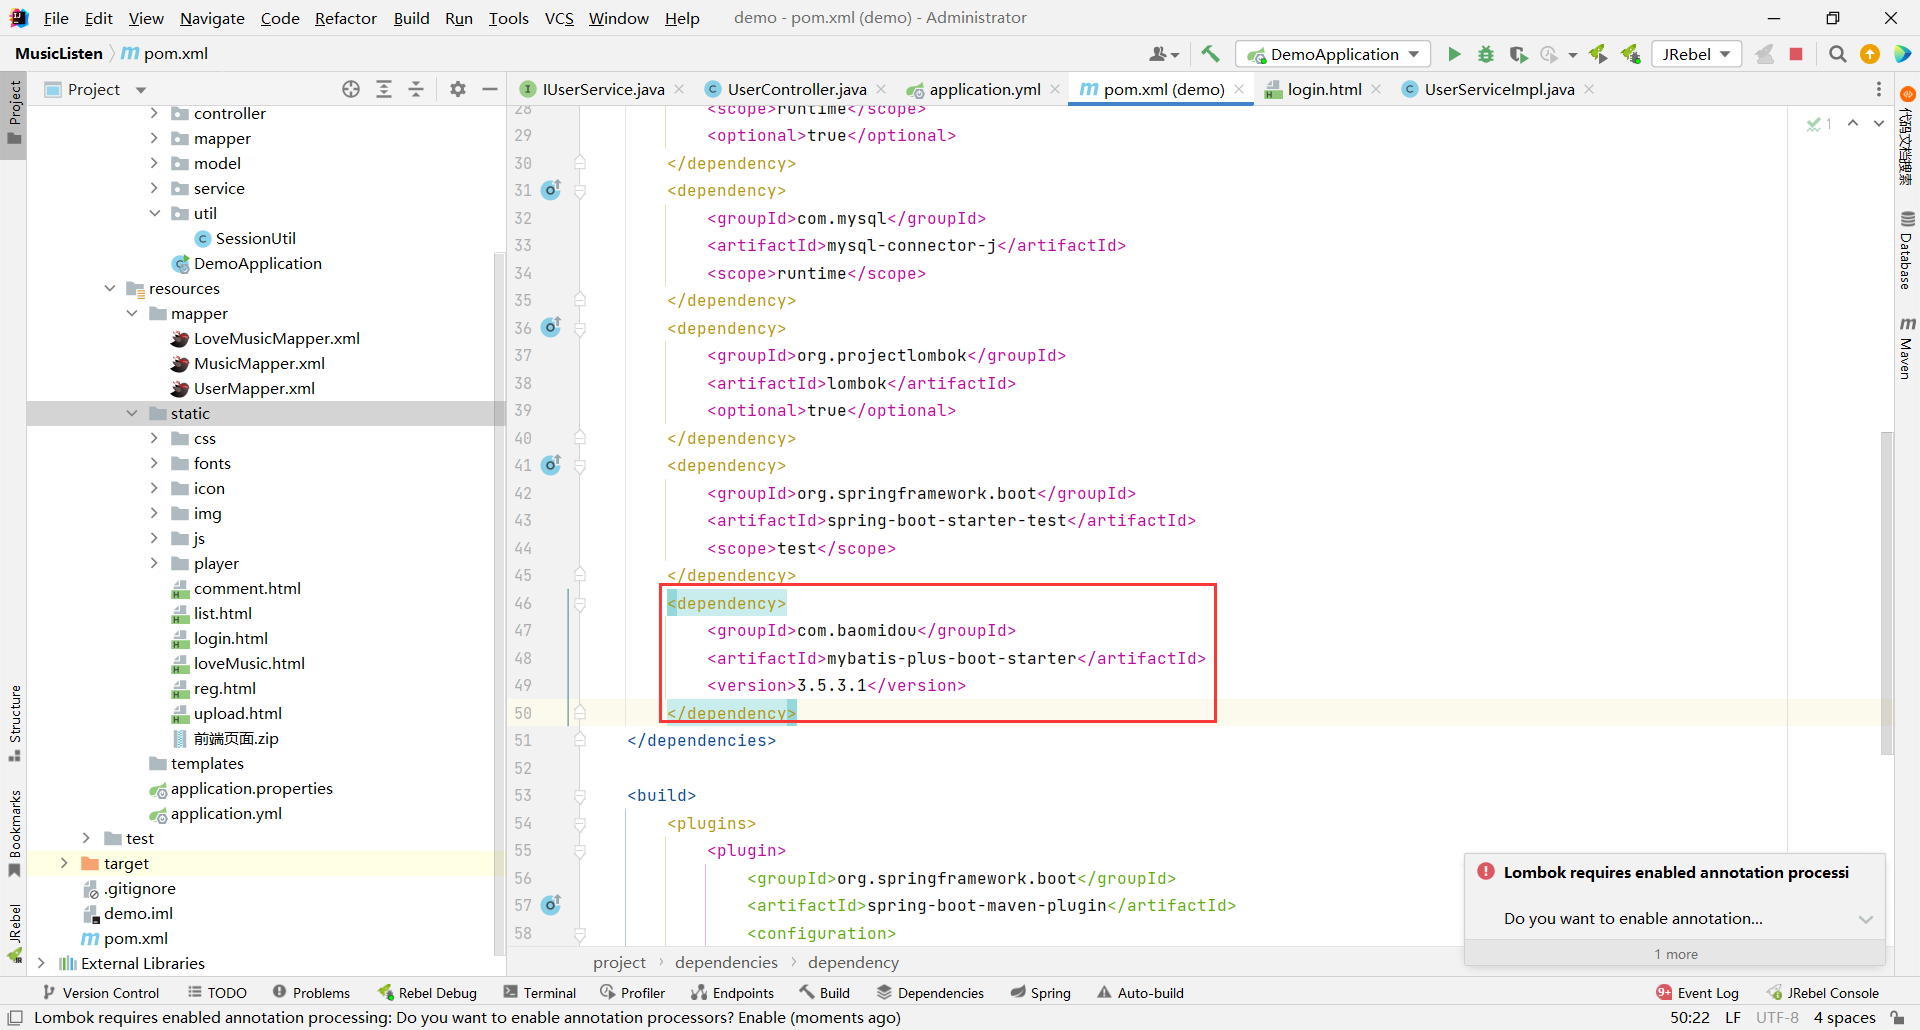
然后在 pom.xml 中引入 MP
> 引入 MP 可以帮助我们更简单的实现分页功能
```xml
com.baomidou
mybatis-plus-boot-starter
3.5.3.1
```
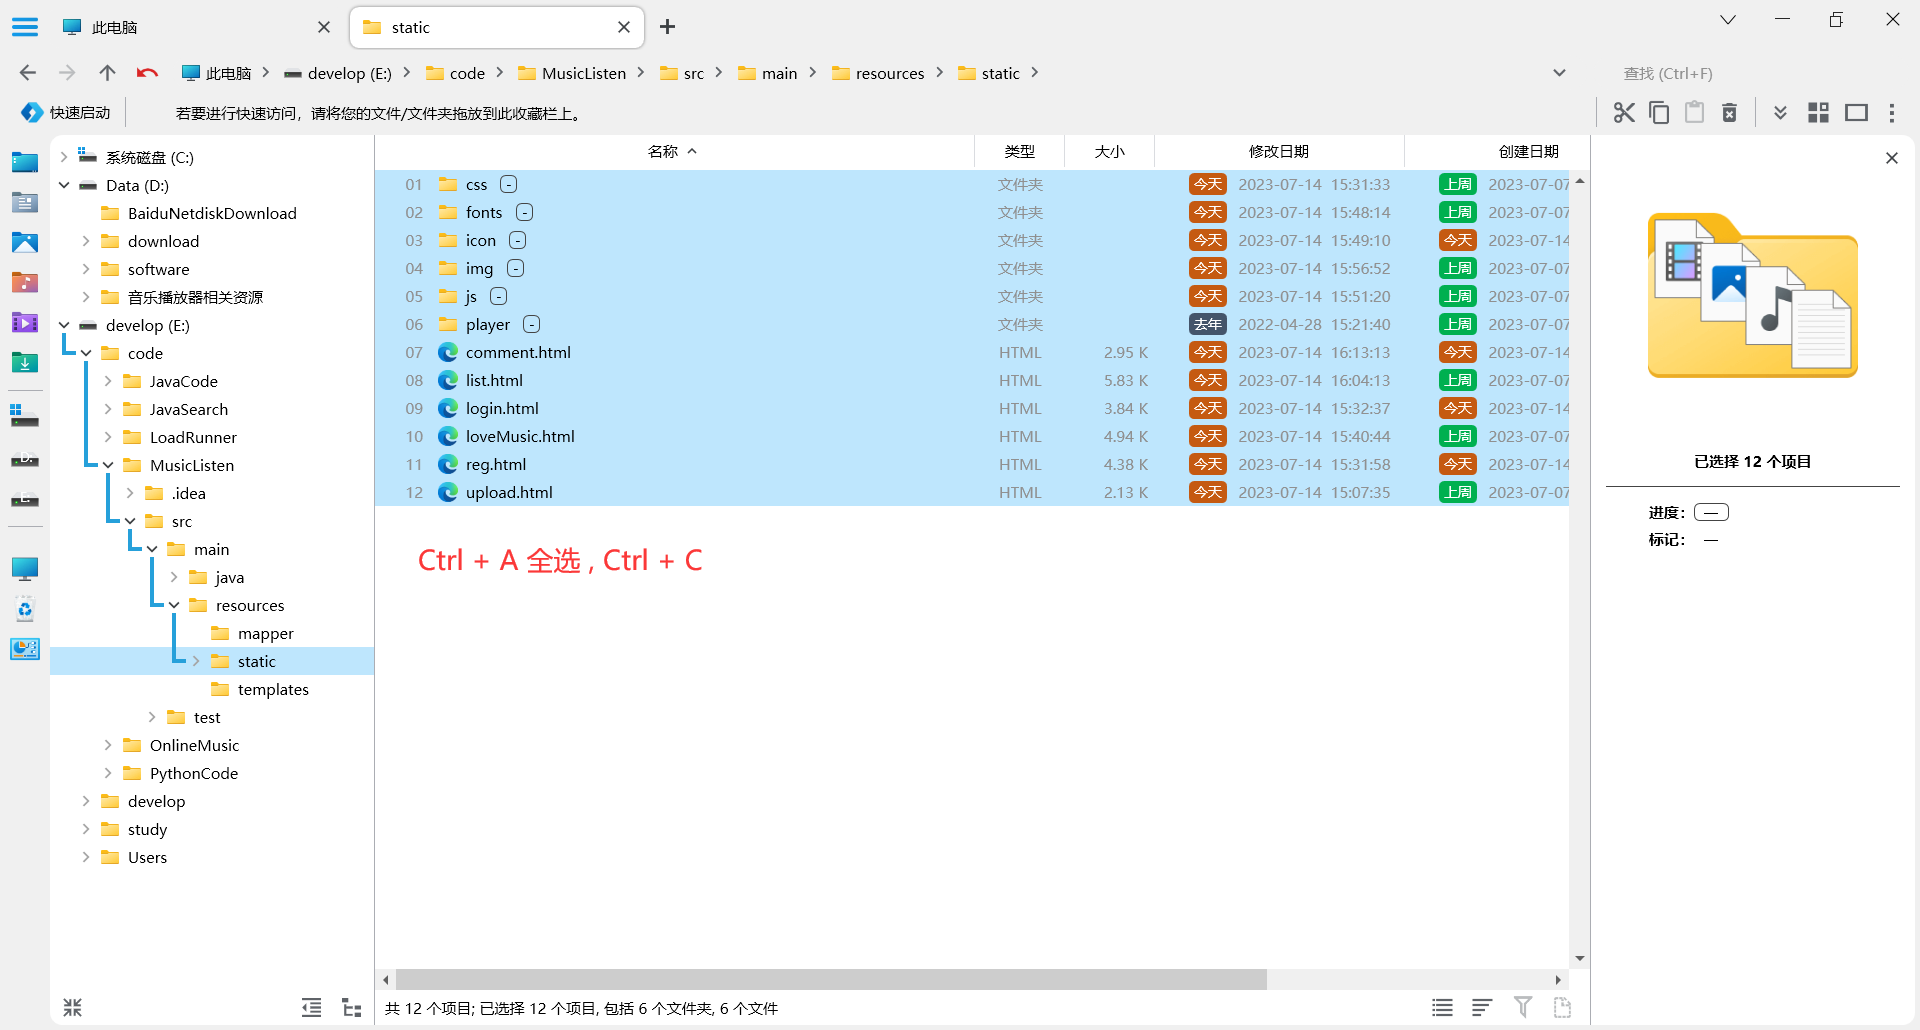
然后我们将前端界面引入进来
[前端页面.zip](https://www.yuque.com/attachments/yuque/0/2023/zip/28016775/1689342467166-6efebe3a-9276-42ab-891d-dda79ce090d3.zip?_lake_card=%7B%22src%22%3A%22https%3A%2F%2Fwww.yuque.com%2Fattachments%2Fyuque%2F0%2F2023%2Fzip%2F28016775%2F1689342467166-6efebe3a-9276-42ab-891d-dda79ce090d3.zip%22%2C%22name%22%3A%22%E5%89%8D%E7%AB%AF%E9%A1%B5%E9%9D%A2.zip%22%2C%22size%22%3A5706140%2C%22ext%22%3A%22zip%22%2C%22source%22%3A%22%22%2C%22status%22%3A%22done%22%2C%22download%22%3Atrue%2C%22taskId%22%3A%22u217ed4e4-49dd-4343-b979-600c40dfeb6%22%2C%22taskType%22%3A%22upload%22%2C%22type%22%3A%22application%2Fzip%22%2C%22__spacing%22%3A%22both%22%2C%22mode%22%3A%22title%22%2C%22id%22%3A%22ued6354a0%22%2C%22margin%22%3A%7B%22top%22%3Atrue%2C%22bottom%22%3Atrue%7D%2C%22card%22%3A%22file%22%7D)
## 1.2 数据库的创建
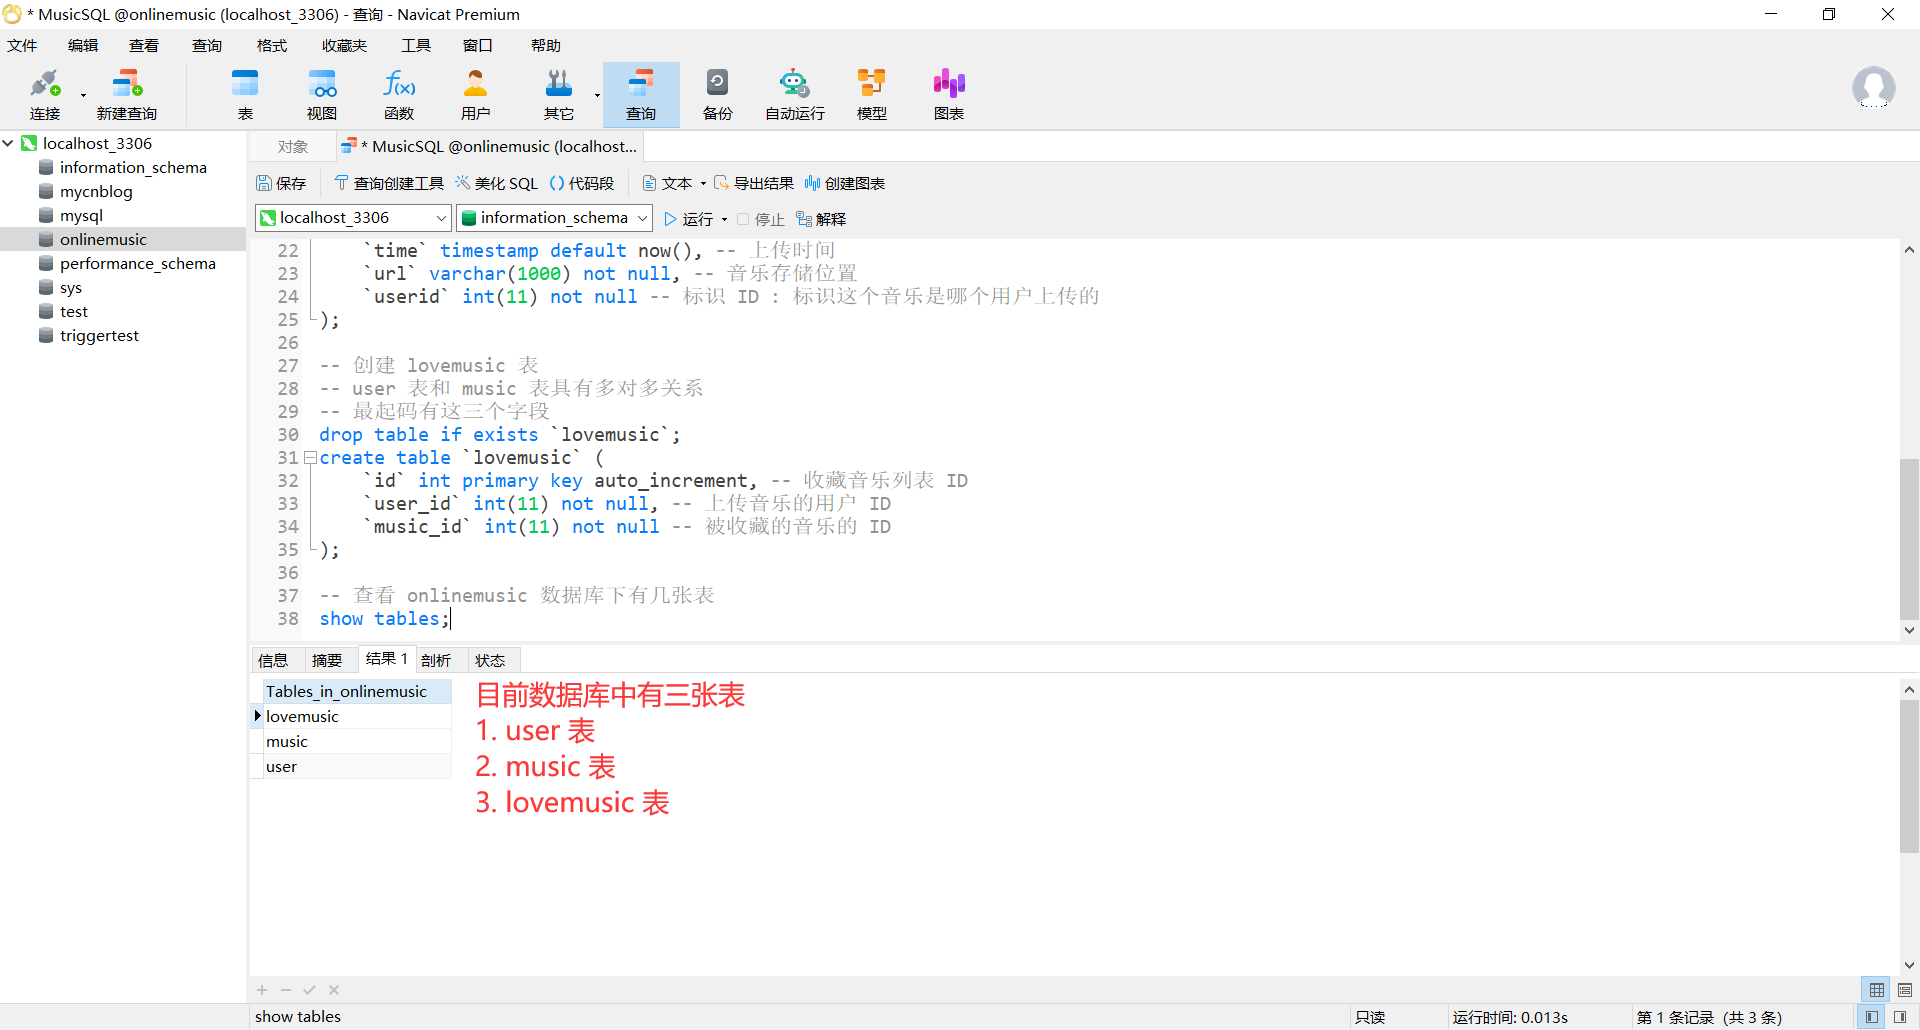
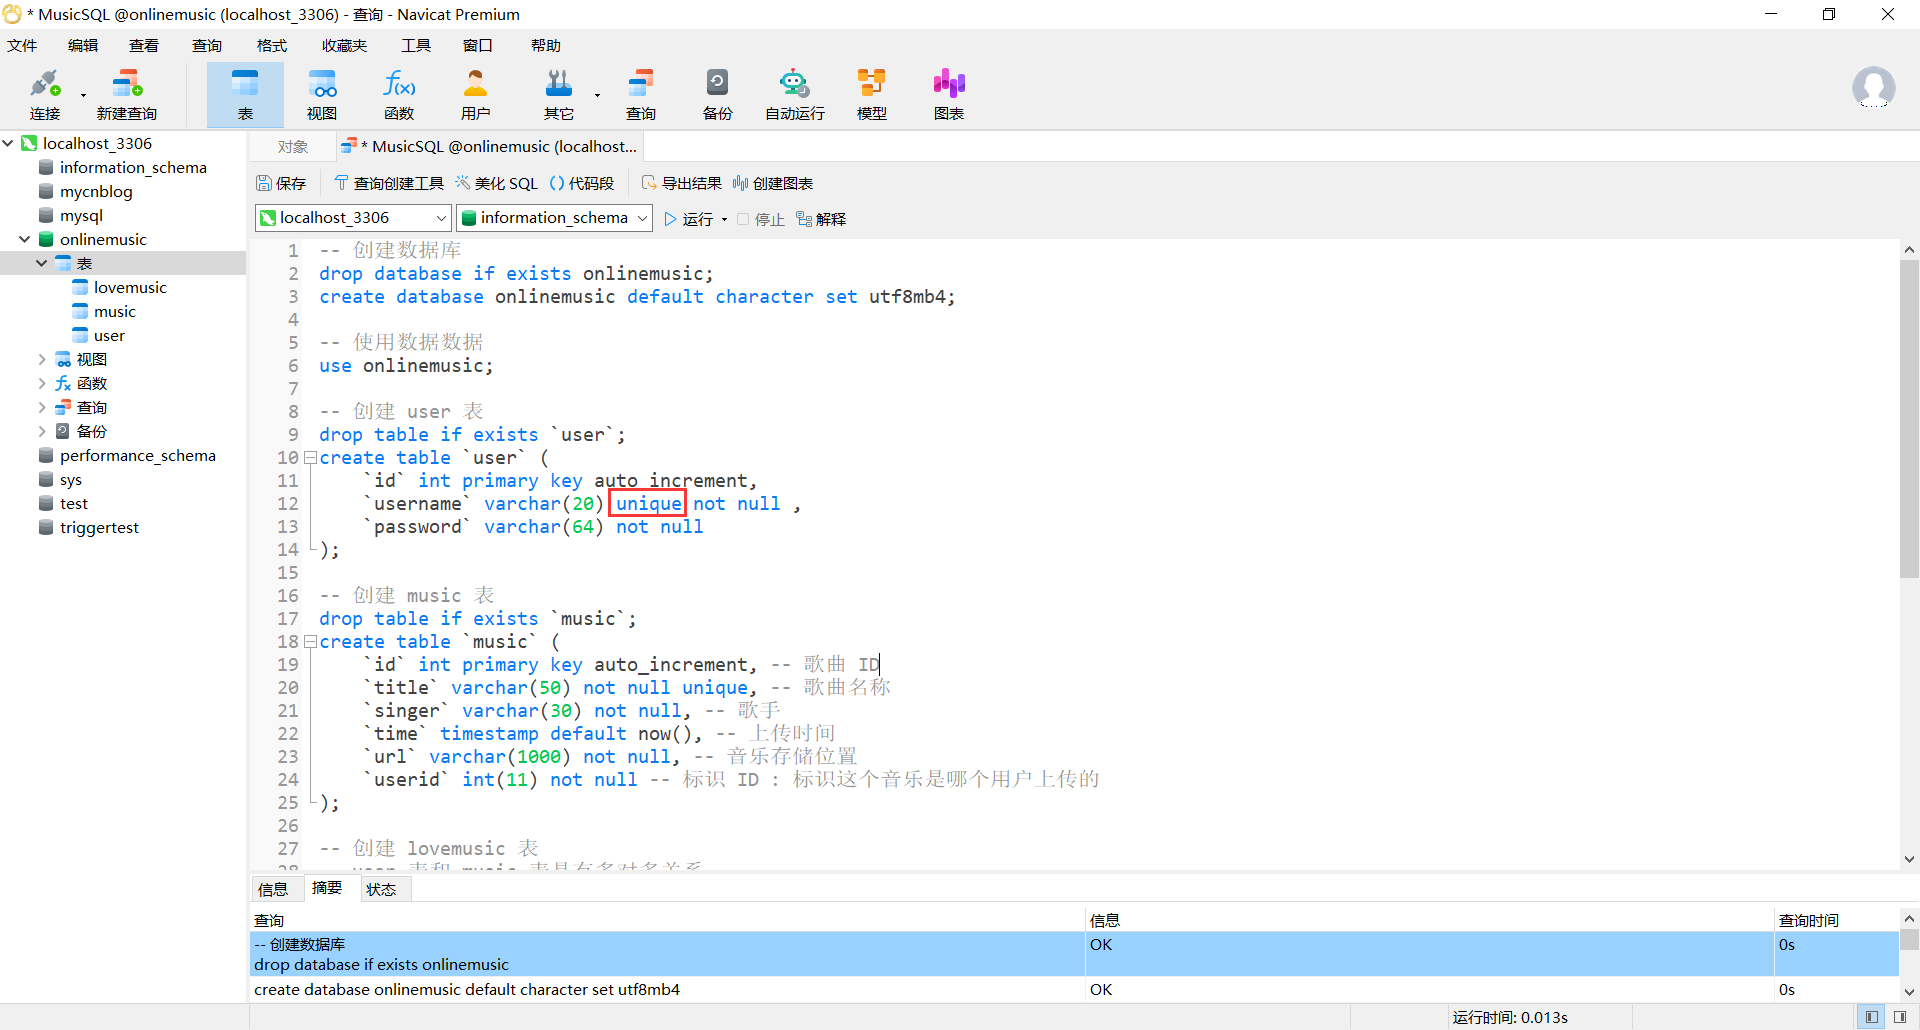
我们音乐小栈系统 , 总共需要三张表 : 用户表、音乐表、收藏表
```sql
-- 创建数据库
drop database if exists onlinemusic;
create database onlinemusic default character set utf8mb4;
-- 使用数据数据
use onlinemusic;
-- 创建 user 表
drop table if exists `user`;
create table `user` (
`id` int primary key auto_increment,
`username` varchar(20) unique not null ,
`password` varchar(64) not null
);
-- 创建 music 表
drop table if exists `music`;
create table `music` (
`id` int primary key auto_increment, -- 歌曲 ID
`title` varchar(50) unique not null , -- 歌曲名称
`singer` varchar(30) not null, -- 歌手
`time` timestamp default now(), -- 上传时间
`url` varchar(1000) not null, -- 音乐存储位置
`userid` int(11) not null -- 标识 ID : 标识这个音乐是哪个用户上传的
);
-- 创建 lovemusic 表
-- user 表和 music 表具有多对多关系
-- 最起码有这三个字段
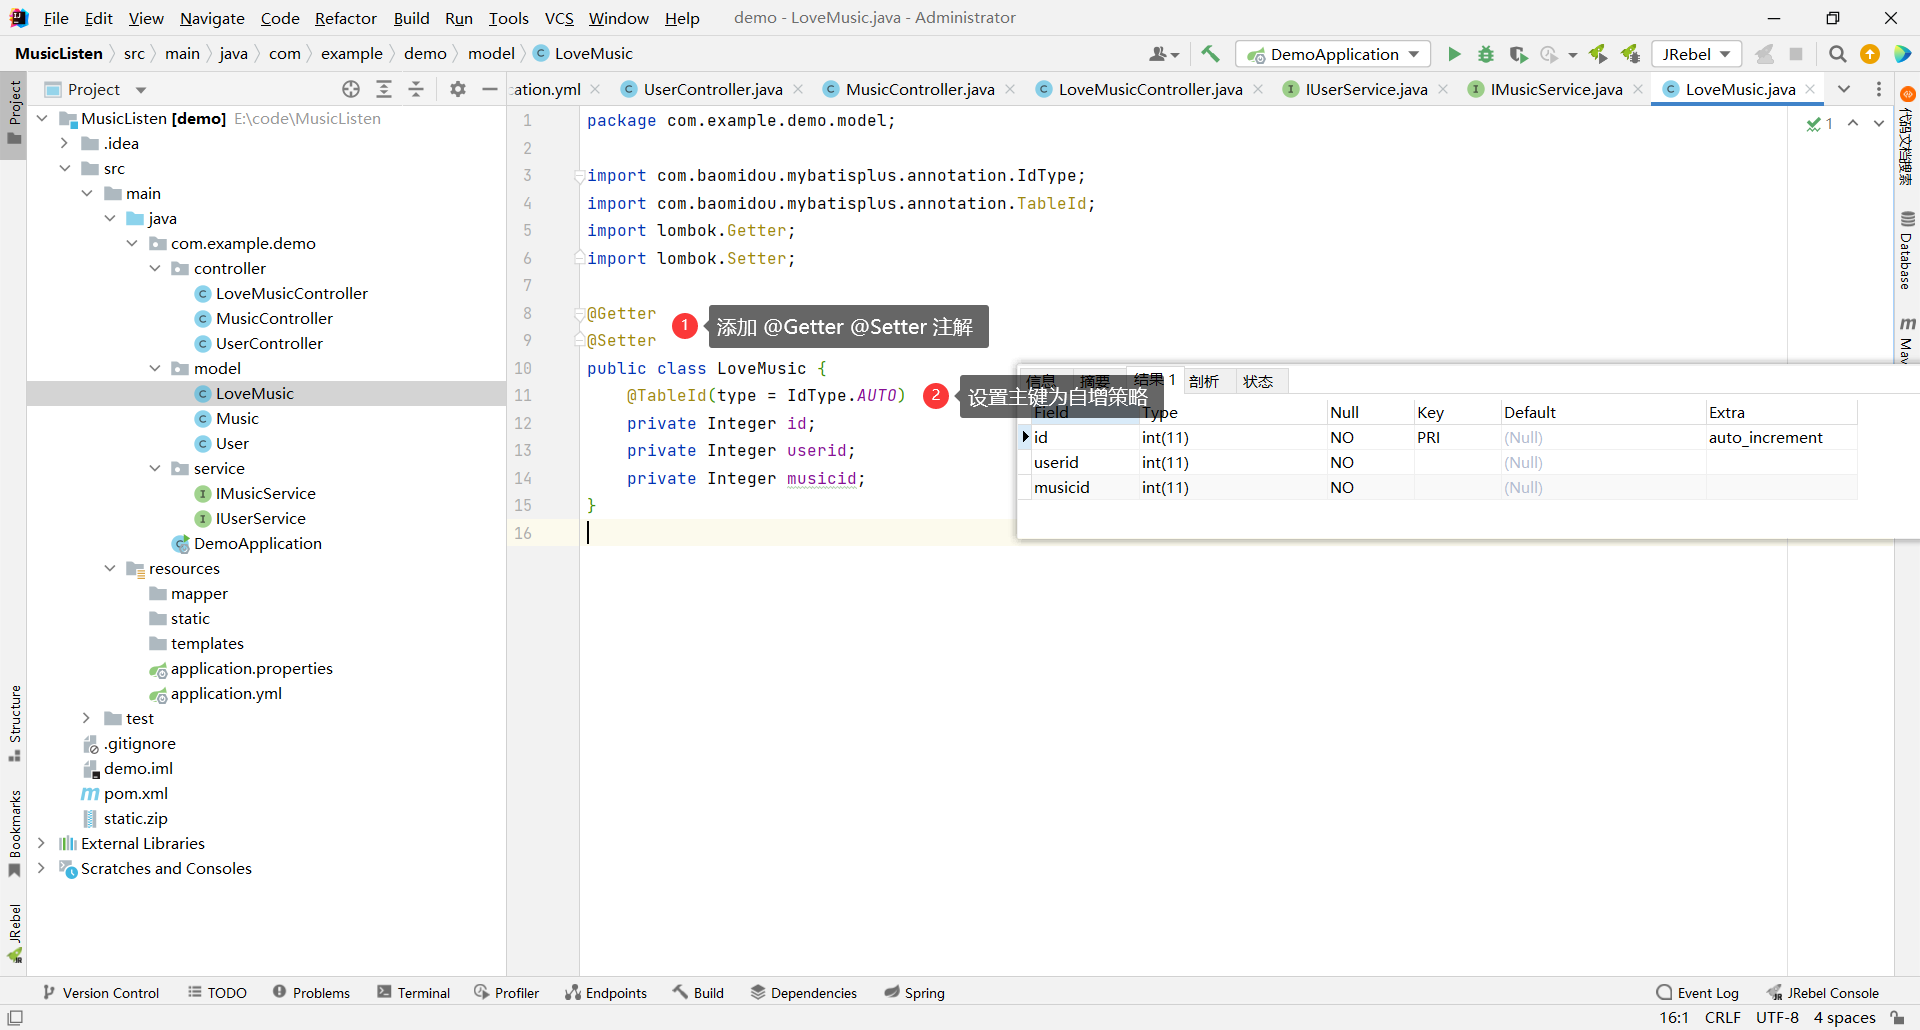
drop table if exists `lovemusic`;
create table `lovemusic` (
`id` int primary key auto_increment, -- 收藏音乐列表 ID
`userid` int(11) not null, -- 上传音乐的用户 ID
`musicid` int(11) not null -- 被收藏的音乐的 ID
);
```
将他在数据库中运行之后 , 我们就可以查看一下是否创建成功了
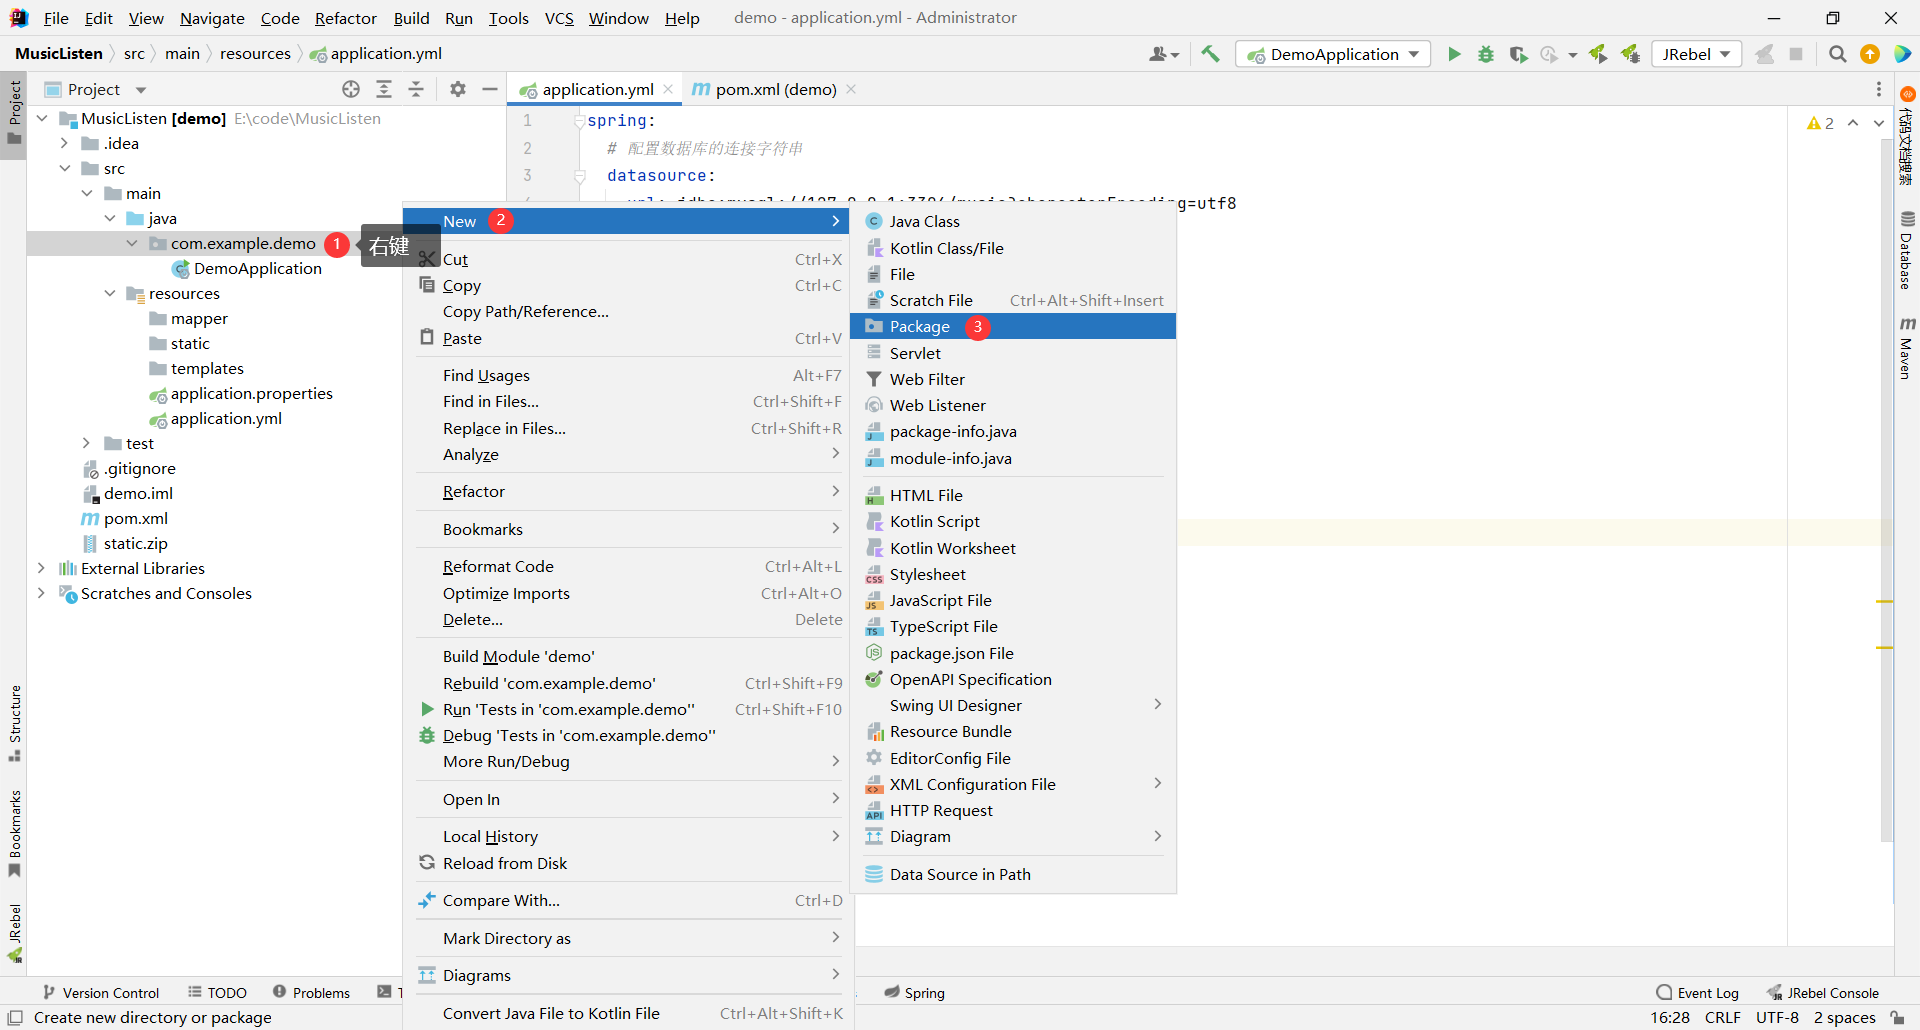
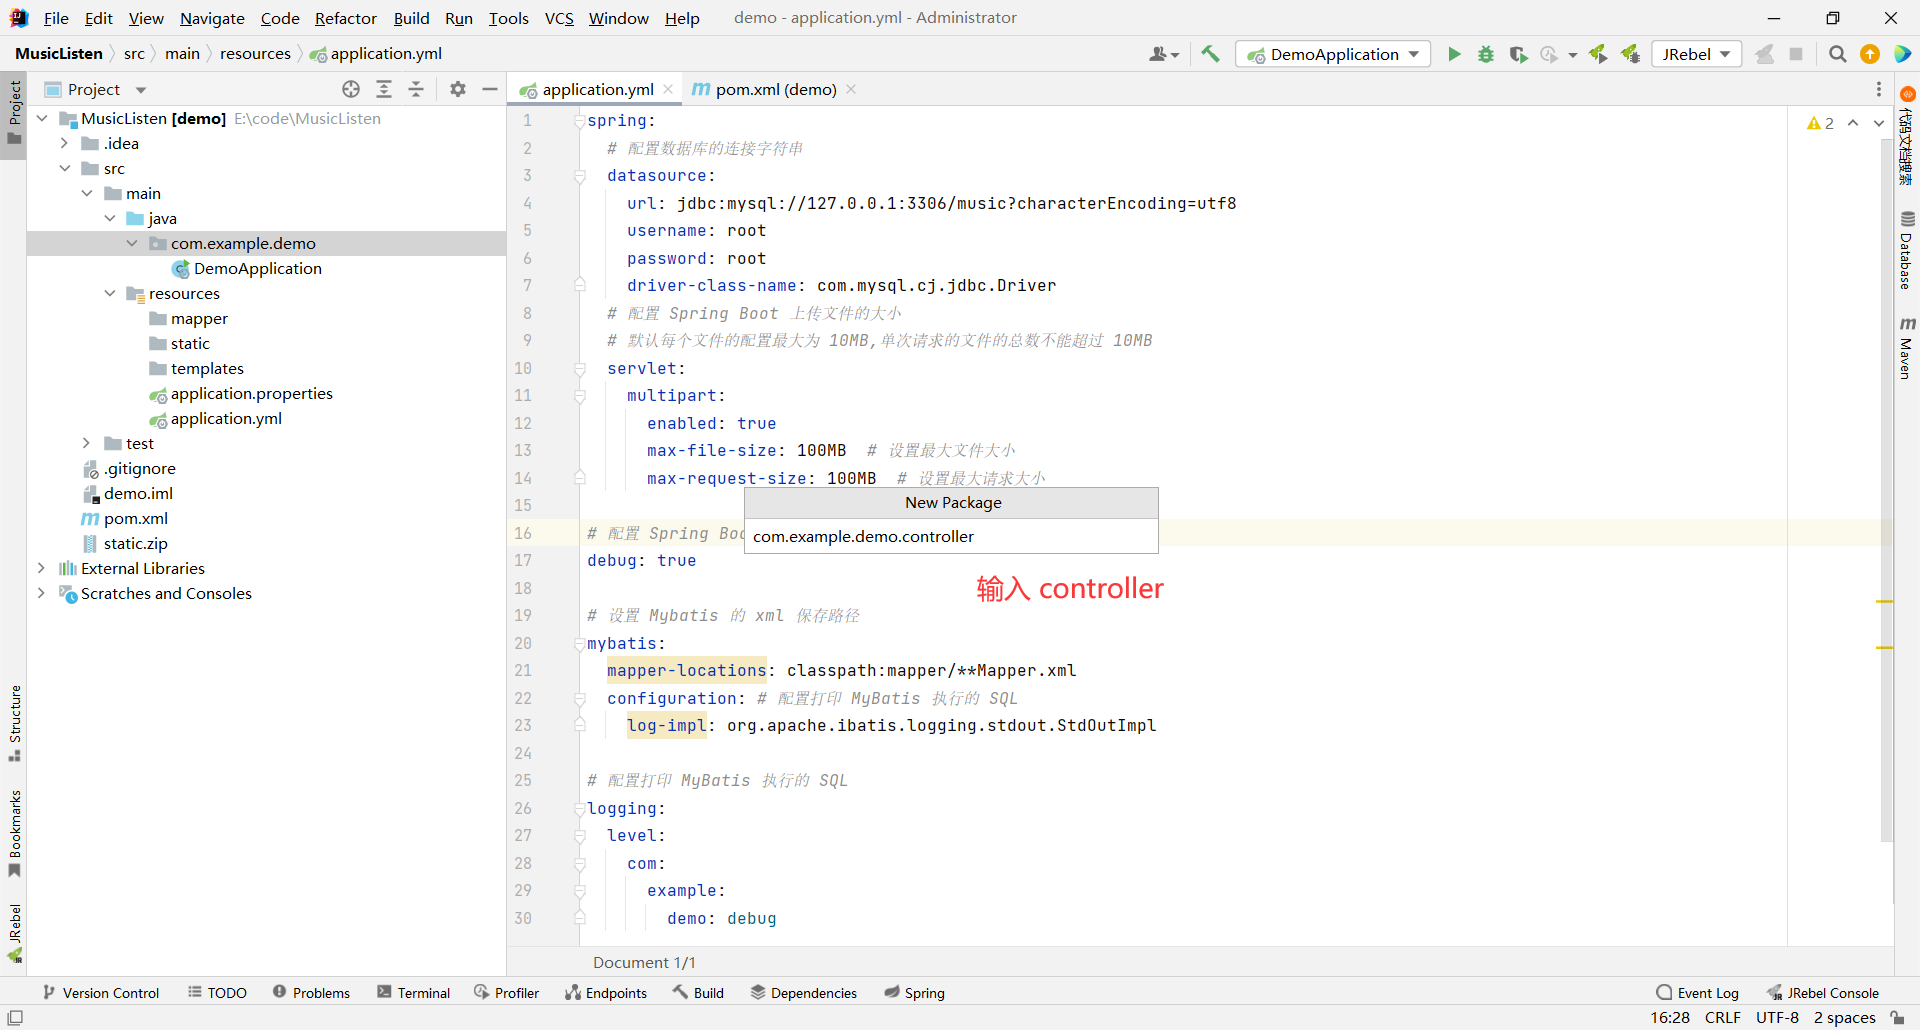
## 1.3 公共模块的创建
我们一个项目 , 至少会有 controller 层、service 层、mapper 层
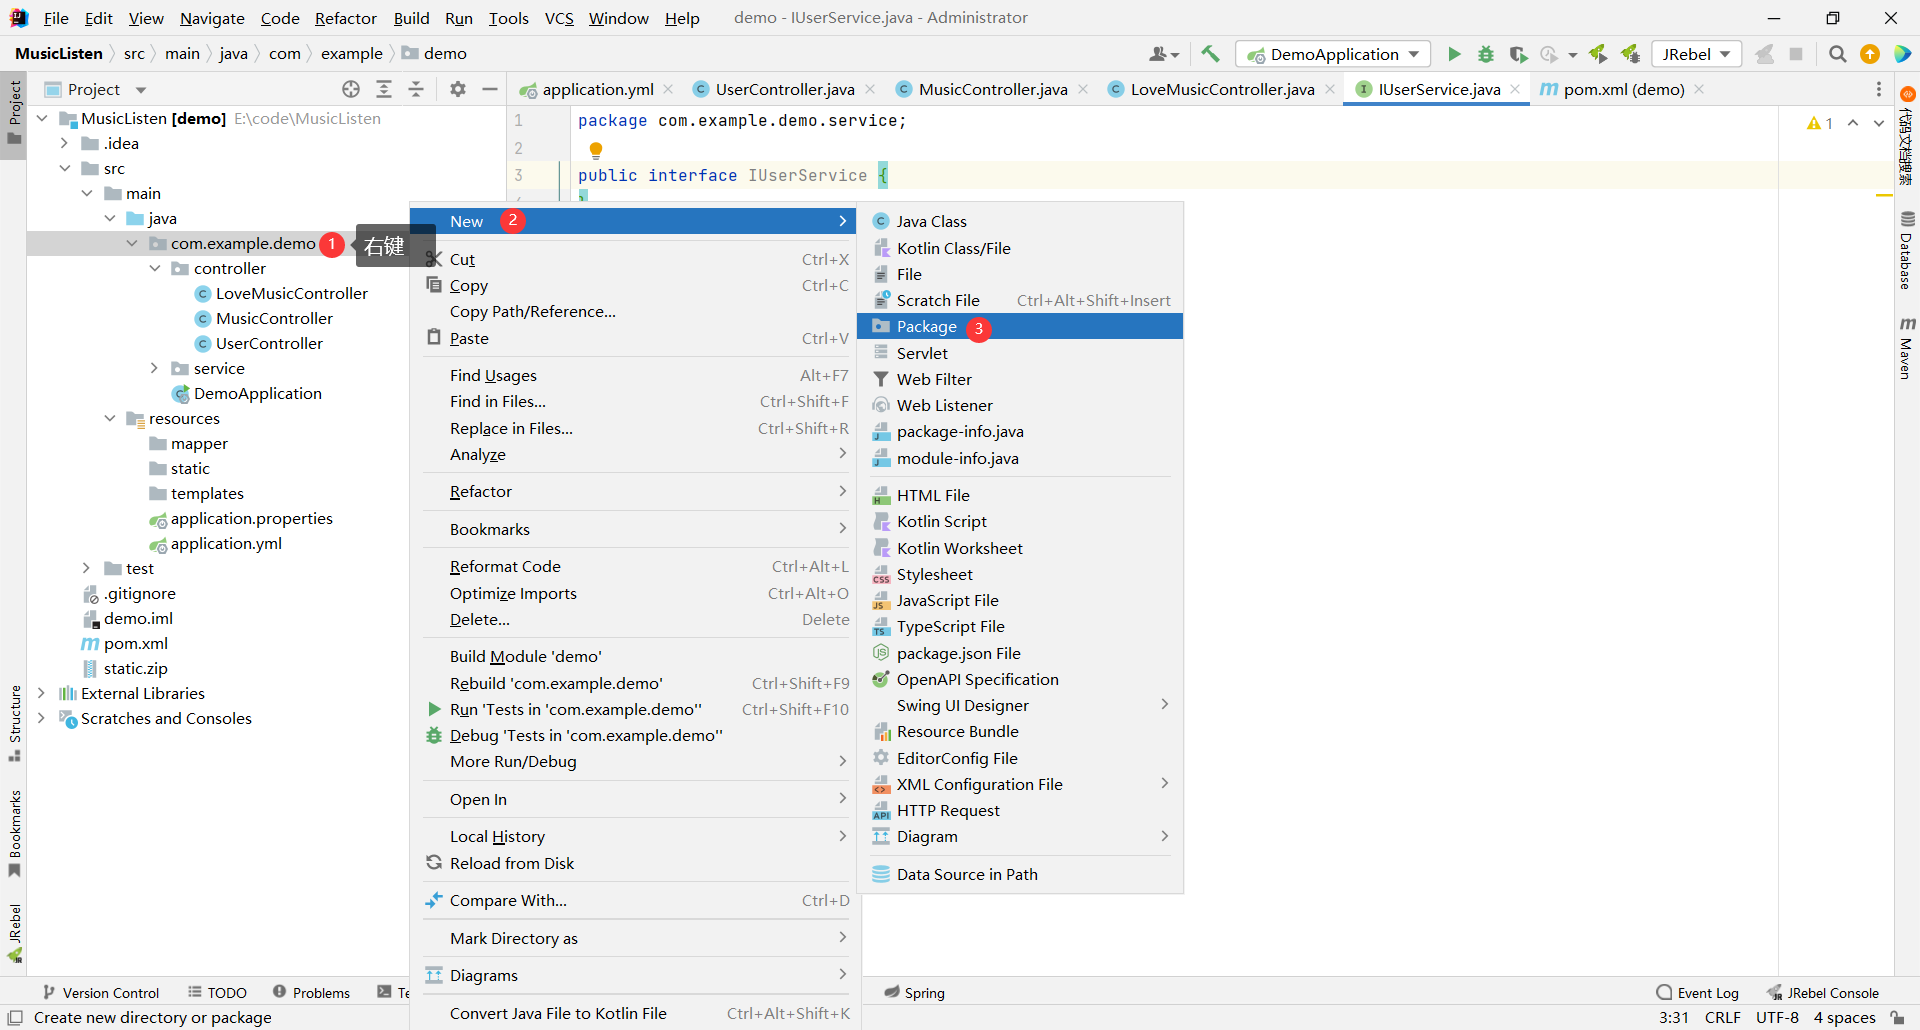
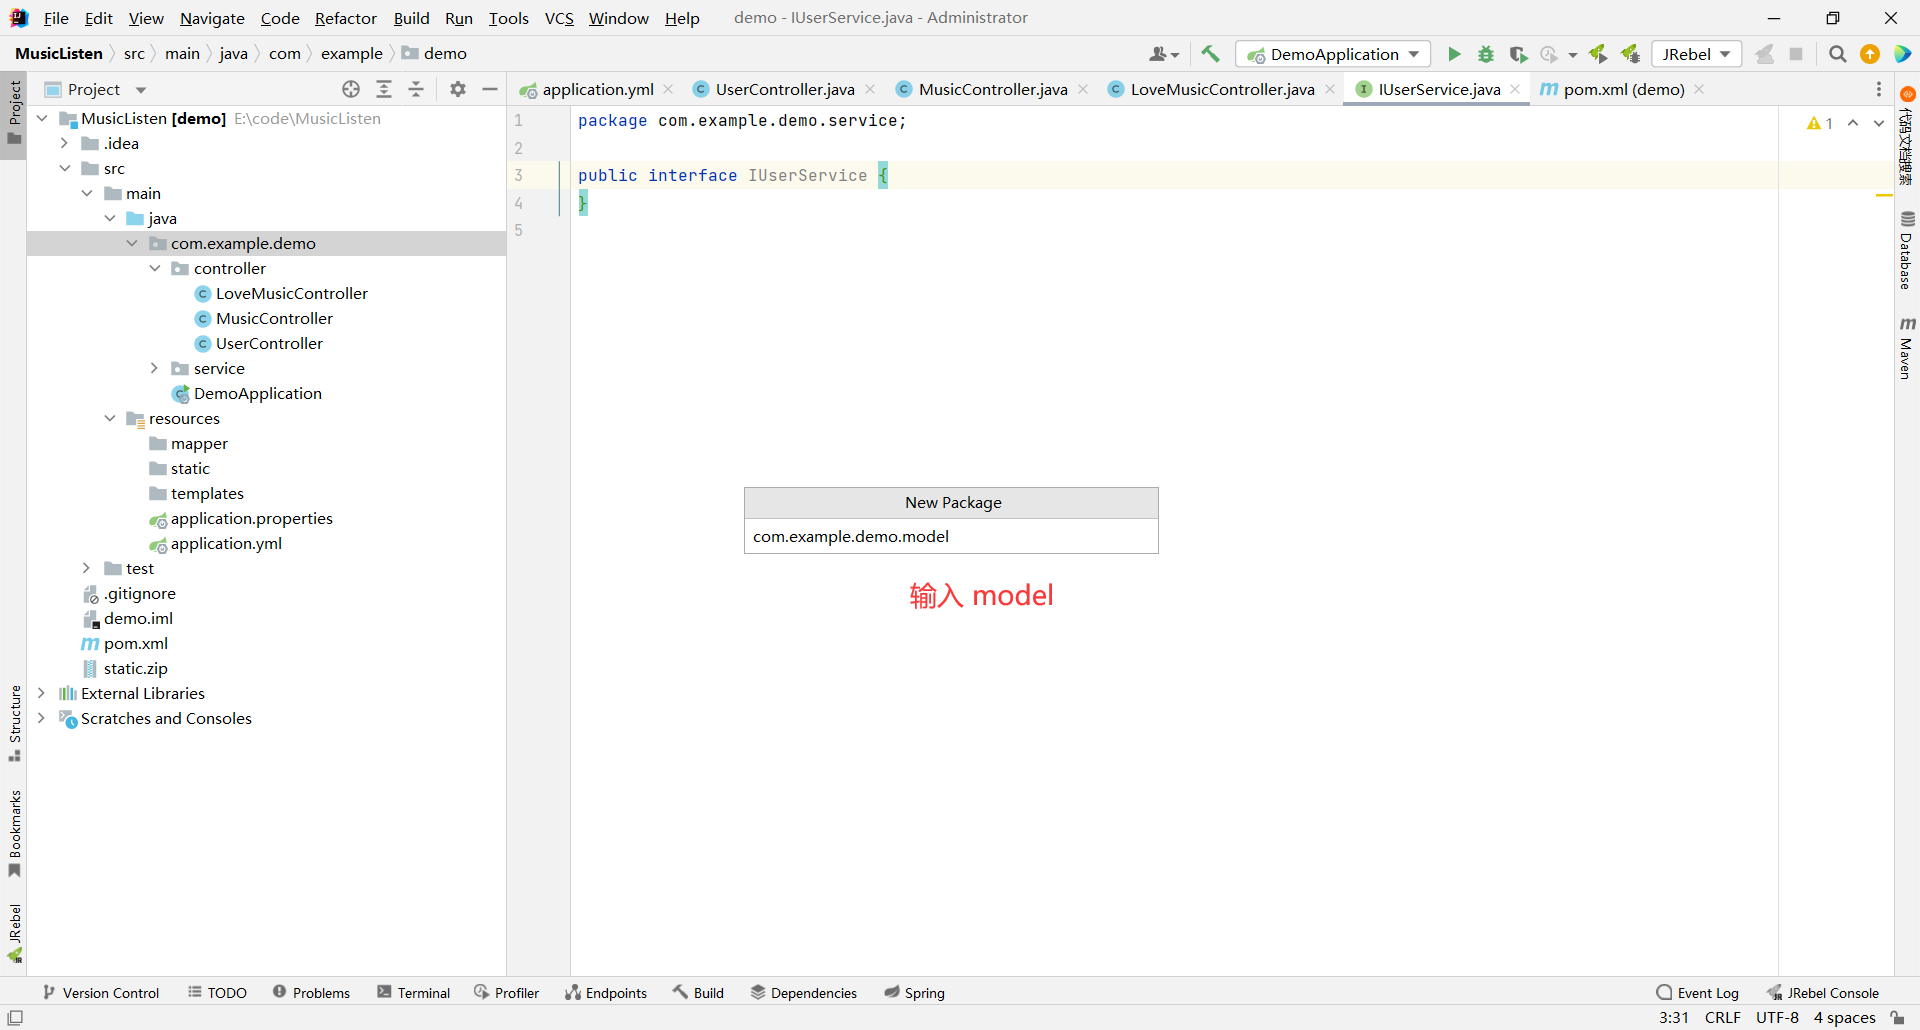
那我们还需要有存放实体类的 , 那就是 model 层
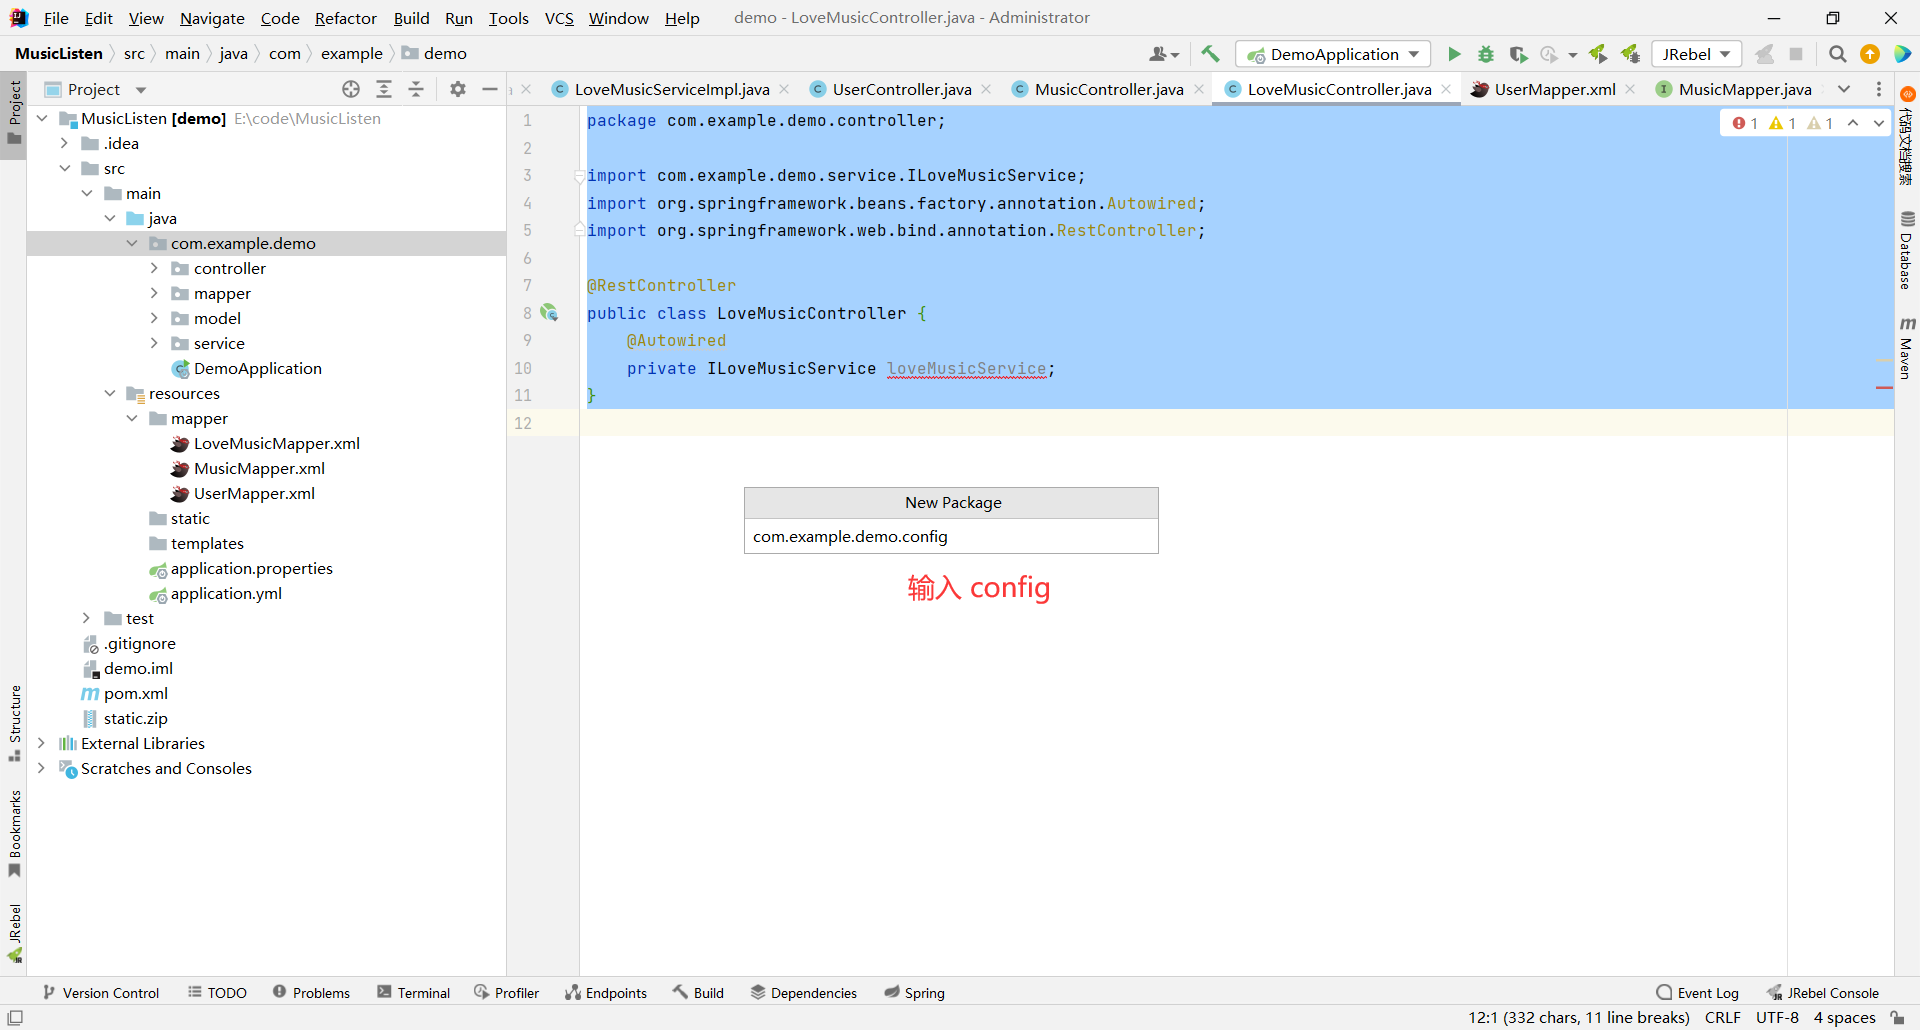
那还会有一些项目中的配置 , 比如 : 拦截器、统一数据格式的返回等等 , 我们把它叫做 config
那项目中还会有一些经常用到的组件 , 我们把它单独提取出来 , 需要放到 util 文件夹下
那么我们就分别来创建
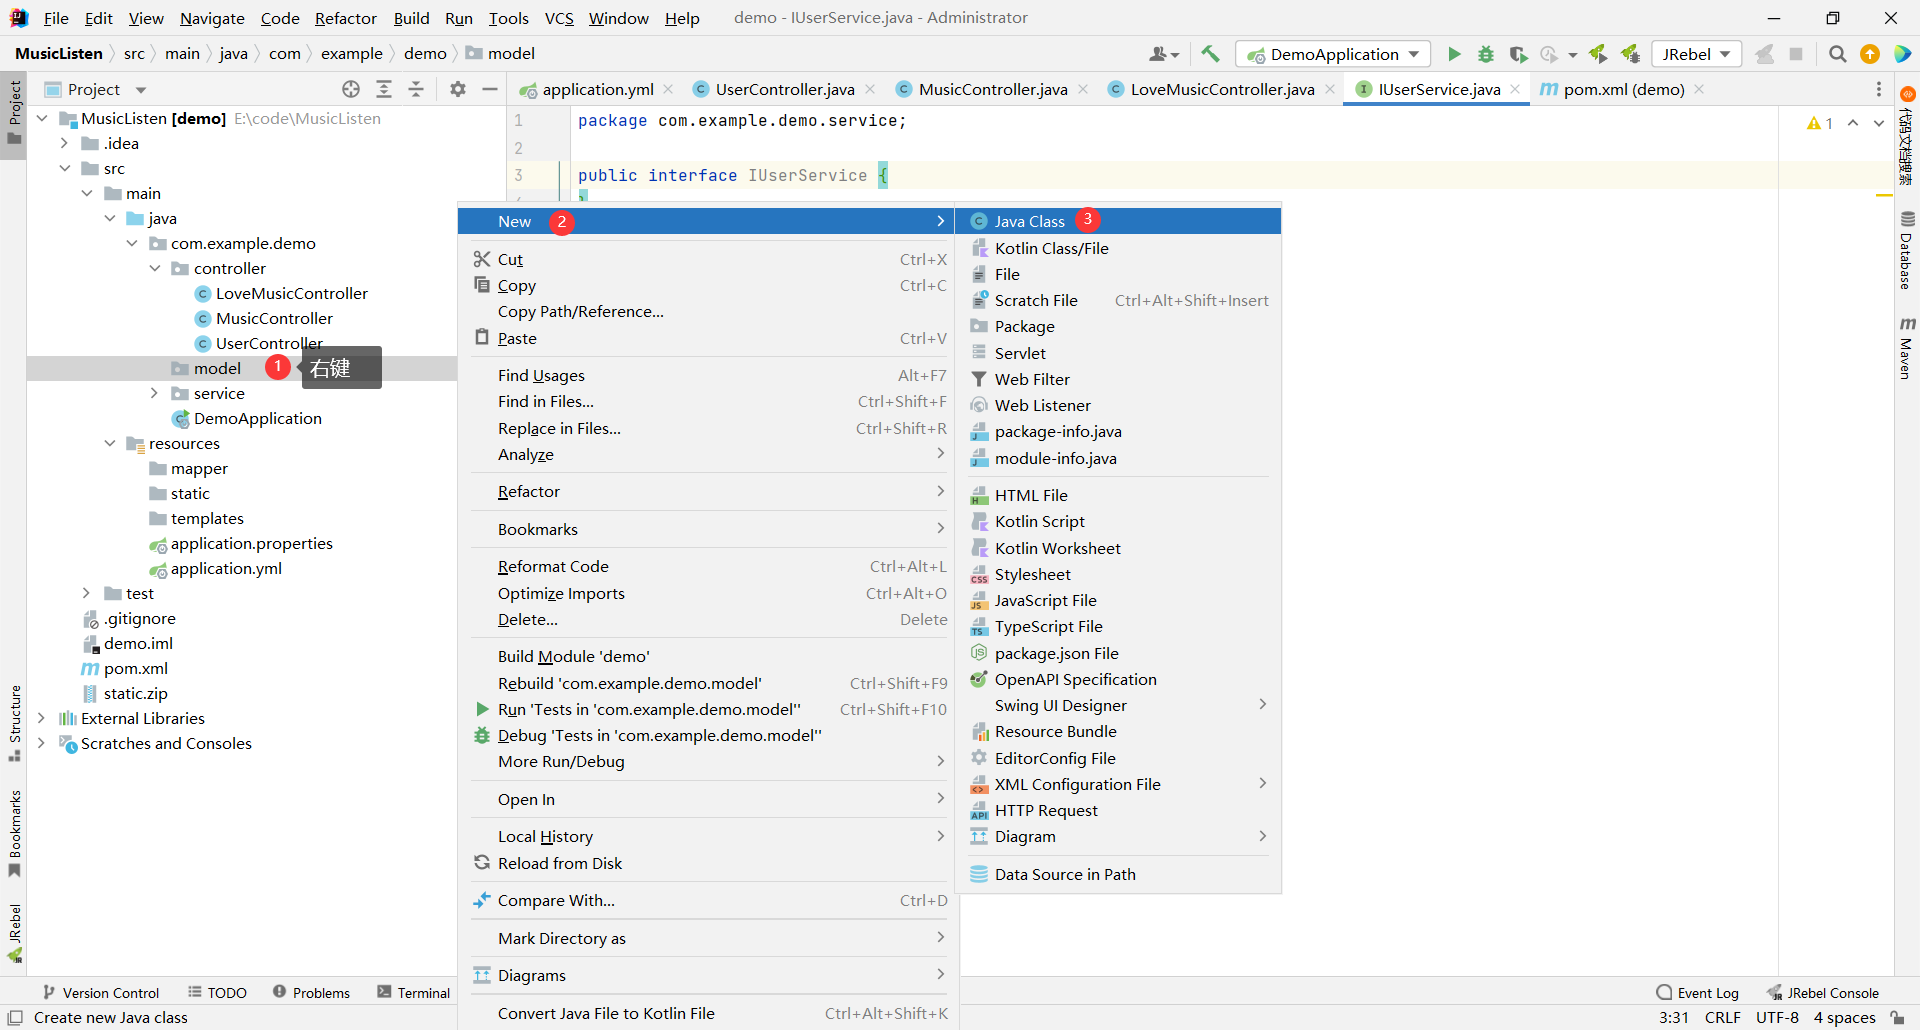
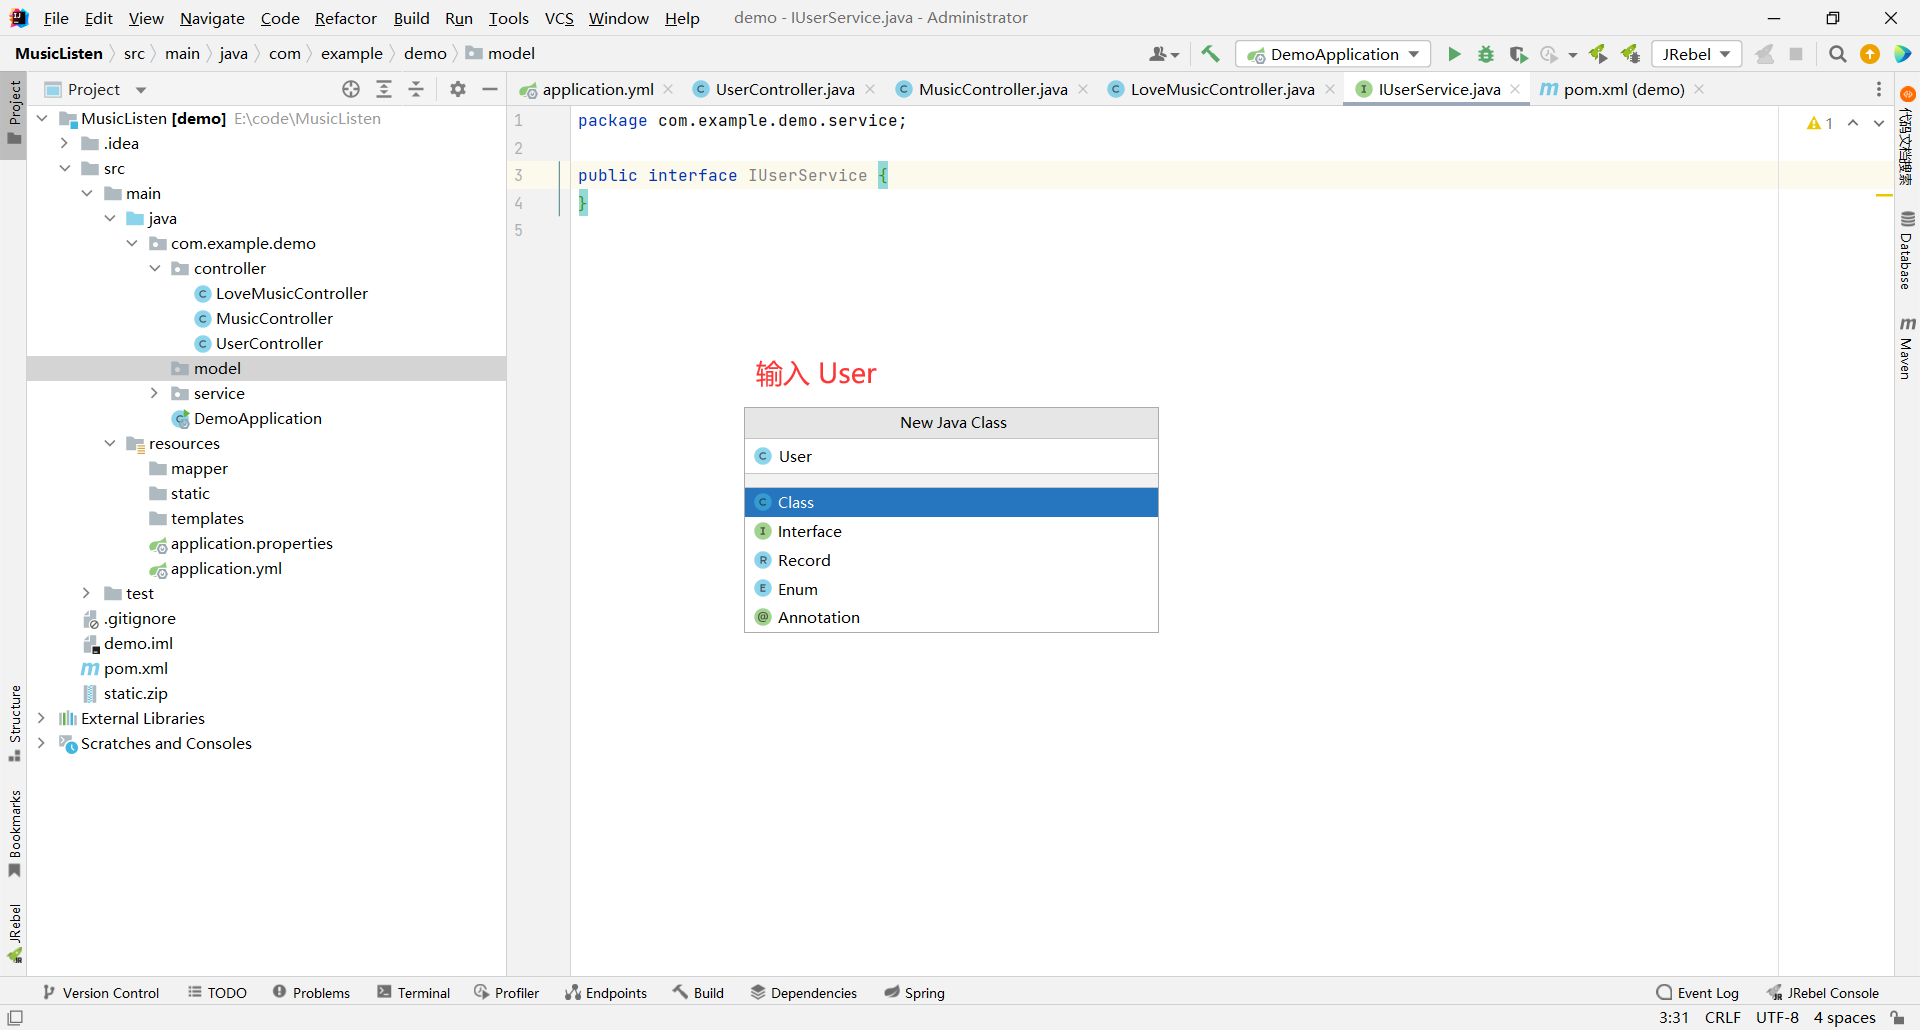
### 1.3.1 实体类
先创建 user 表对应的实体类
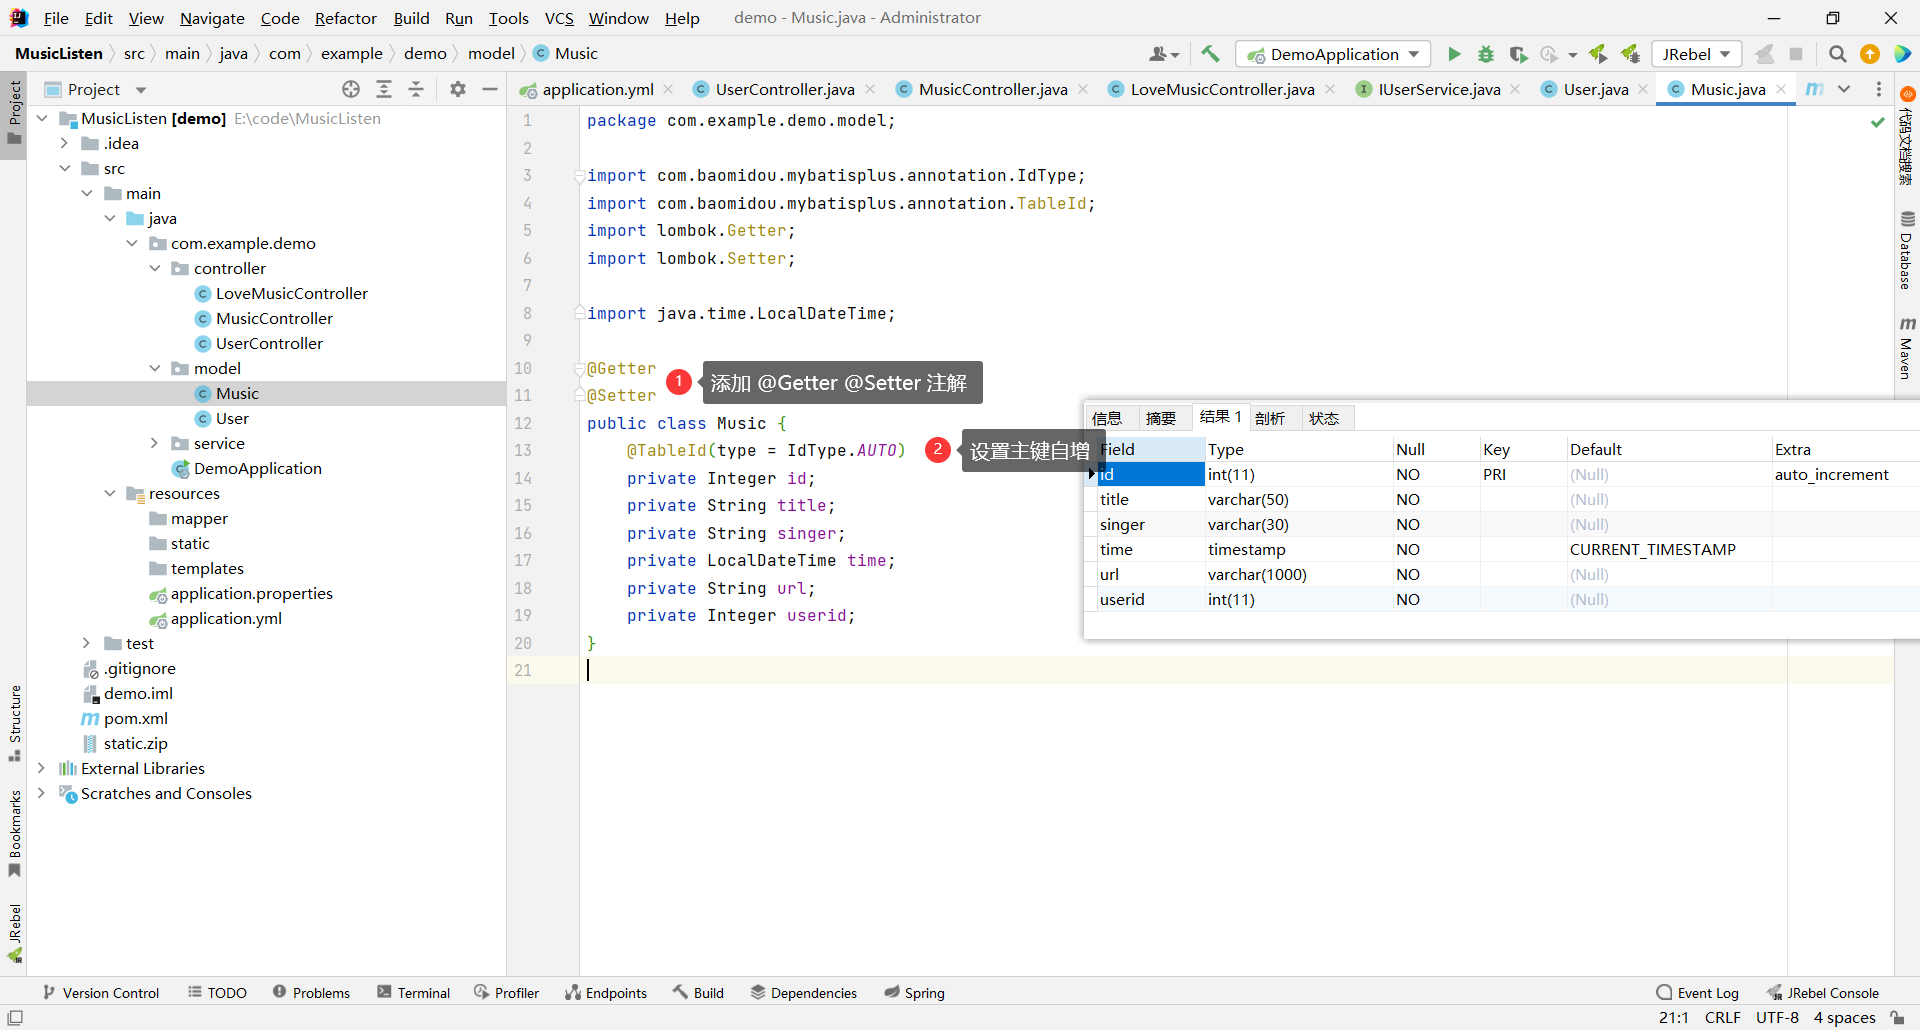
然后在最上面添加 @Getter @Setter 注解
然后我们按照字段类型来去编写字段 , 要求属性名以及属性的类型要与字段名和类型保持一致
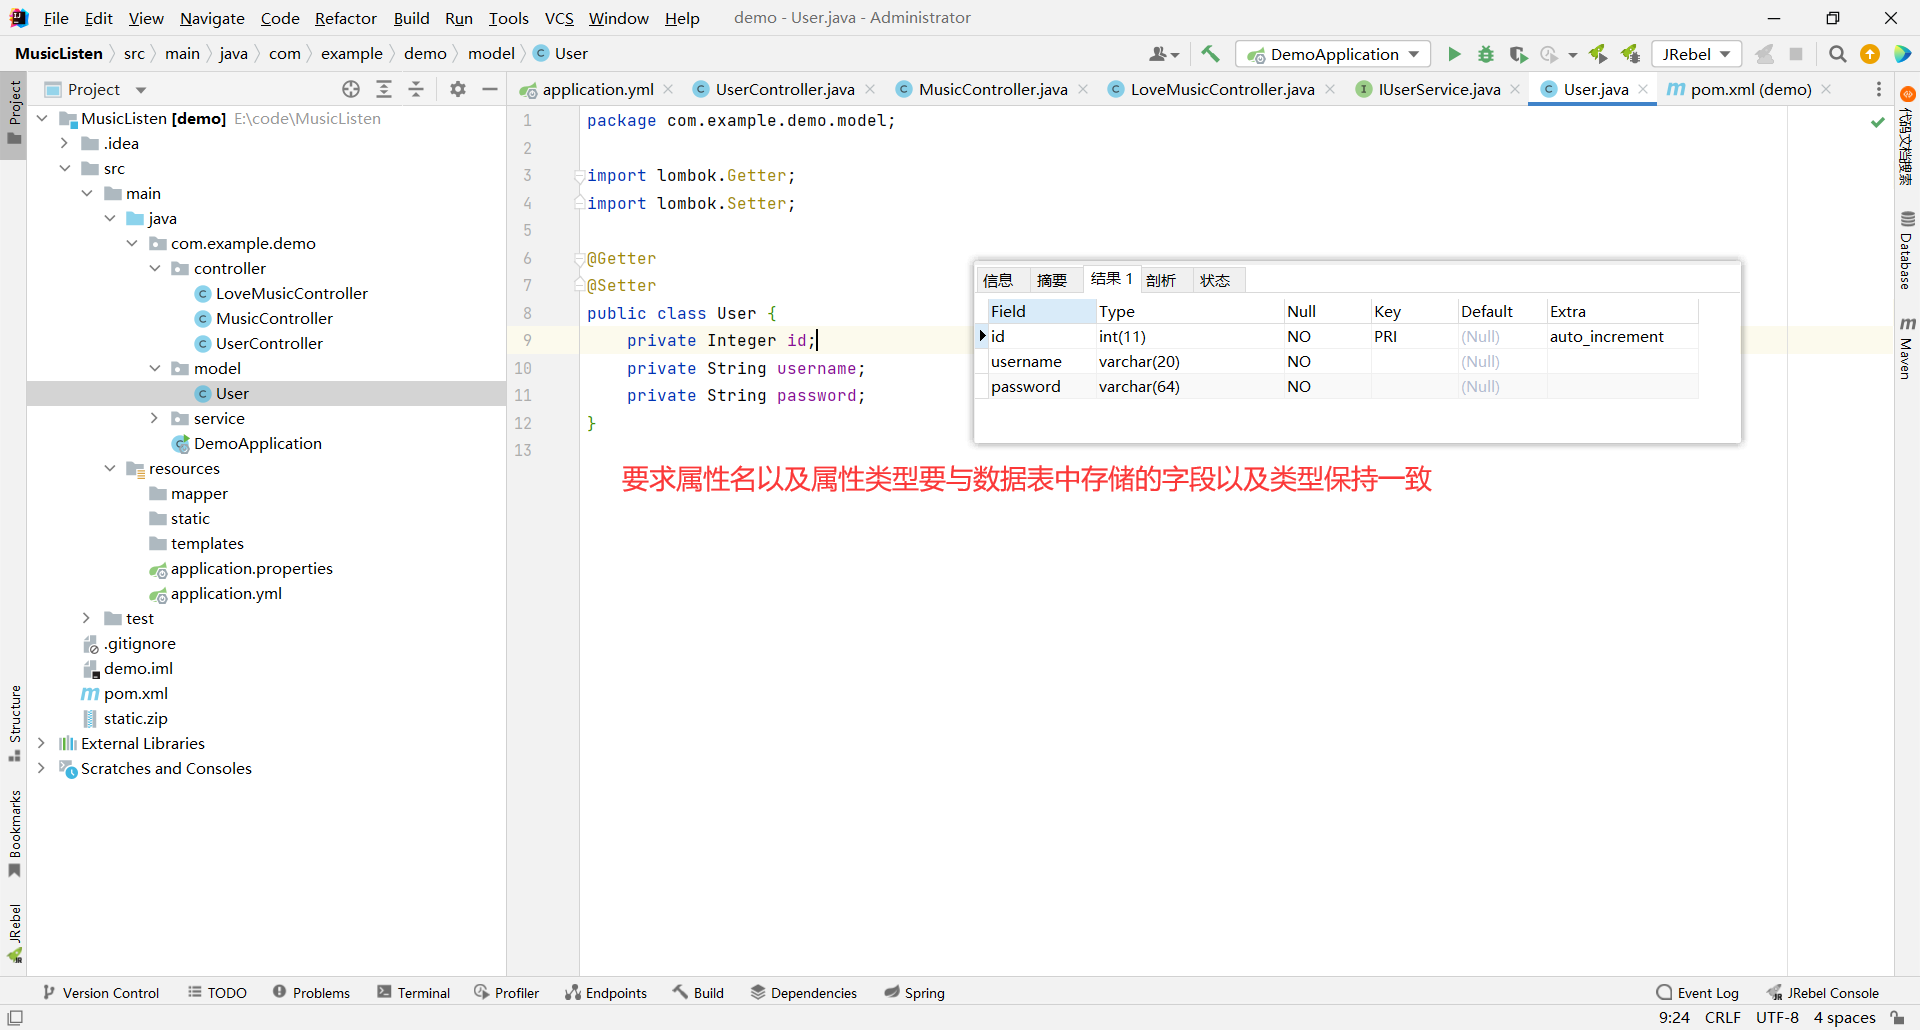
但是还存在一个问题 : 我们在使用 MP 的时候 , 要注意的一个点是 - 创建实体类的时候 , 要指定主键生成 ID 的策略 , 如果不设置的话 , 默认使用雪花算法
> 雪花算法就会生成一长串很长的 ID
那接下来我们就需要针对主键设置生成策略 , 使用注解 : @TableId(type = IdType.AUTO)
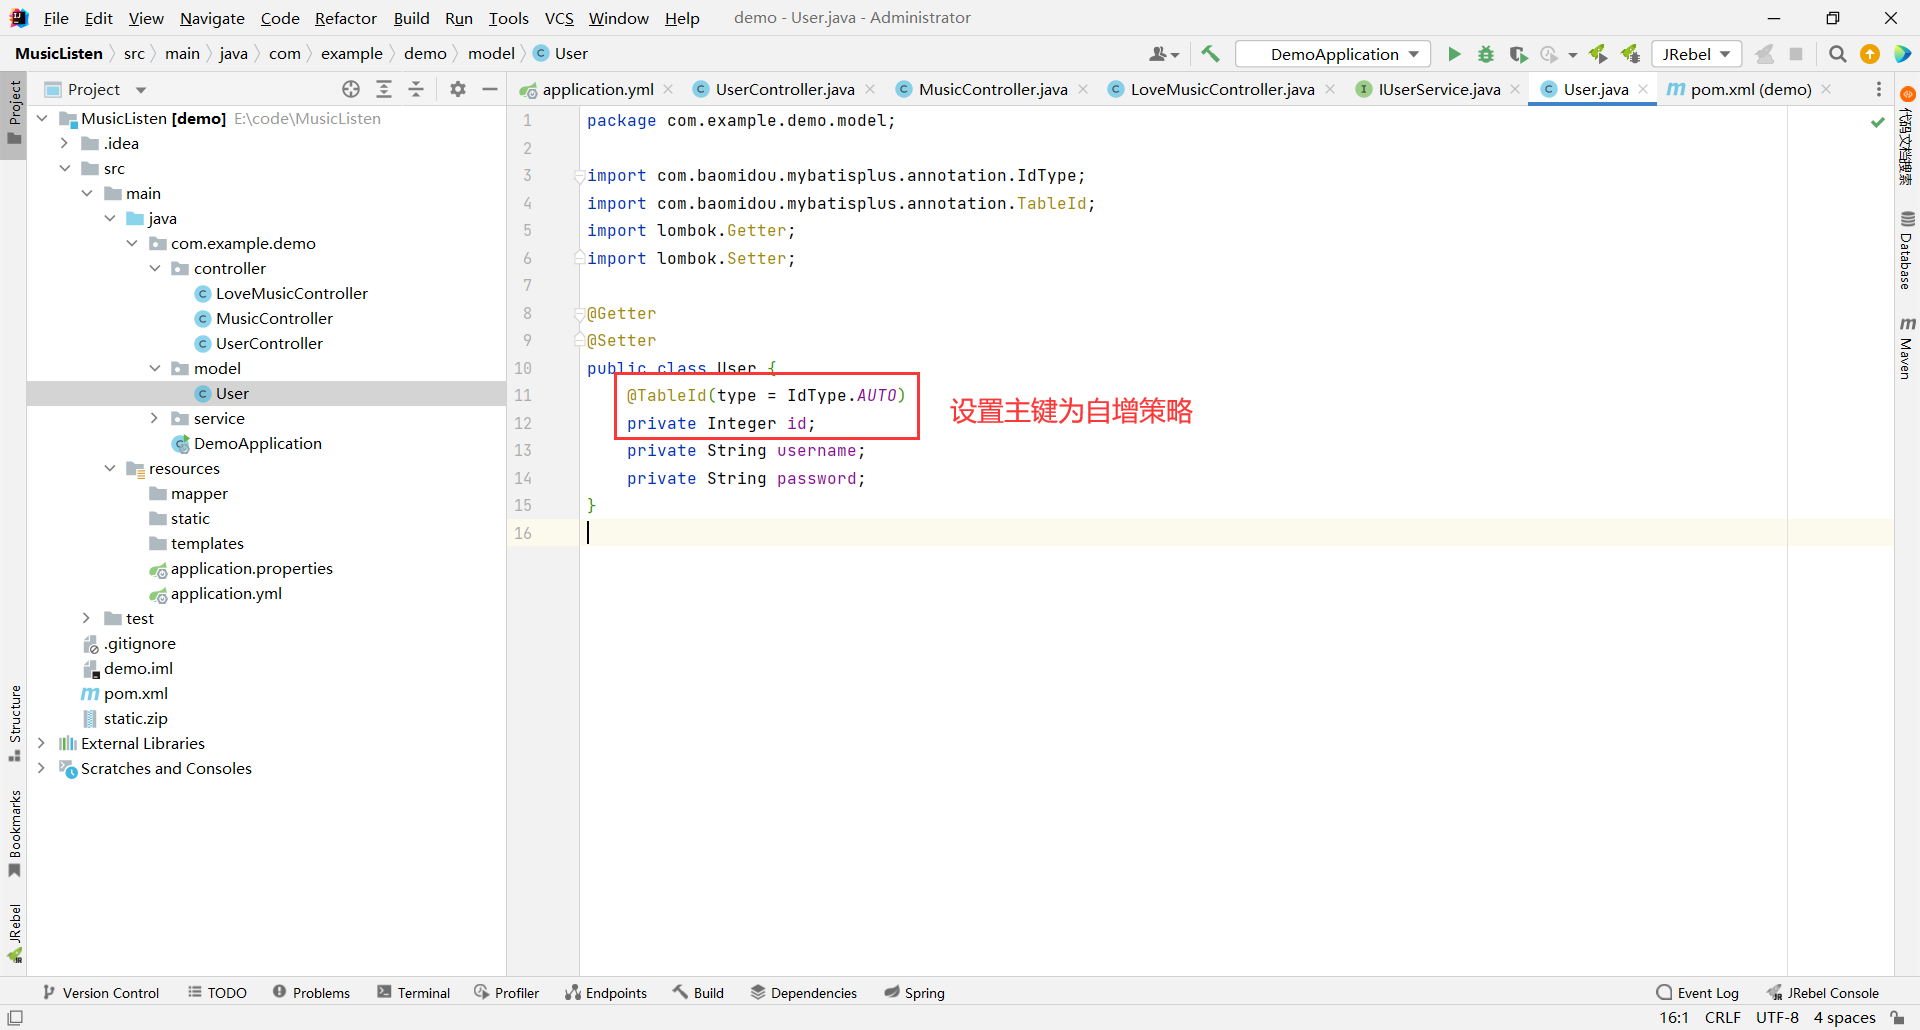
```java
package com.example.demo.model;
import com.baomidou.mybatisplus.annotation.IdType;
import com.baomidou.mybatisplus.annotation.TableId;
import lombok.Getter;
import lombok.Setter;
@Getter
@Setter
public class User {
@TableId(type = IdType.AUTO)
private Integer id;
private String username;
private String password;
}
```
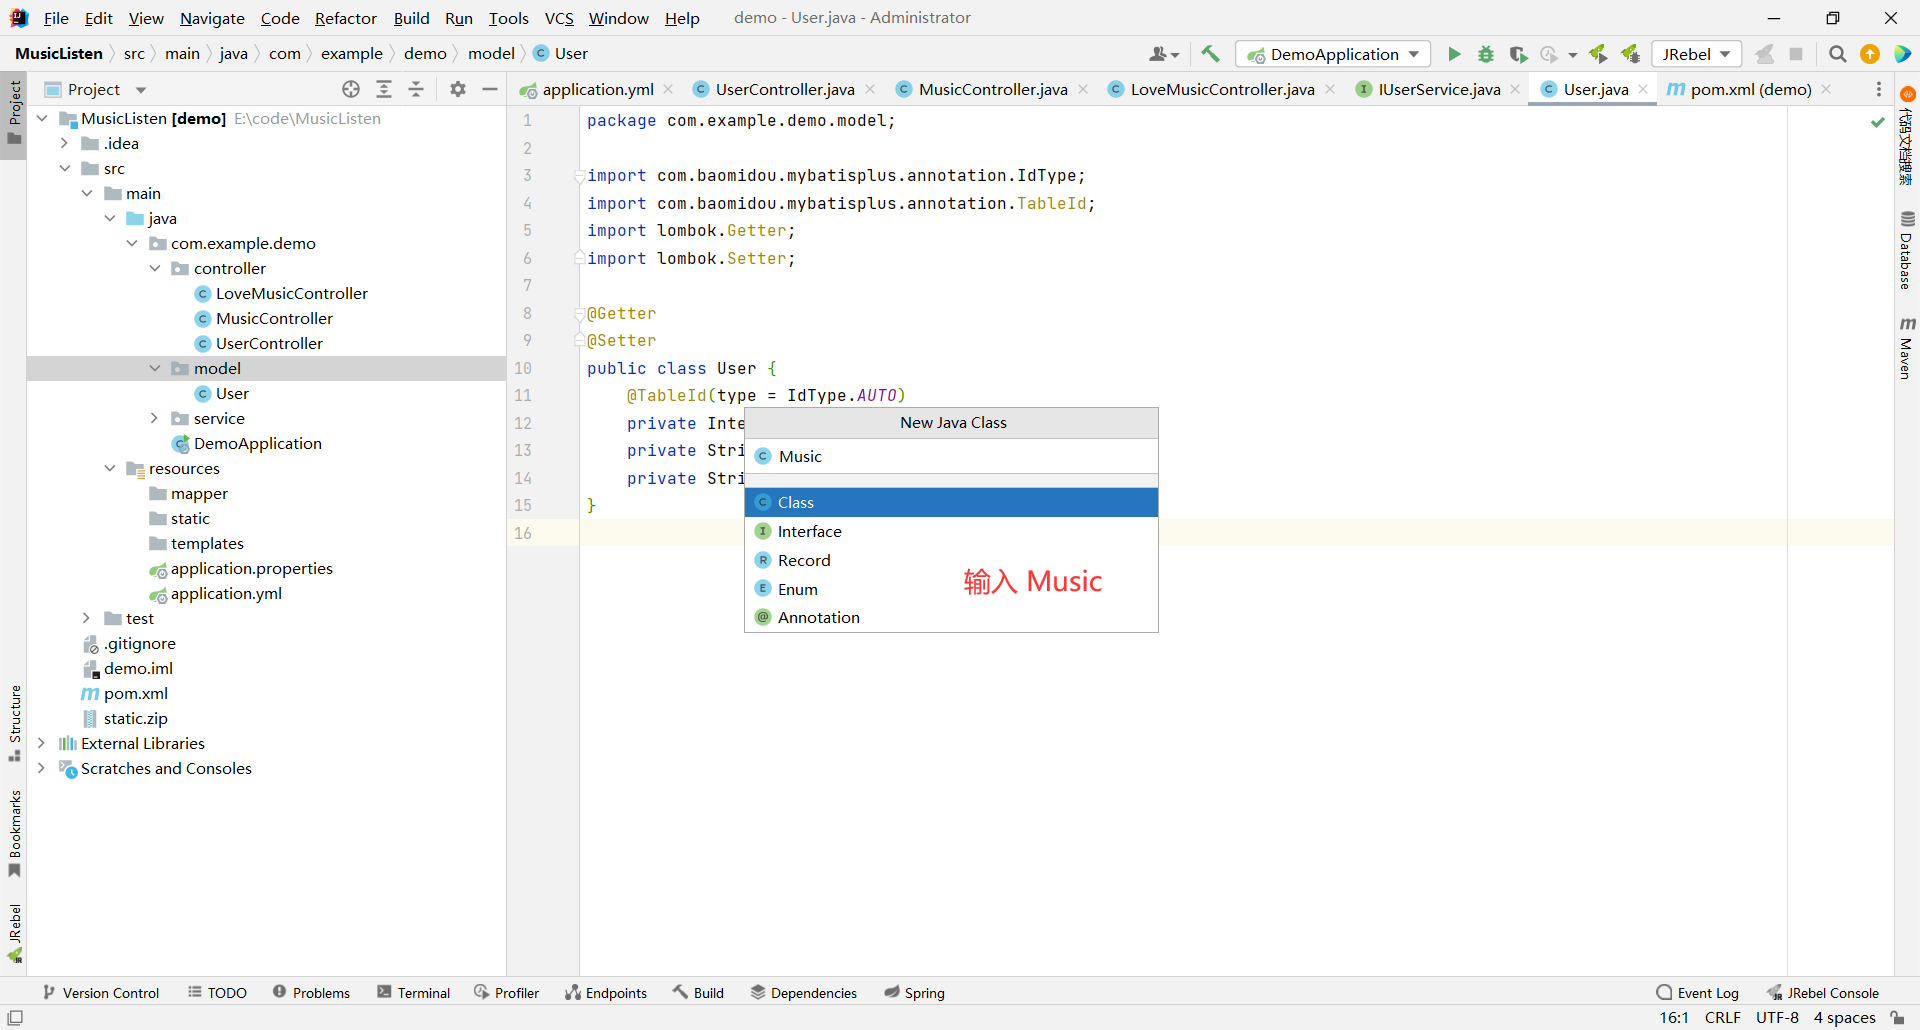
然后接下来我们创建另外两个实体类

```java
package com.example.demo.model;
import com.baomidou.mybatisplus.annotation.IdType;
import com.baomidou.mybatisplus.annotation.TableId;
import lombok.Getter;
import lombok.Setter;
import java.time.LocalDateTime;
@Getter
@Setter
public class Music {
@TableId(type = IdType.AUTO)
private Integer id;
private String title;
private String singer;
private LocalDateTime time;
private String url;
private Integer userid;
}
```
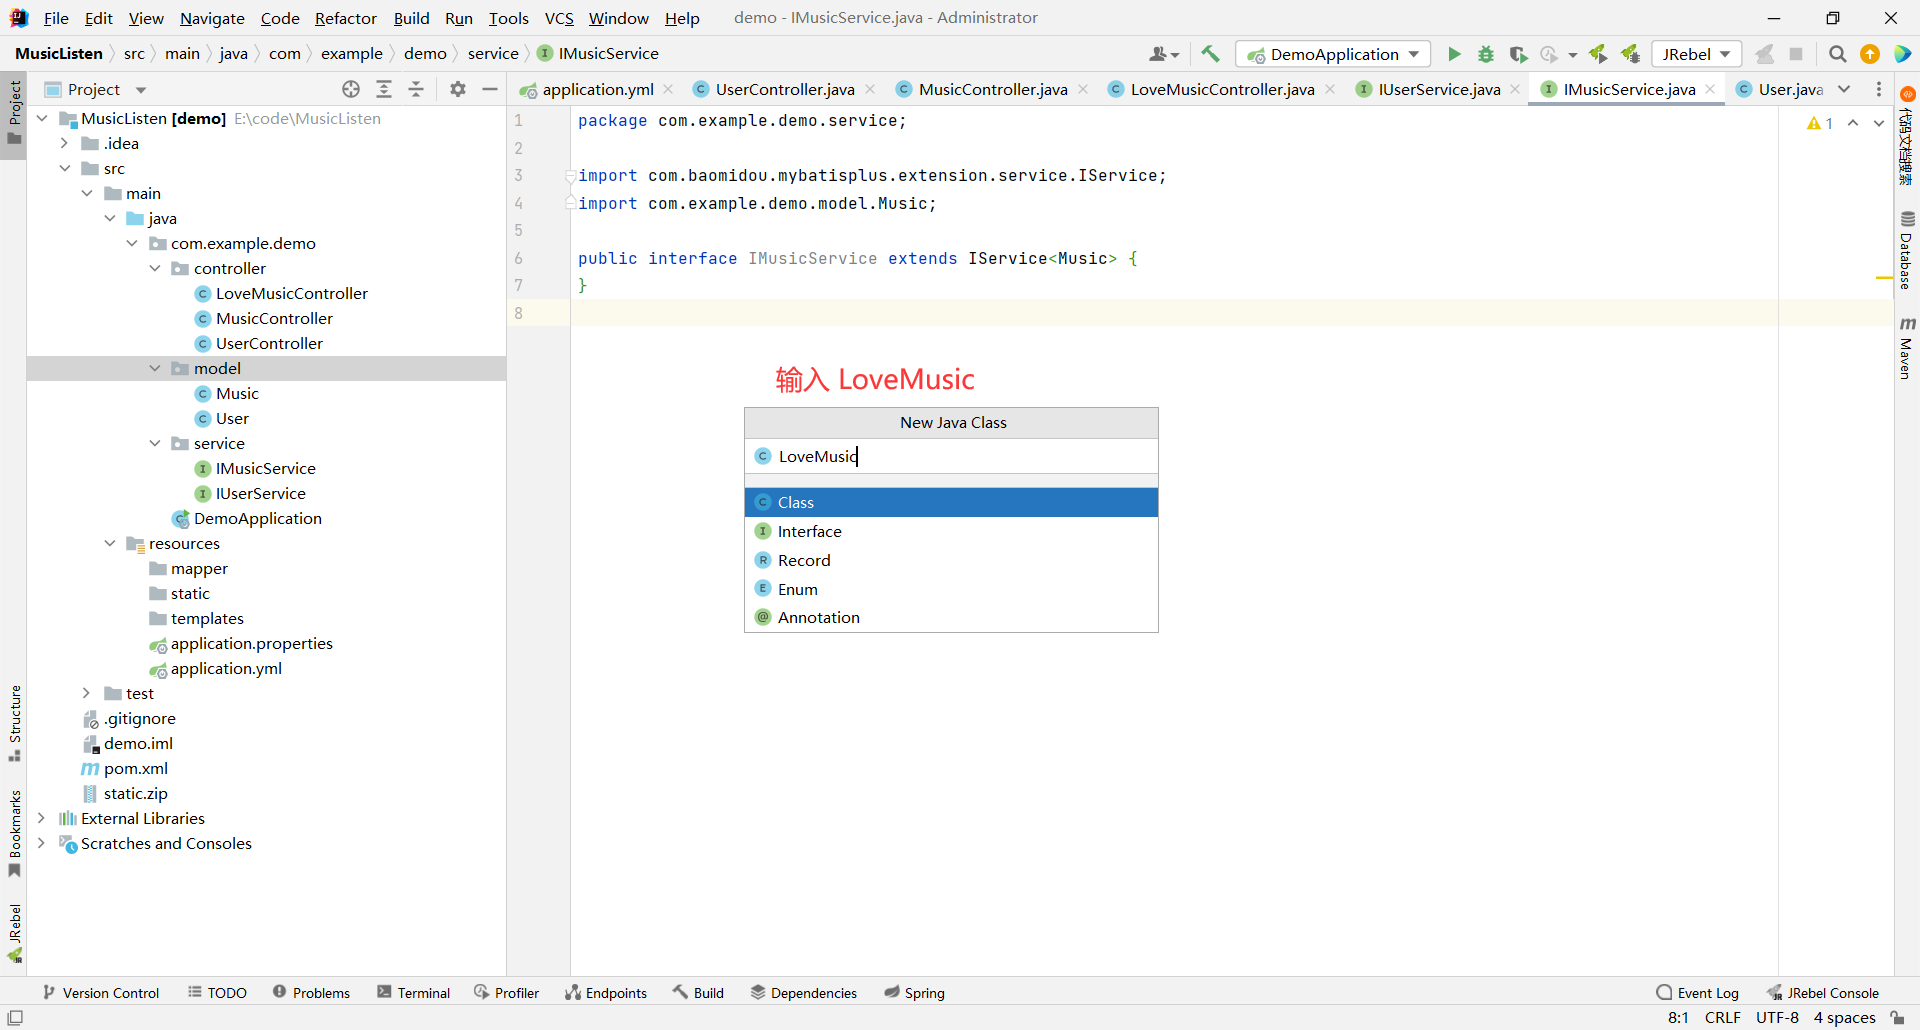
最后编写 LoveMusic

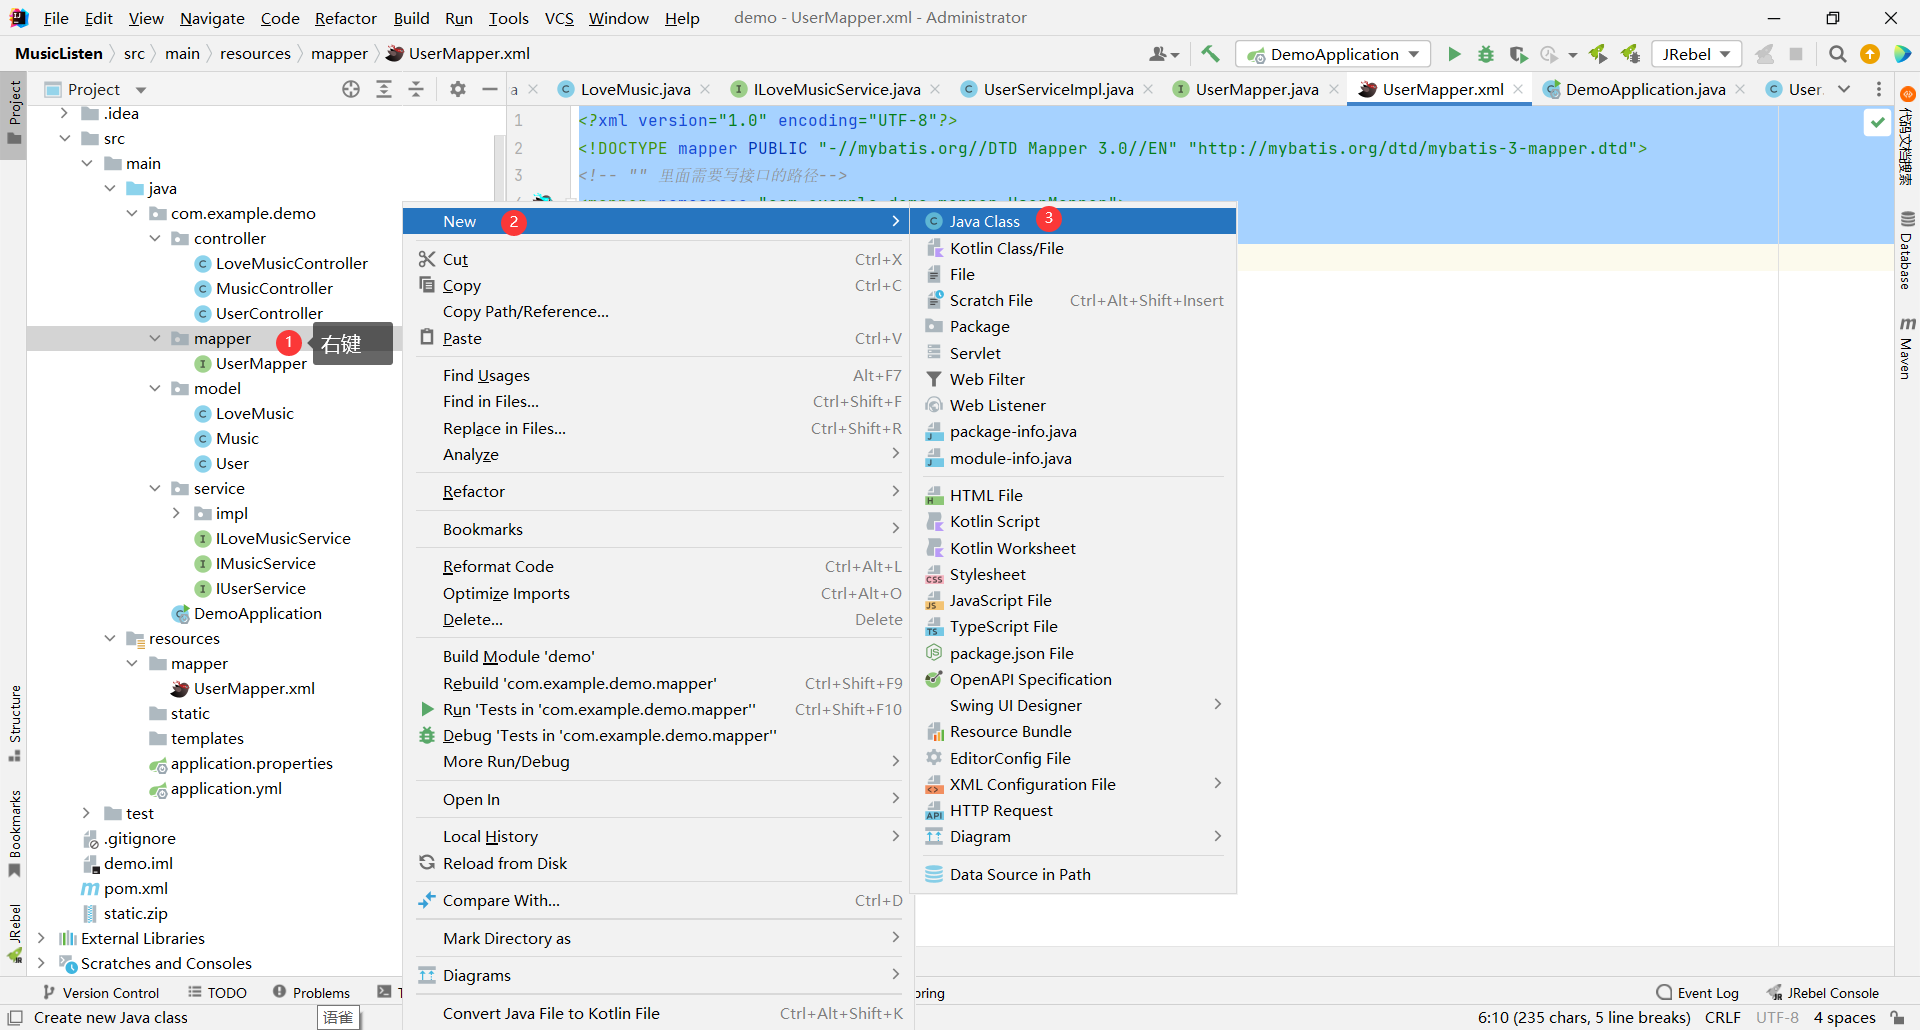
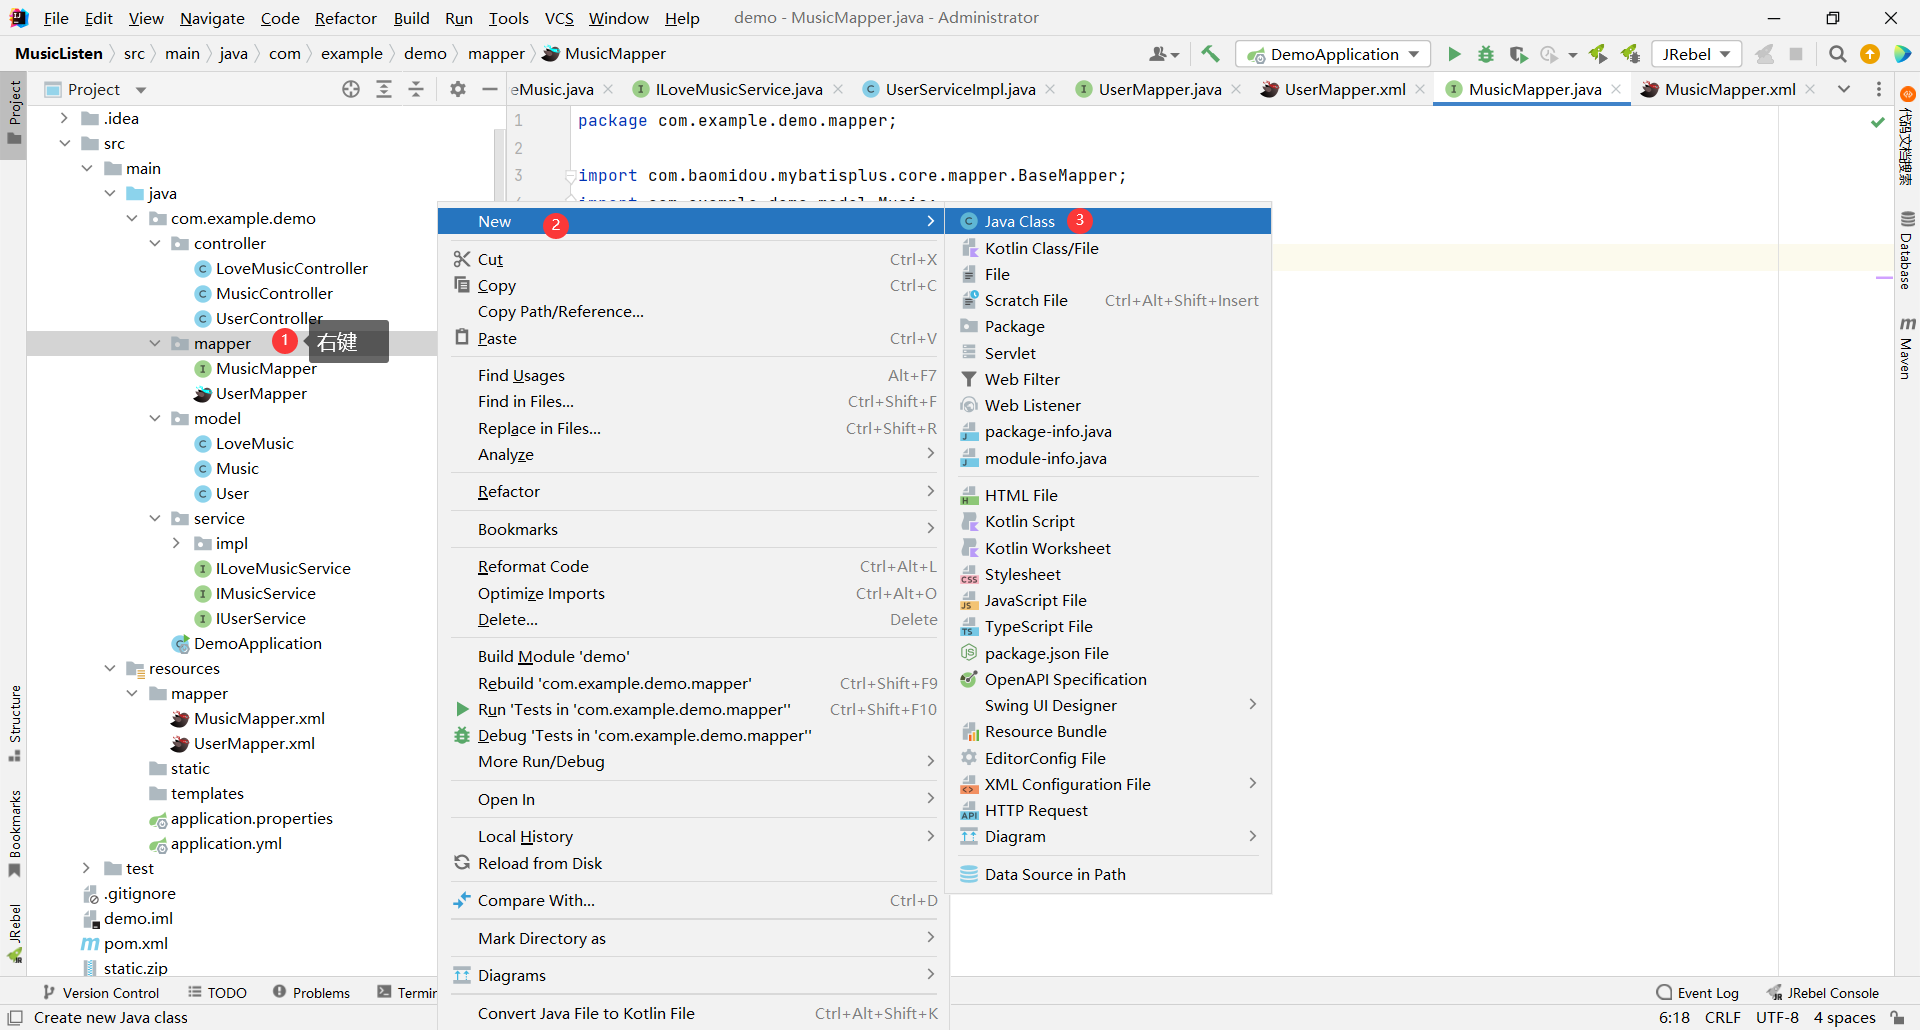
### 1.3.2 mapper 层
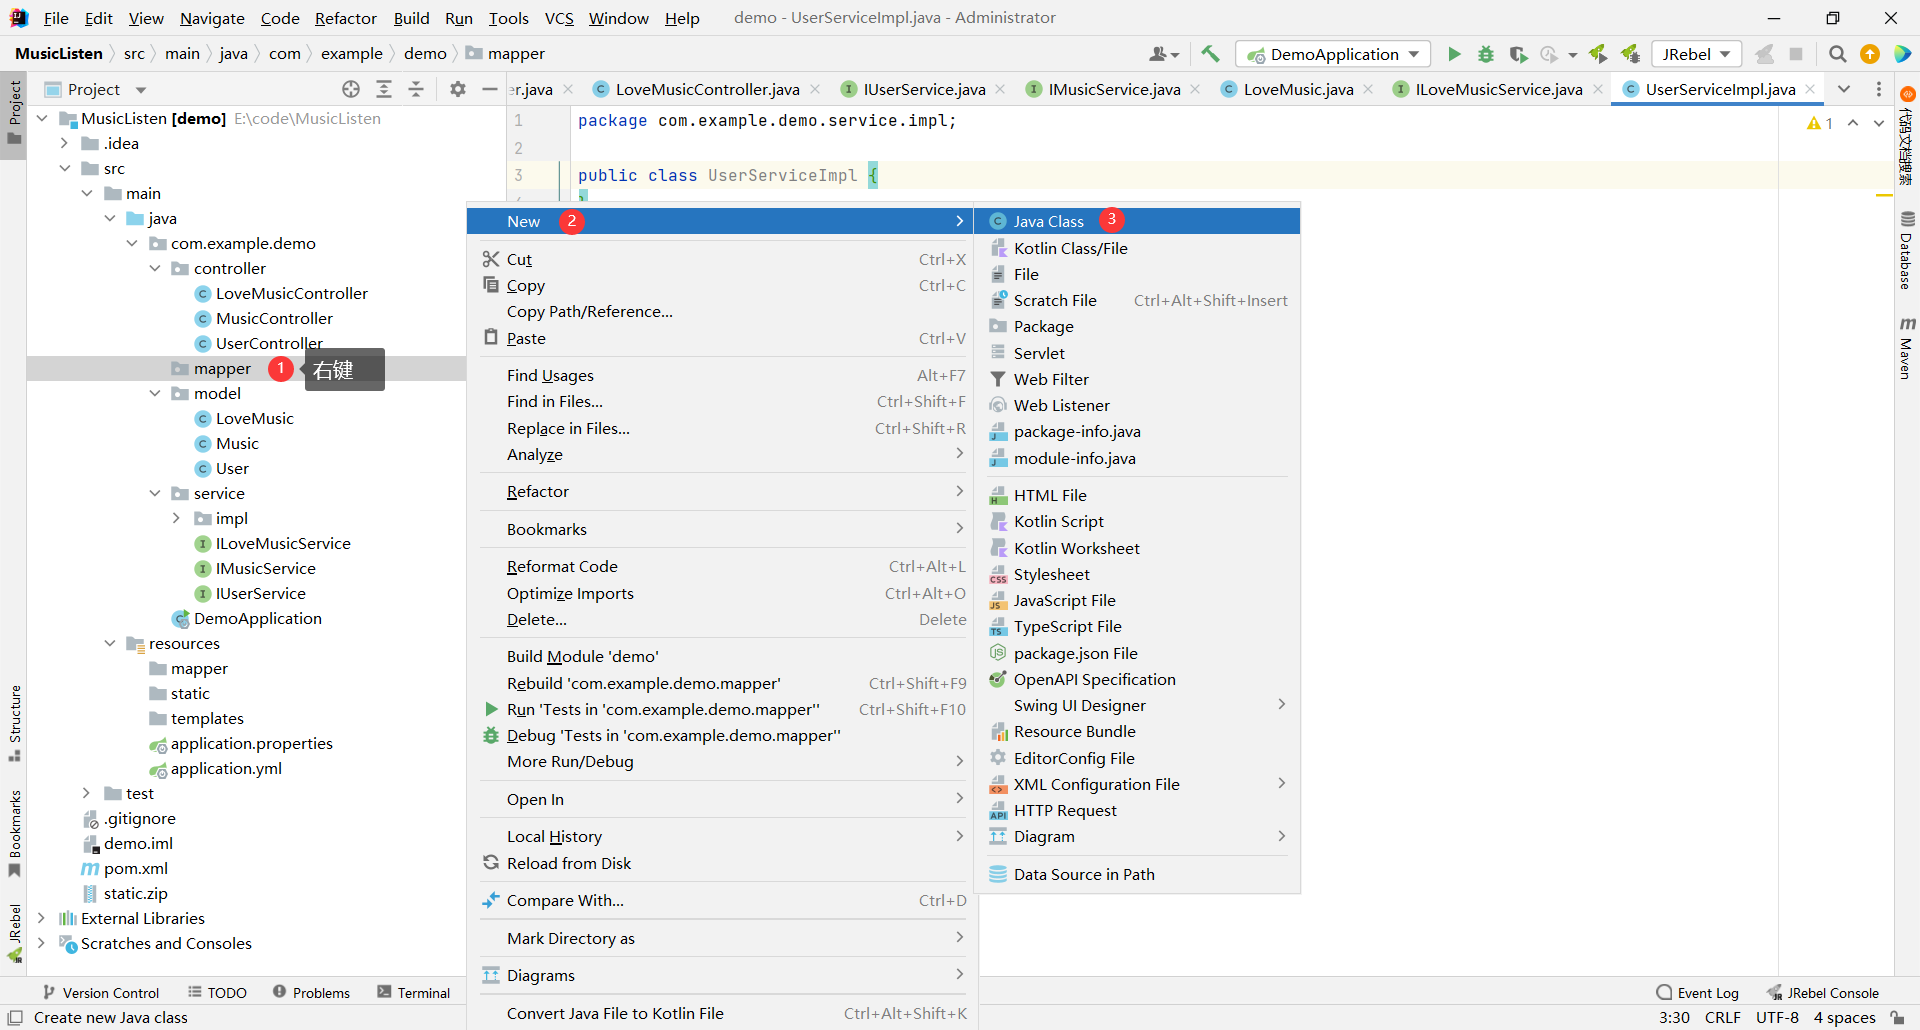
我们先来创建 mapper 层
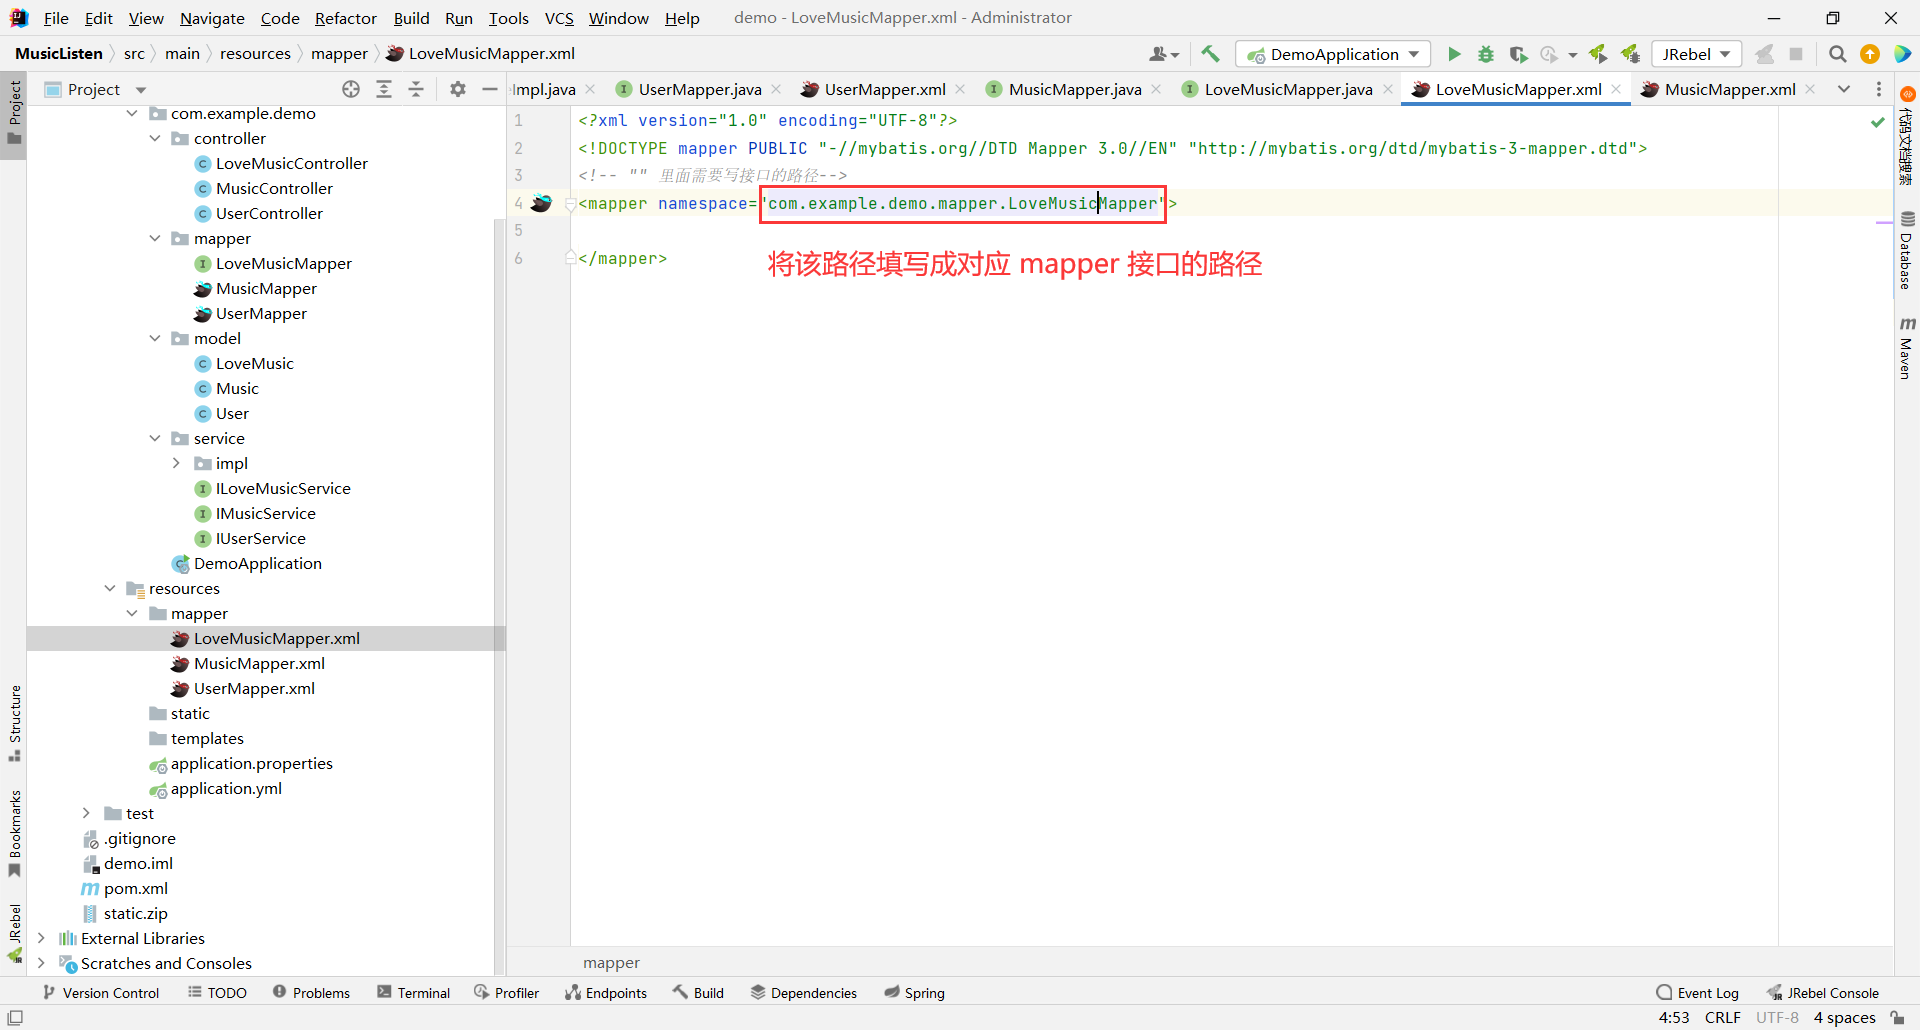
那 mapper 层对应他的声明和实现 , 我们既要去实现 xxxMapper 接口 , 也要去实现 xxxMapper.xml
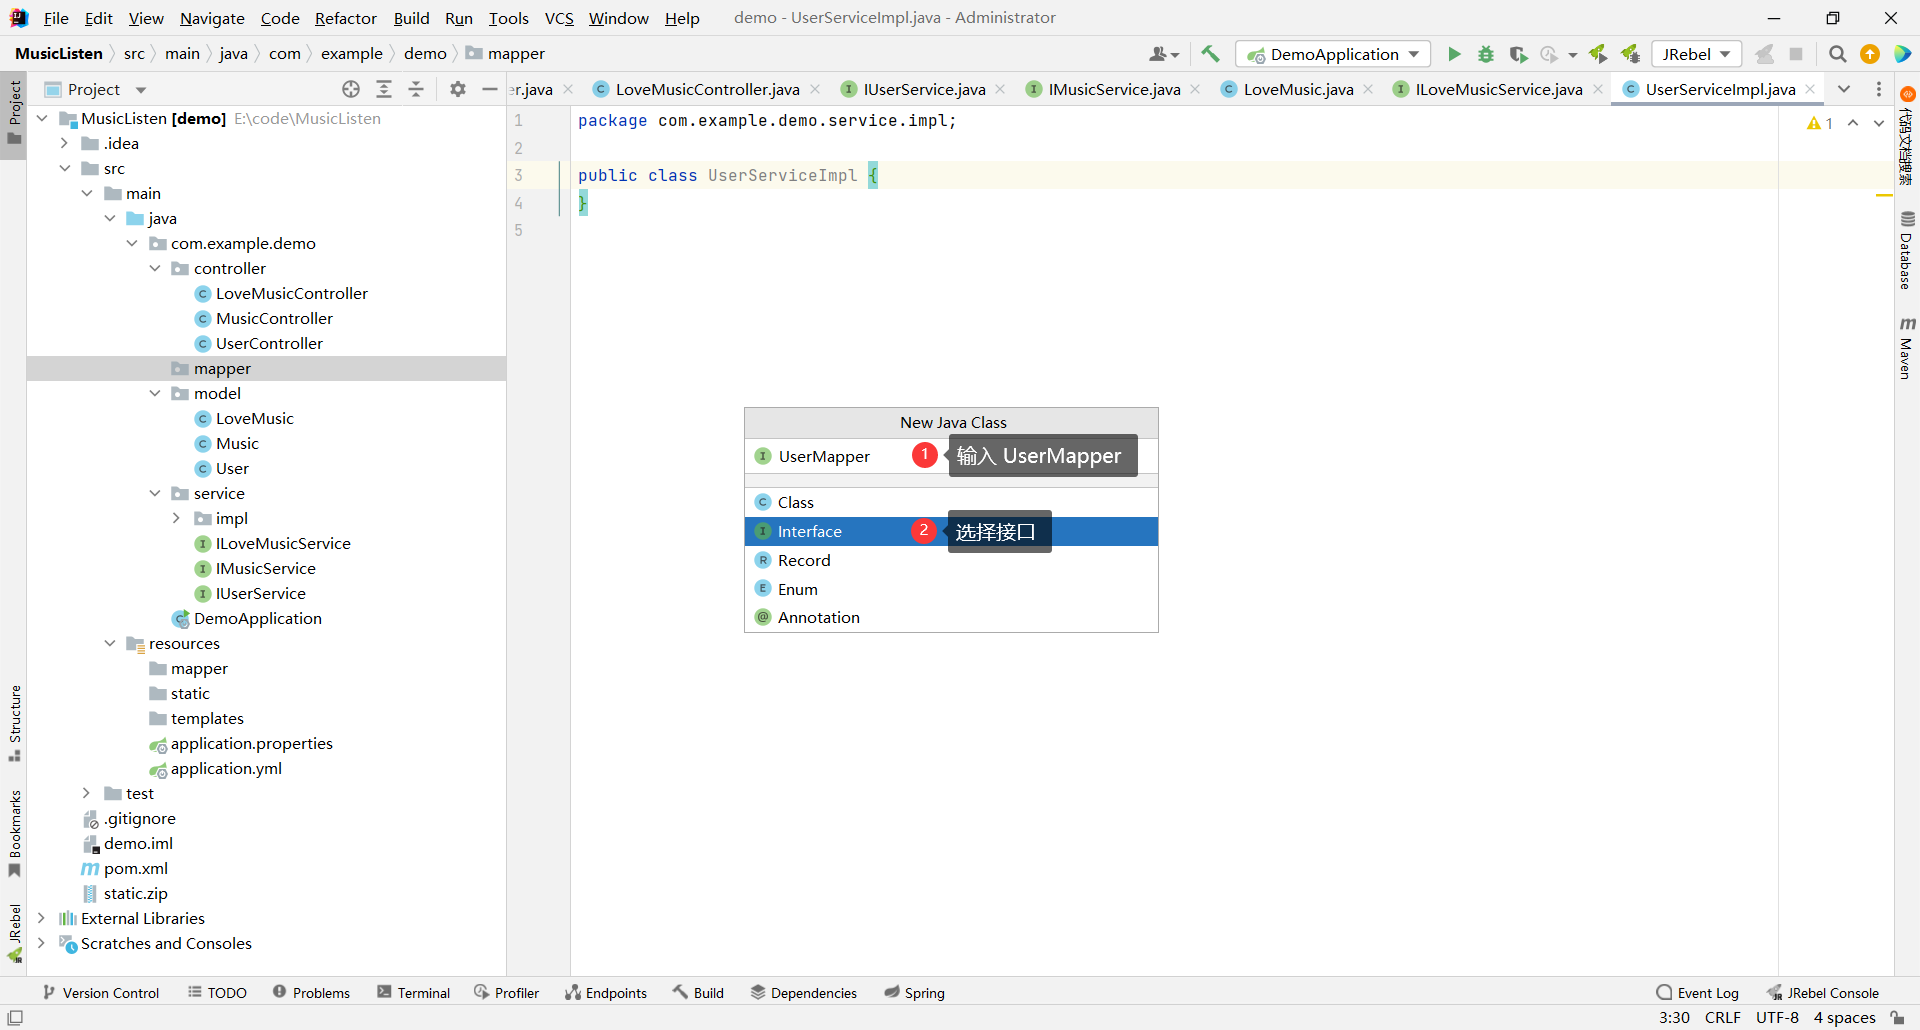
#### UserMapper
##### 接口
UserMapper 接口 :
然后在最上面添加 @Mapper 注解 , 但是 MP 给我们提供了一种方式 , 不用每个 mapper 上面都加 @Mapper 注解
我们只需要在启动类上添加 @MapperScan("mapper 层路径")
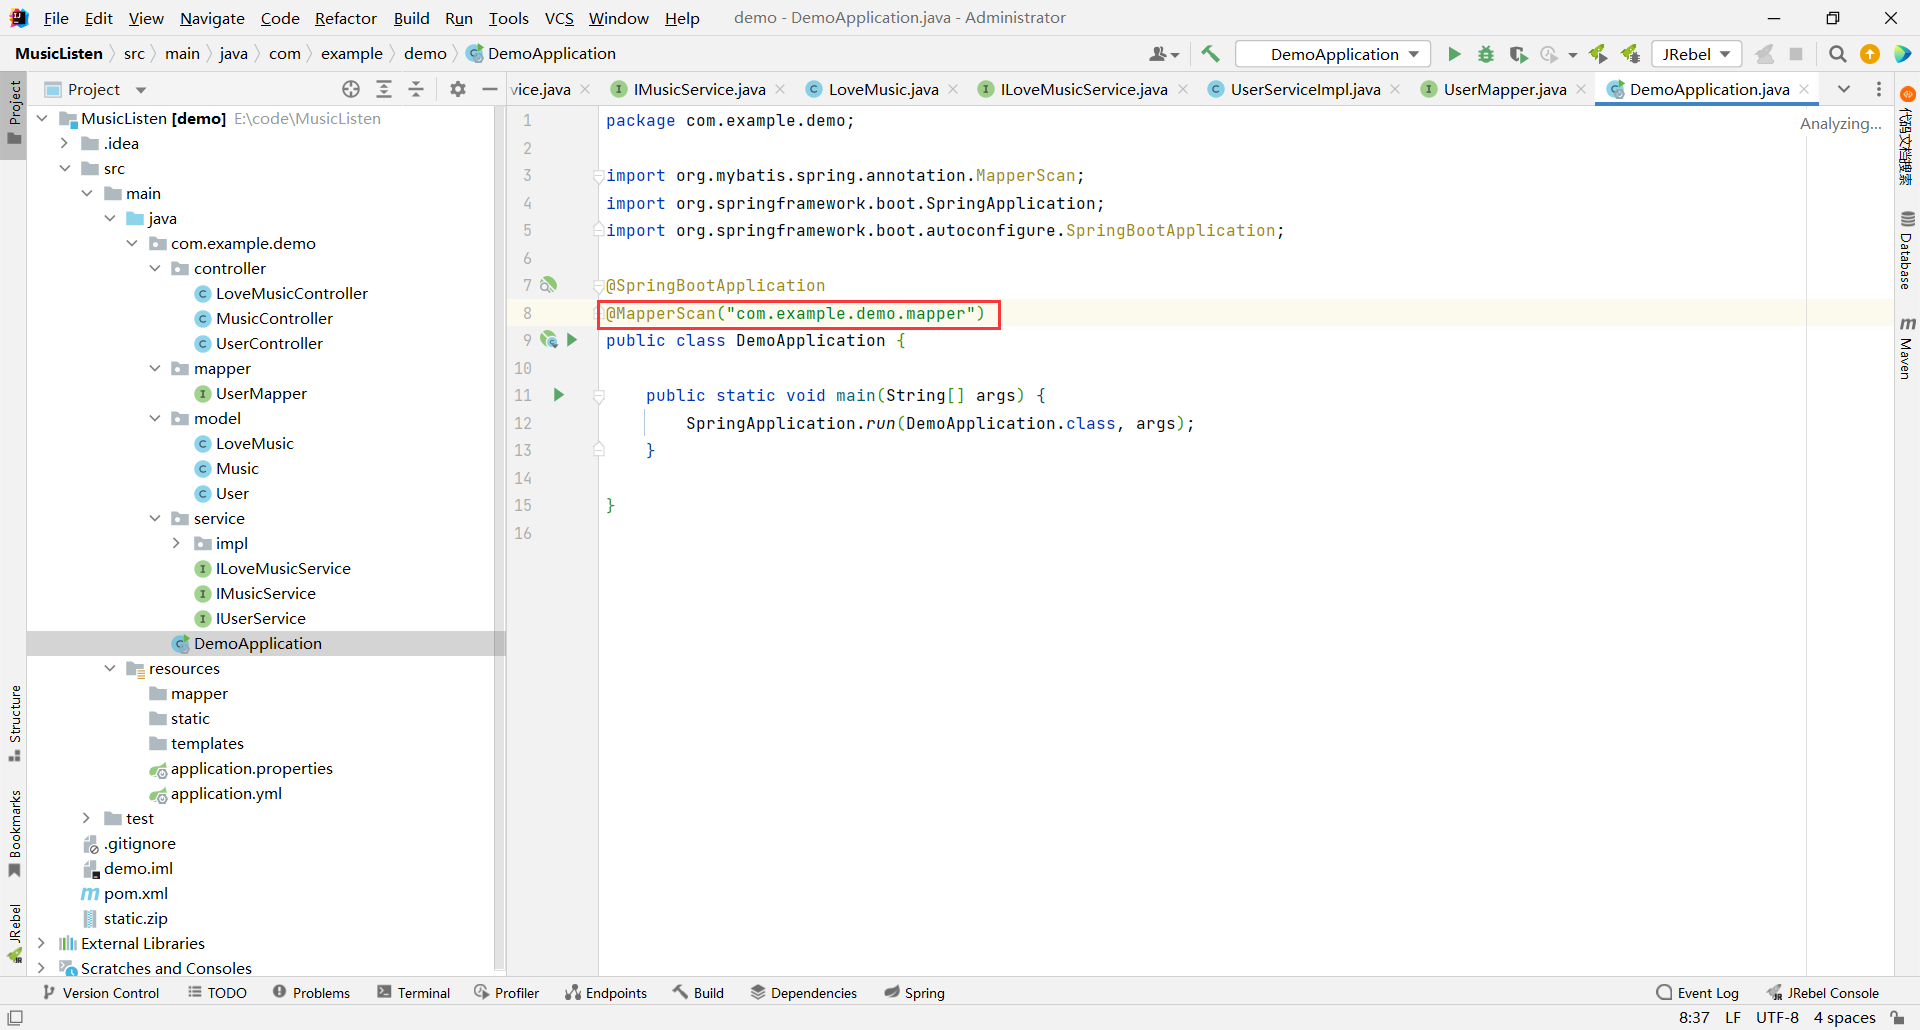
添加此注解的作用就是当项目启动的时候 , 会扫描 com.example.demo.mapper 路径 , 将该路径下面的接口自动帮我们加上 @Mapper
那接口创建好之后 , 我们还要去继承 BaseMap , 也就是 extends BaseMap<要操作的实体类>
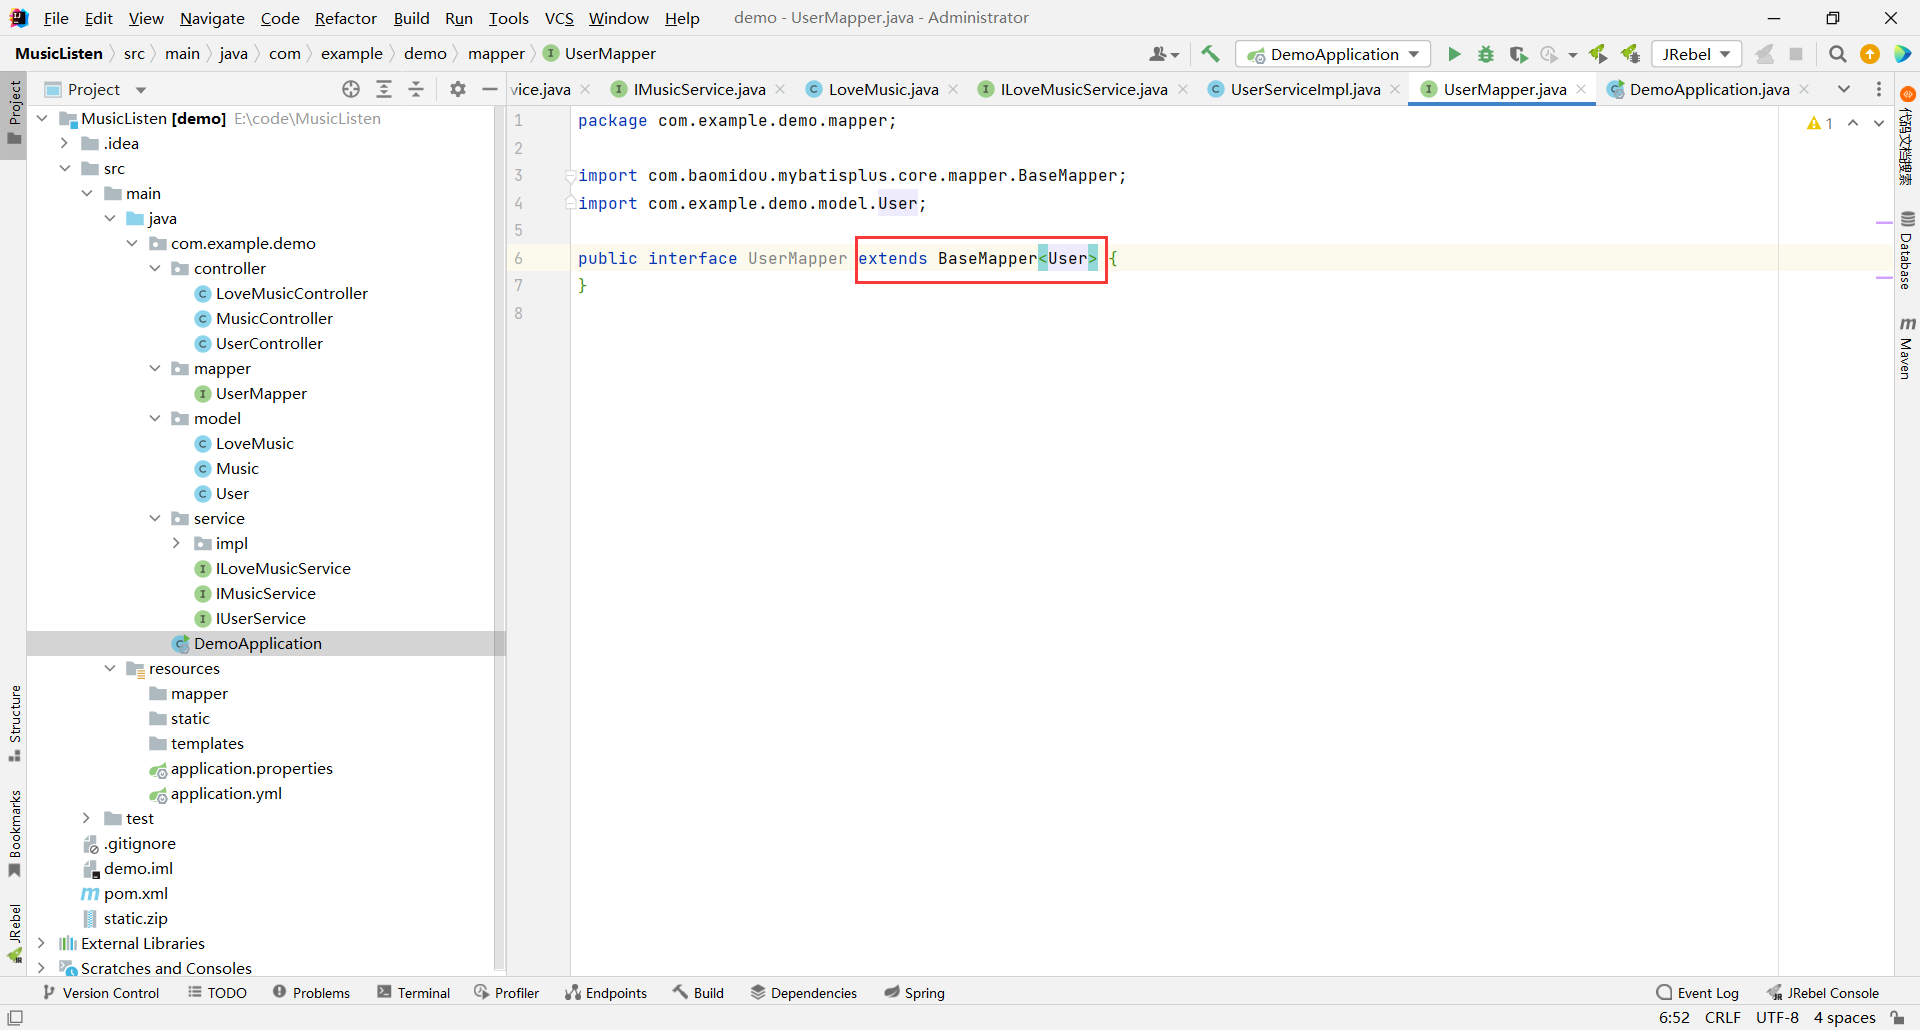
```java
package com.example.demo.mapper;
import com.baomidou.mybatisplus.core.mapper.BaseMapper;
import com.example.demo.model.User;
public interface UserMapper extends BaseMapper {
}
```
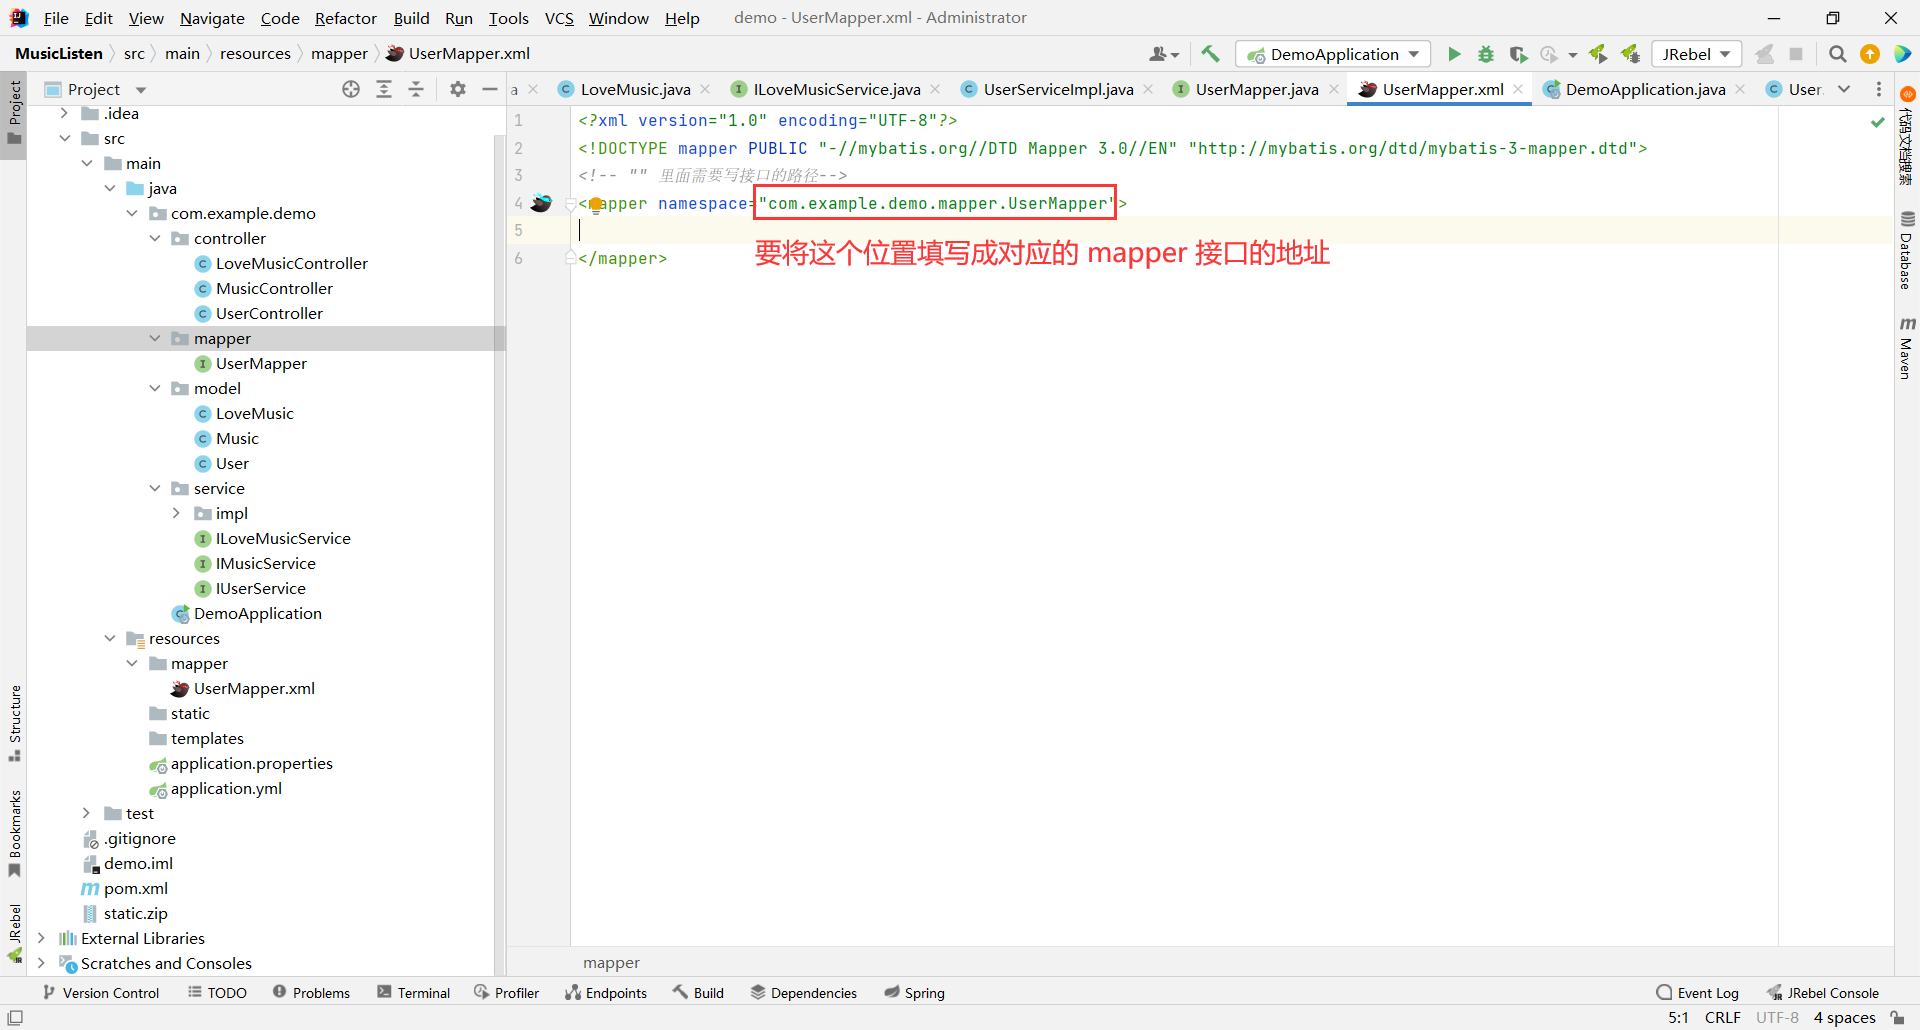
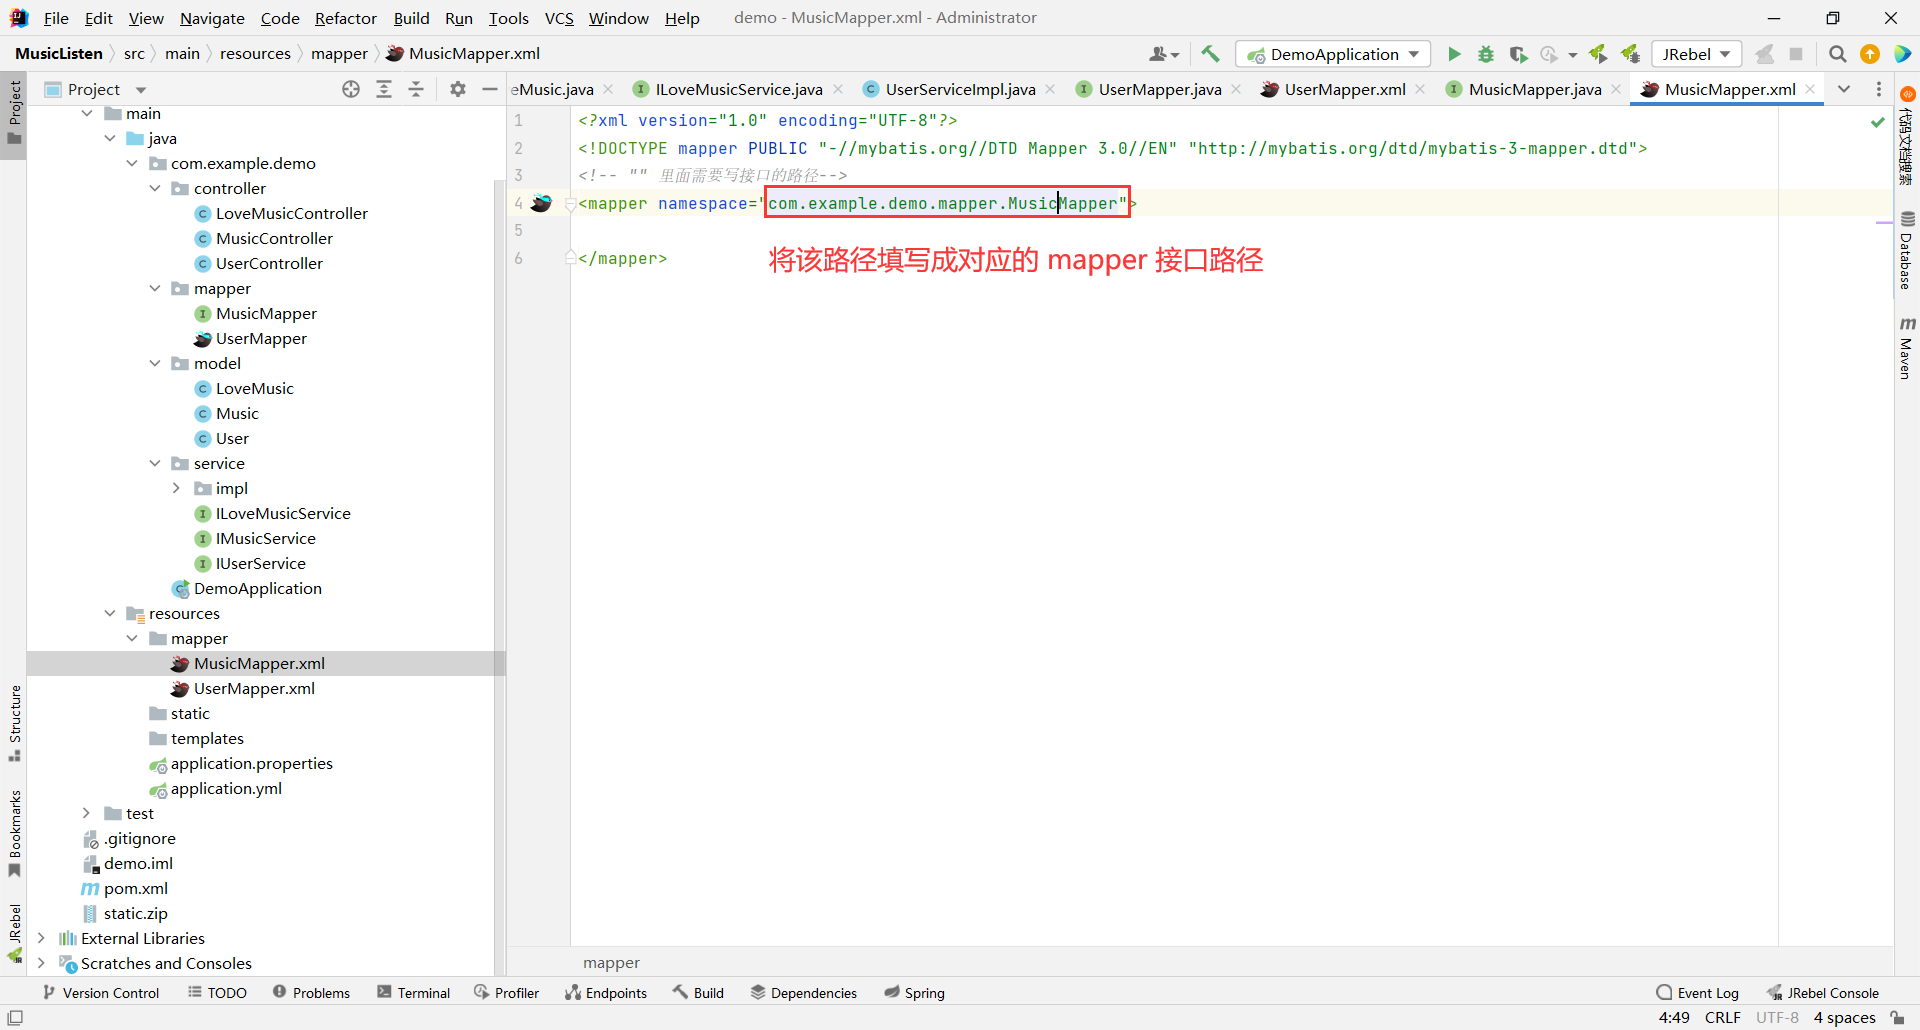
##### 对应的 xml
UserMapper.xml :
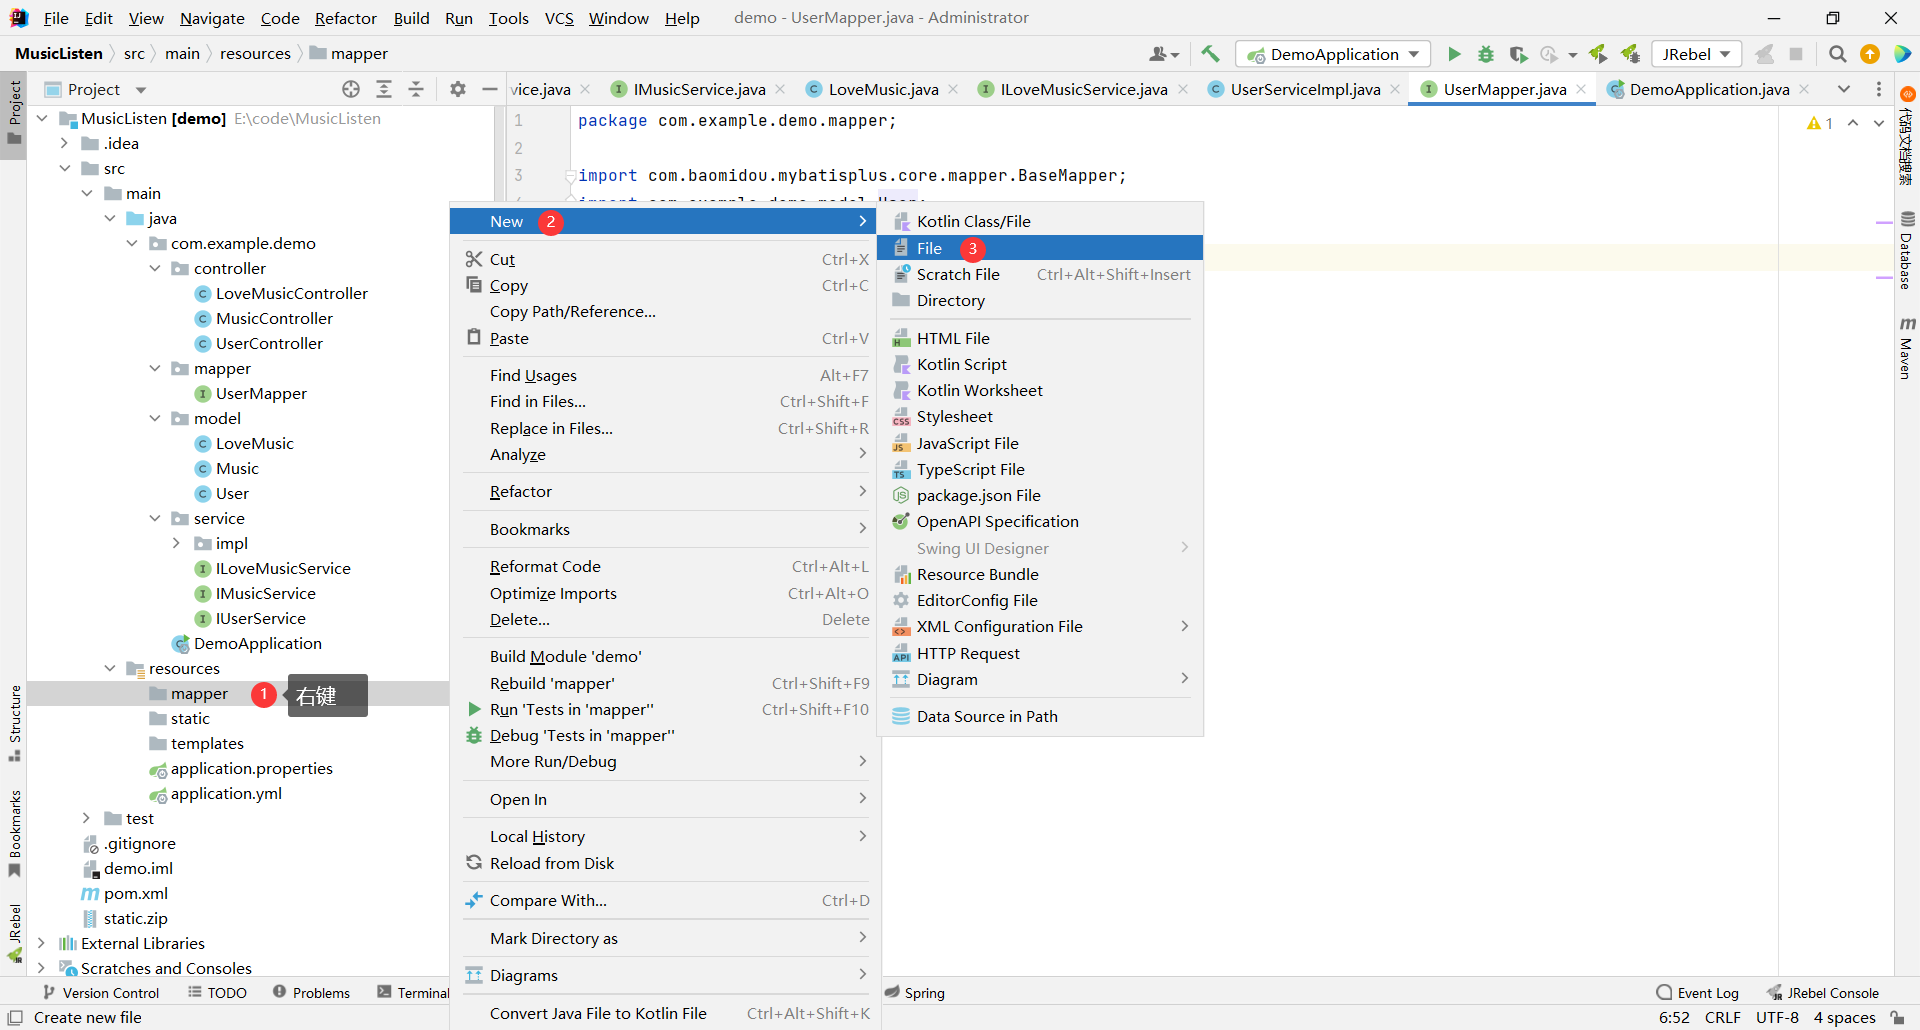
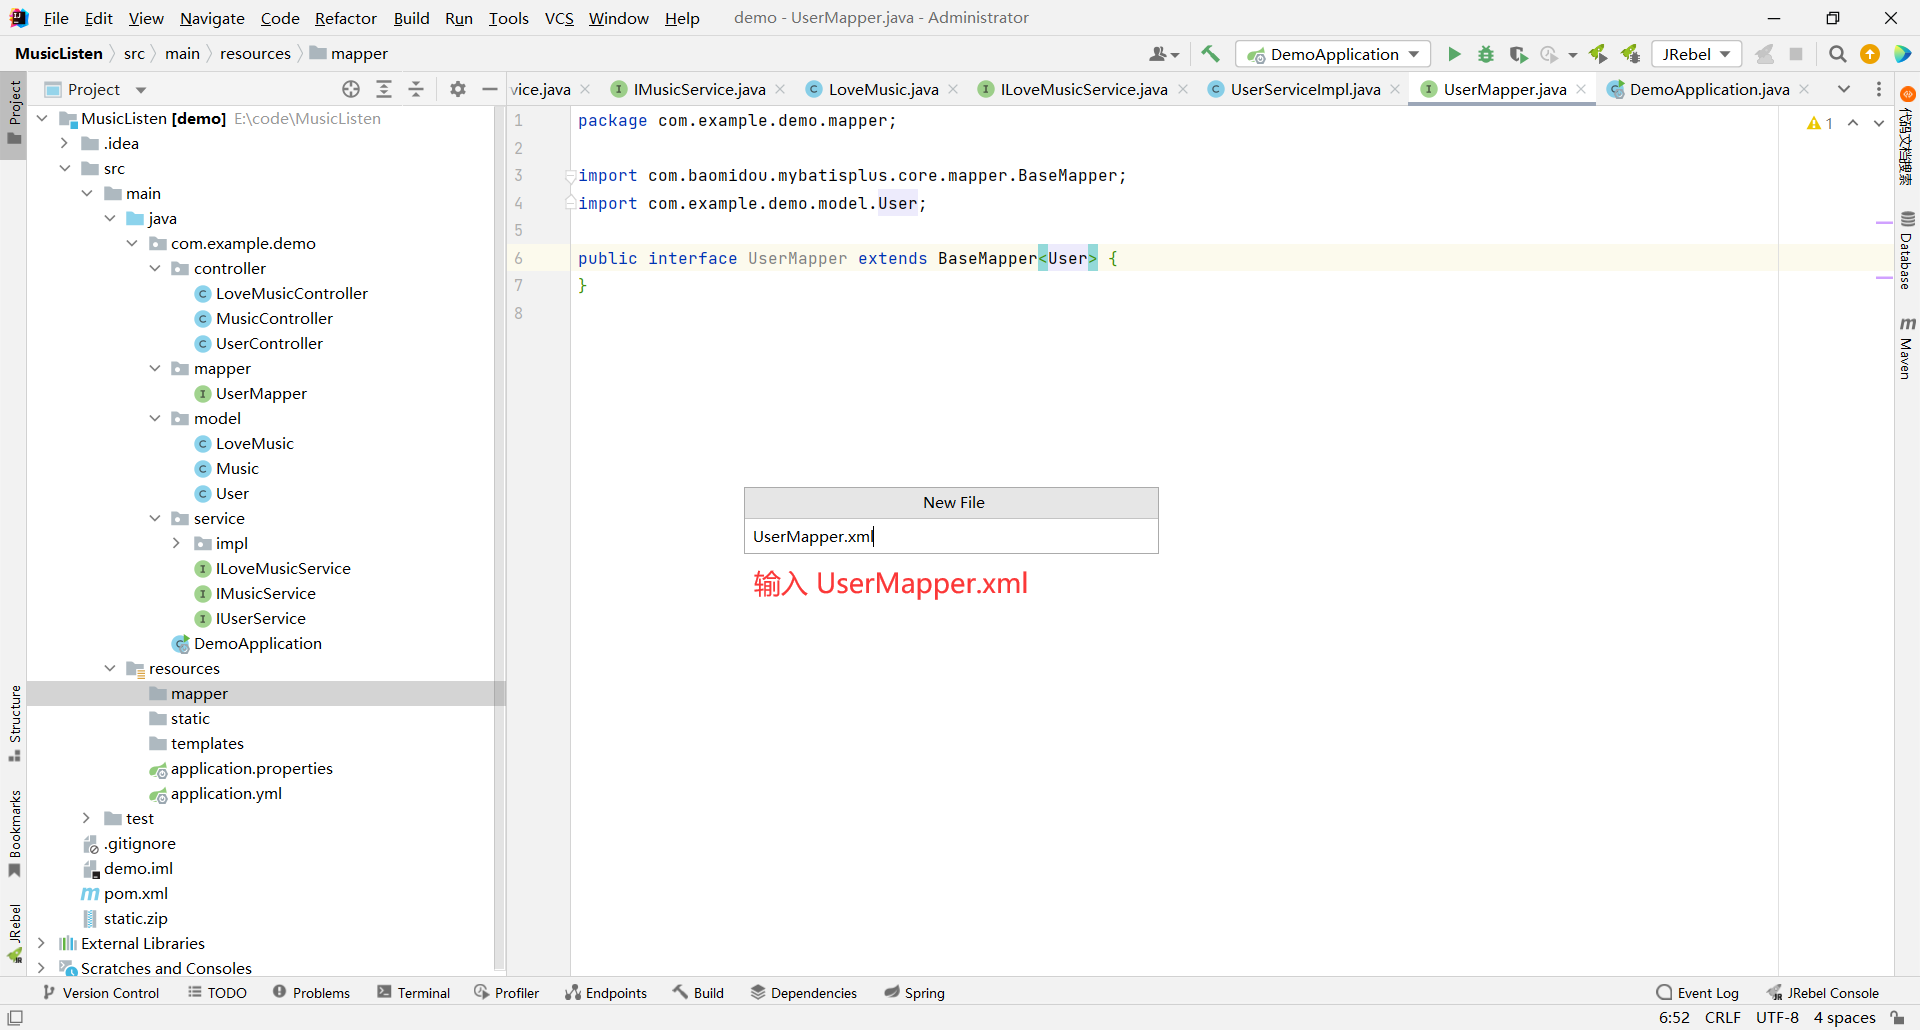
粘贴进这段代码
```xml
```
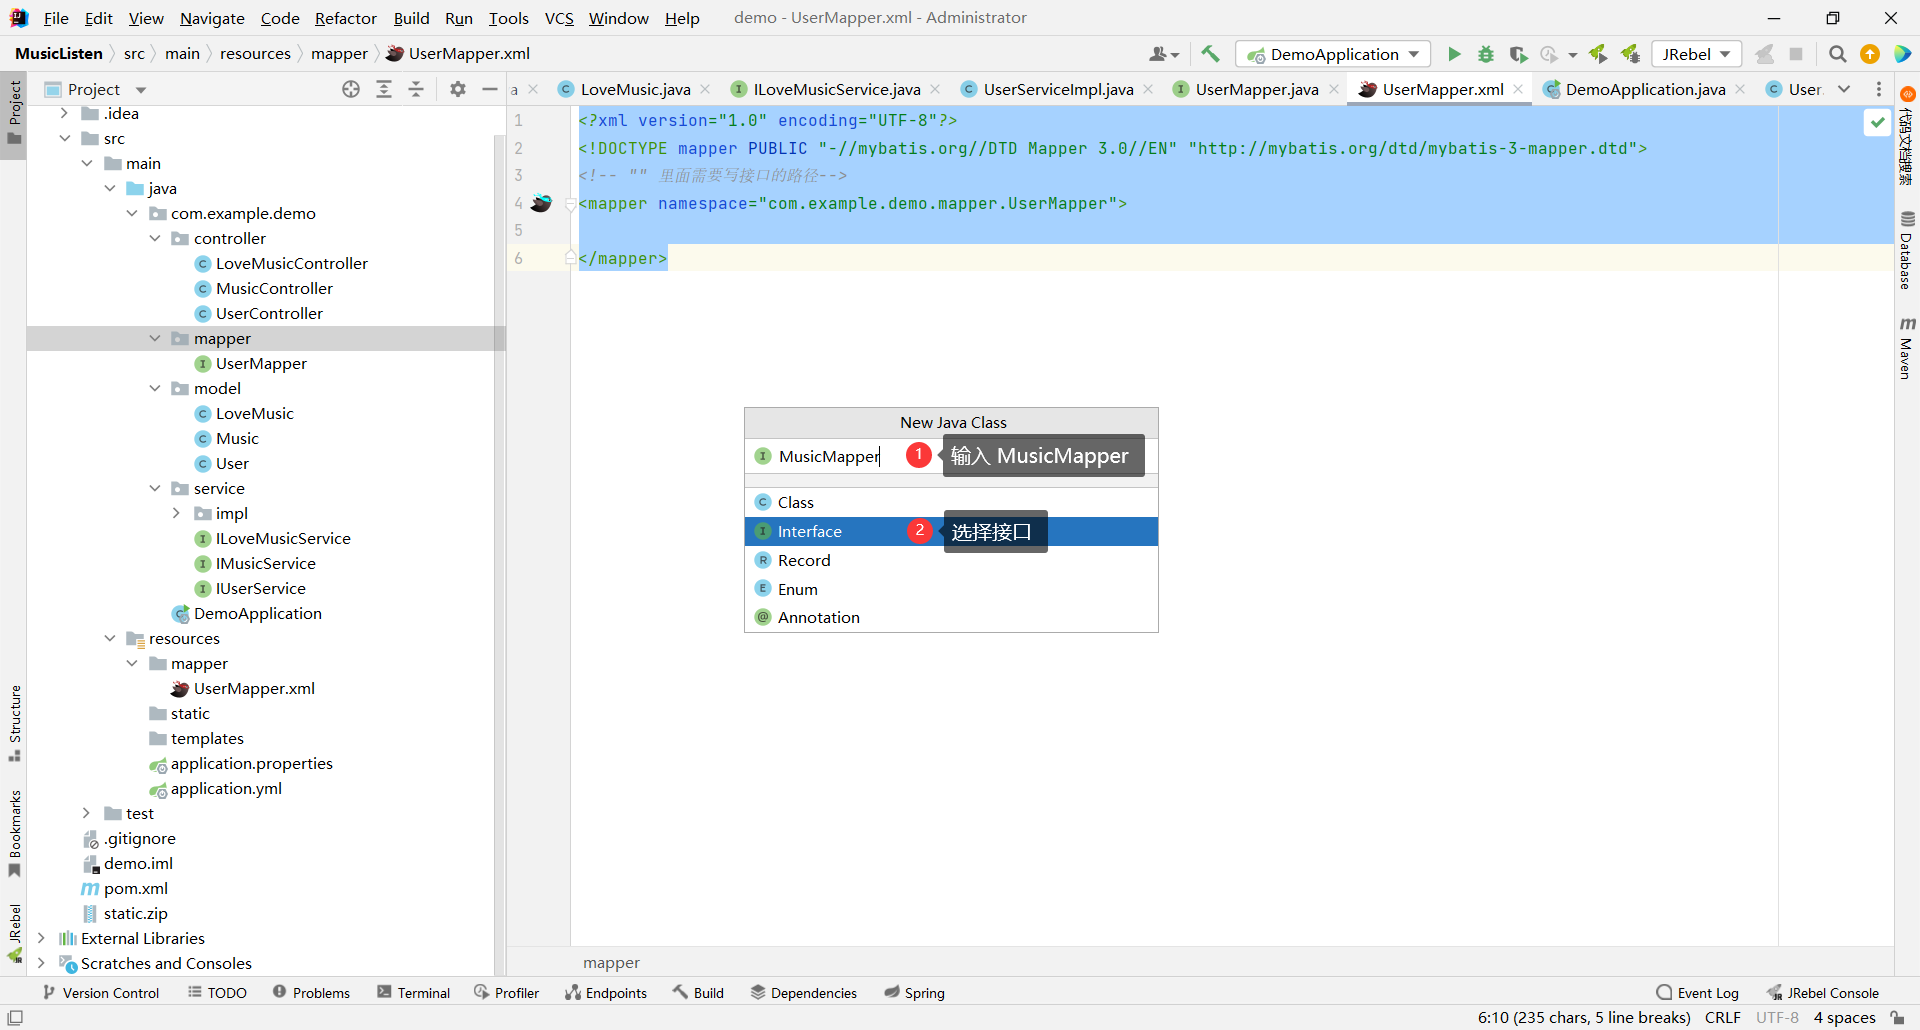
#### MusicMapper
##### 接口
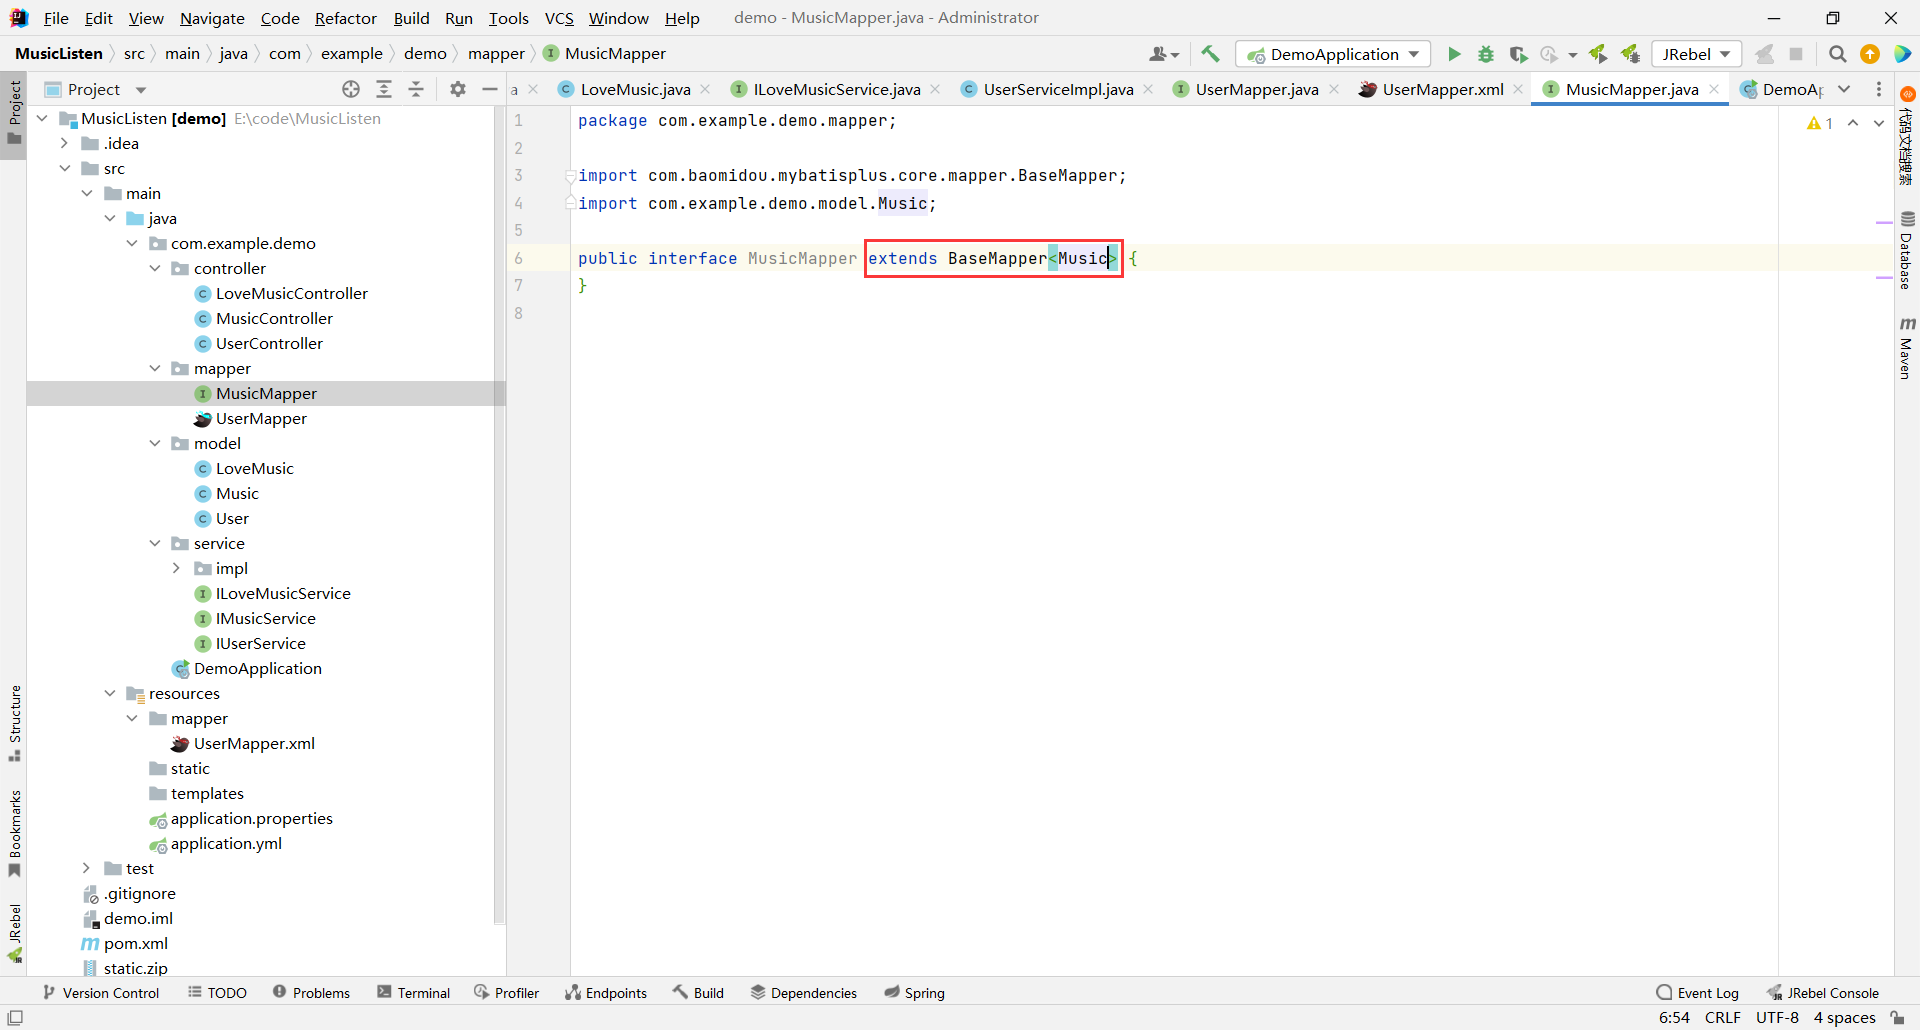
```java
package com.example.demo.mapper;
import com.baomidou.mybatisplus.core.mapper.BaseMapper;
import com.example.demo.model.Music;
public interface MusicMapper extends BaseMapper {
}
```
##### 对应的 xml
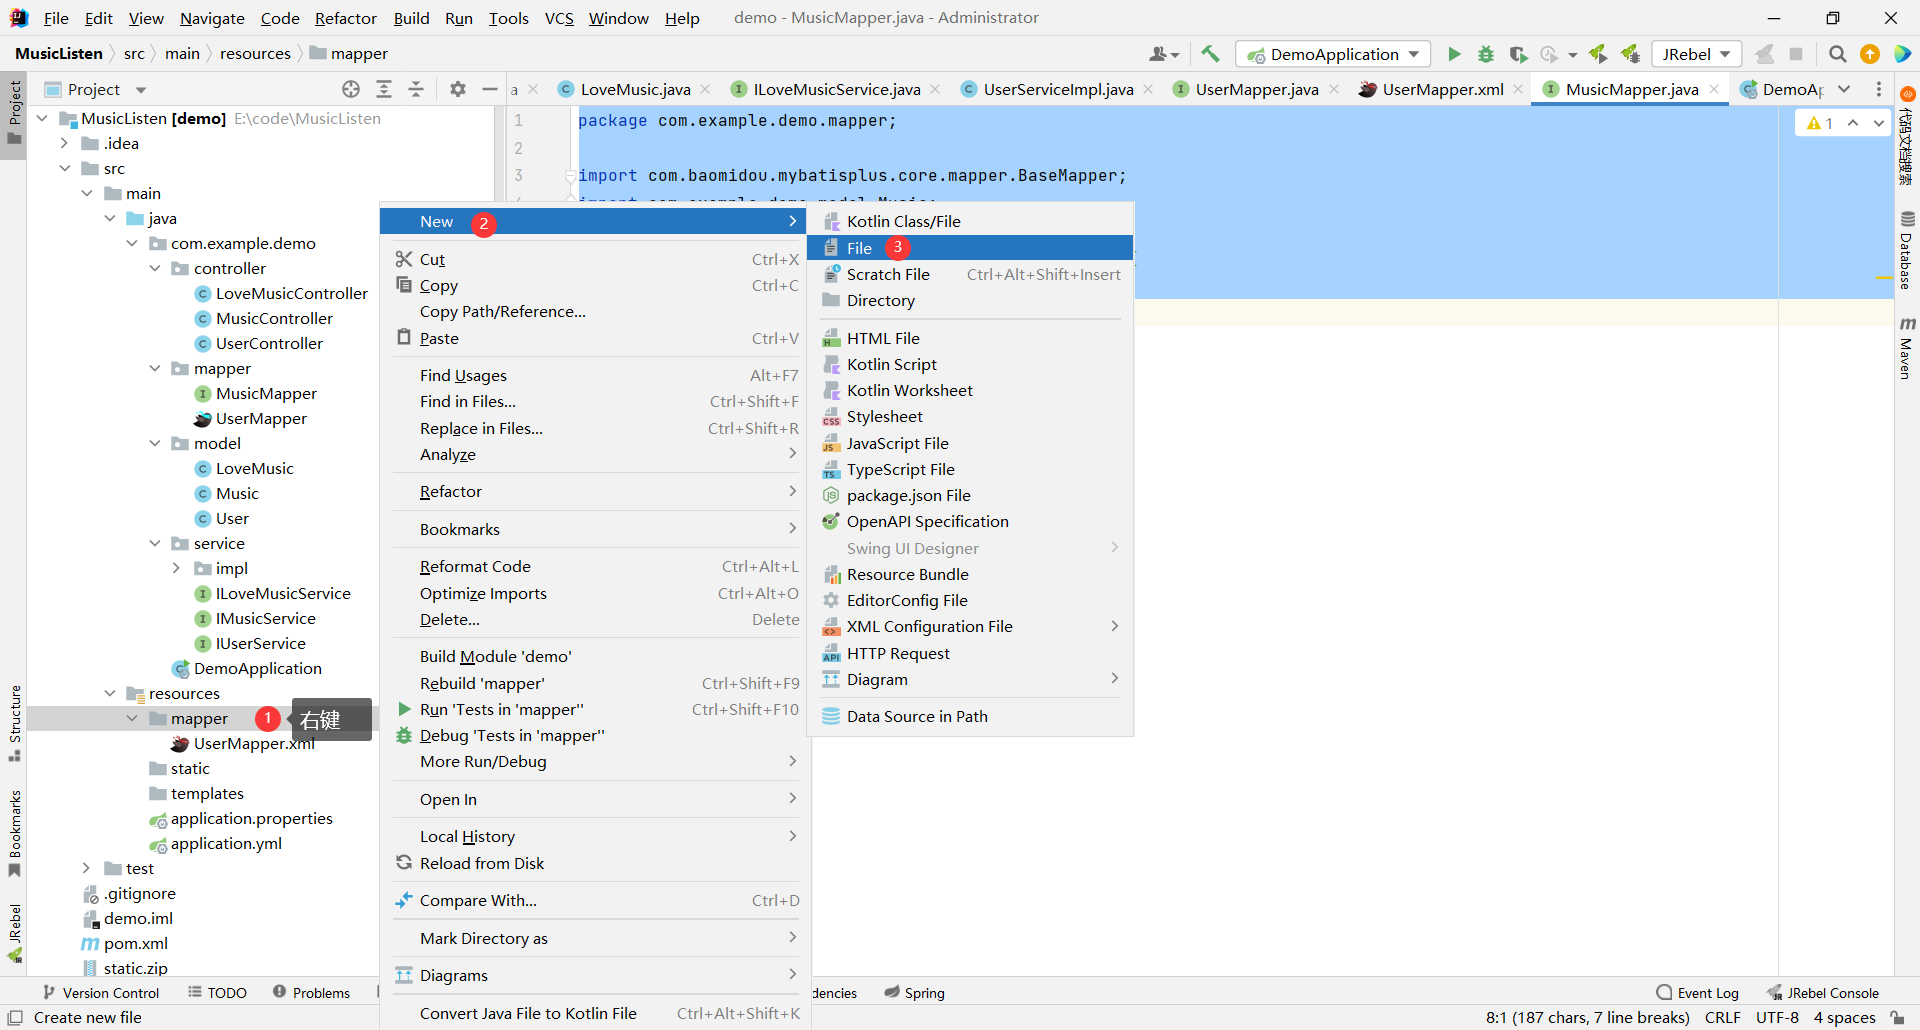
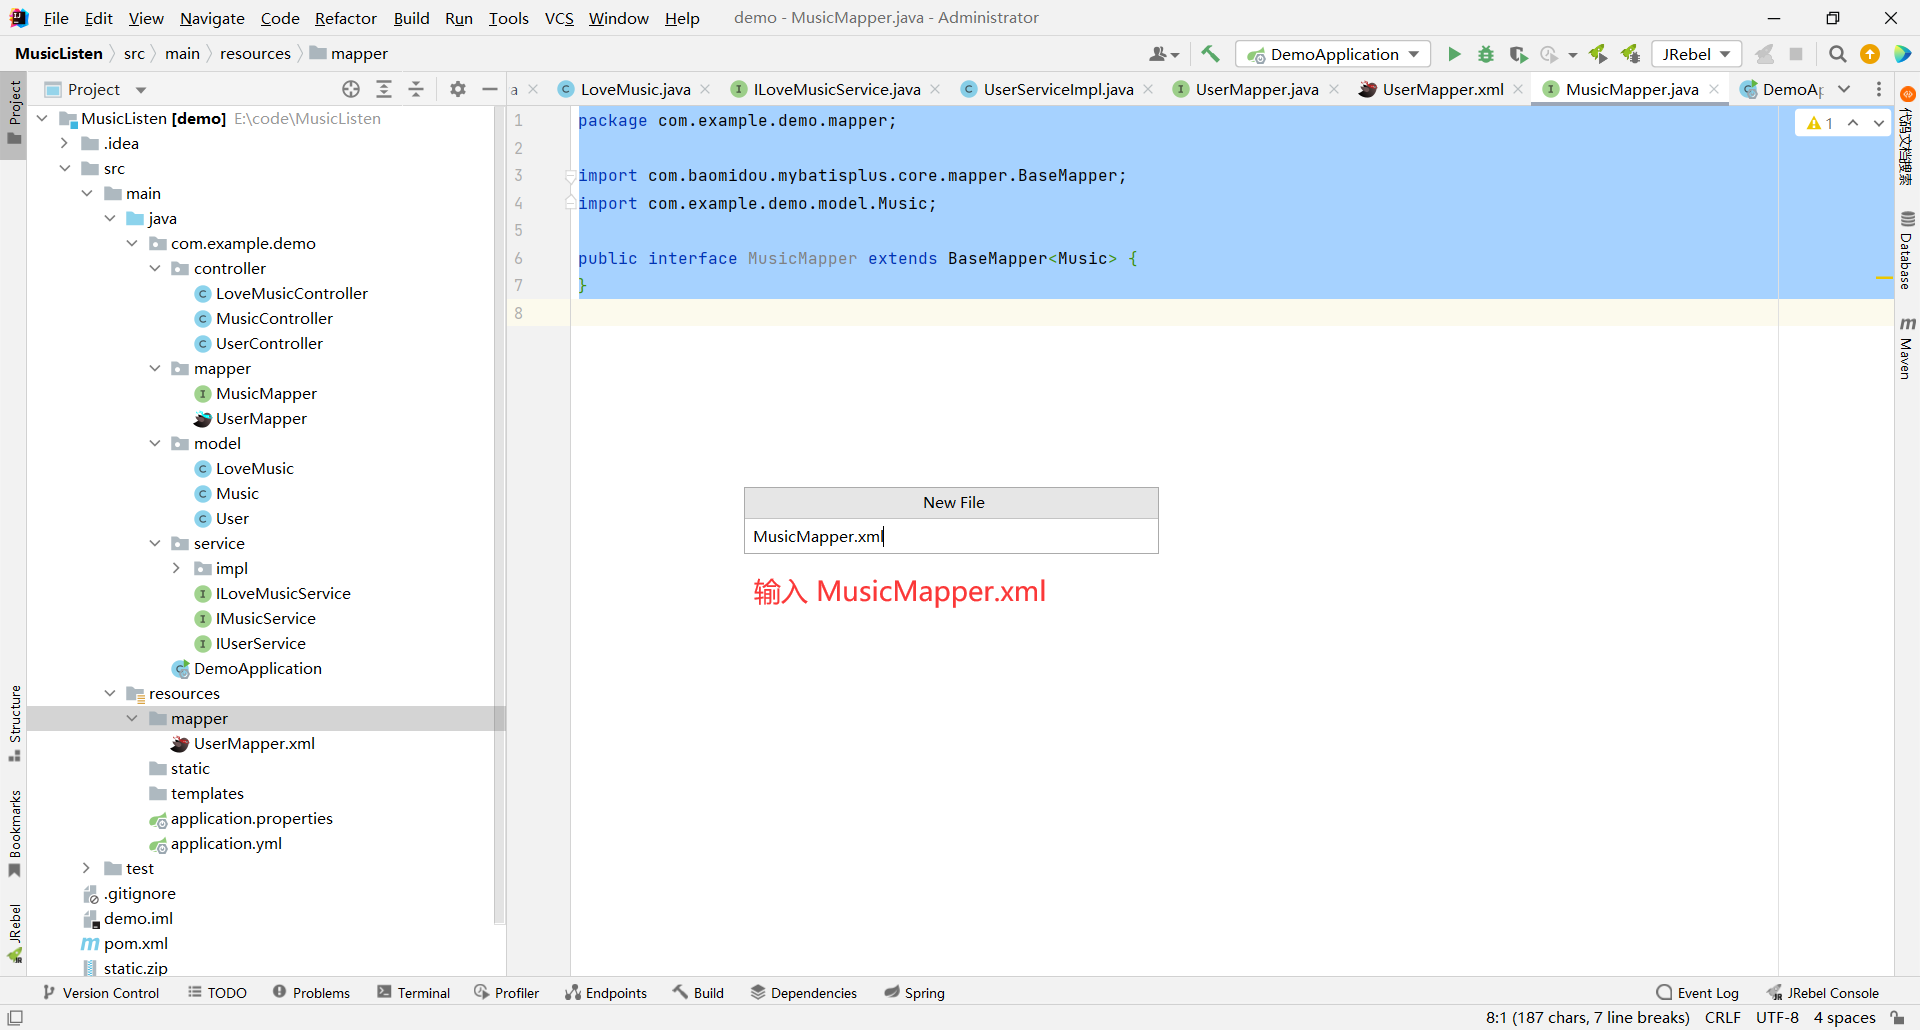
粘贴进这段代码
```xml
```
#### LoveMusicMapper
##### 接口
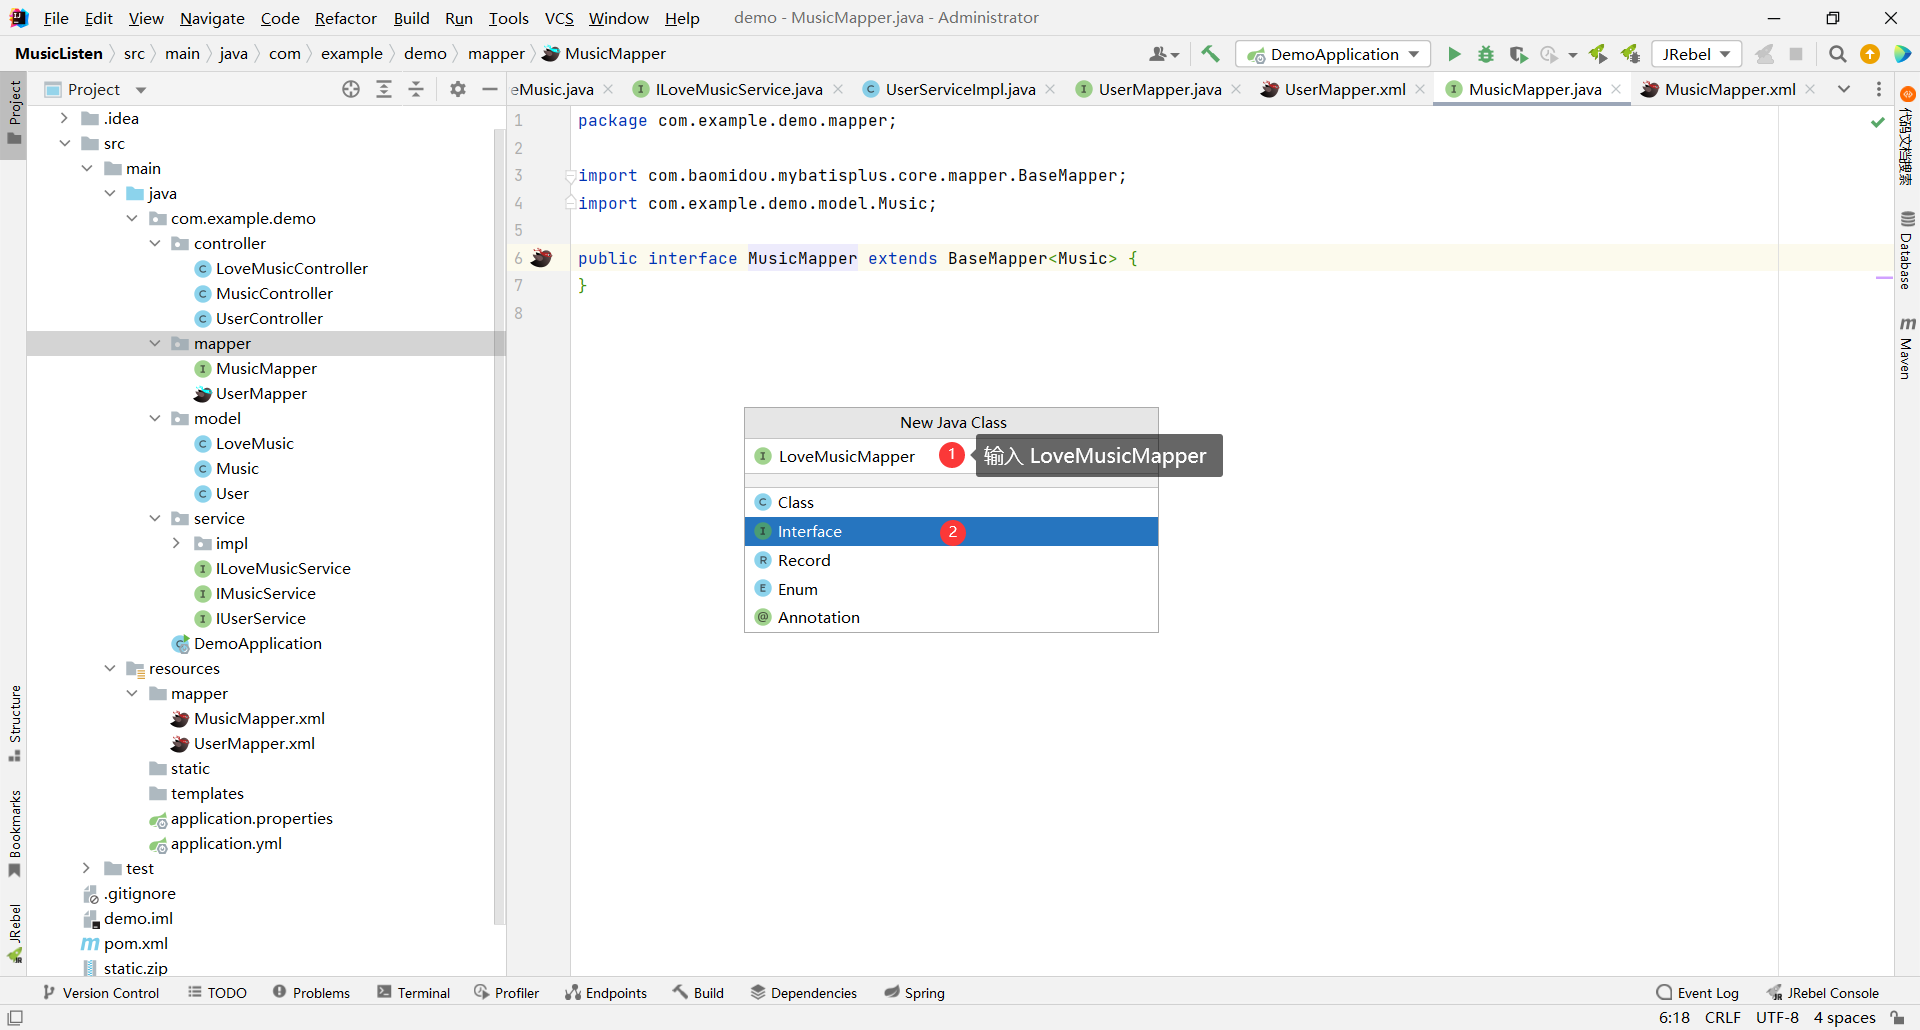
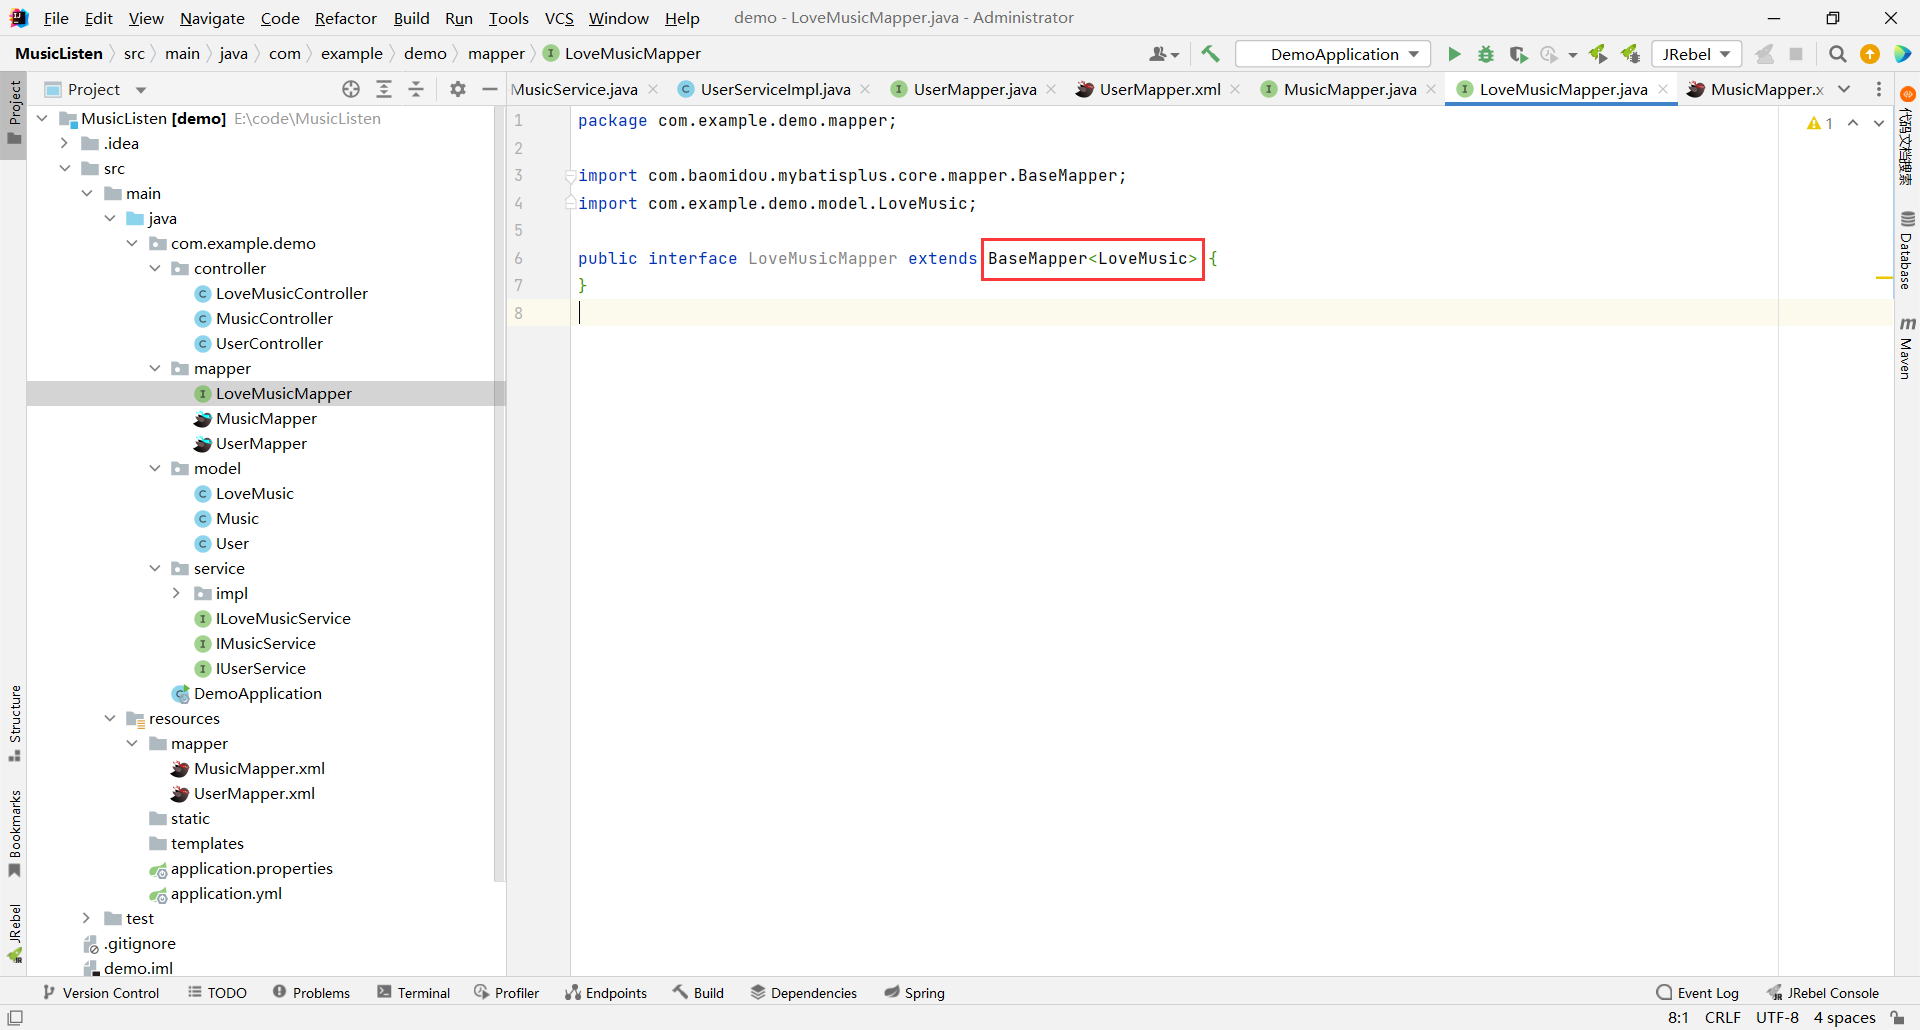
```java
package com.example.demo.mapper;
import com.baomidou.mybatisplus.core.mapper.BaseMapper;
import com.example.demo.model.LoveMusic;
public interface LoveMusicMapper extends BaseMapper {
}
```
##### 对应的 xml
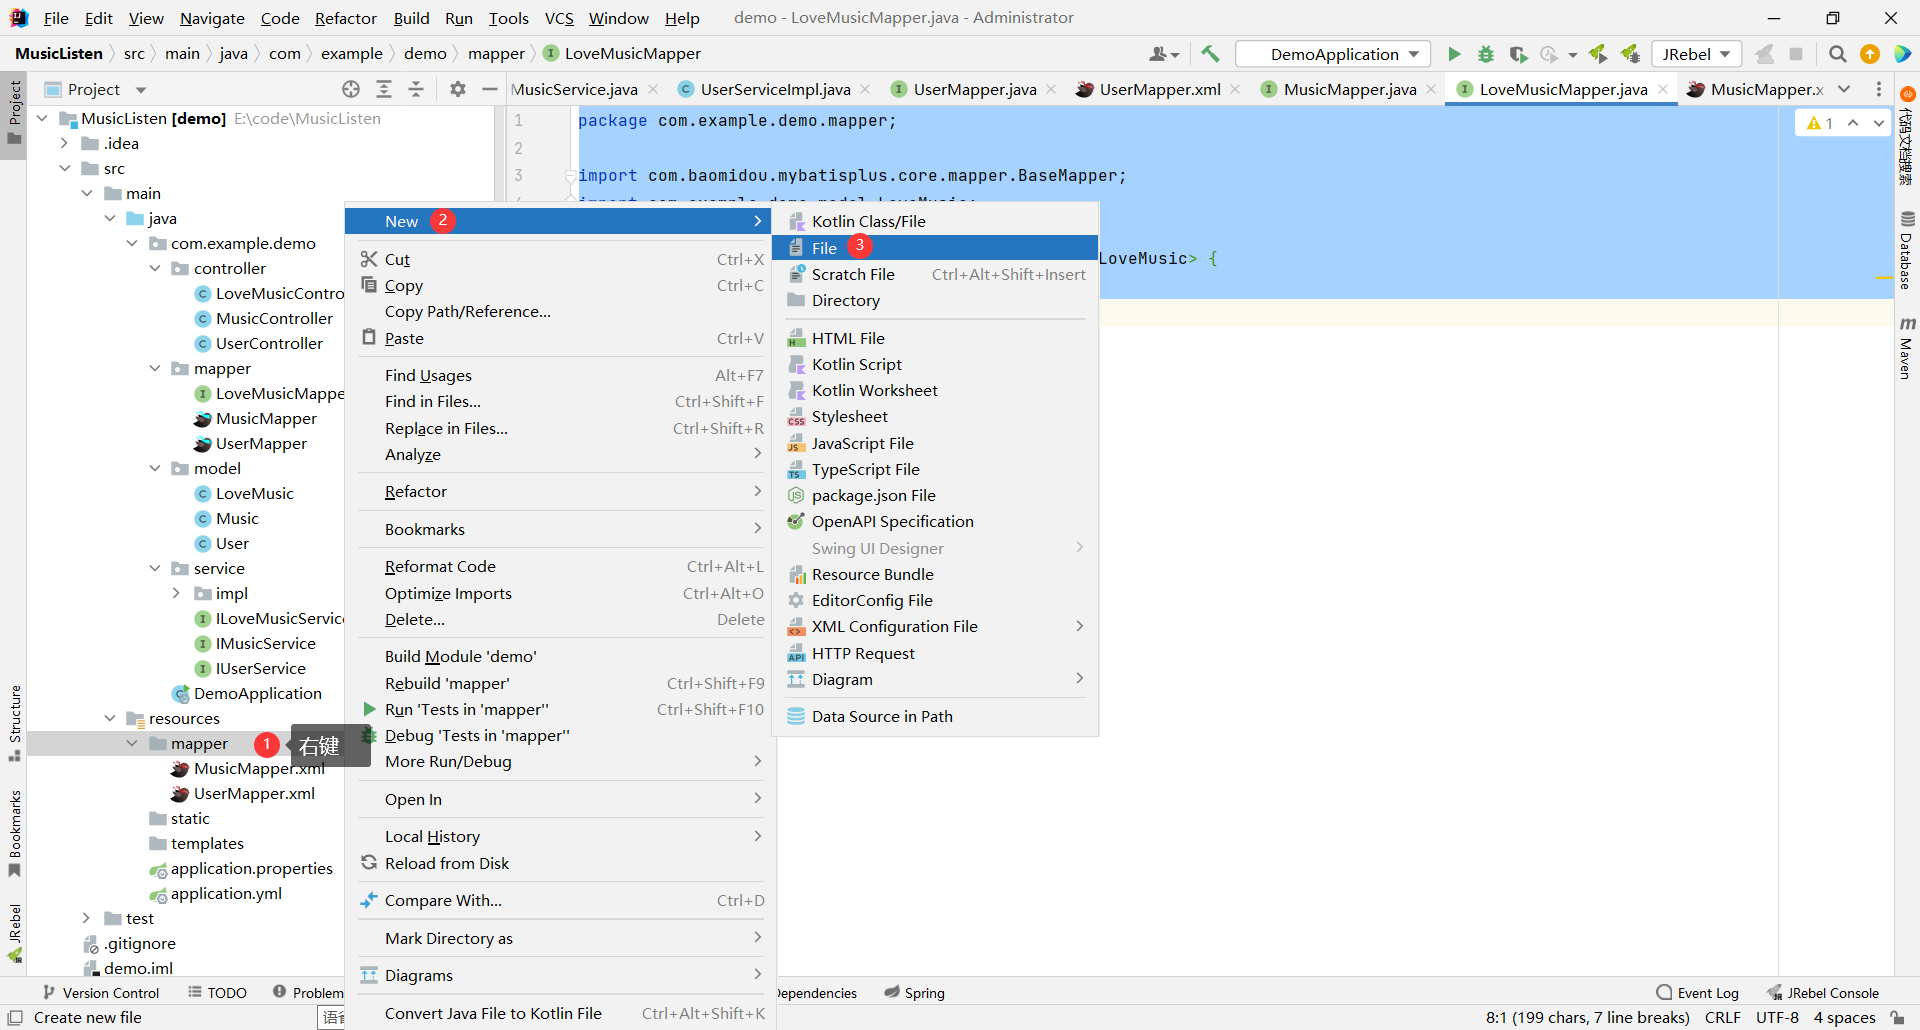
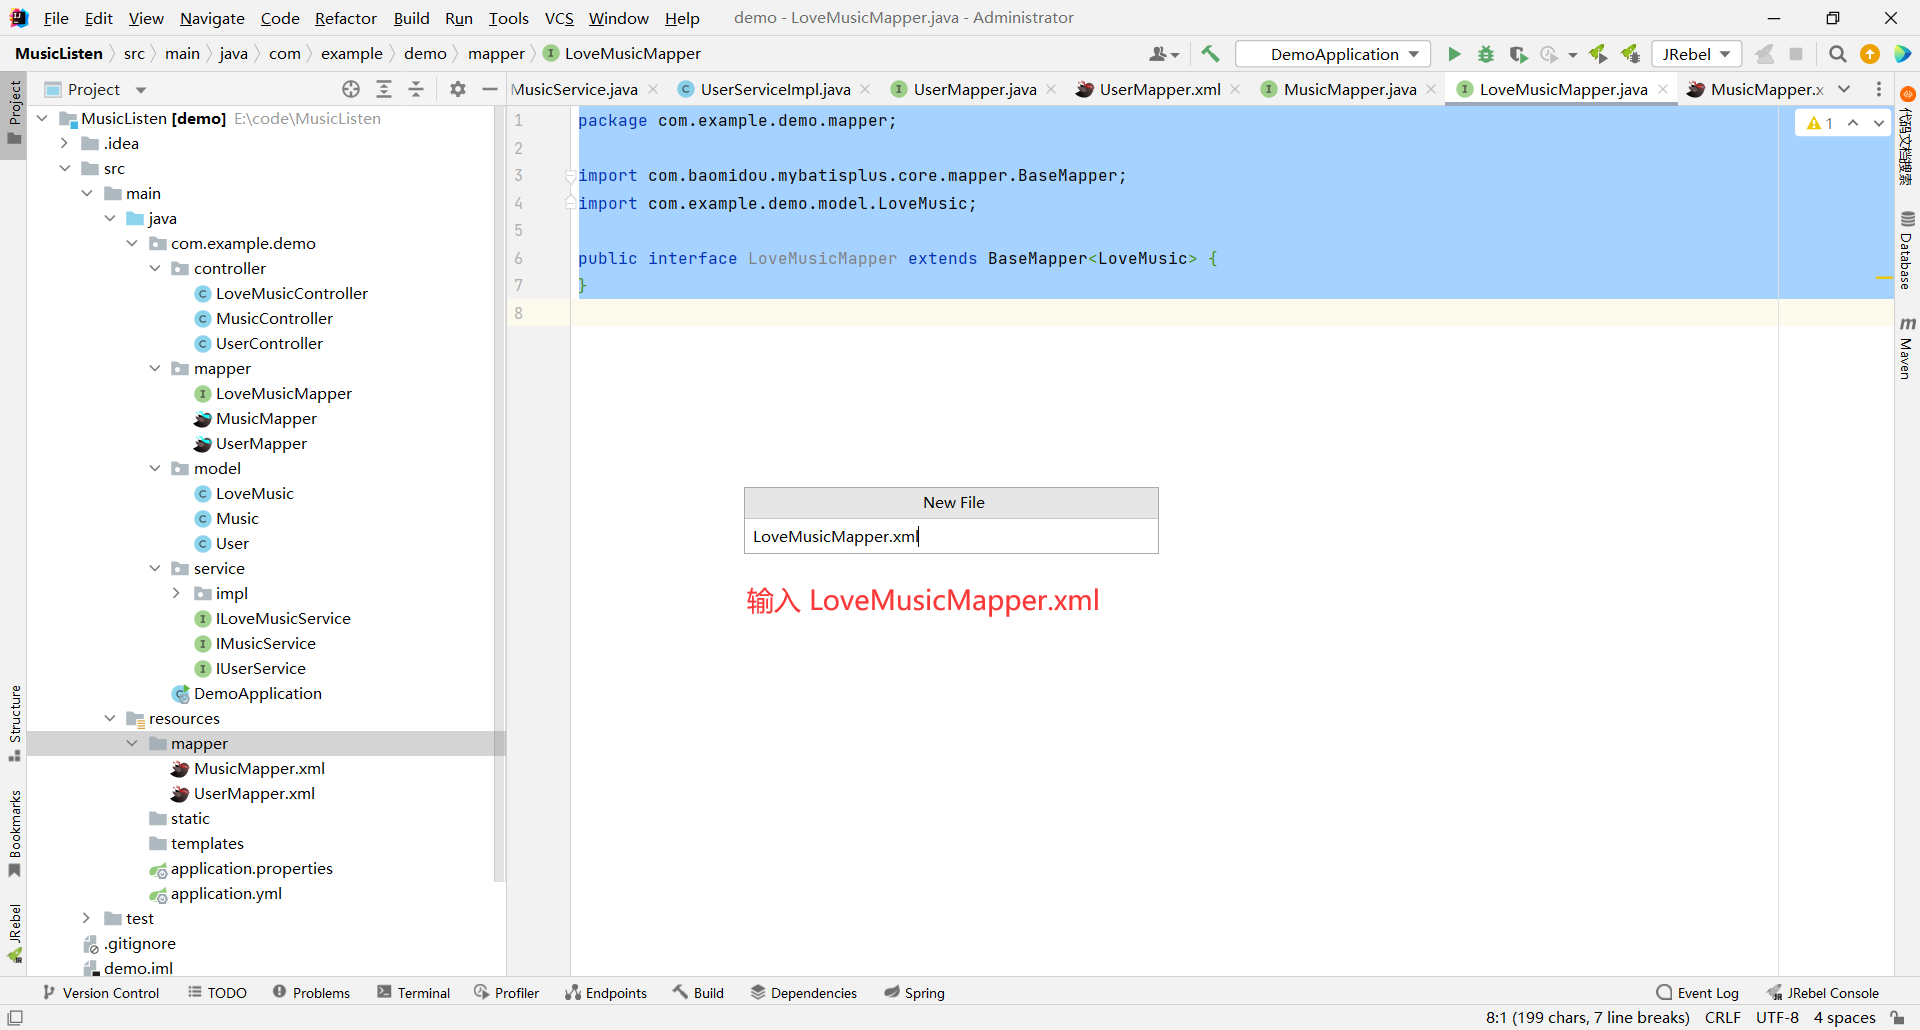
粘贴进这段代码
```xml
```
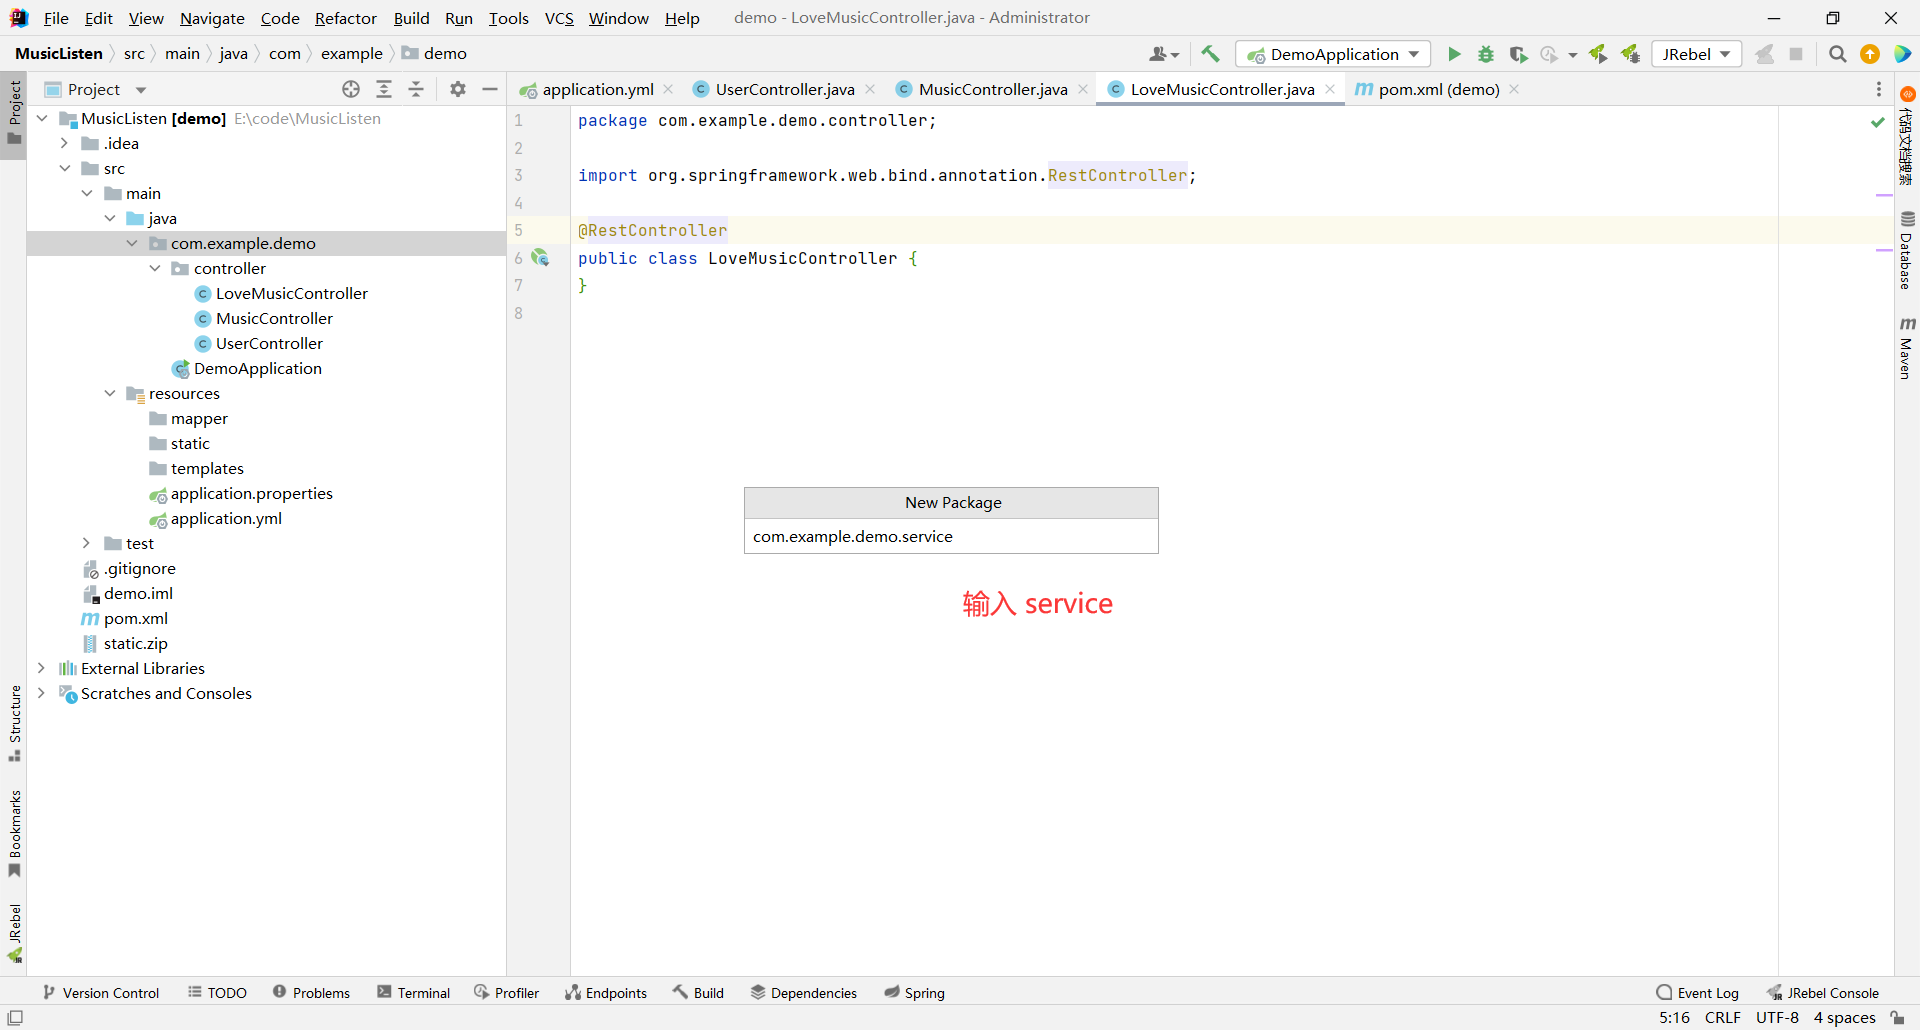
### 1.3.3 service 层
先创建出 service 目录
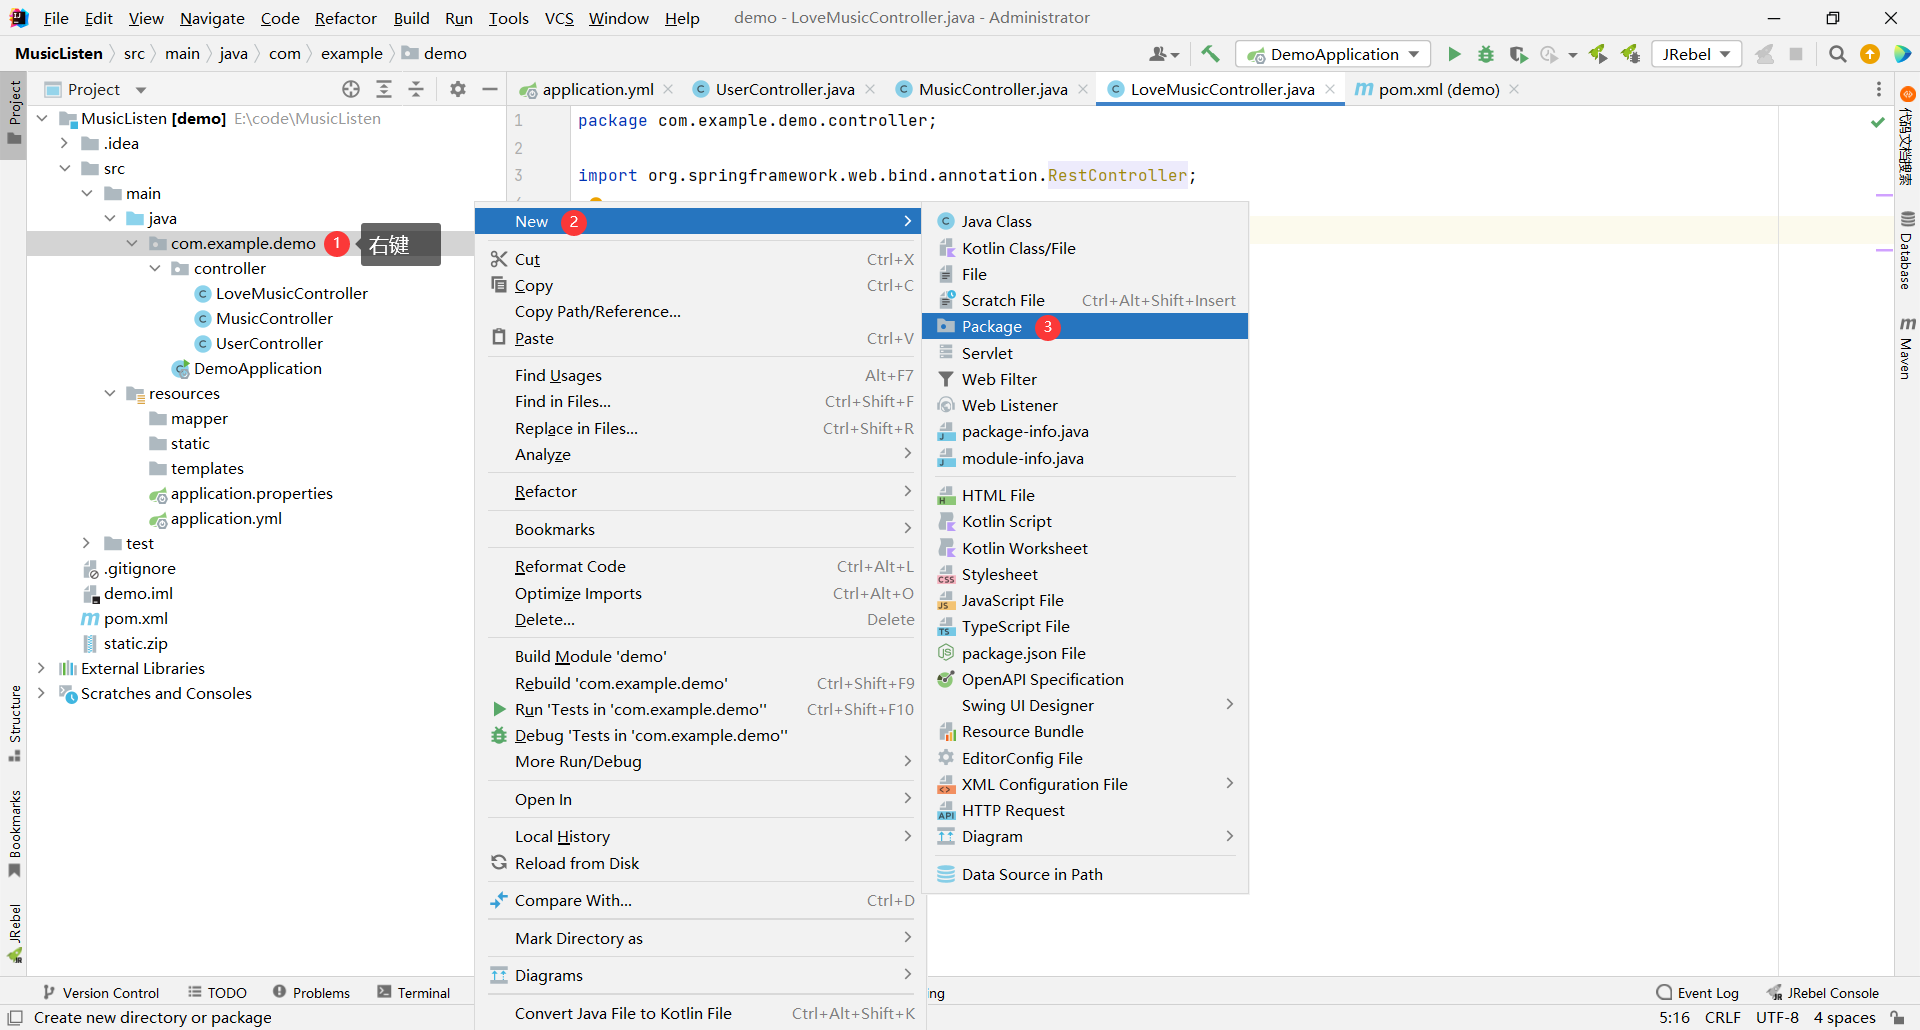
我们是通过 MP 来实现 SQL 查询的
那么 MP 要求 service 层包括两部分 : 接口 + 实现类
那我们就先创建接口
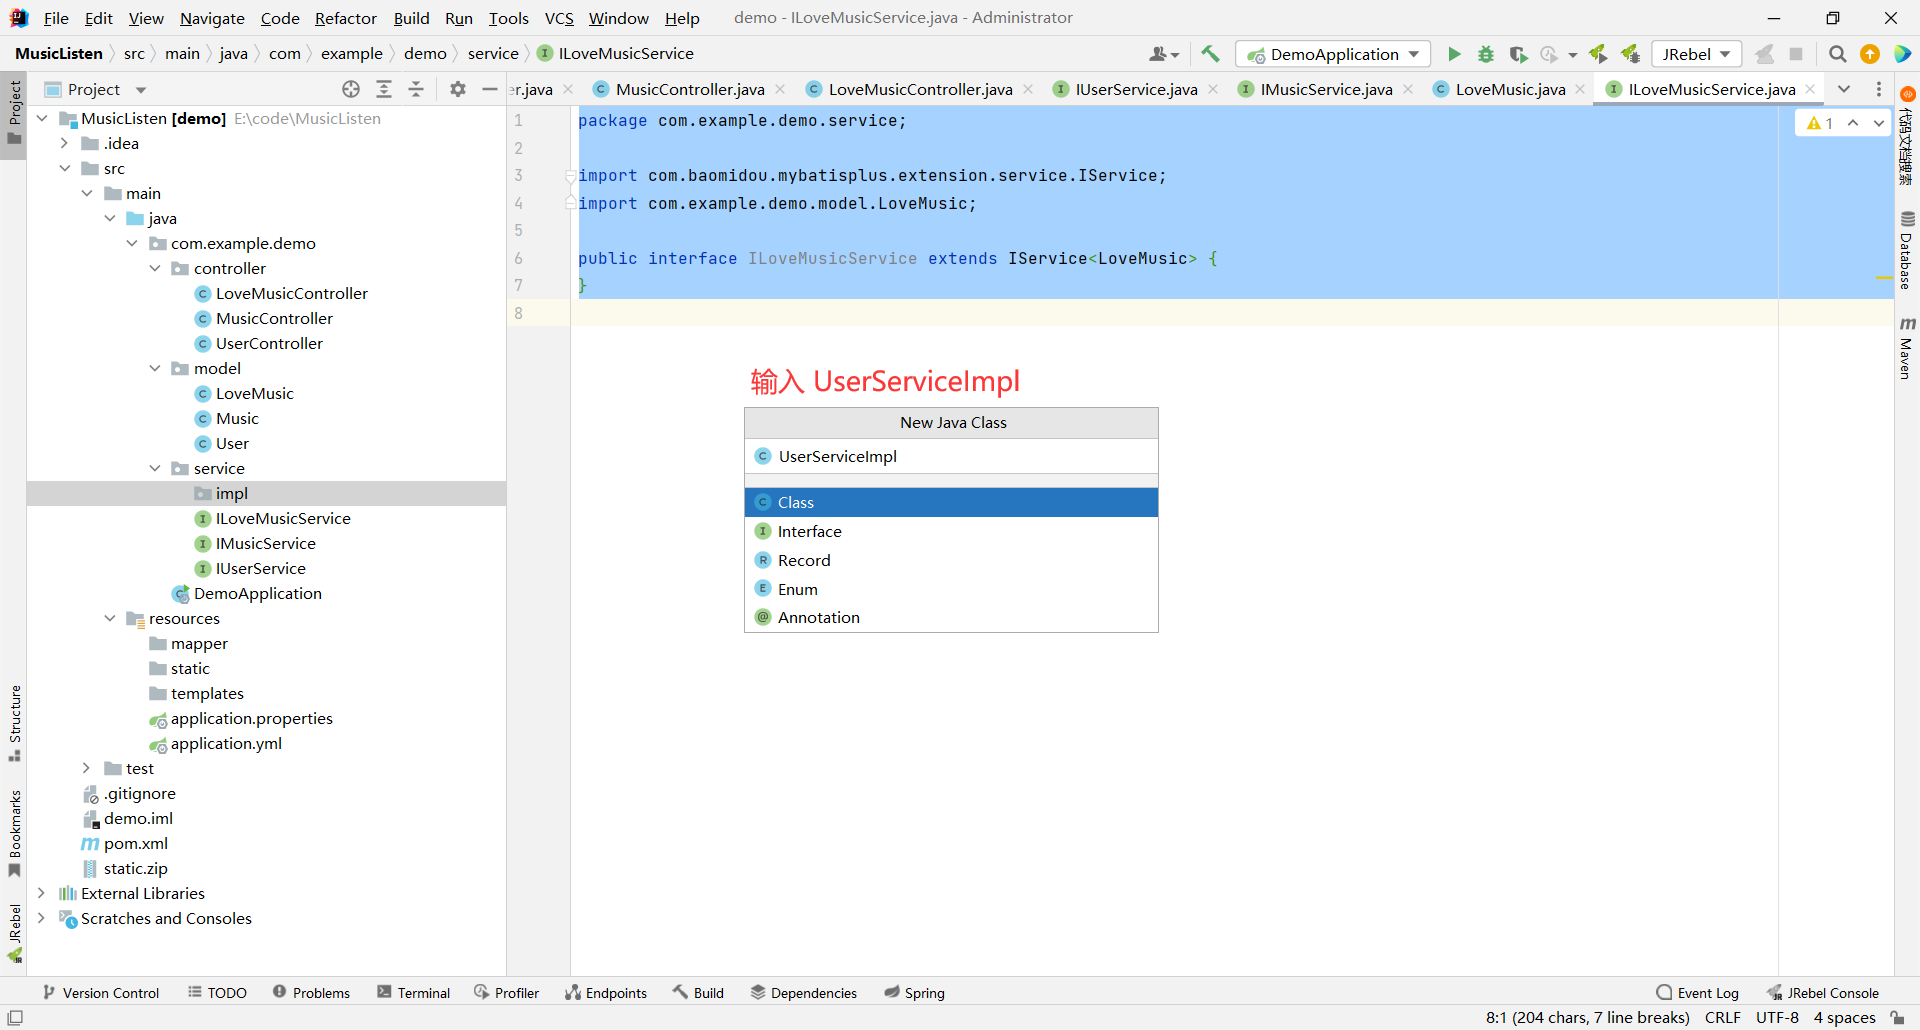
#### 接口
先创建 UserService
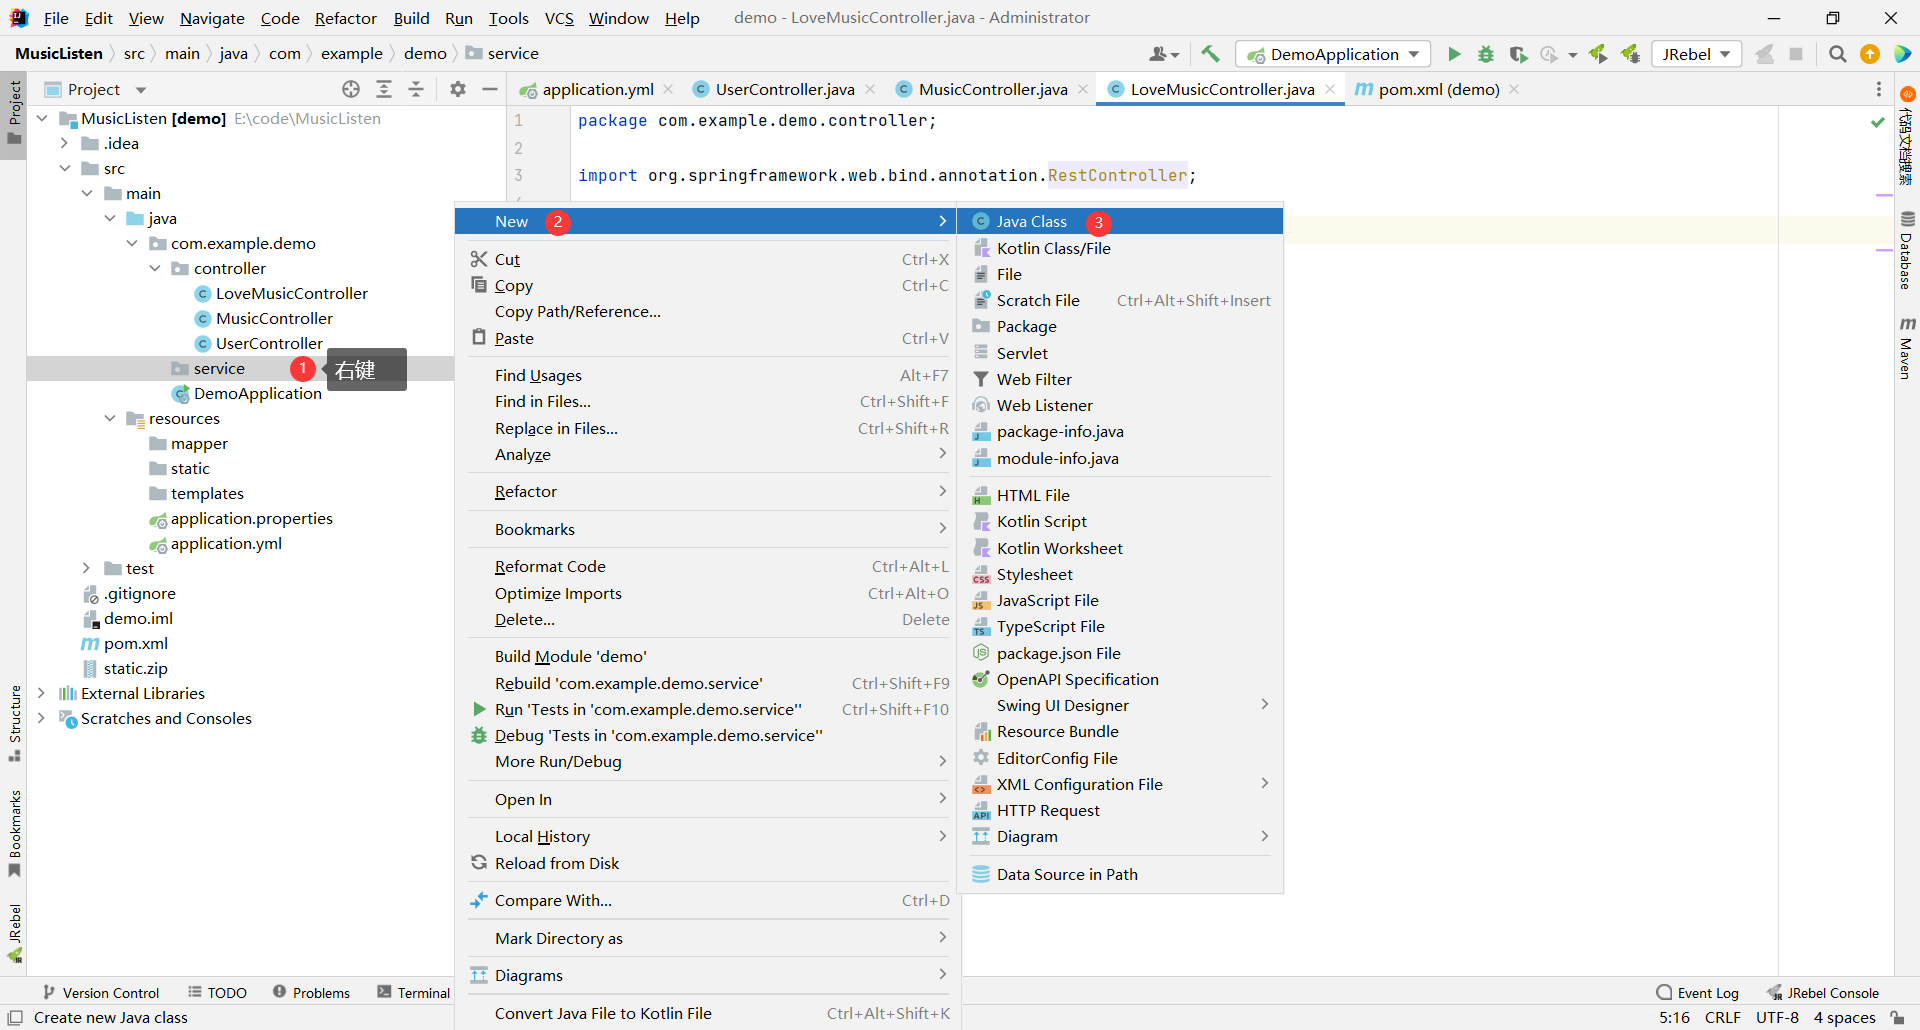
先创建 IUserService
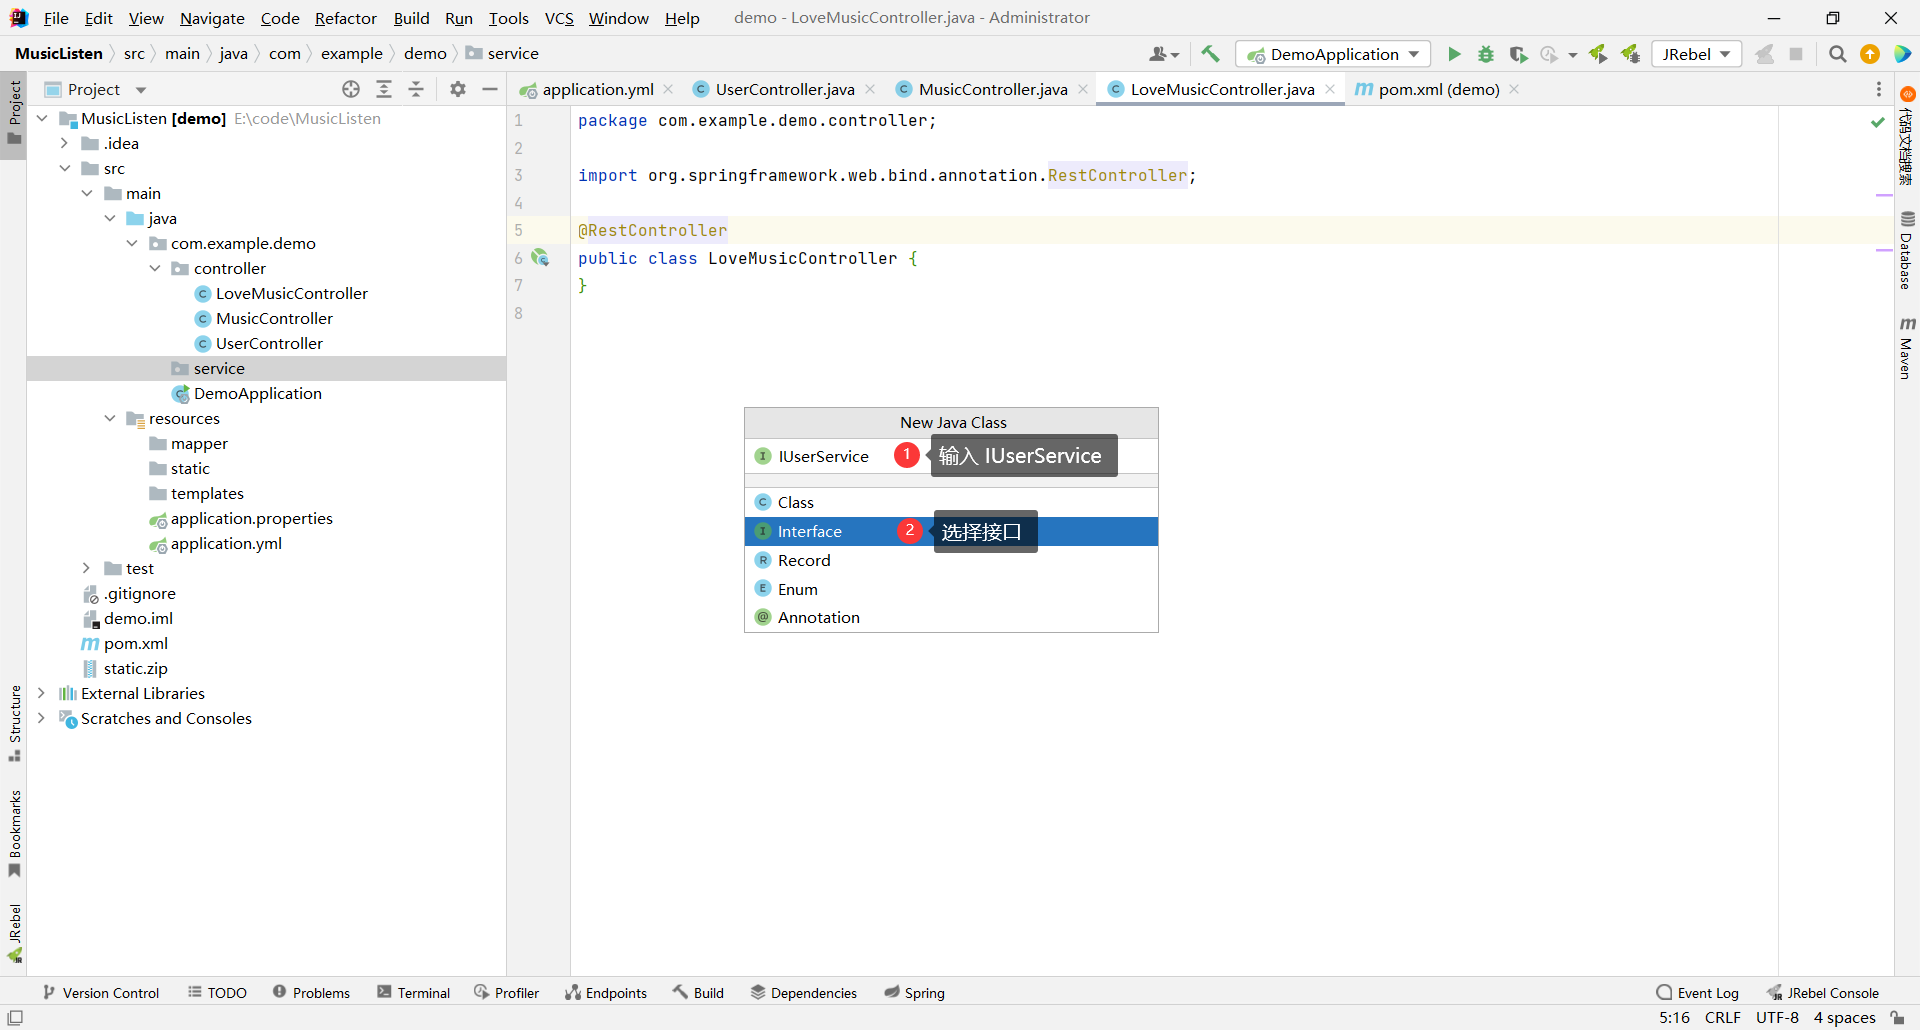
按照 MP 要求 , 我们需要去继承 IService<要操作的数据> 接口
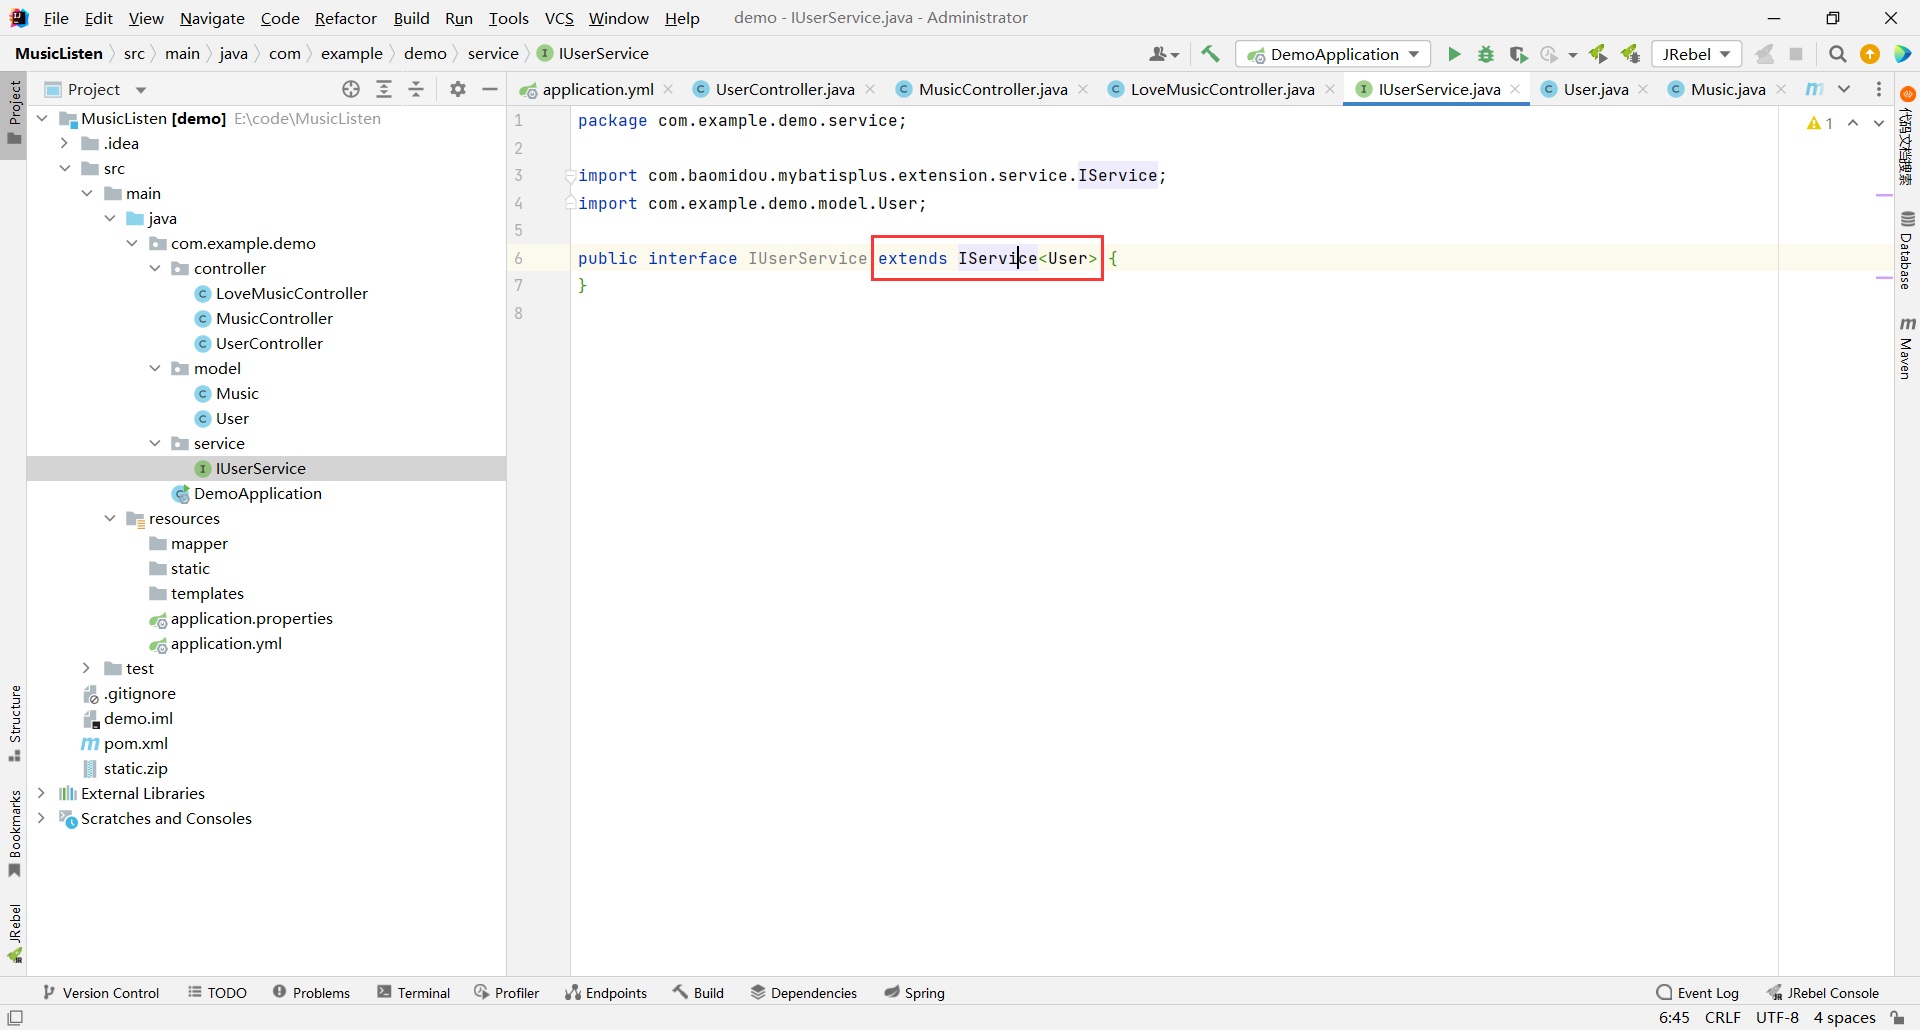
```java
package com.example.demo.service;
import com.baomidou.mybatisplus.extension.service.IService;
import com.example.demo.model.User;
public interface IUserService extends IService {
}
```
然后接下来去实现 IMusicService

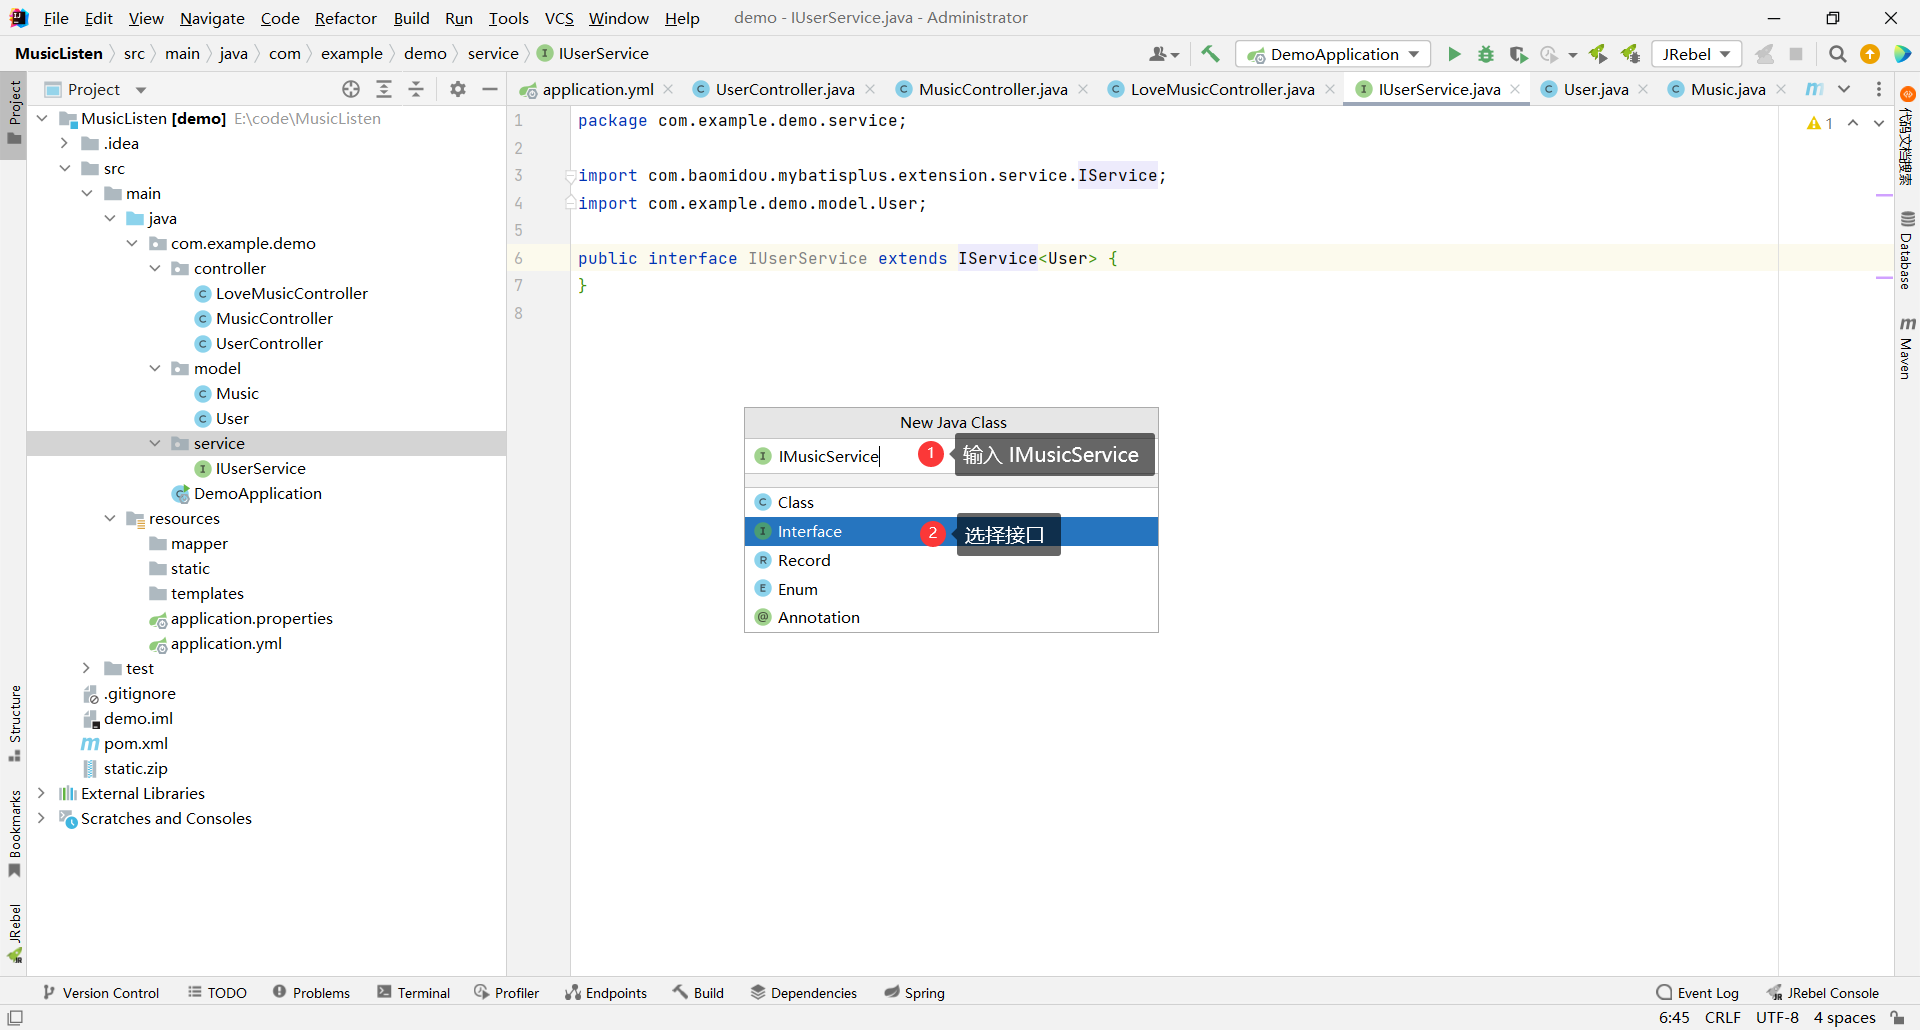
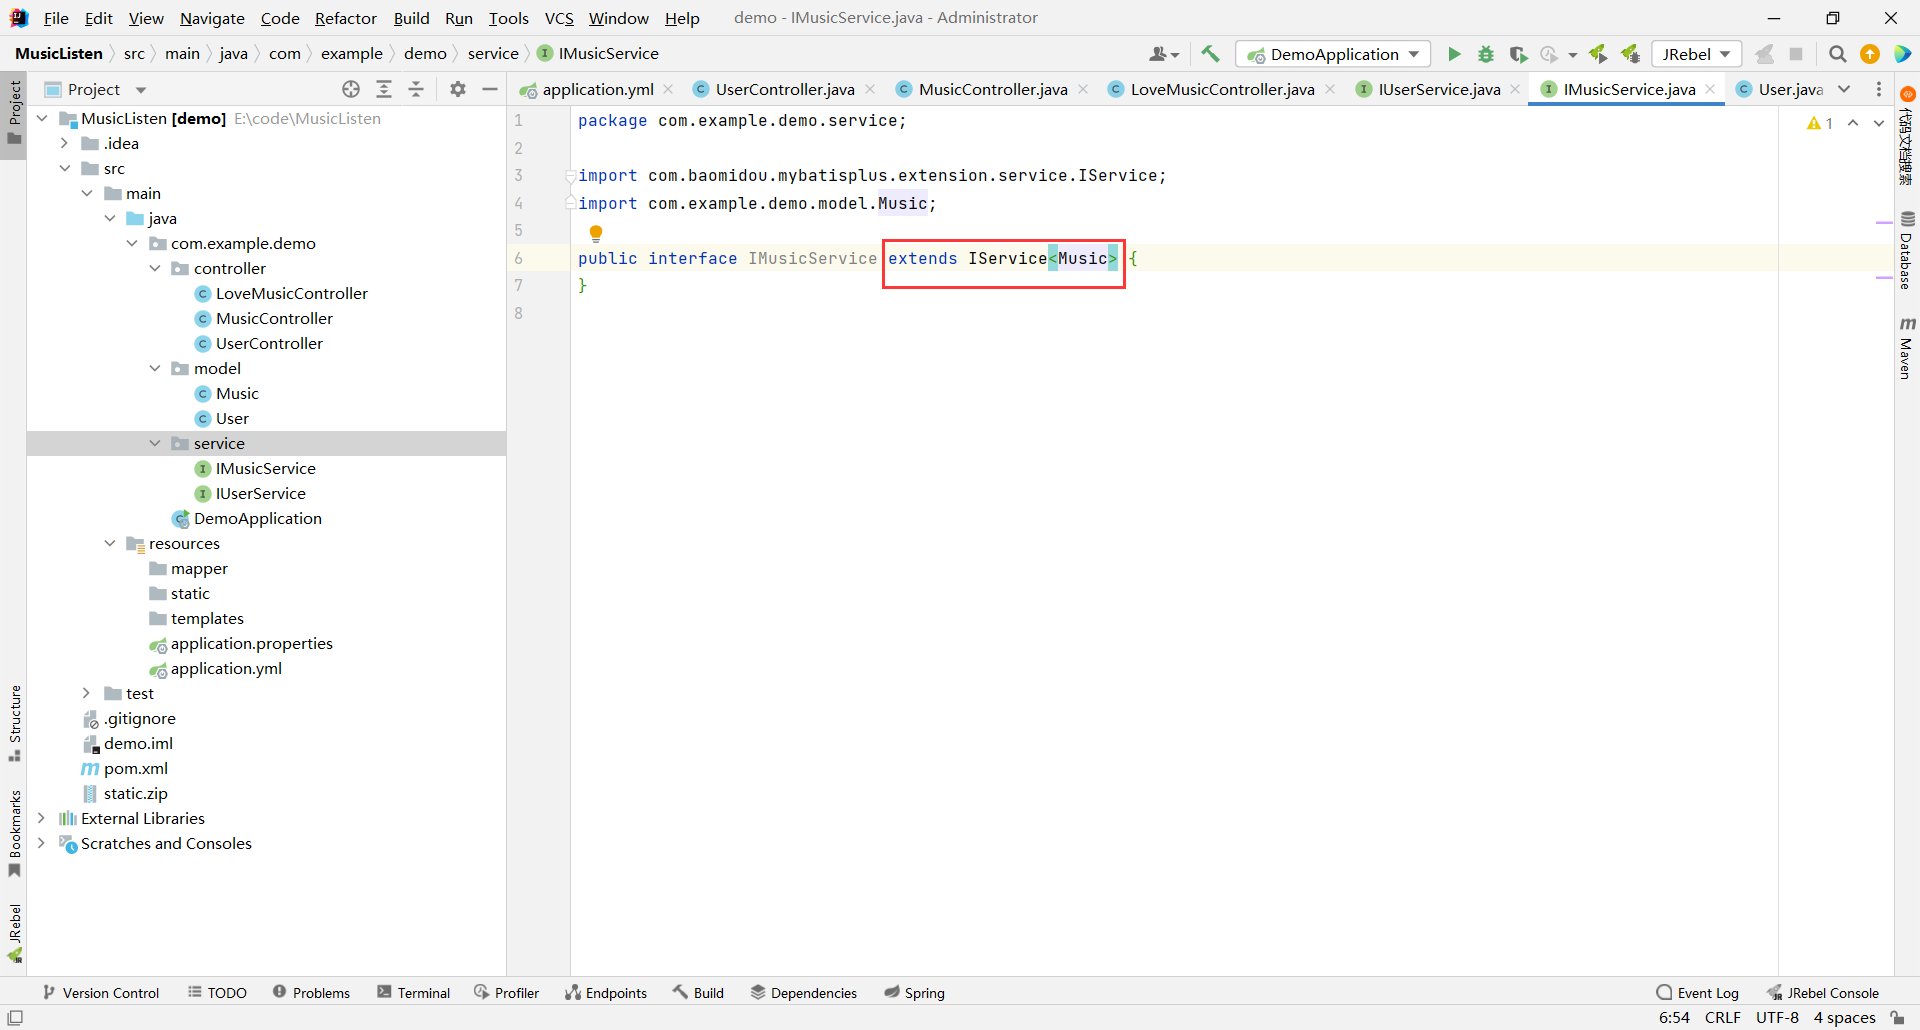
```java
package com.example.demo.service;
import com.baomidou.mybatisplus.extension.service.IService;
import com.example.demo.model.Music;
public interface IMusicService extends IService {
}
```
最后创建 ILoveMusicService
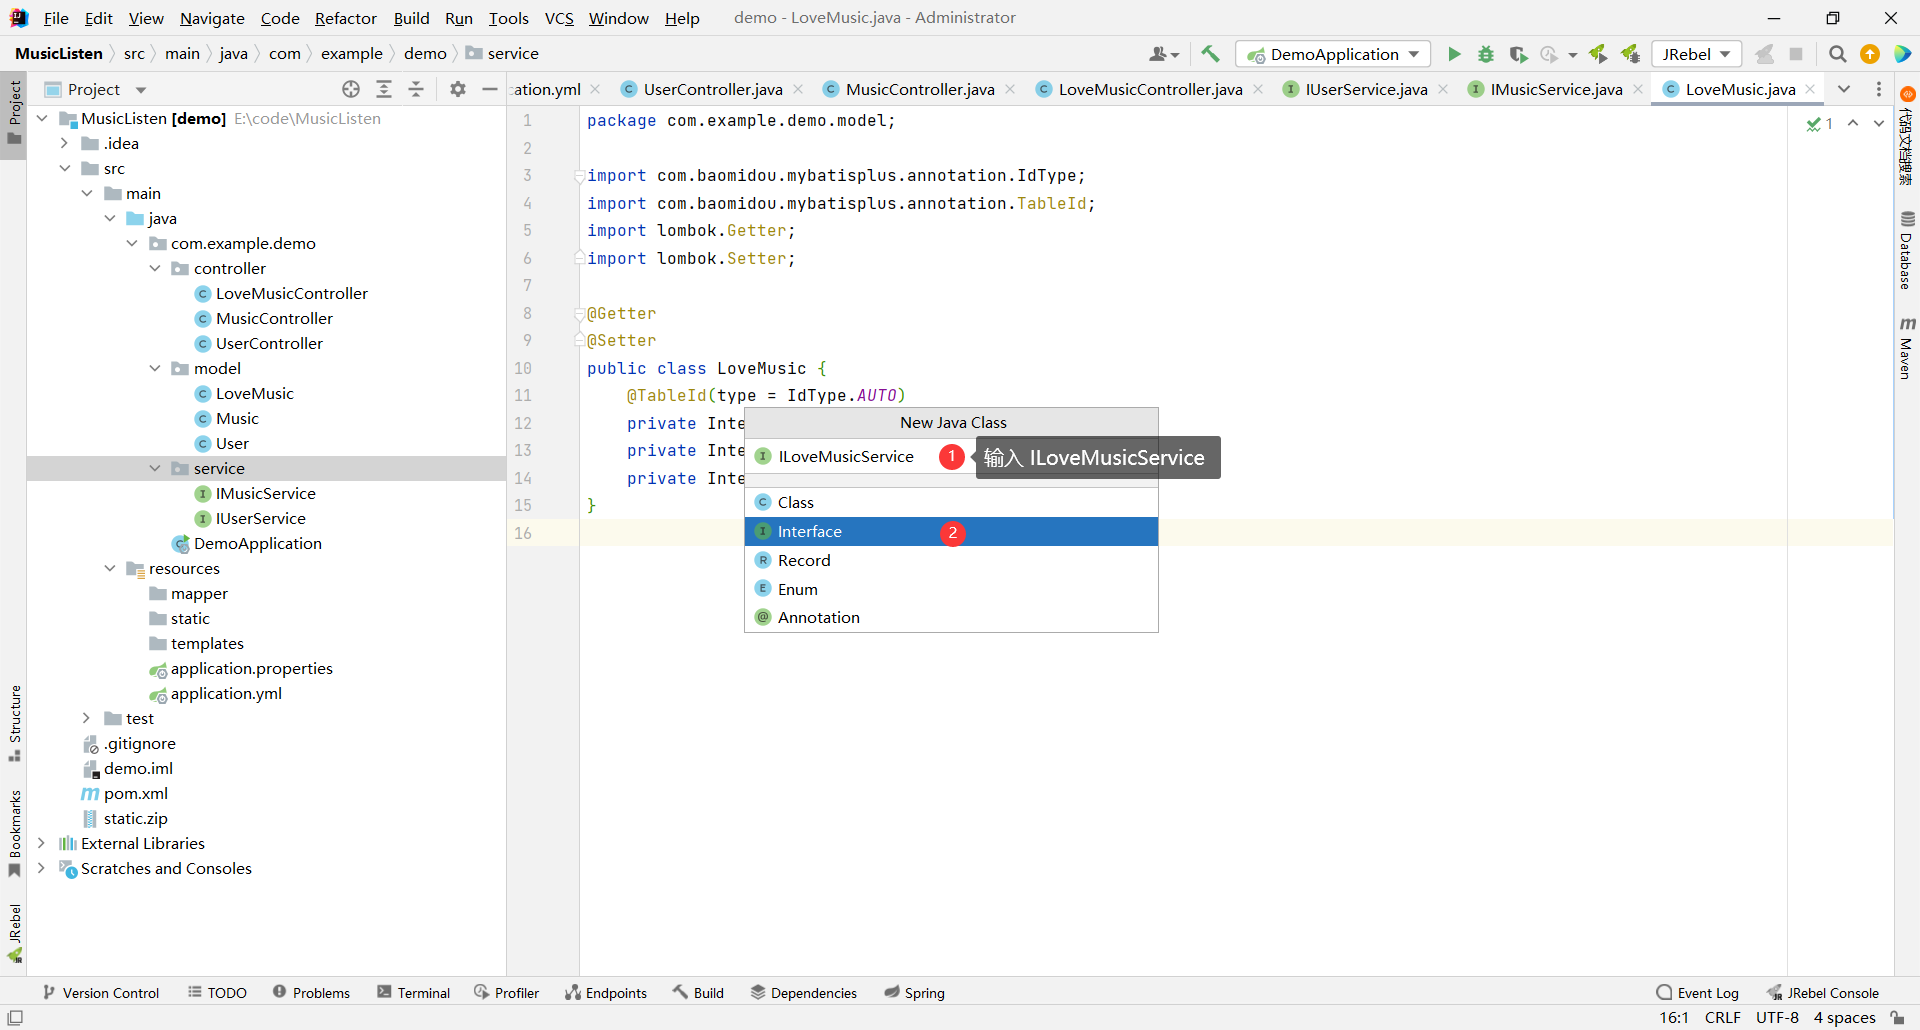
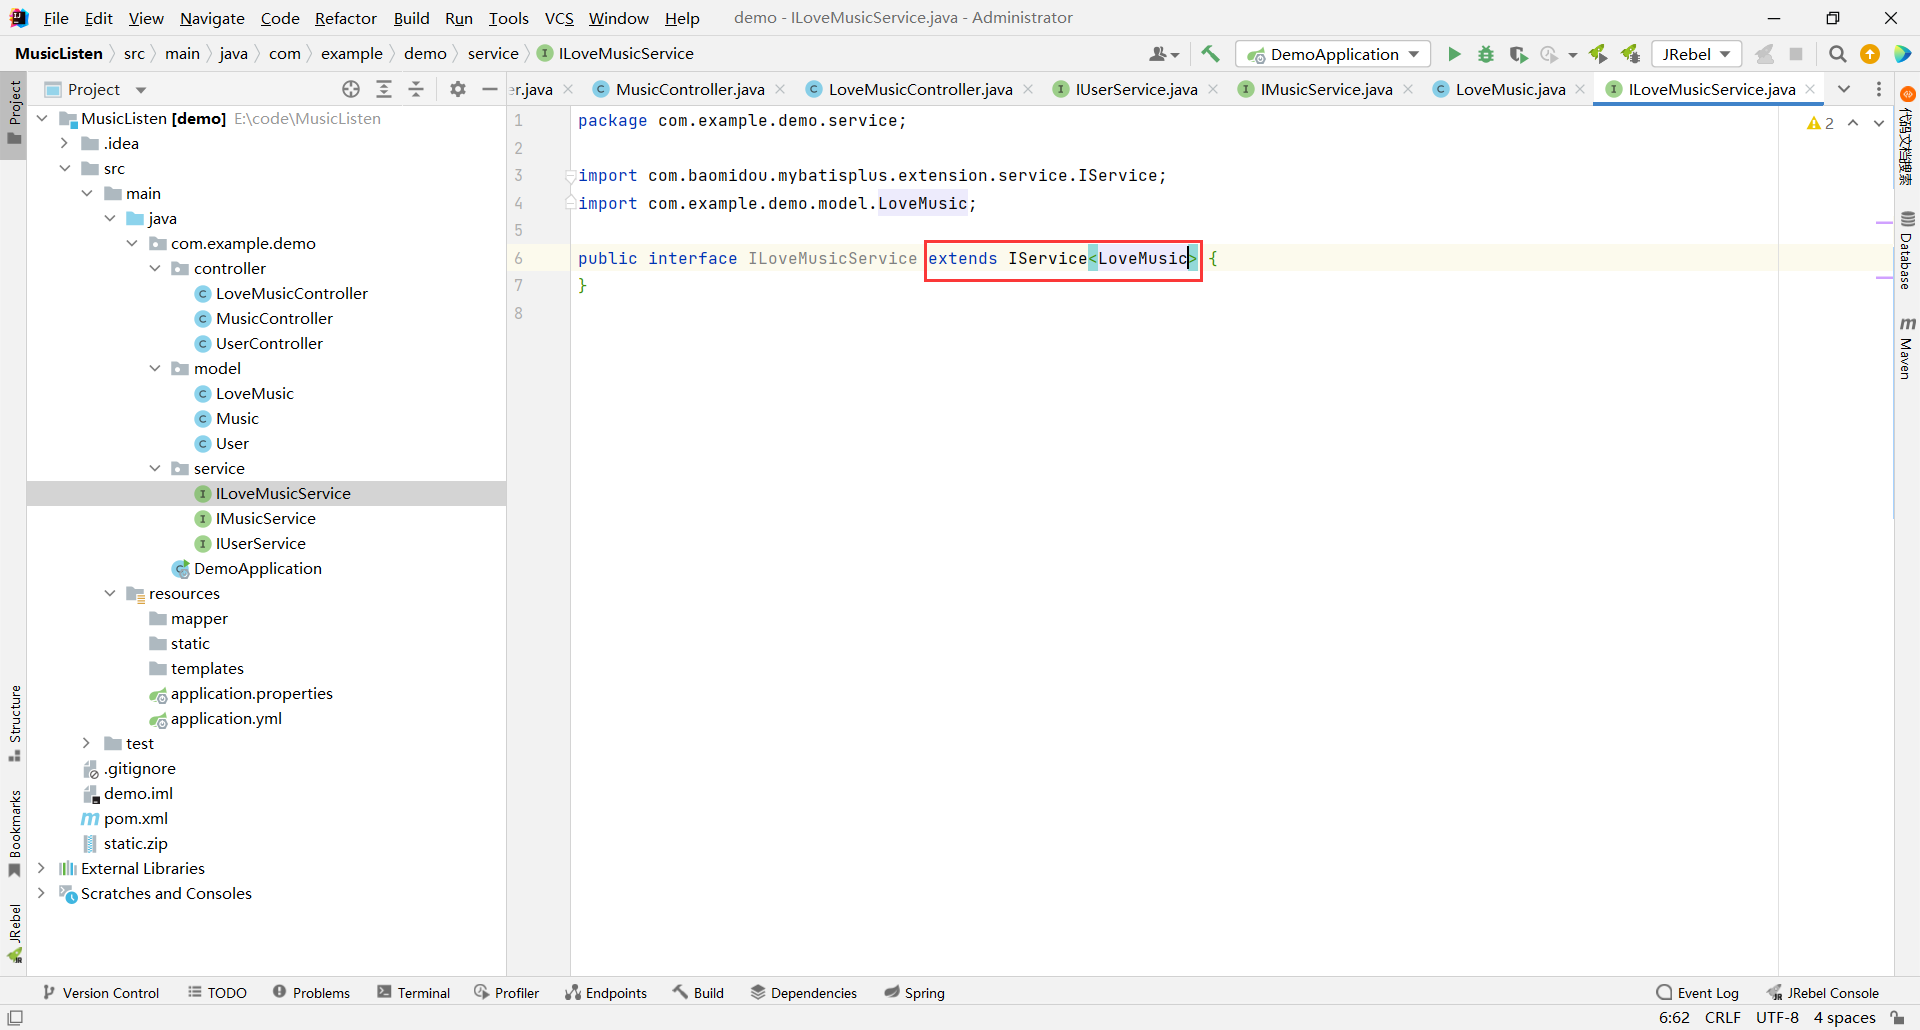
```java
package com.example.demo.service;
import com.baomidou.mybatisplus.extension.service.IService;
import com.example.demo.model.LoveMusic;
public interface ILoveMusicService extends IService {
}
```
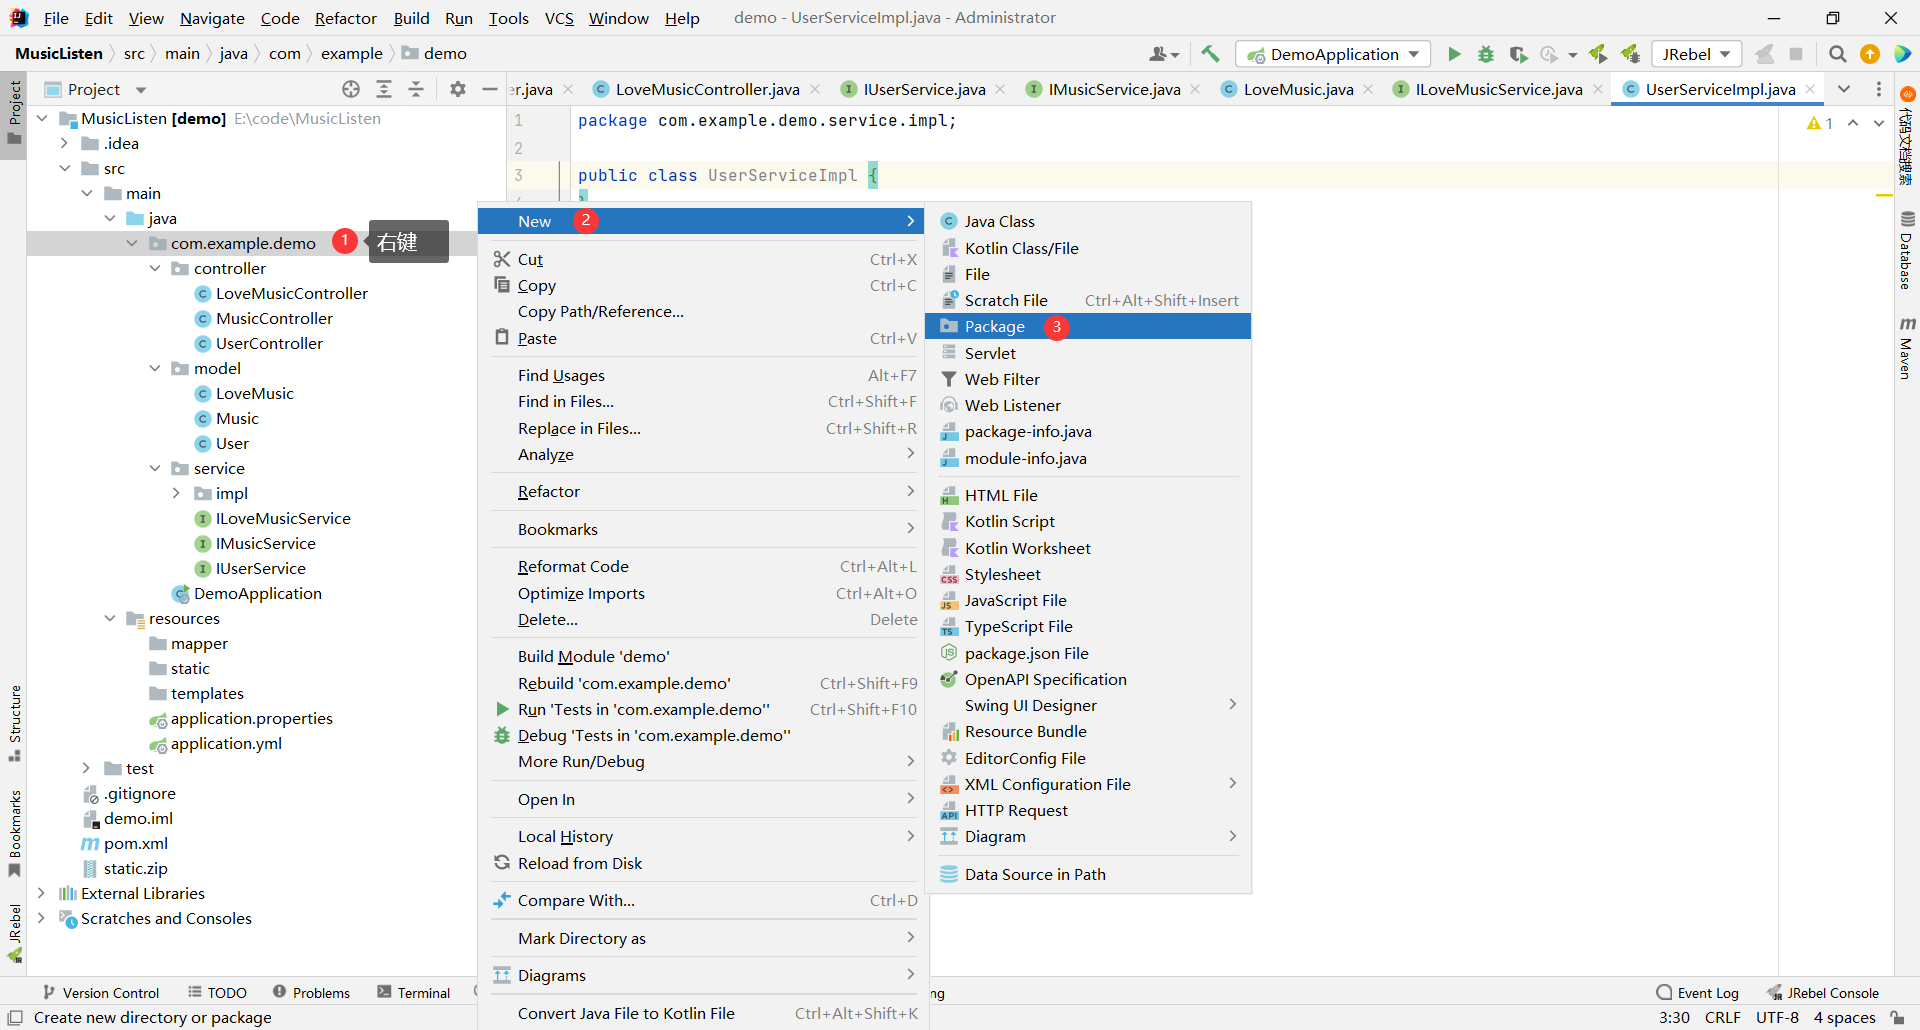
#### 实现类
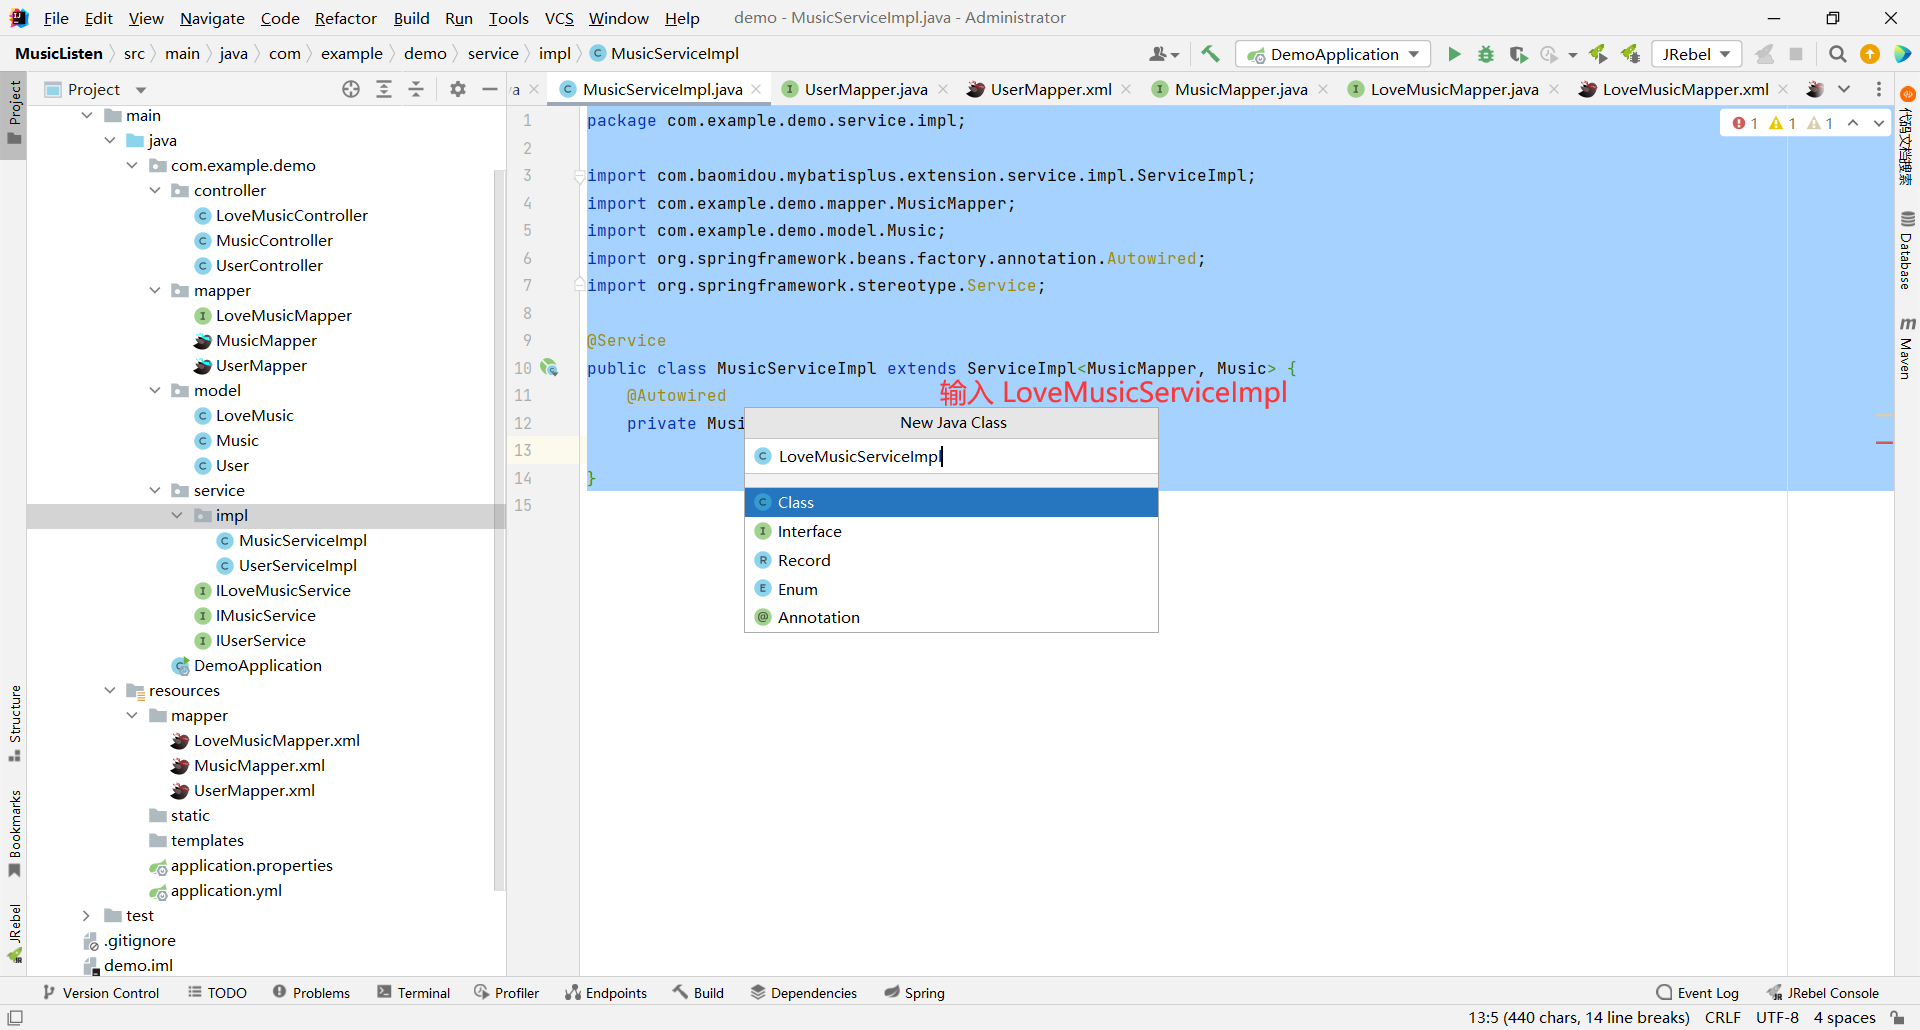
我们先在 service 层下面新创建一个包 , 叫做 impl
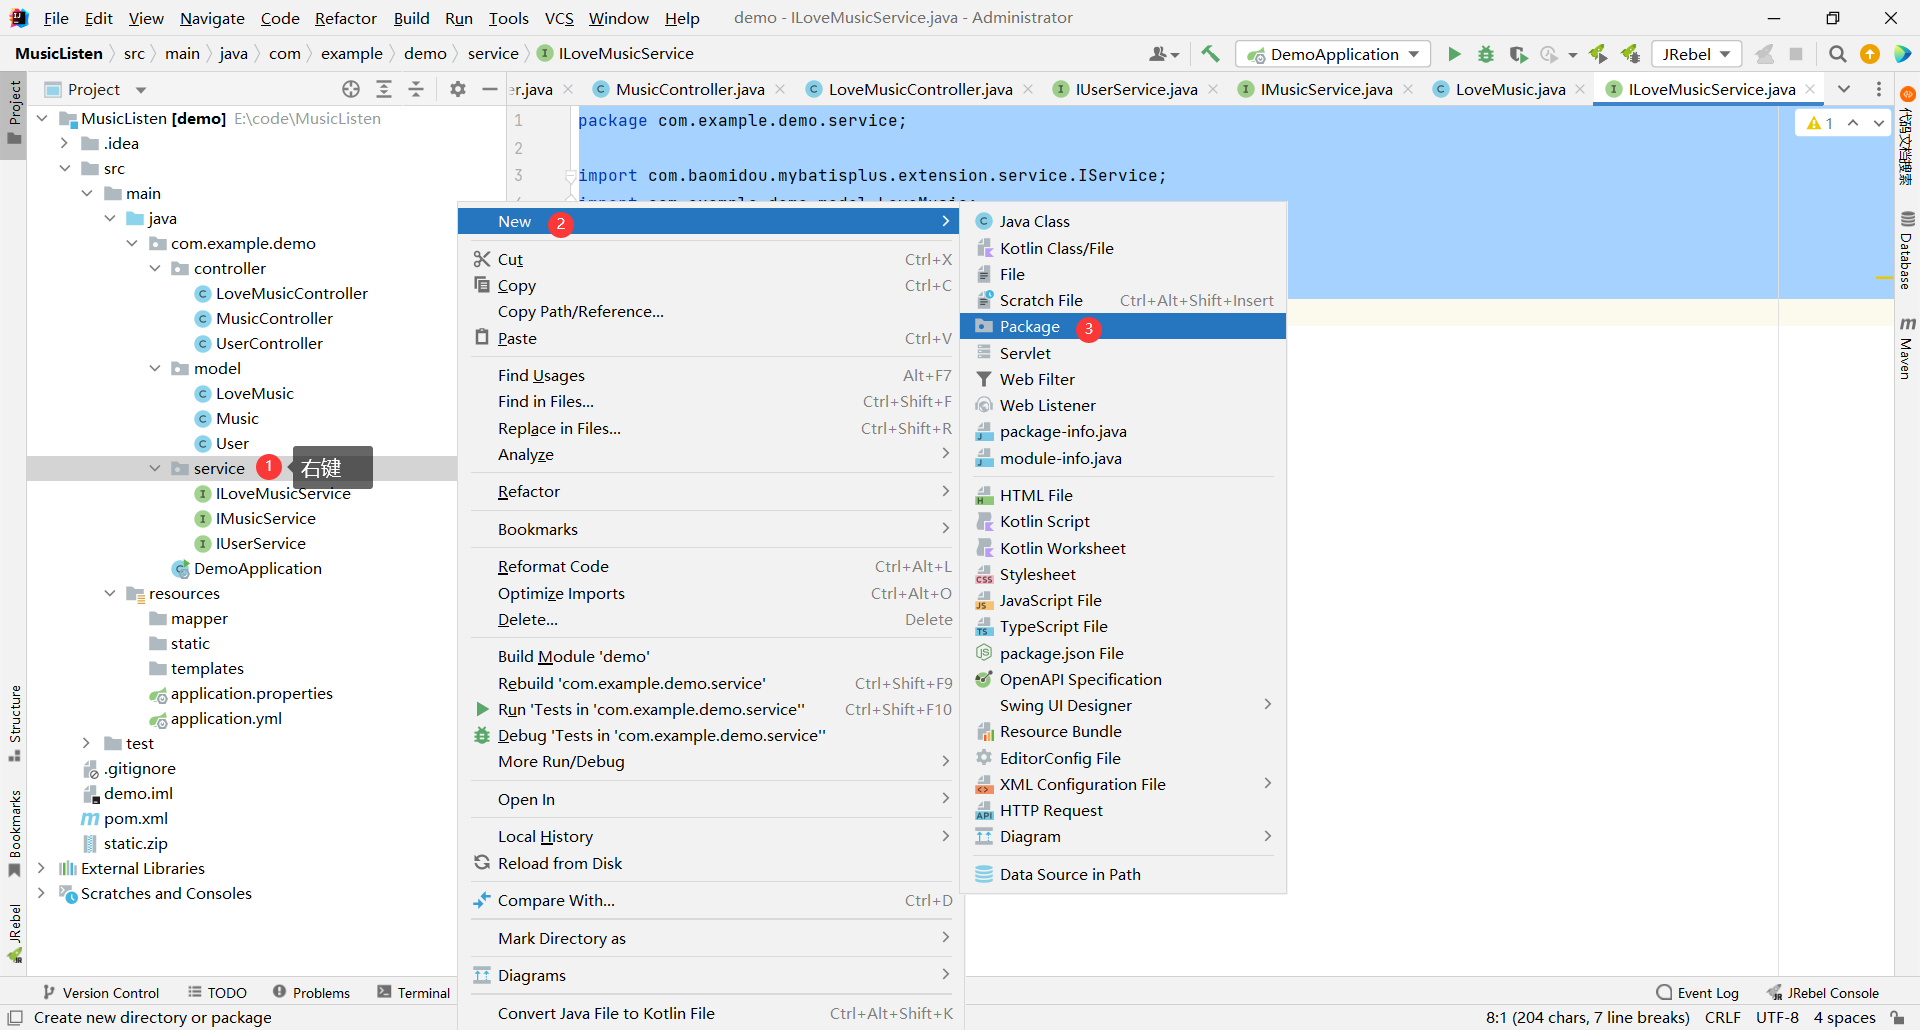
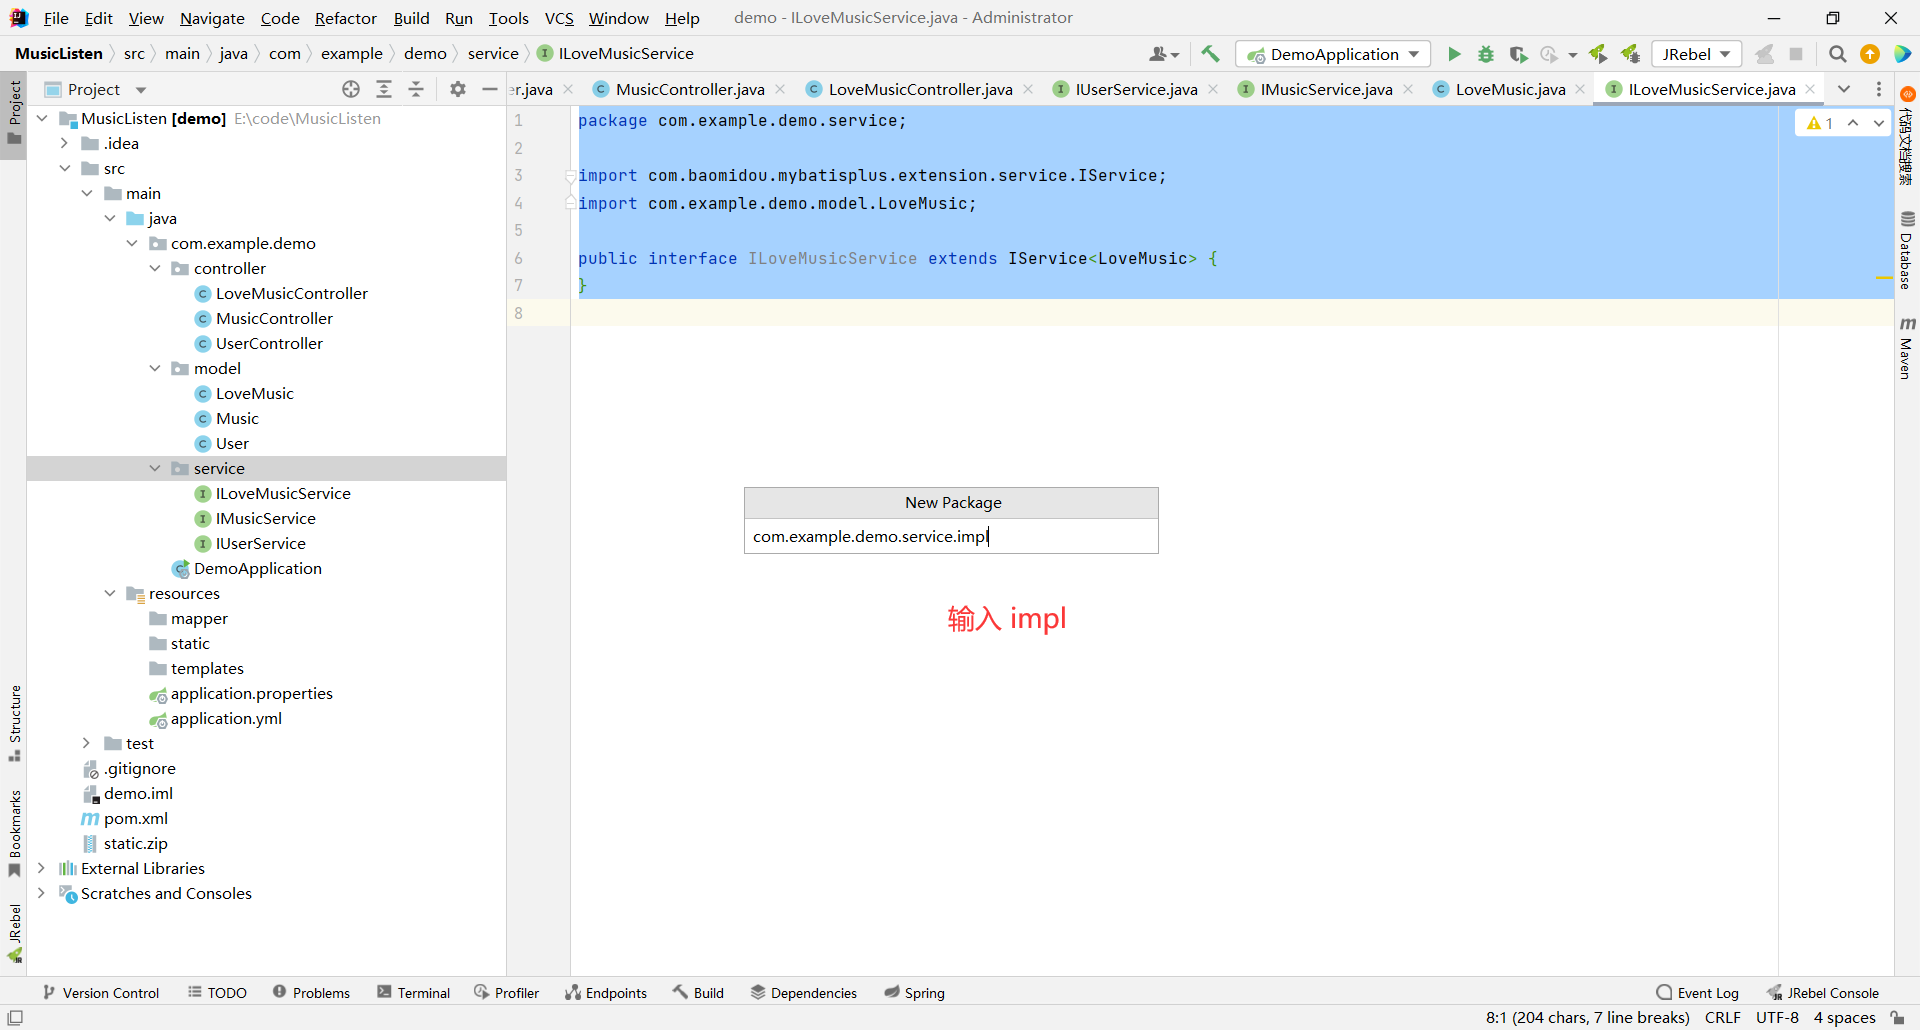
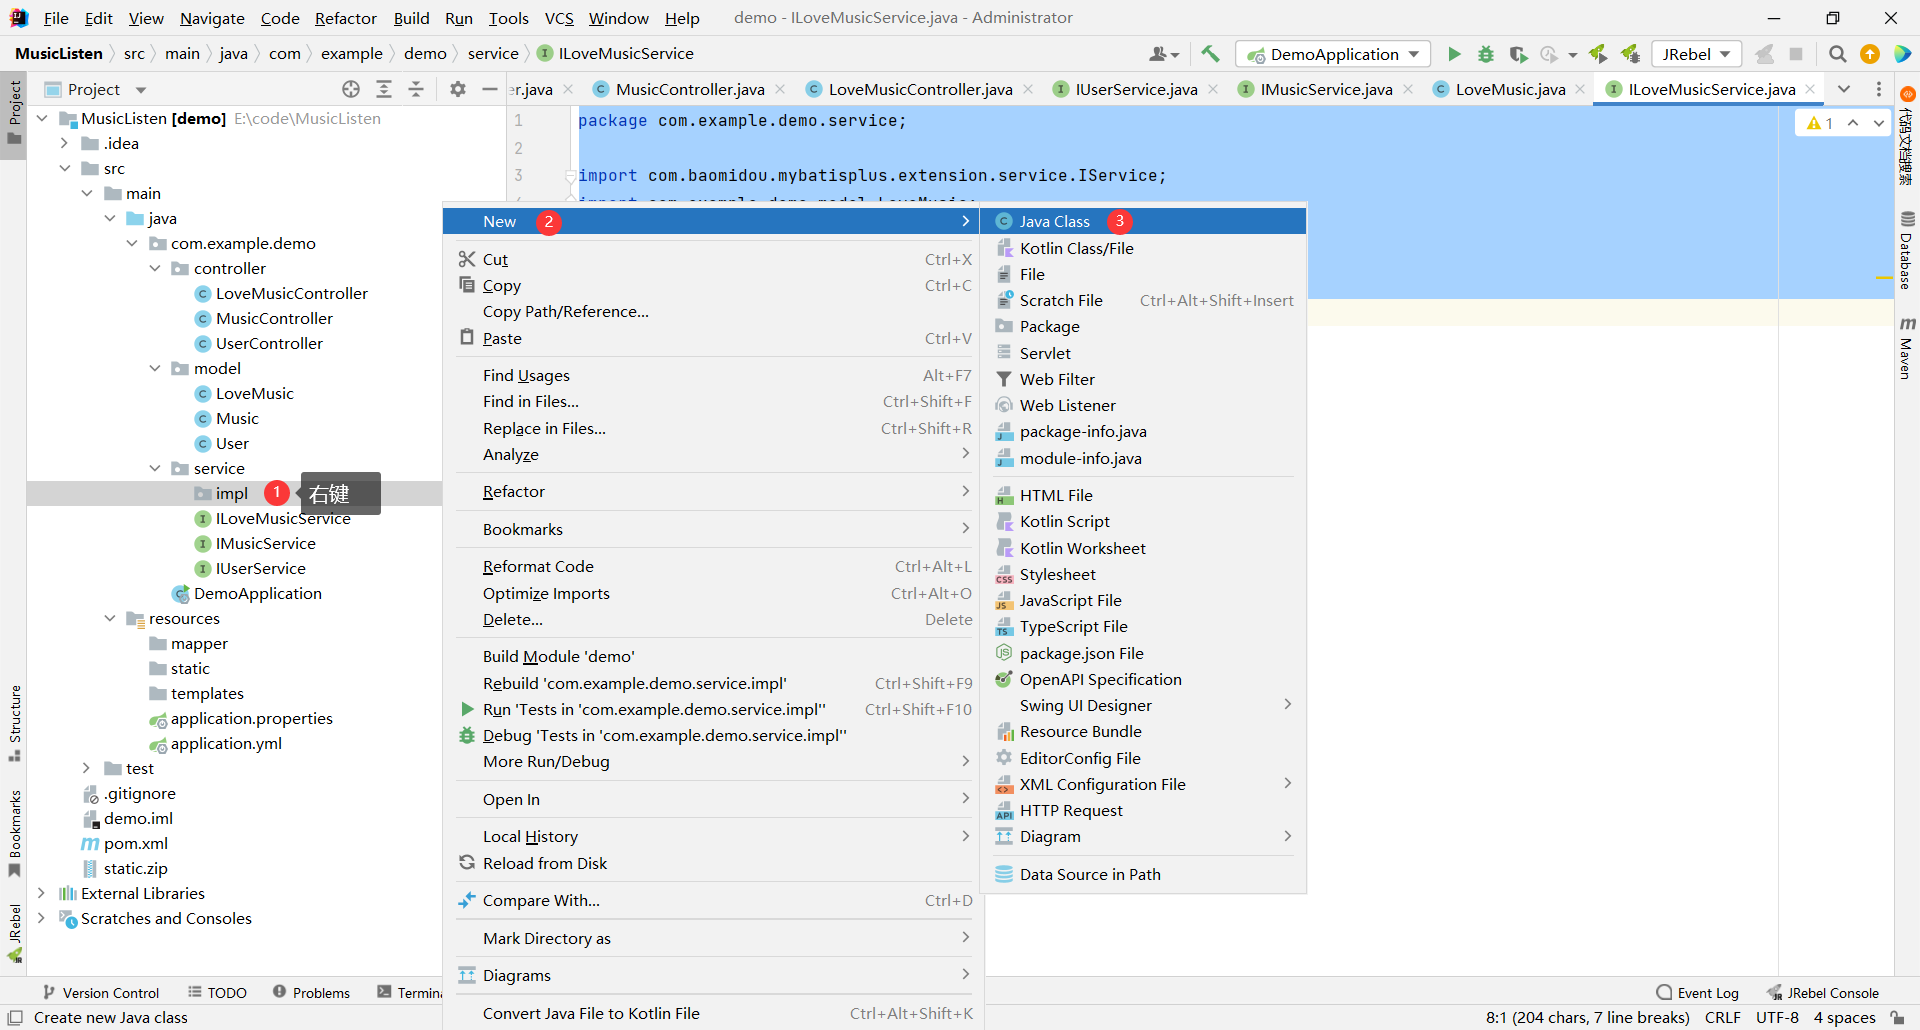
然后在 impl 包下面创建各自的实体类
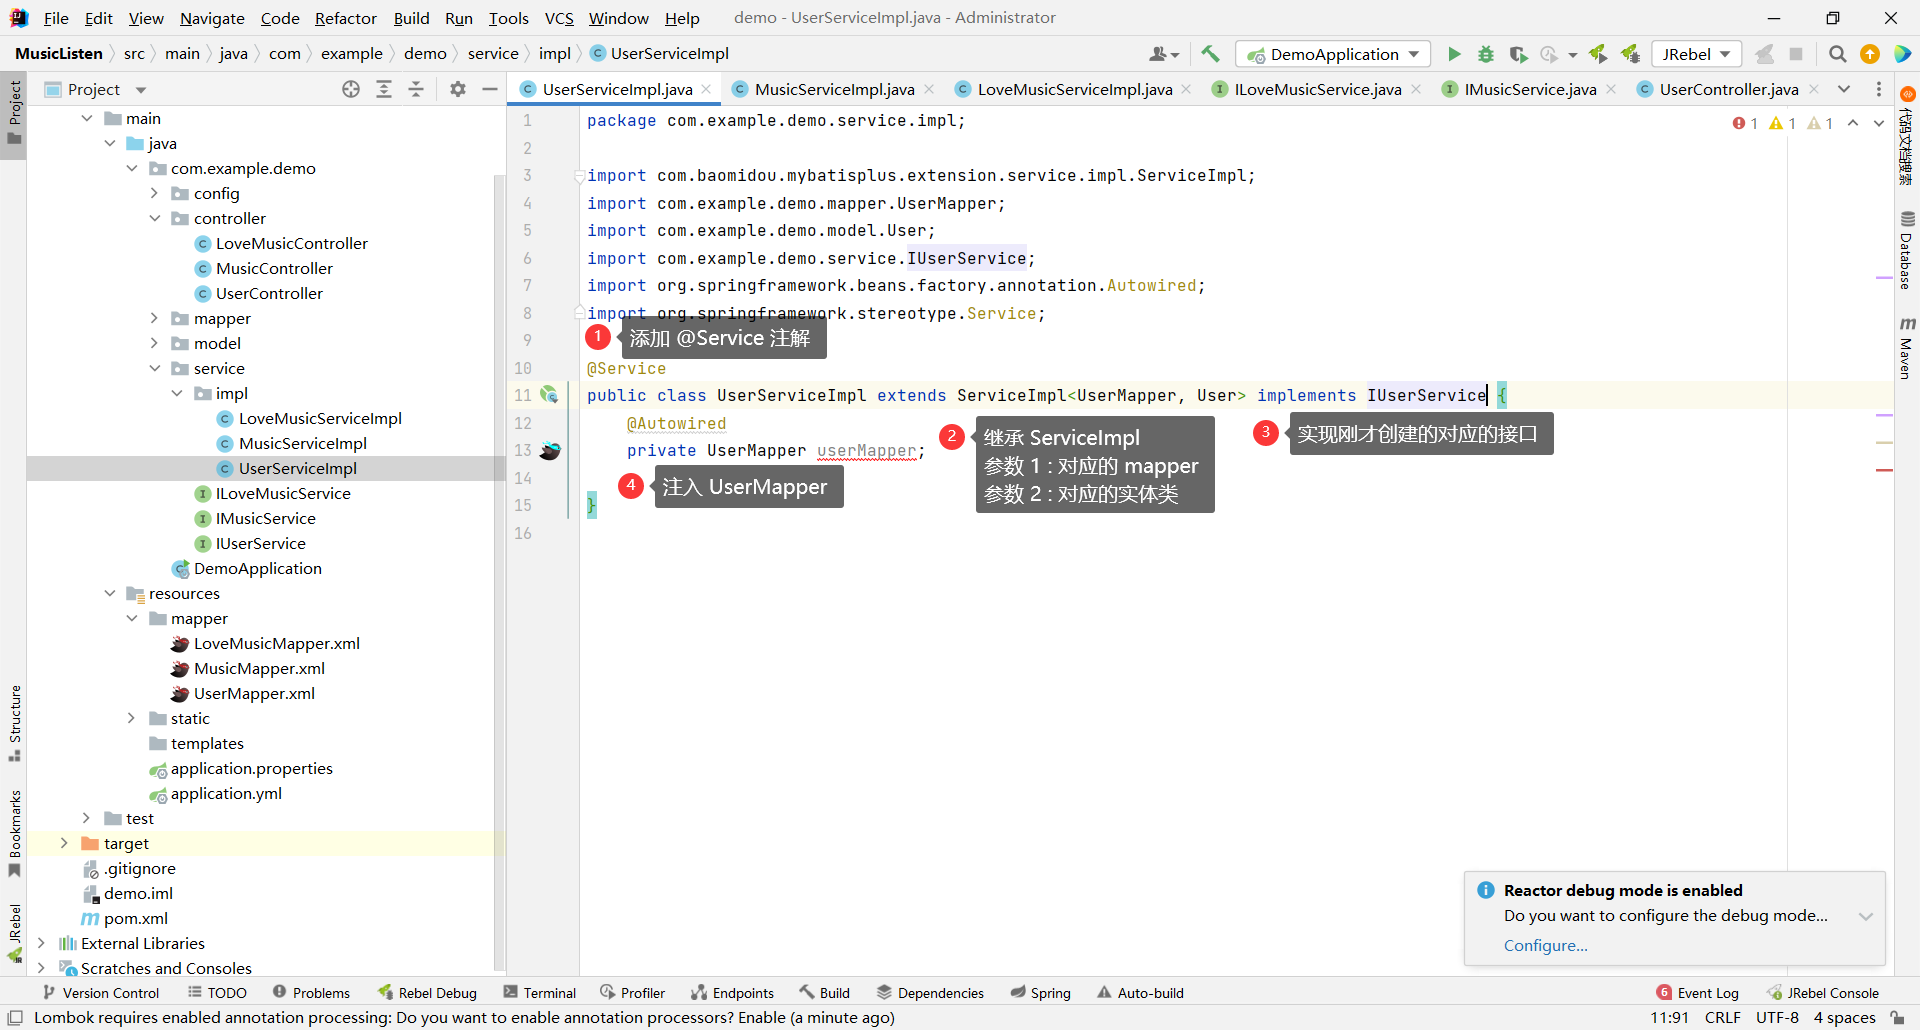
1. UserServiceImpl
我们需要做三件事
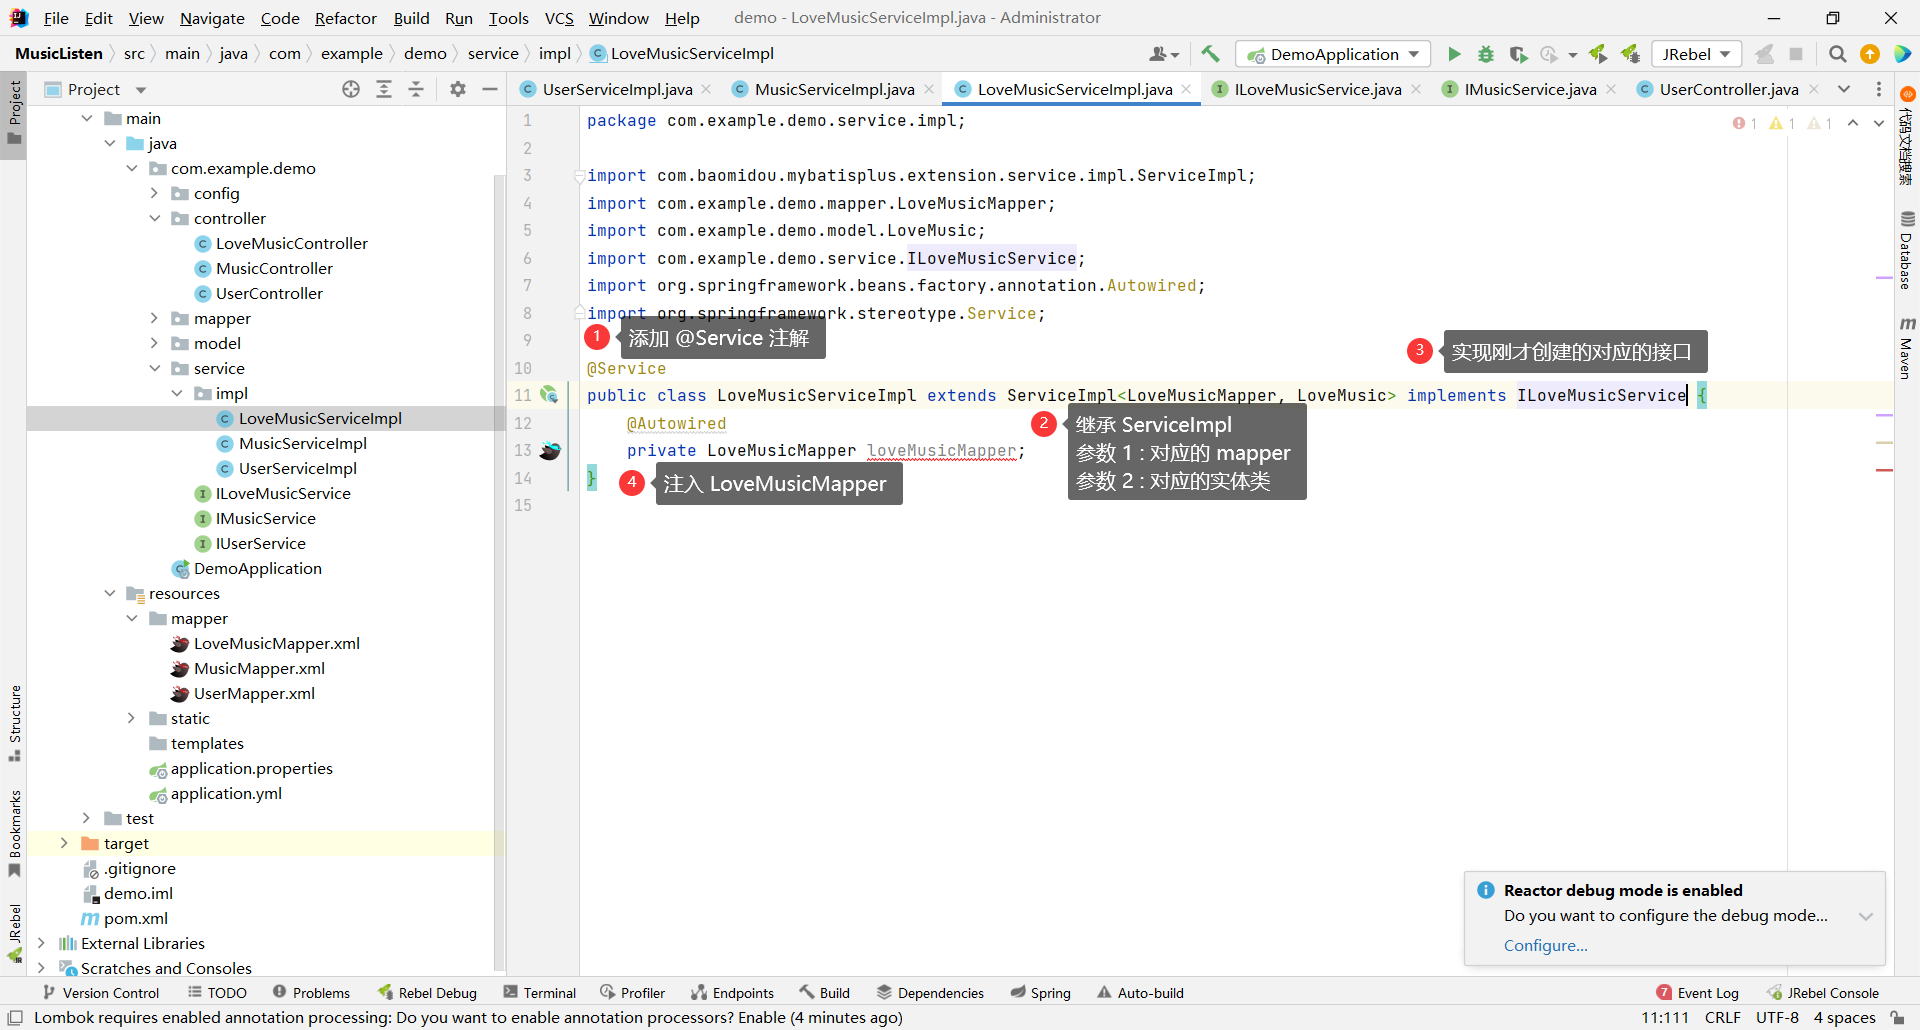
(1) 添加 @Service 注解
(2) 继承 ServiceImpl 类 , 也就是 extends ServiceImpl , 第一个参数填写对应的 mapper 层 , 第二个参数填写对应的实体类
(3) 实现我们刚才创建的对应的接口
然后我们可以将 UserMapper 注入进来
```java
package com.example.demo.service.impl;
import com.baomidou.mybatisplus.extension.service.impl.ServiceImpl;
import com.example.demo.mapper.UserMapper;
import com.example.demo.model.User;
import com.example.demo.service.IUserService;
import org.springframework.beans.factory.annotation.Autowired;
import org.springframework.stereotype.Service;
@Service
public class UserServiceImpl extends ServiceImpl implements IUserService {
@Autowired
private UserMapper userMapper;
}
```
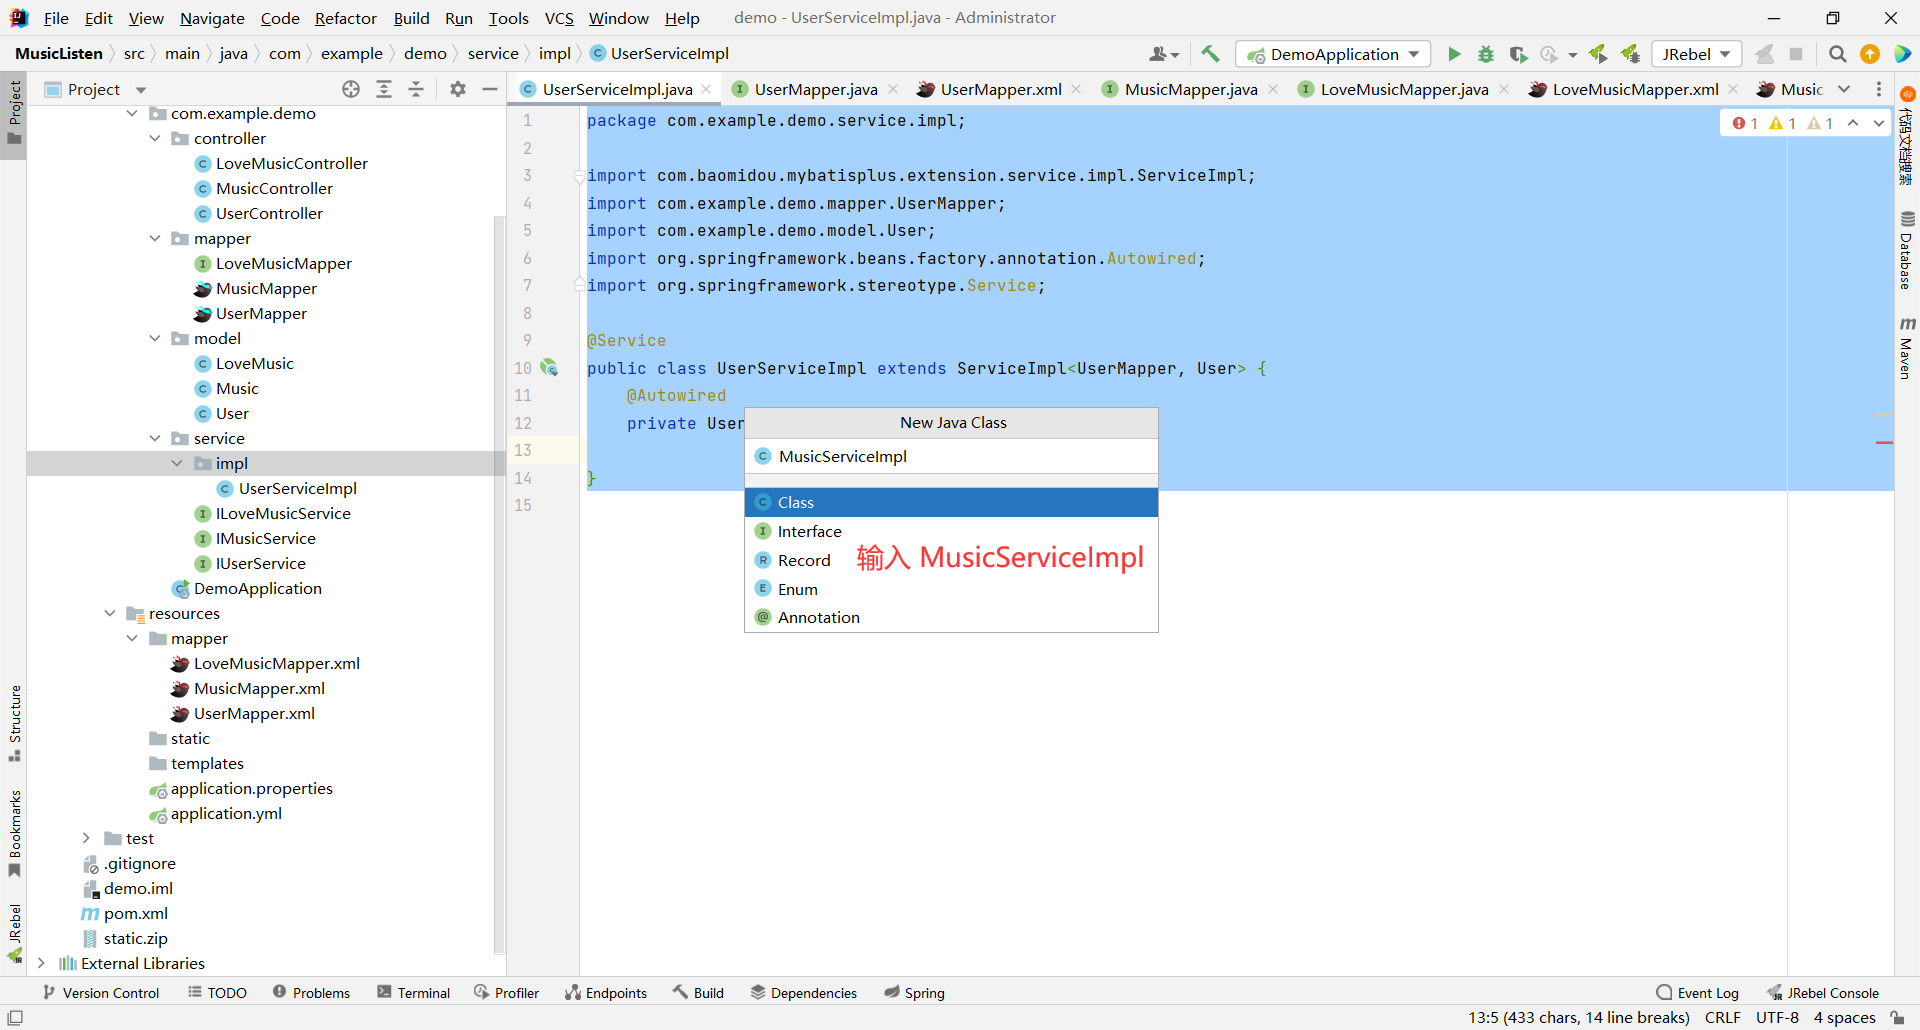
2. MusicServiceImpl

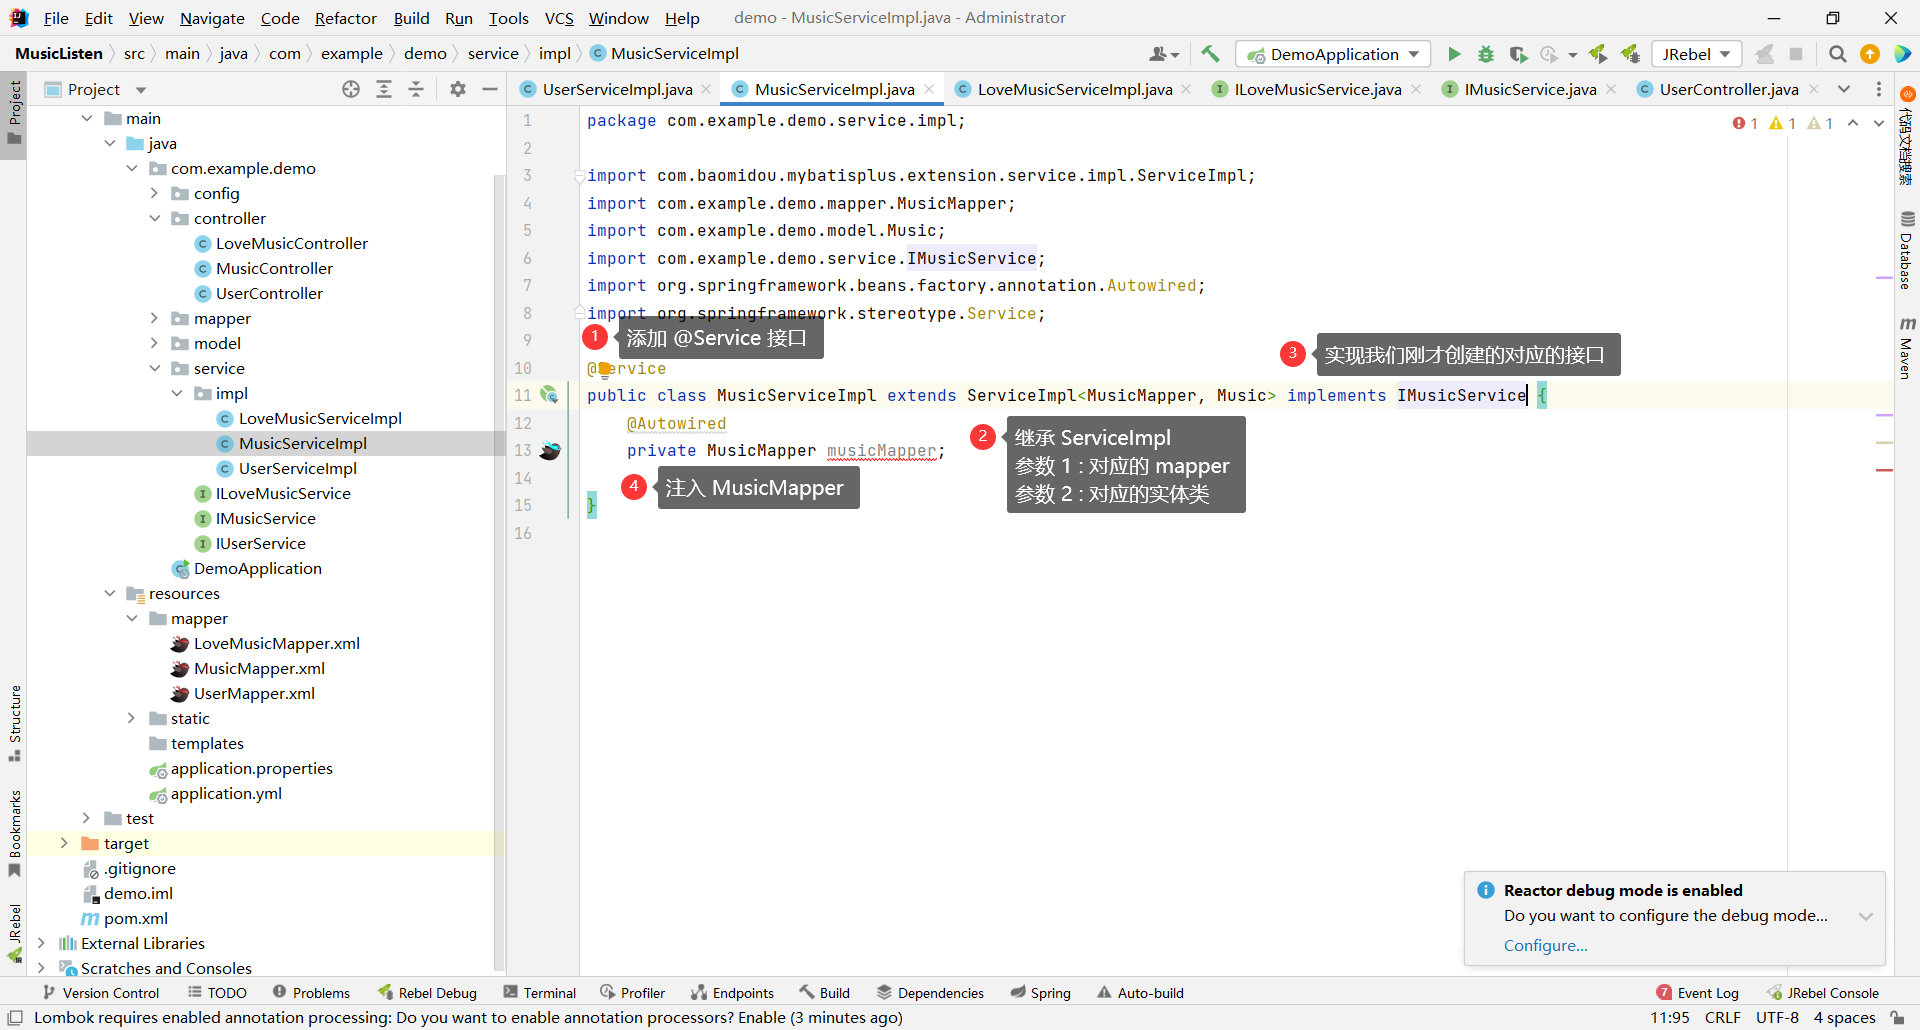
```java
package com.example.demo.service.impl;
import com.baomidou.mybatisplus.extension.service.impl.ServiceImpl;
import com.example.demo.mapper.MusicMapper;
import com.example.demo.model.Music;
import com.example.demo.service.IMusicService;
import org.springframework.beans.factory.annotation.Autowired;
import org.springframework.stereotype.Service;
@Service
public class MusicServiceImpl extends ServiceImpl implements IMusicService {
@Autowired
private MusicMapper musicMapper;
}
```
3. LoveMusicServiceImpl

```java
package com.example.demo.service.impl;
import com.baomidou.mybatisplus.extension.service.impl.ServiceImpl;
import com.example.demo.mapper.LoveMusicMapper;
import com.example.demo.model.LoveMusic;
import com.example.demo.service.ILoveMusicService;
import org.springframework.beans.factory.annotation.Autowired;
import org.springframework.stereotype.Service;
@Service
public class LoveMusicServiceImpl extends ServiceImpl implements ILoveMusicService {
@Autowired
private LoveMusicMapper loveMusicMapper;
}
```
### 1.3.4 controller 层
那么 controller 层是与前端打交道的第一阵营 , 我们前端传输过来数据第一步要先在 controller 层中进行校验
所以我们来创建 controller 层
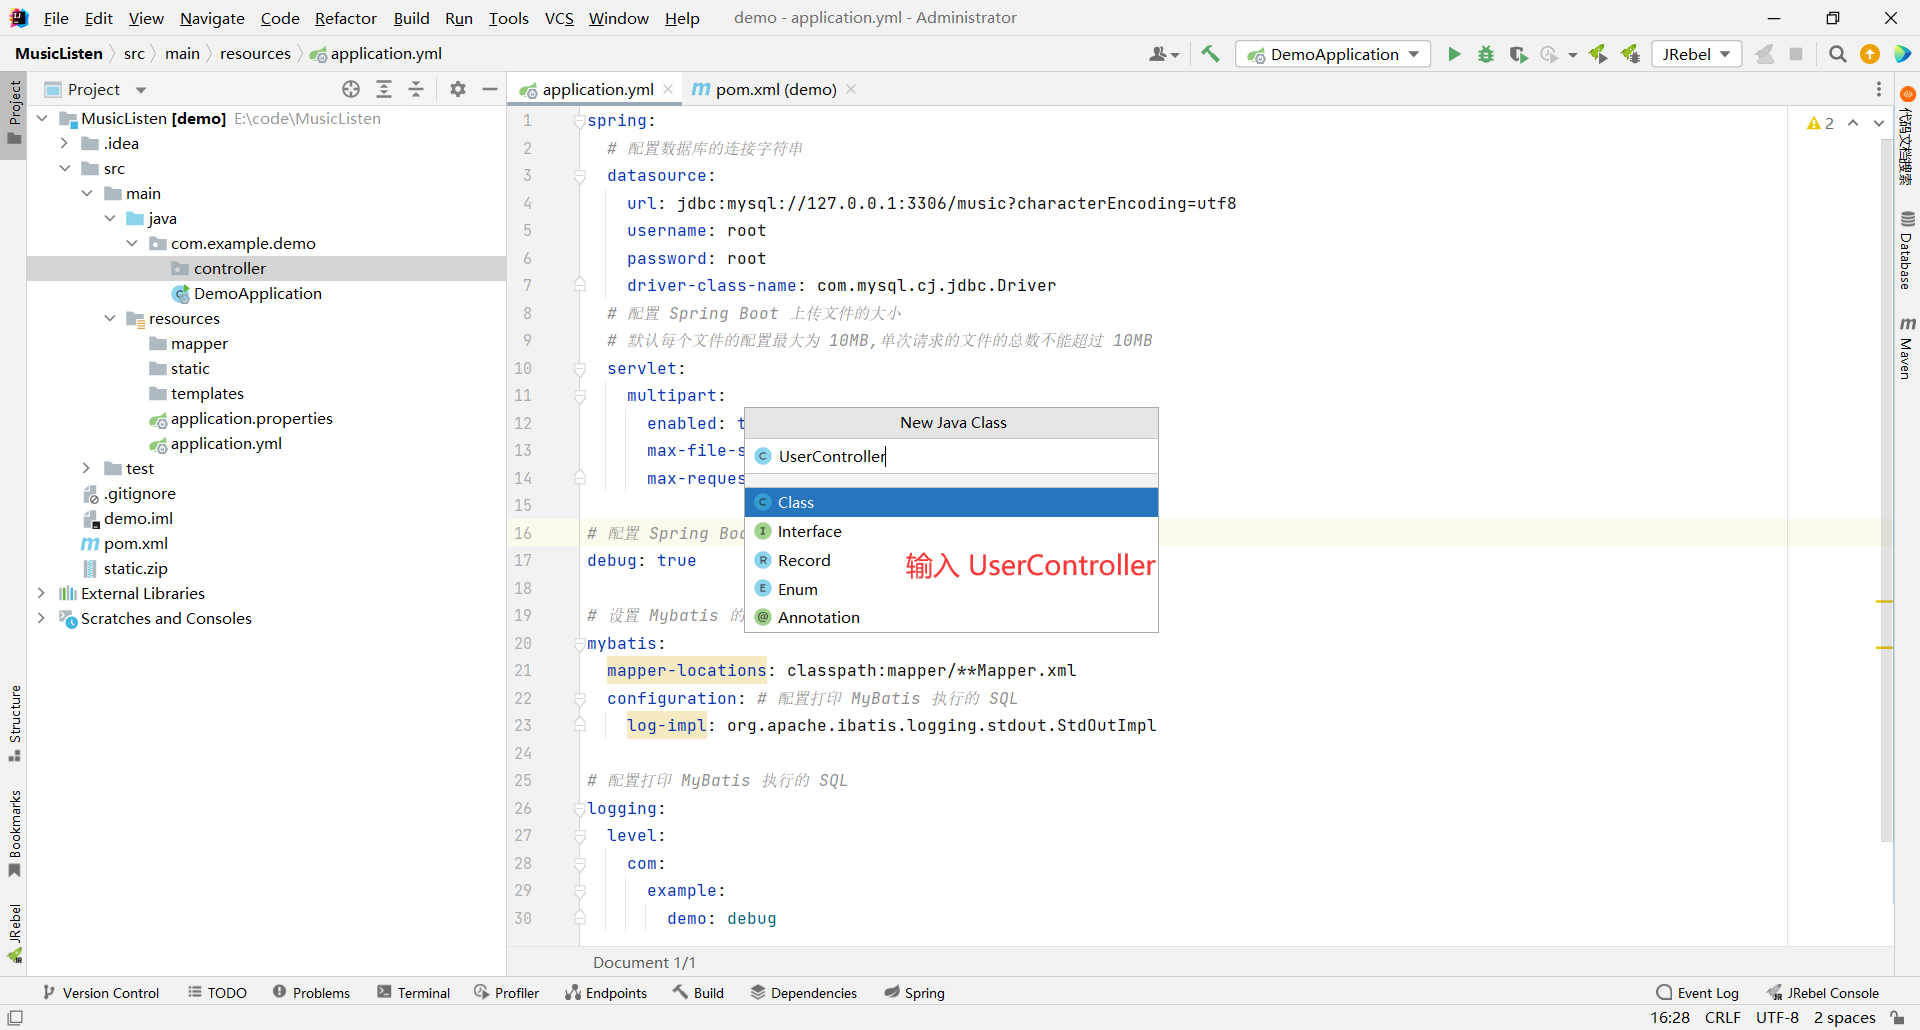
在最上面加上 @RestController 注解 , 然后将 UserService 注入进来
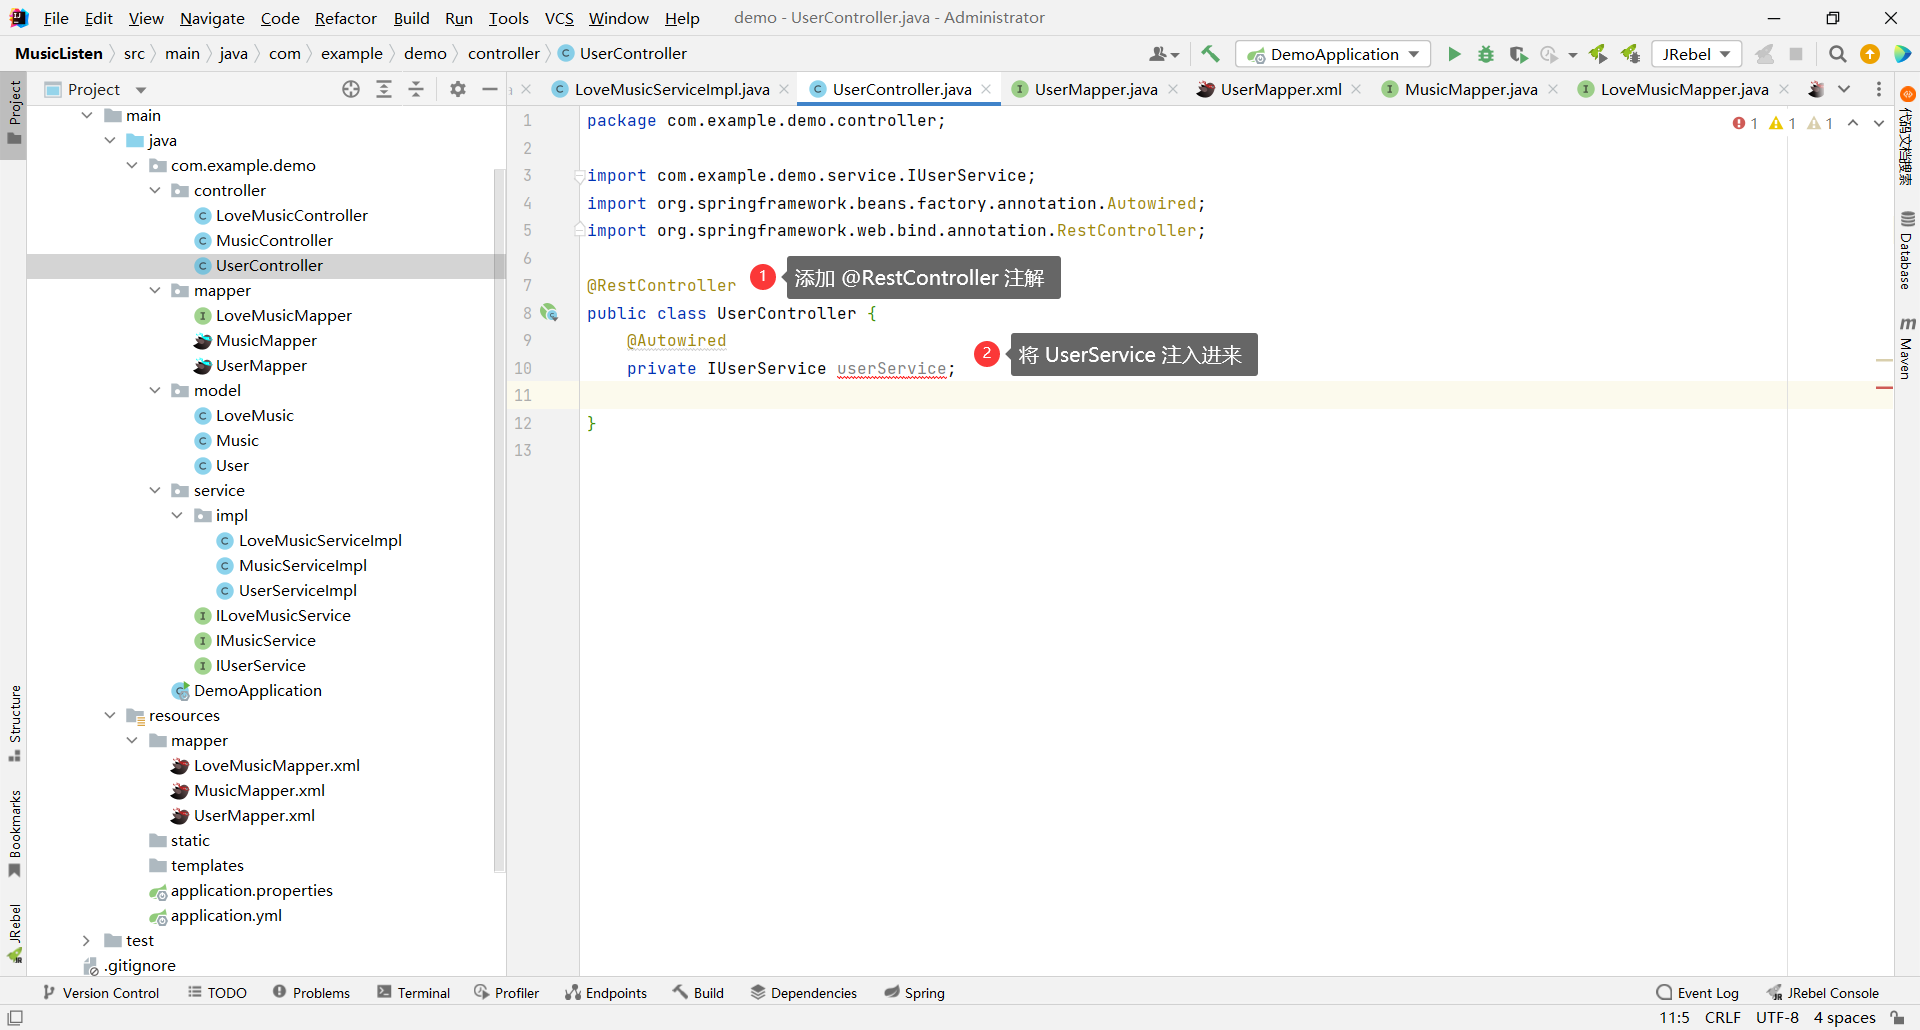
```java
package com.example.demo.controller;
import com.example.demo.service.IUserService;
import org.springframework.beans.factory.annotation.Autowired;
import org.springframework.web.bind.annotation.RestController;
@RestController
public class UserController {
@Autowired
private IUserService userService;
}
```
然后创建 MusicController

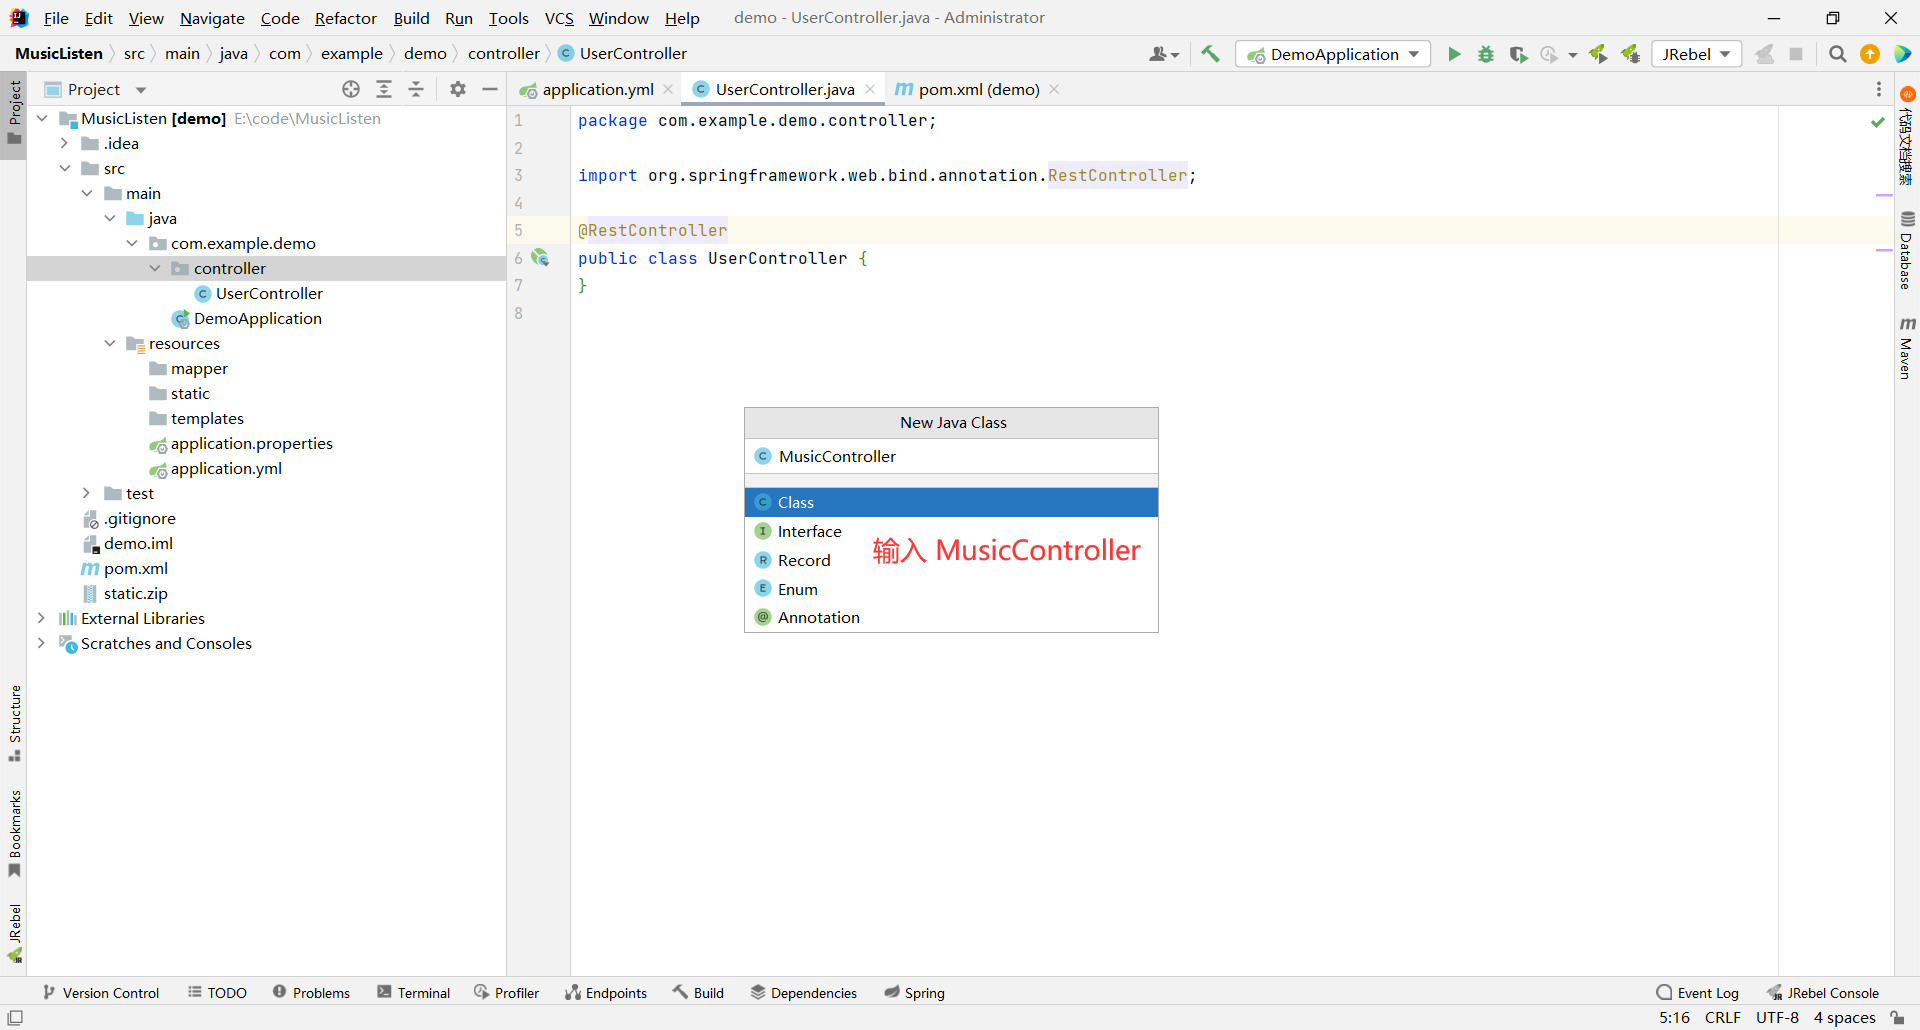
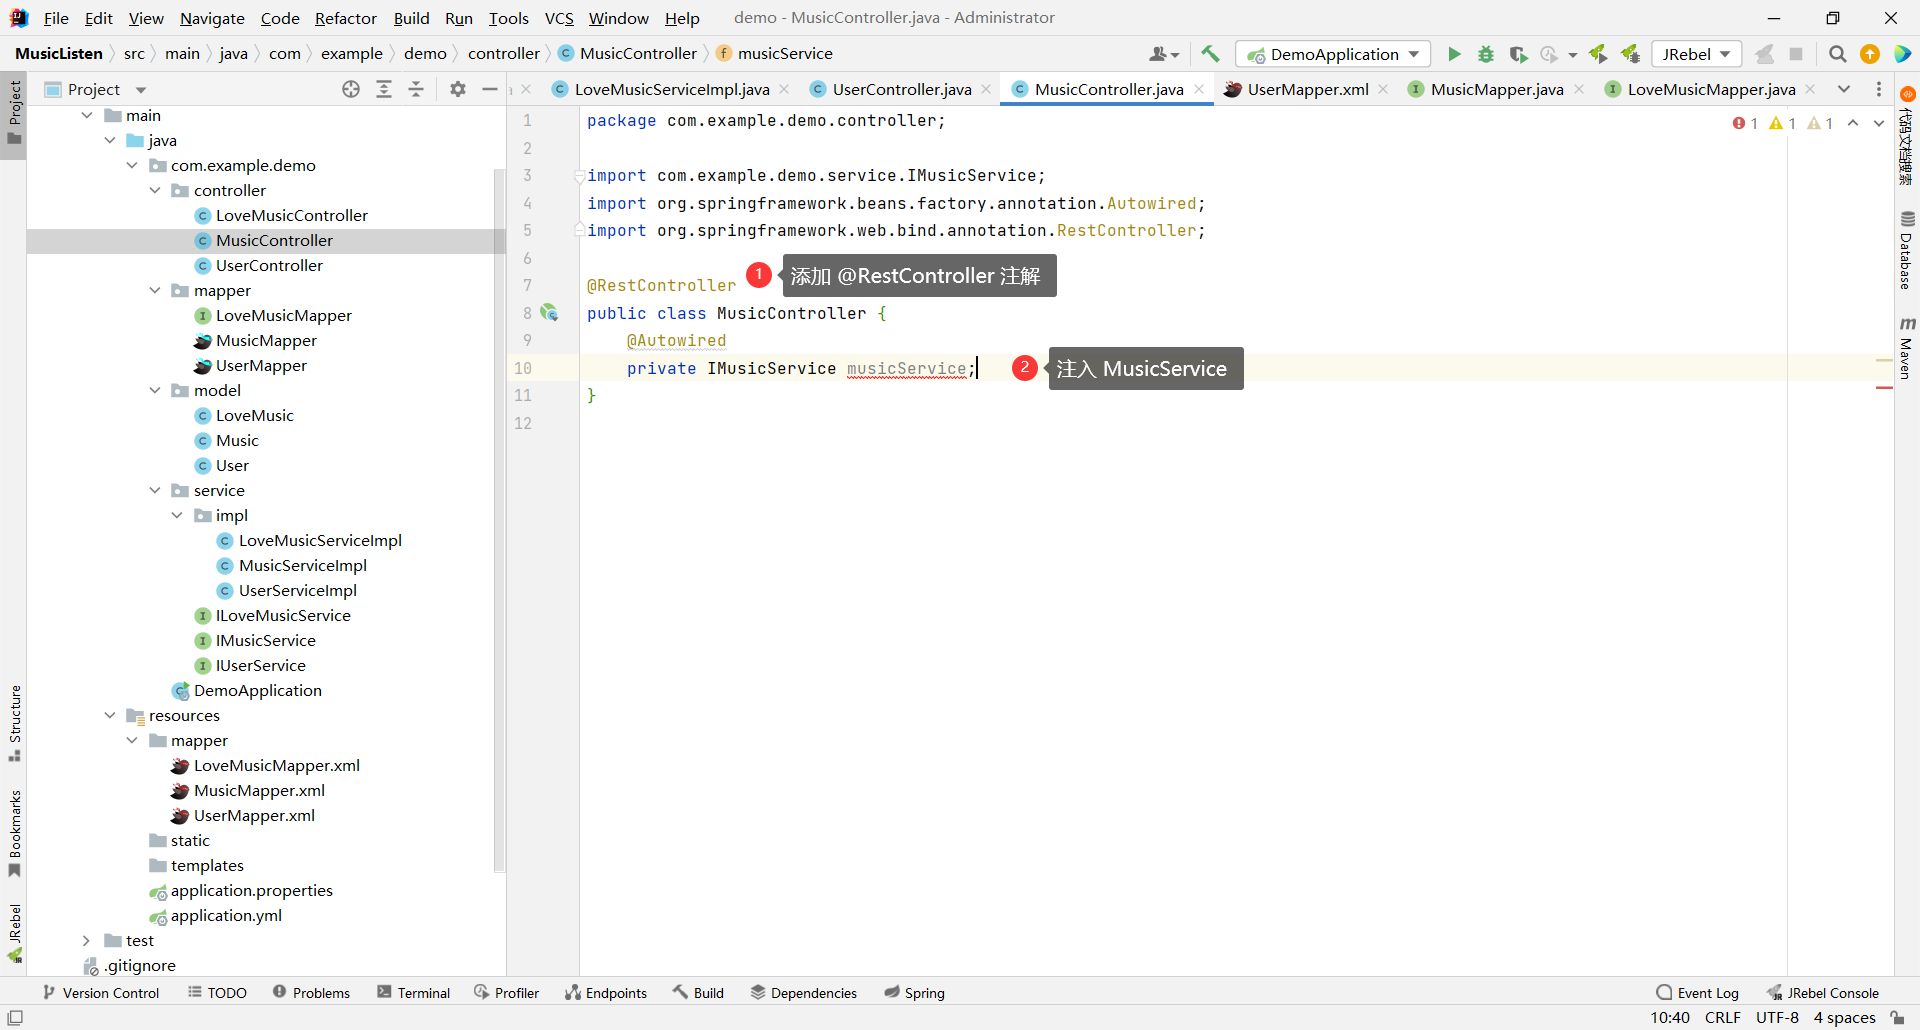
```java
package com.example.demo.controller;
import com.example.demo.service.IMusicService;
import org.springframework.beans.factory.annotation.Autowired;
import org.springframework.web.bind.annotation.RestController;
@RestController
public class MusicController {
@Autowired
private IMusicService musicService;
}
```
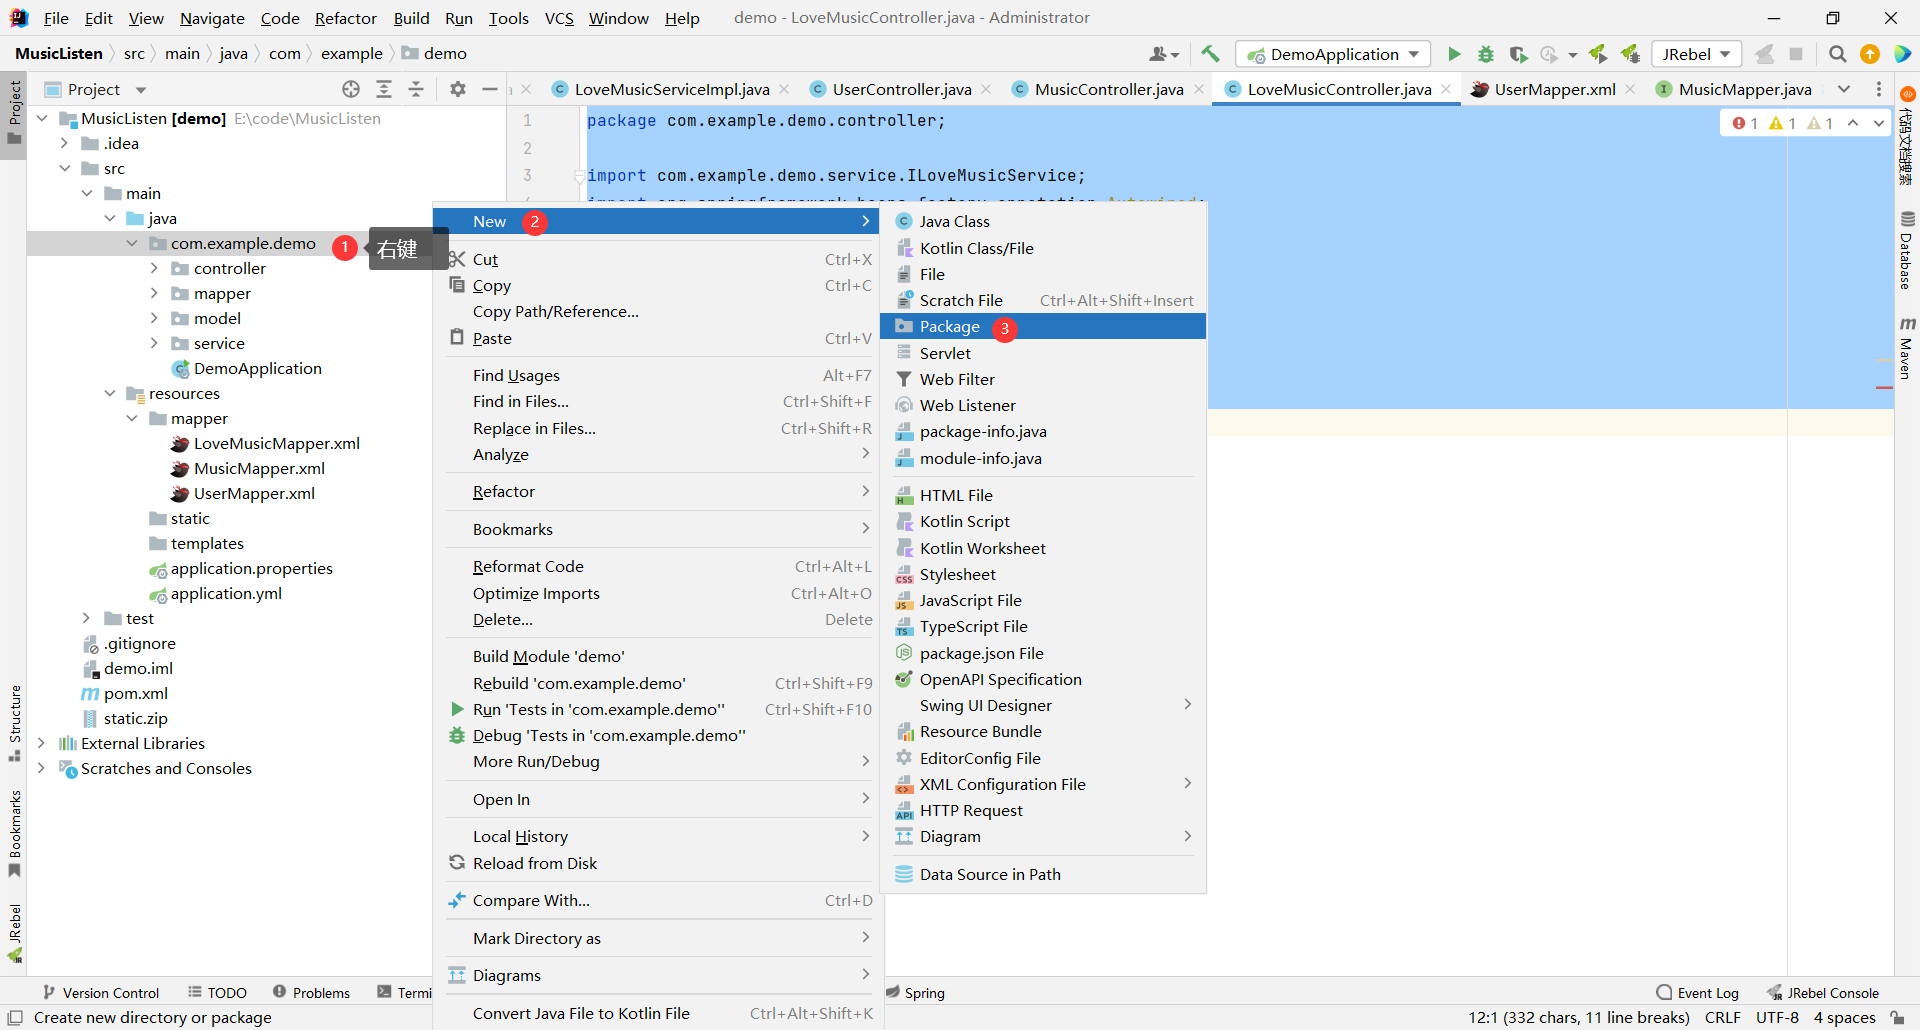
创建 LoveMusicController

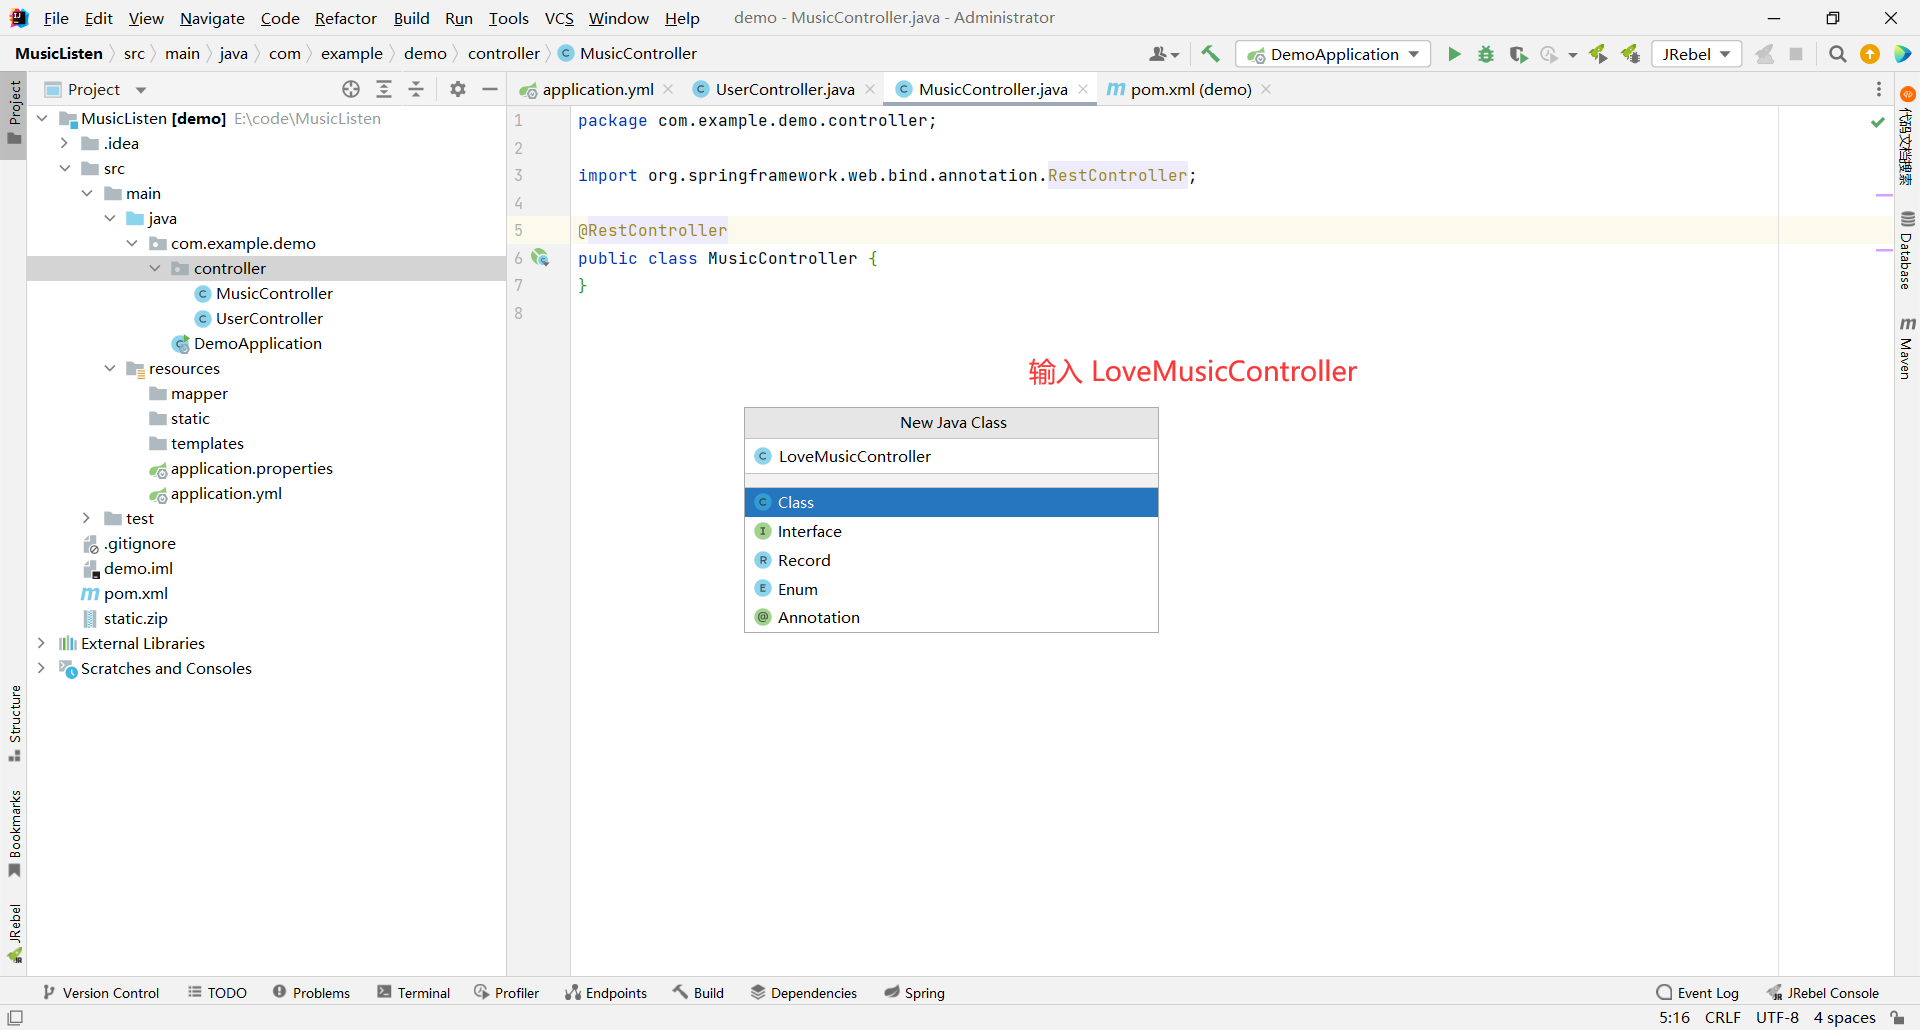
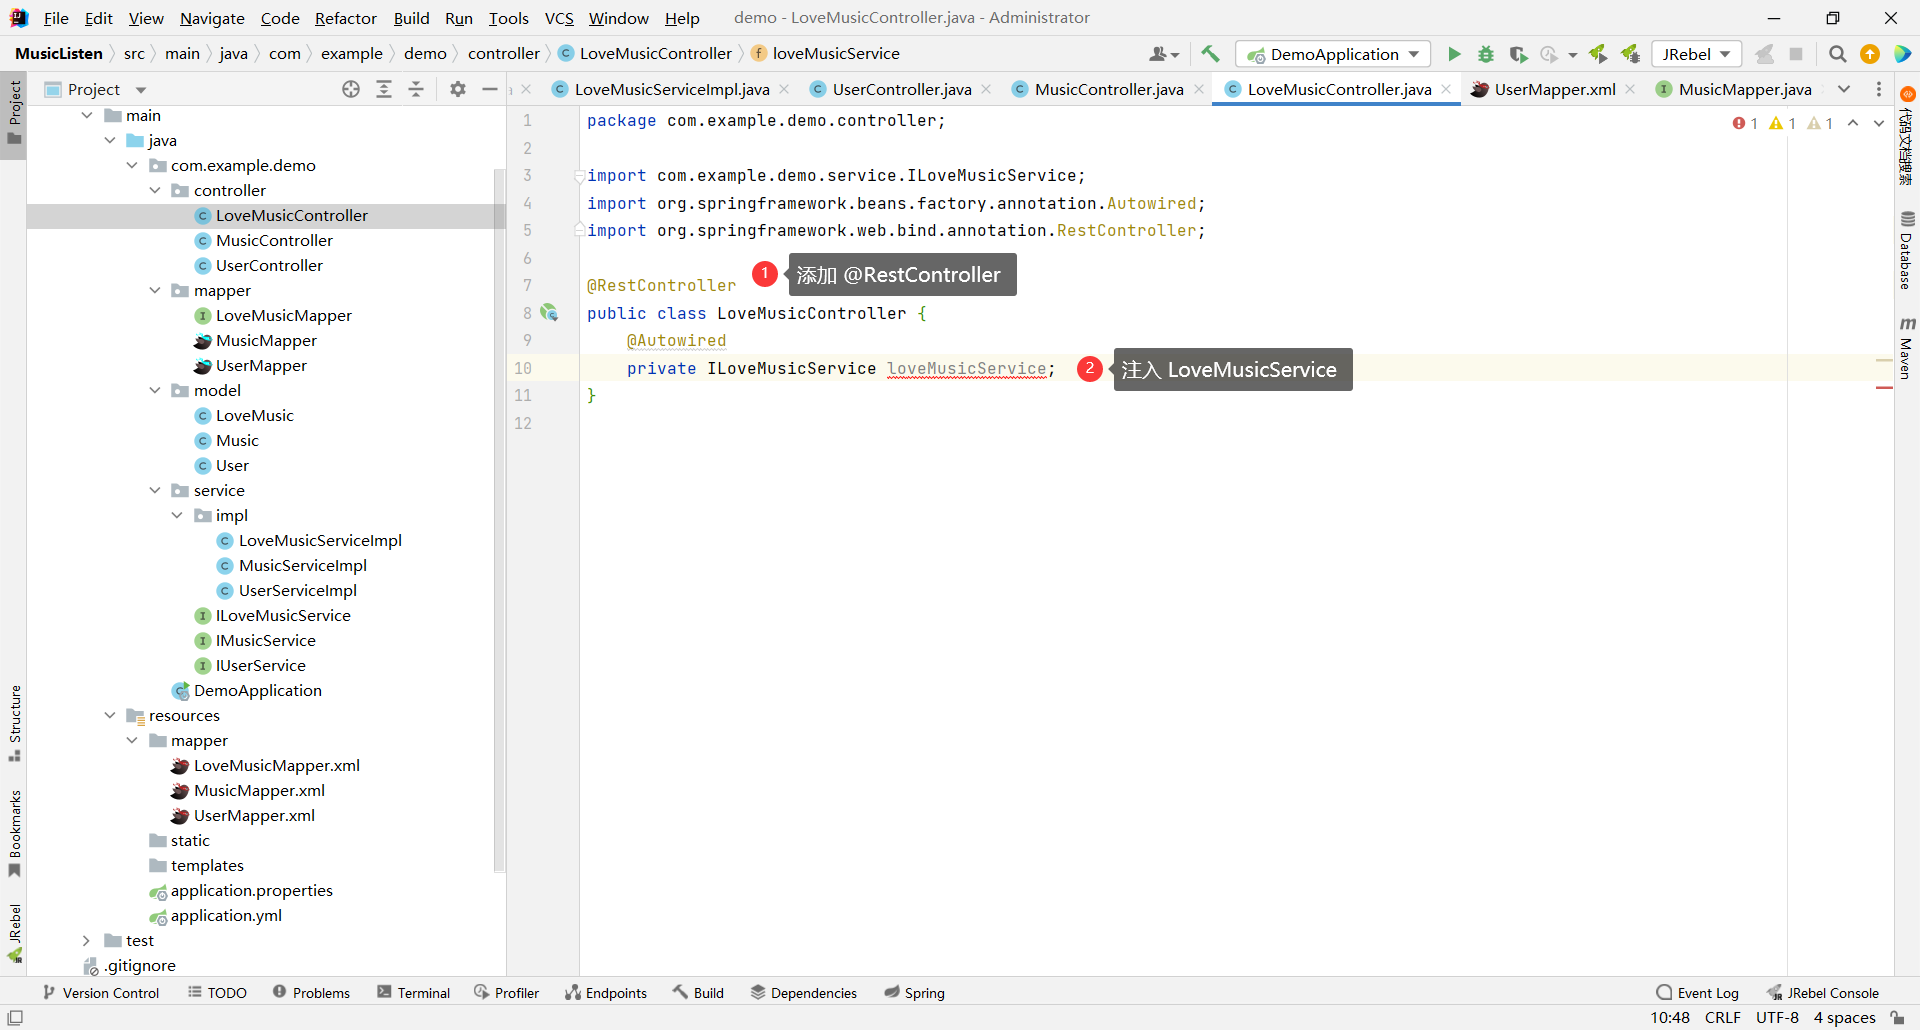
```java
package com.example.demo.controller;
import com.example.demo.service.ILoveMusicService;
import org.springframework.beans.factory.annotation.Autowired;
import org.springframework.web.bind.annotation.RestController;
@RestController
public class LoveMusicController {
@Autowired
private ILoveMusicService loveMusicService;
}
```
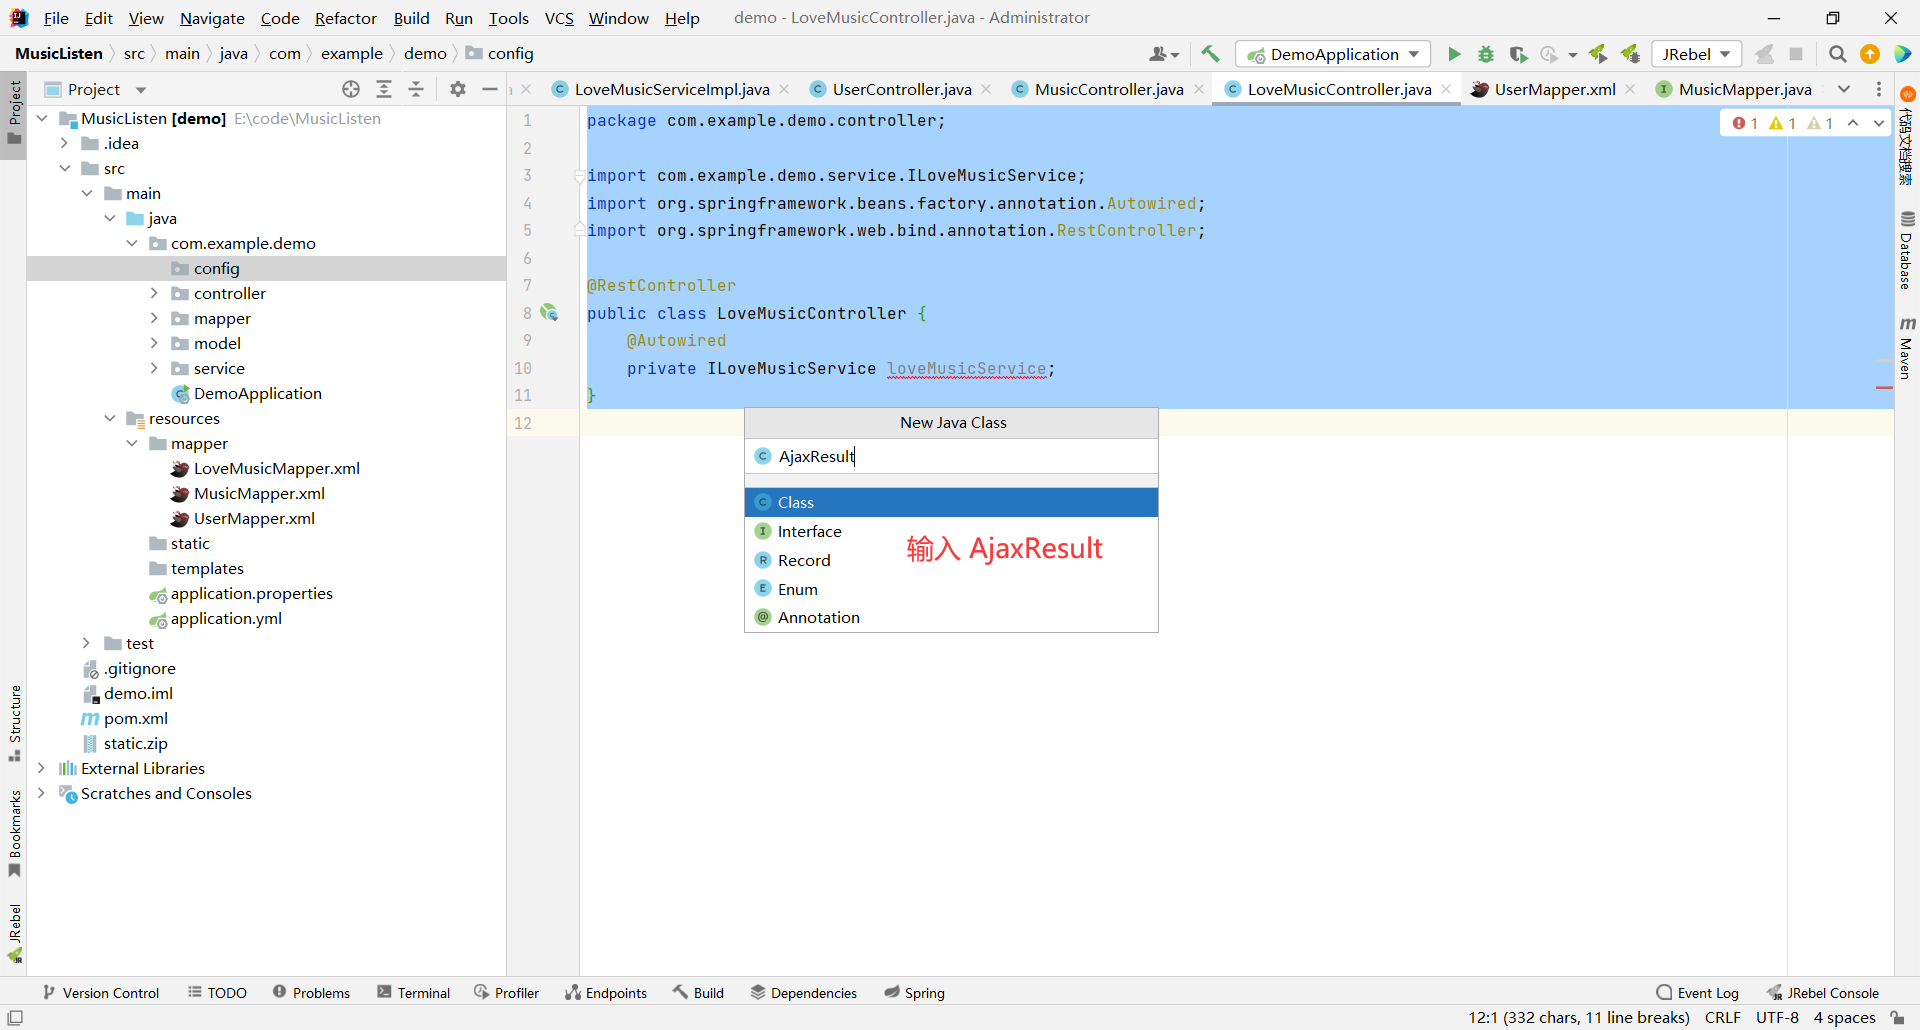
### 1.3.5 统一返回对象
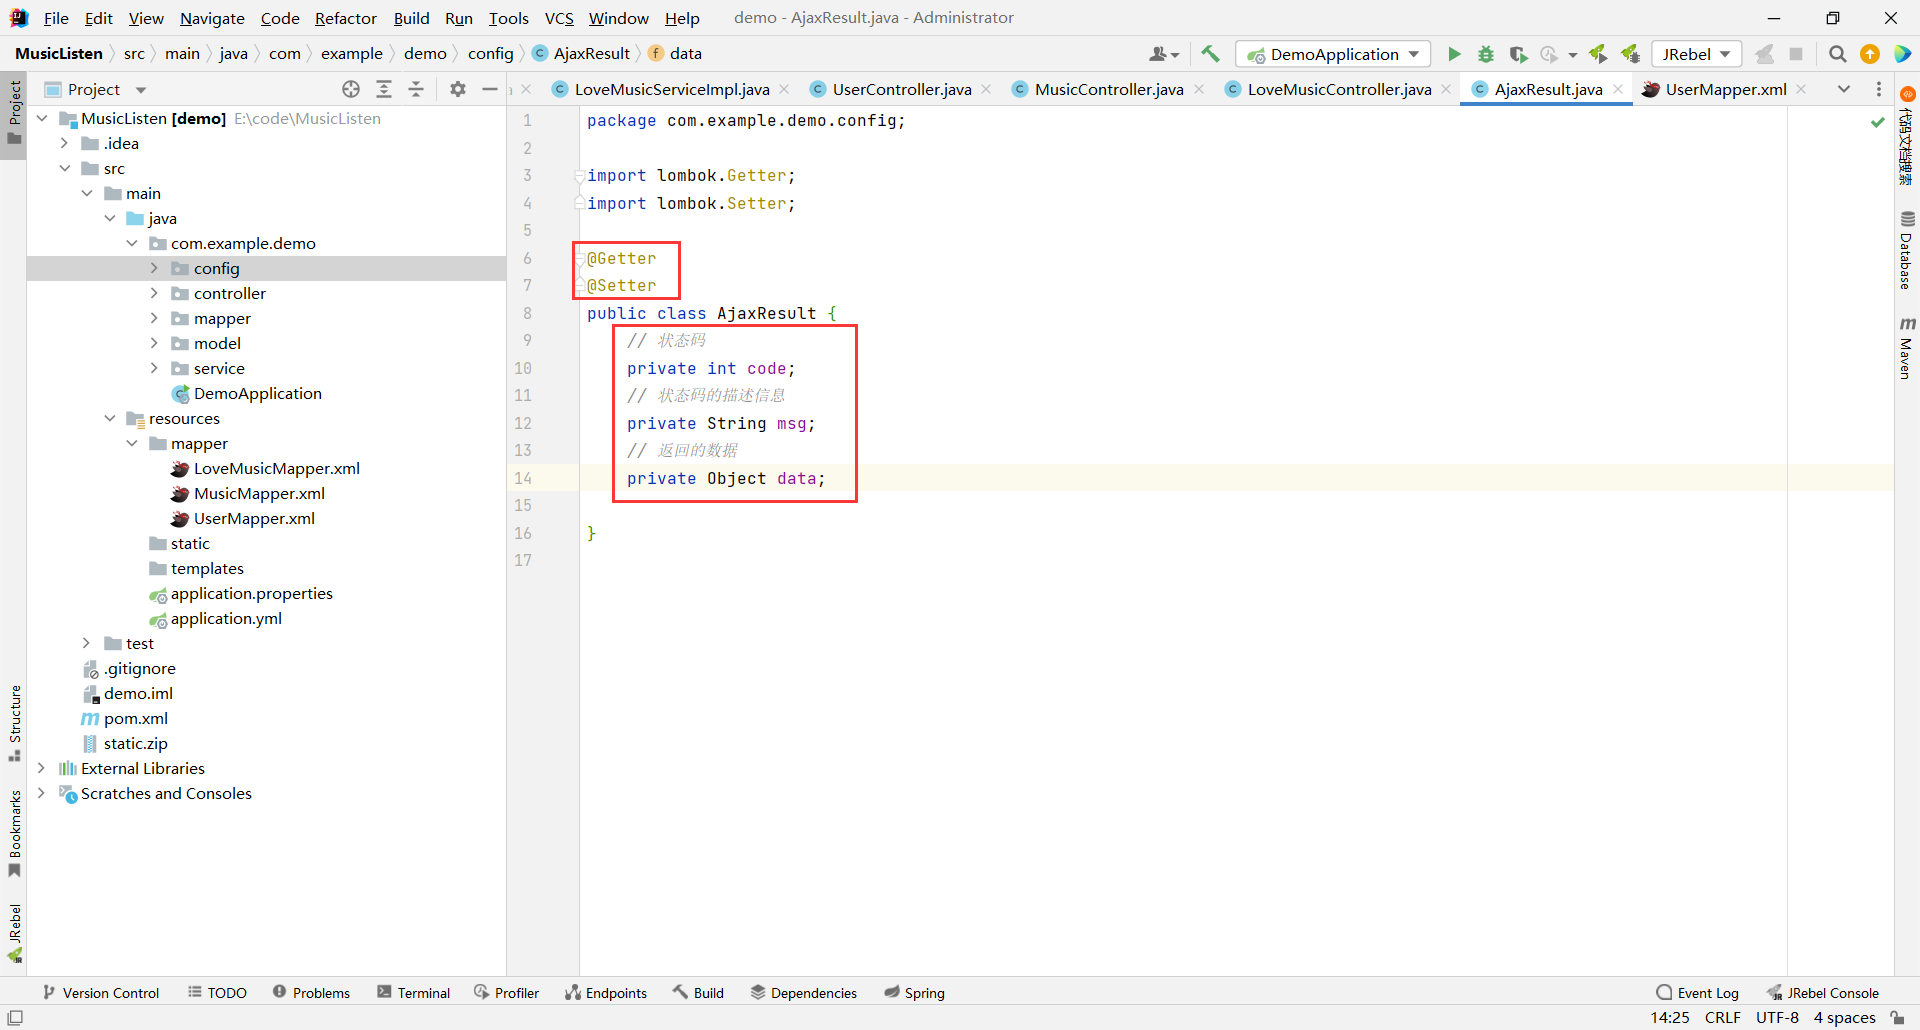
我们来实现一下统一返回对象

我们创建三个字段 : code、msg、data , 分别是状态码、状态码的描述信息、返回的数据
并且提供他们的 Getter Setter 方法
> 使用 @Getter @Setter 注解即可
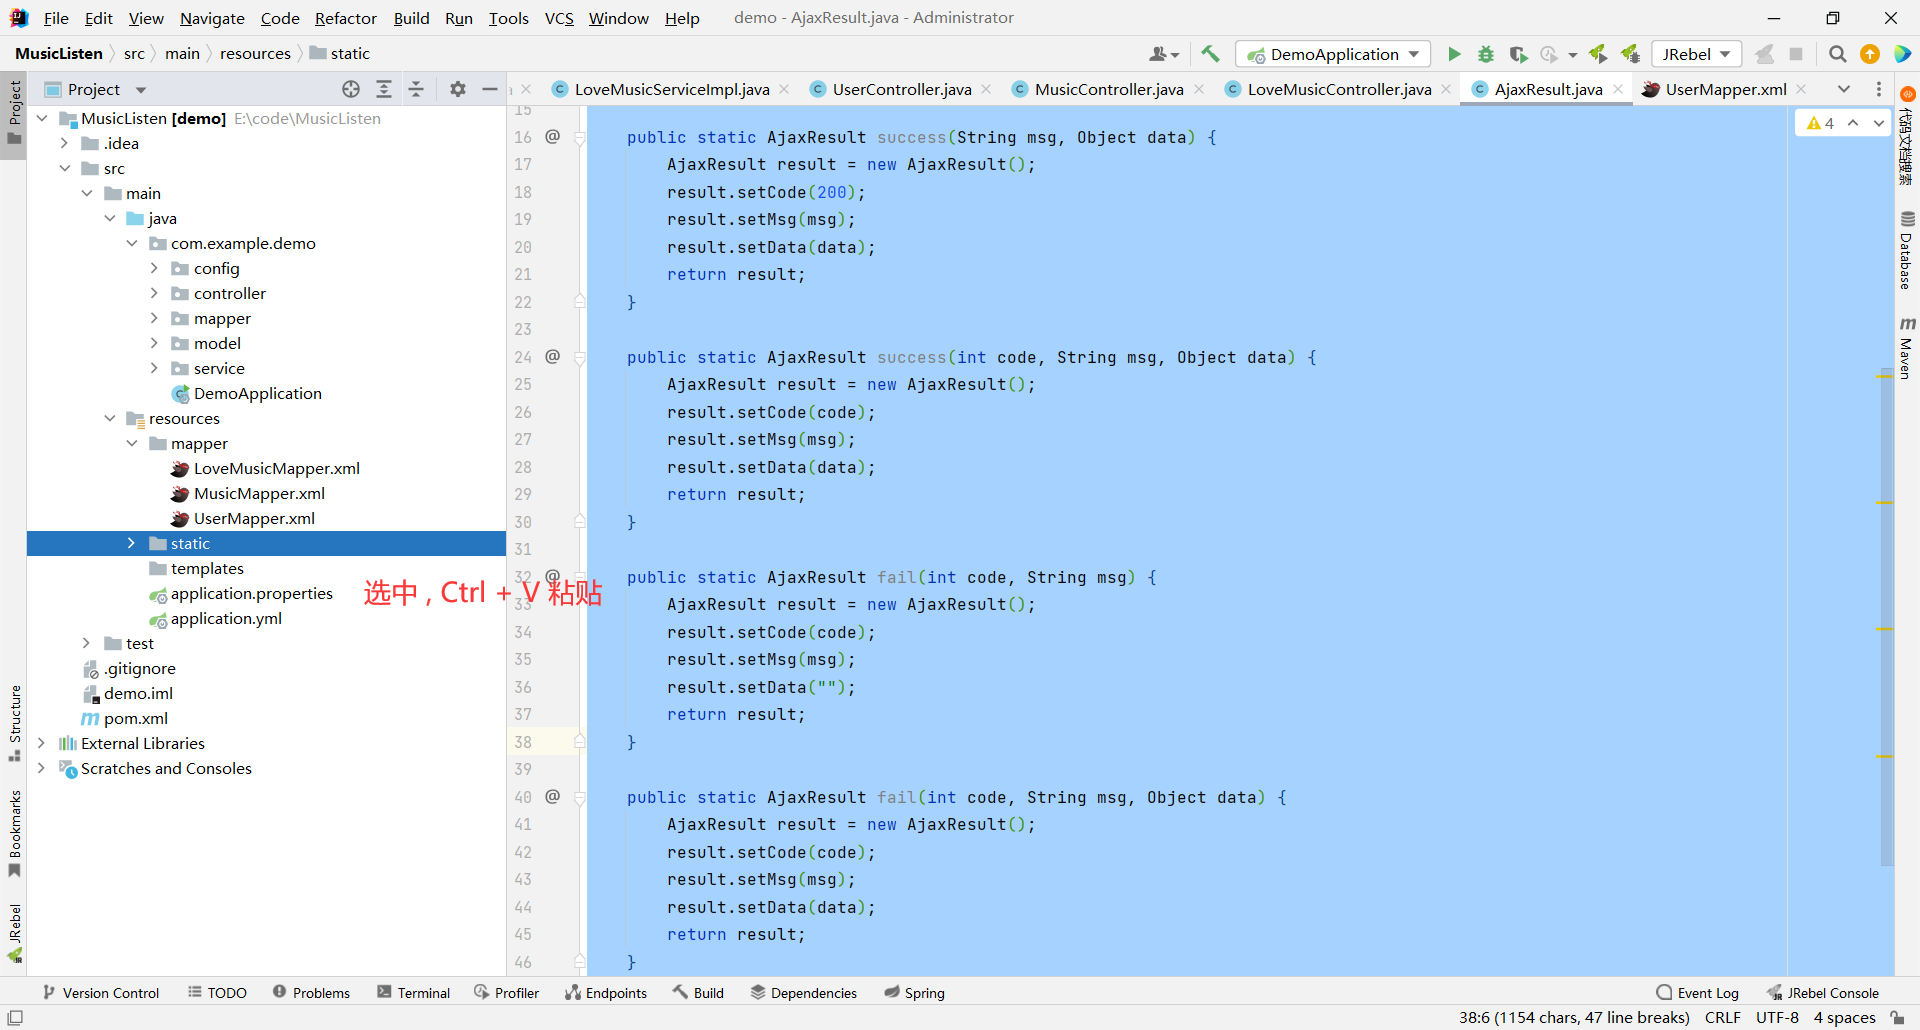
光有状态码还不够 , 我们还要提供几个方法 , 用户调用这几个方法就实现了统一数据格式的返回对象
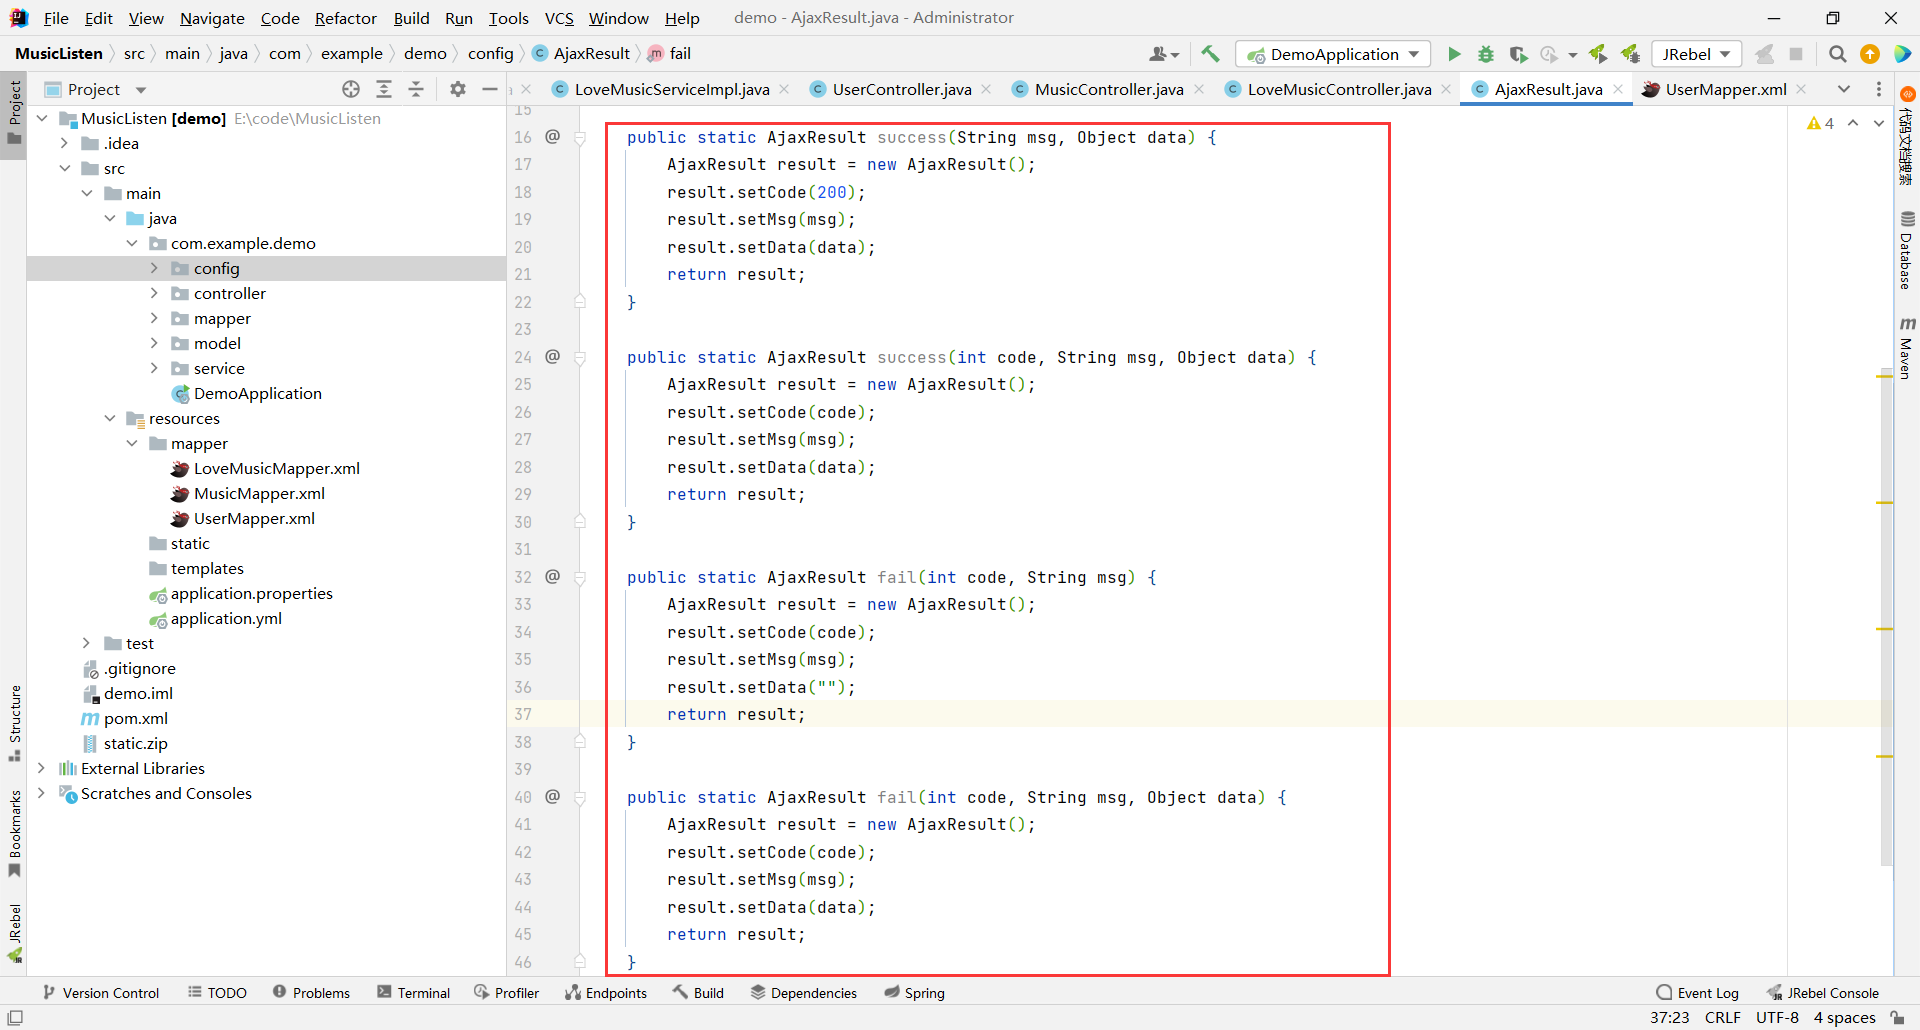
当用户成功的时候 , 调用 success 方法 , 用户可以选择是否自己指定状态码 , 默认是 200
当用户失败的时候 , 调用 fail 方法 , 用户可以不传 data , 也可以传 data
那这几个方法构成了重载
> 1. 与返回值无关
> 2. 函数名相同
> 3. 参数列表不同
```java
package com.example.demo.config;
import lombok.Getter;
import lombok.Setter;
@Getter
@Setter
public class AjaxResult {
// 状态码
private int code;
// 状态码的描述信息
private String msg;
// 返回的数据
private Object data;
public static AjaxResult success(String msg, Object data) {
AjaxResult result = new AjaxResult();
result.setCode(200);
result.setMsg(msg);
result.setData(data);
return result;
}
public static AjaxResult success(int code, String msg, Object data) {
AjaxResult result = new AjaxResult();
result.setCode(code);
result.setMsg(msg);
result.setData(data);
return result;
}
public static AjaxResult fail(int code, String msg) {
AjaxResult result = new AjaxResult();
result.setCode(code);
result.setMsg(msg);
result.setData("");
return result;
}
public static AjaxResult fail(int code, String msg, Object data) {
AjaxResult result = new AjaxResult();
result.setCode(code);
result.setMsg(msg);
result.setData(data);
return result;
}
}
```
# 二 . 基本功能实现
## 2.1 注册
约定前后端交互接口
```json
请求:
[
url: "/user/reg",
type: "POST",
data: {
用户名,
密码
}
]
响应 :
[
code: 200,
msg: "注册成功",
data: {
1, // 返回 1 代表成功
-1 // 返回 -1 代表失败
}
]
```
### 2.1.1 前端
首先 , 我们需要对注册按钮编写事件
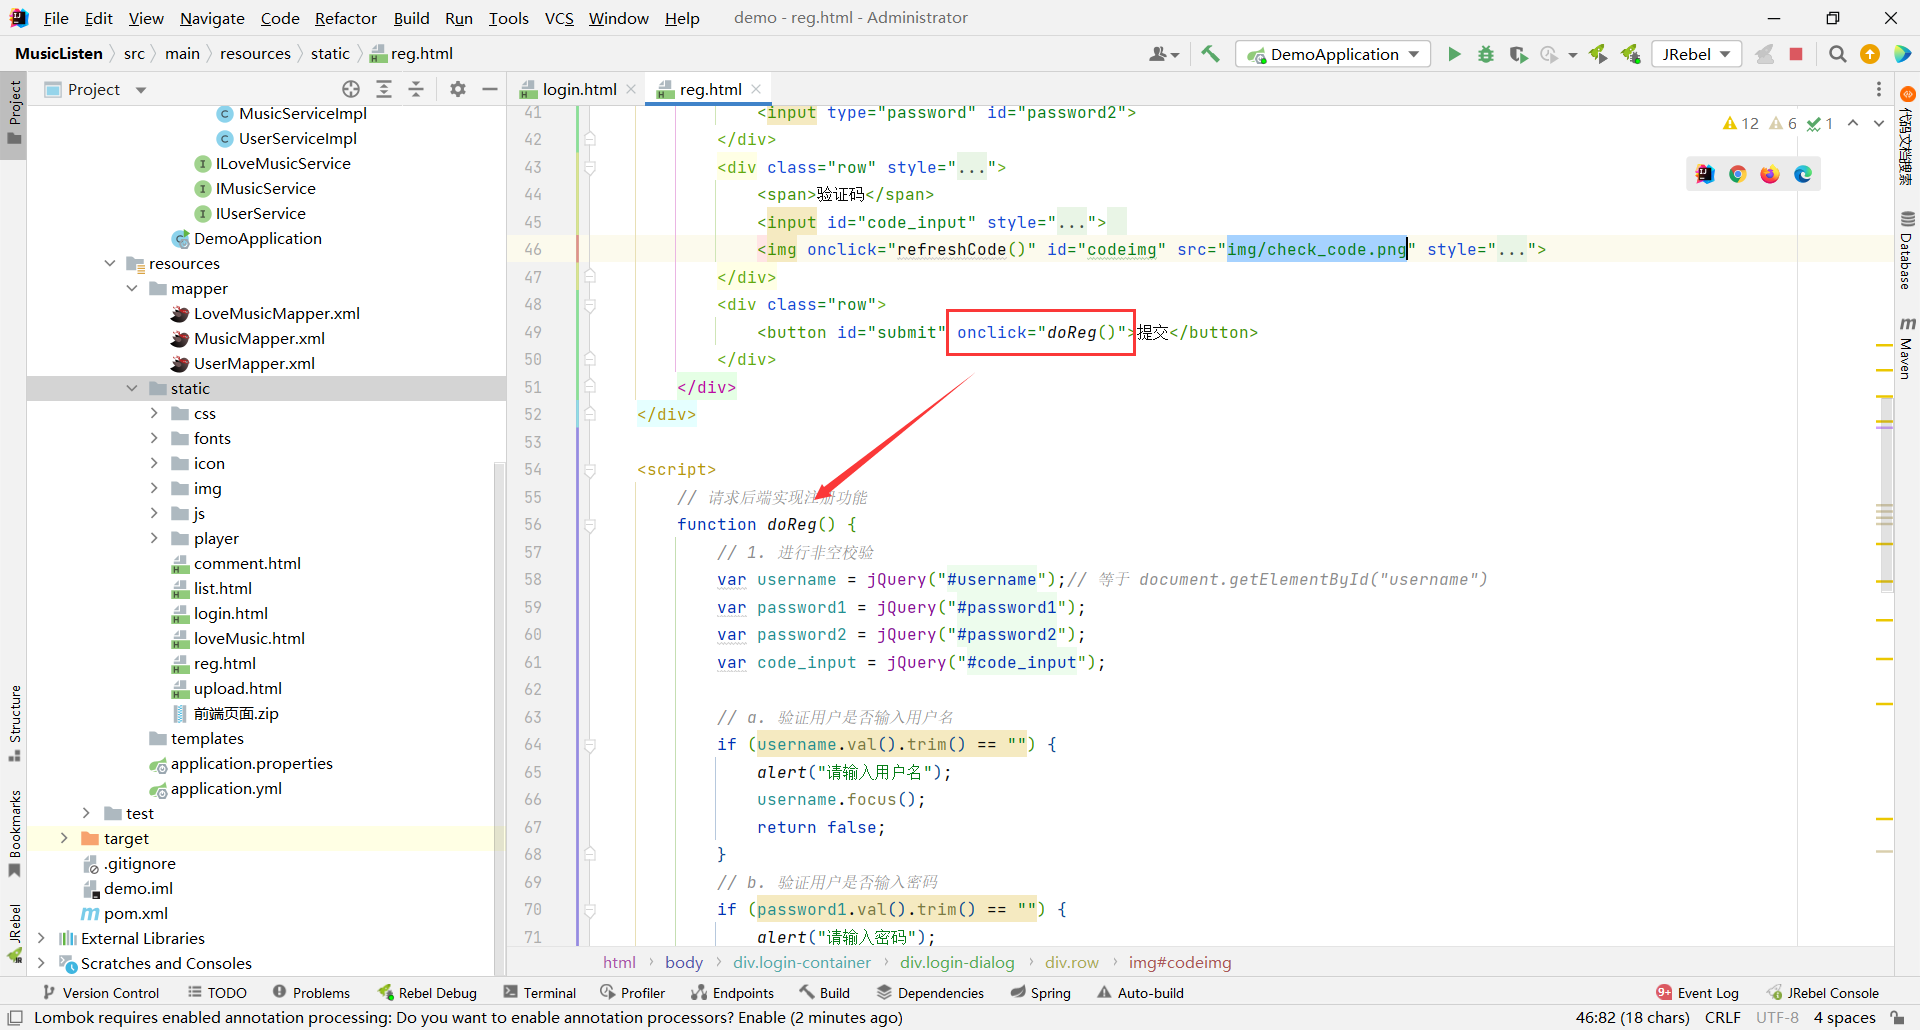
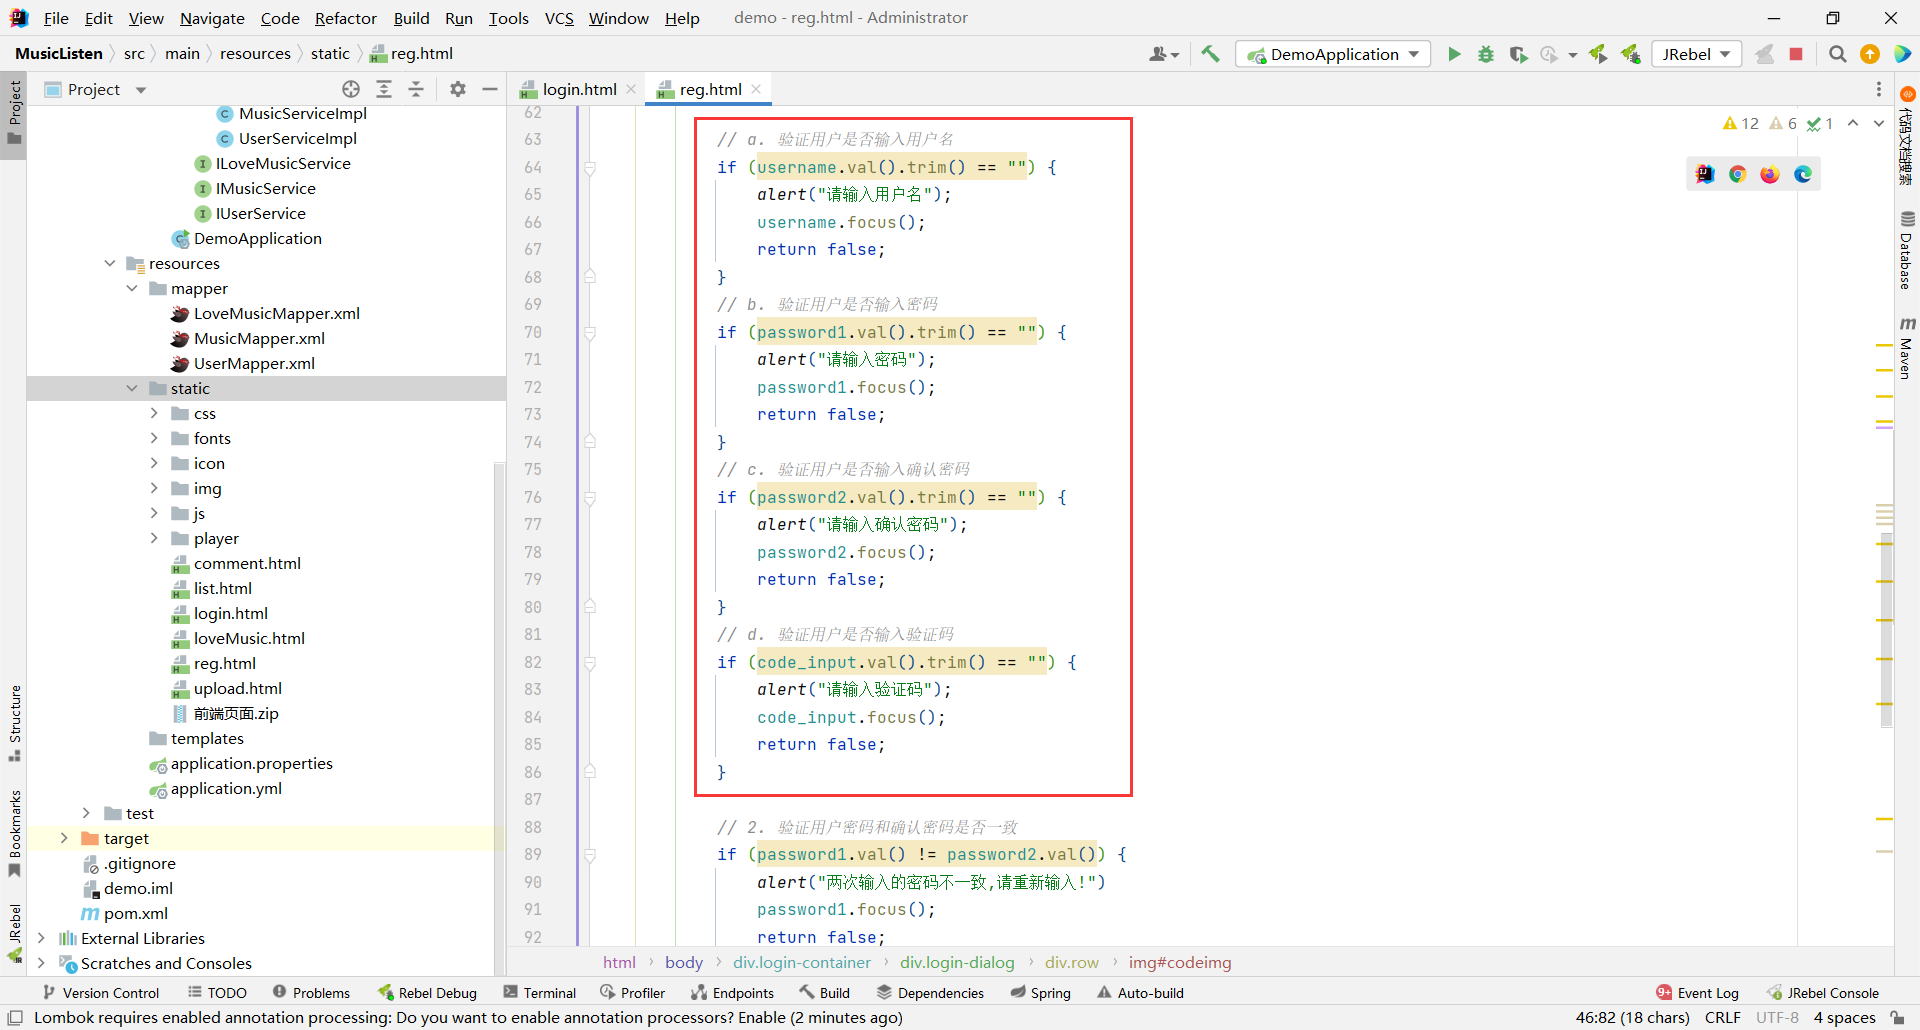
然后需要去获取到三个输入框的值 , 然后去判断用户是否输入 , 如果没输入的话那就要提醒用户输入
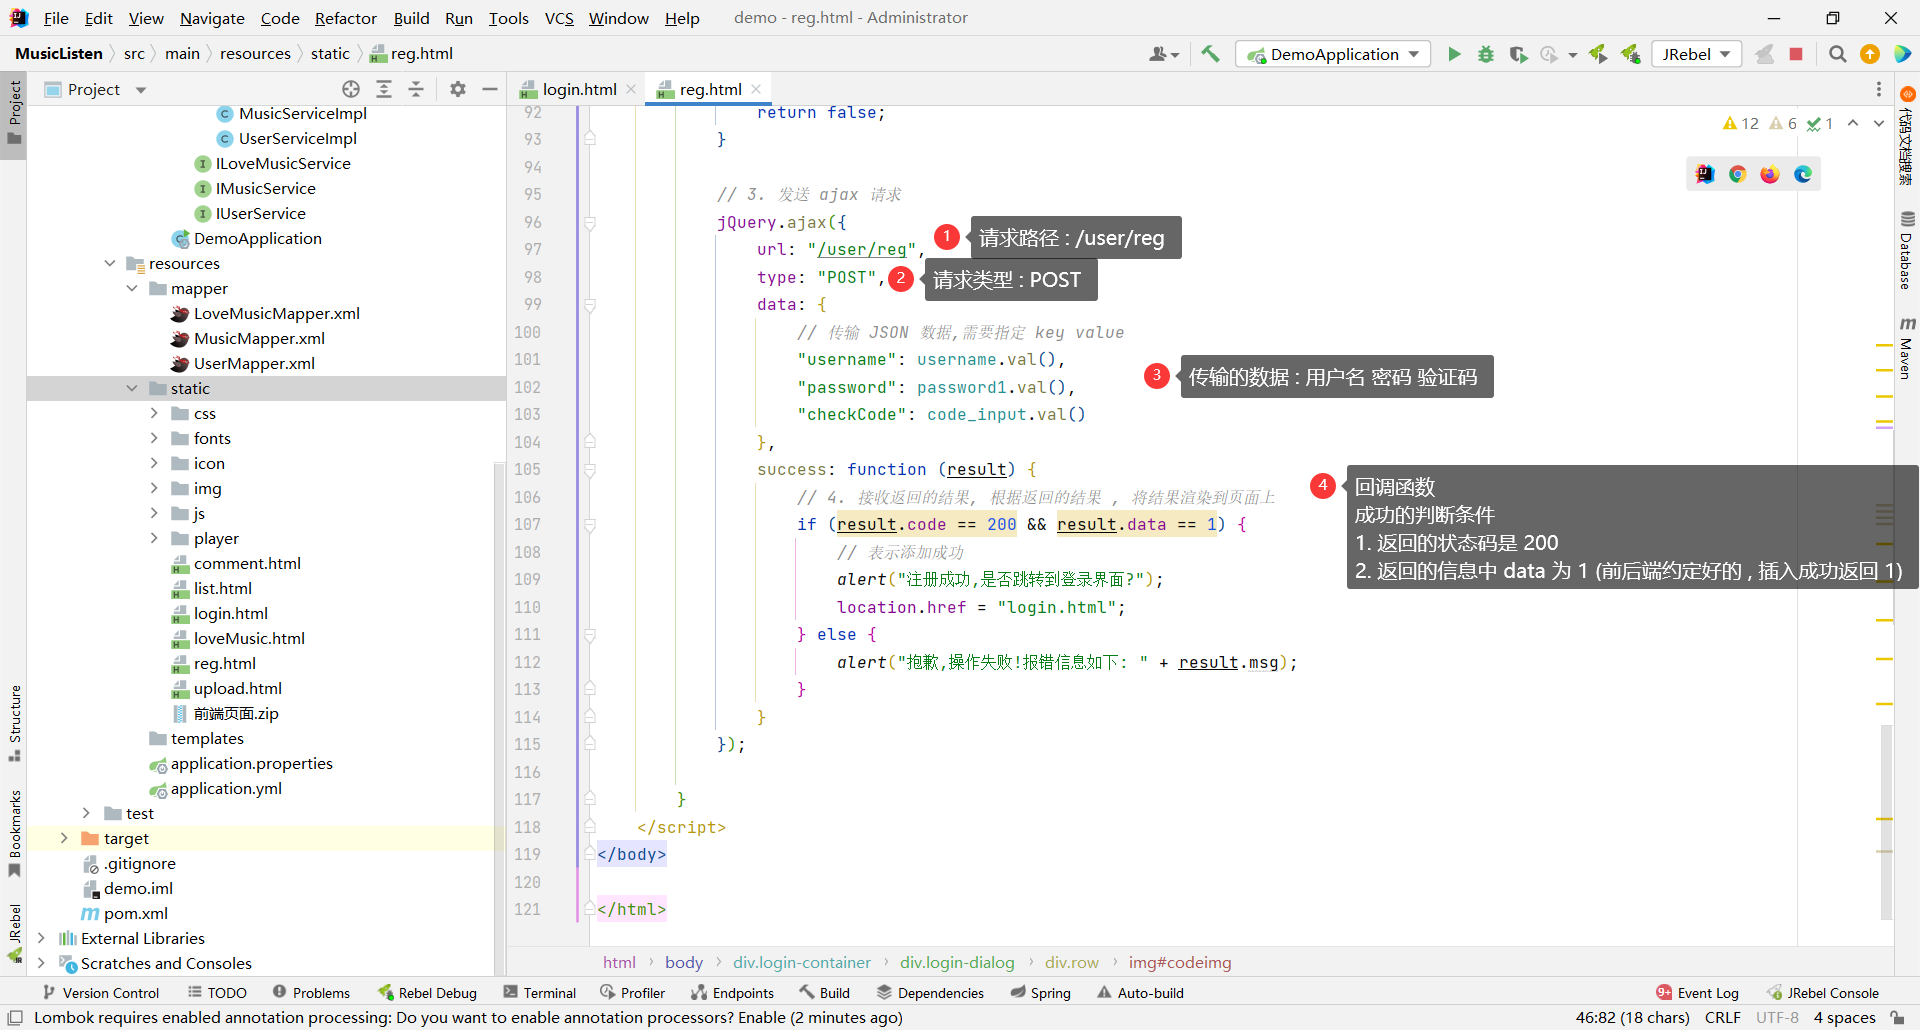
如果用户 用户名、密码、验证码都输入的了话 , 那我们就可以向后端发送 ajax 请求了
```html
注册
```
### 2.1.2 后端
注册功能的核心本质就是往数据库中添加数据
那我们就先来编写 mapper 层
#### mapper 层
##### 接口
我们需要接收用户名、密码、验证码三个字段 , 那我们就选择使用对象来接收
我们选择让 User 对象作为参数 , 但是 User 对象里面并没有验证码的字段
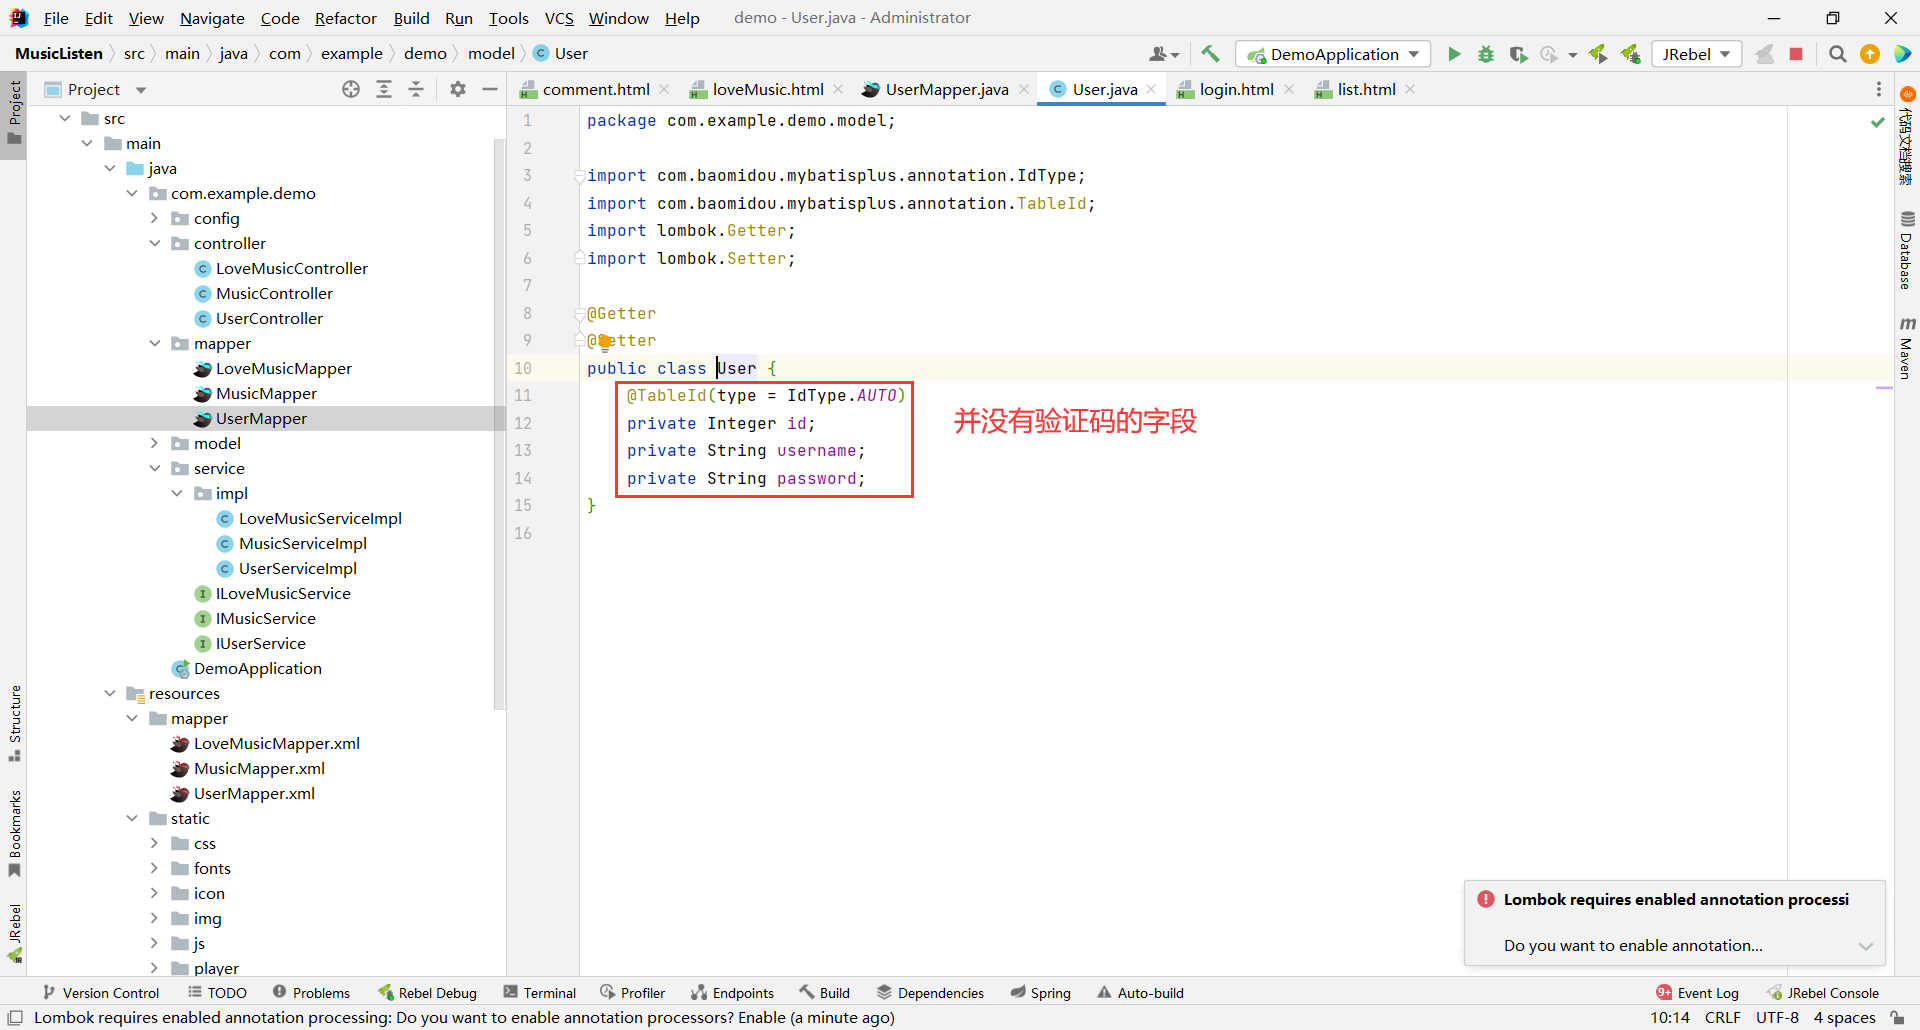
所以我们可以在 User 的基础上 , 创建出一个子类 , 让子类带有验证码信息
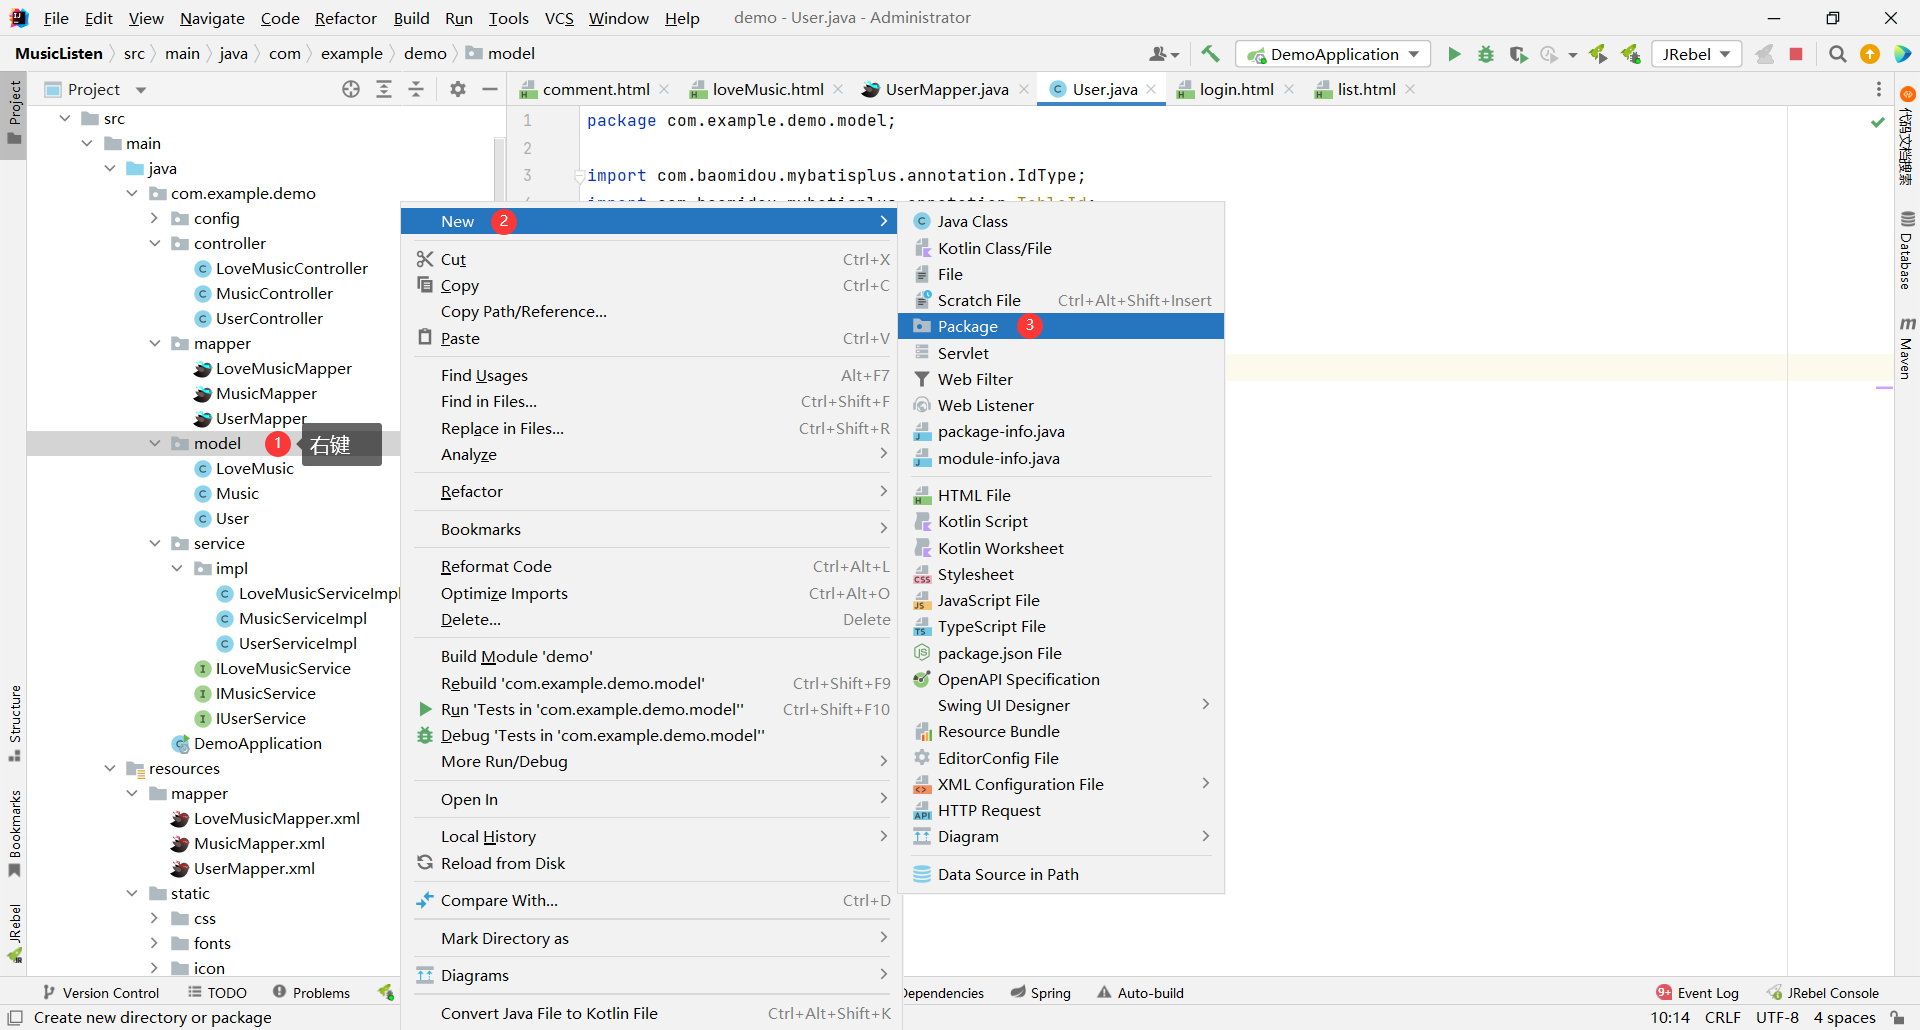
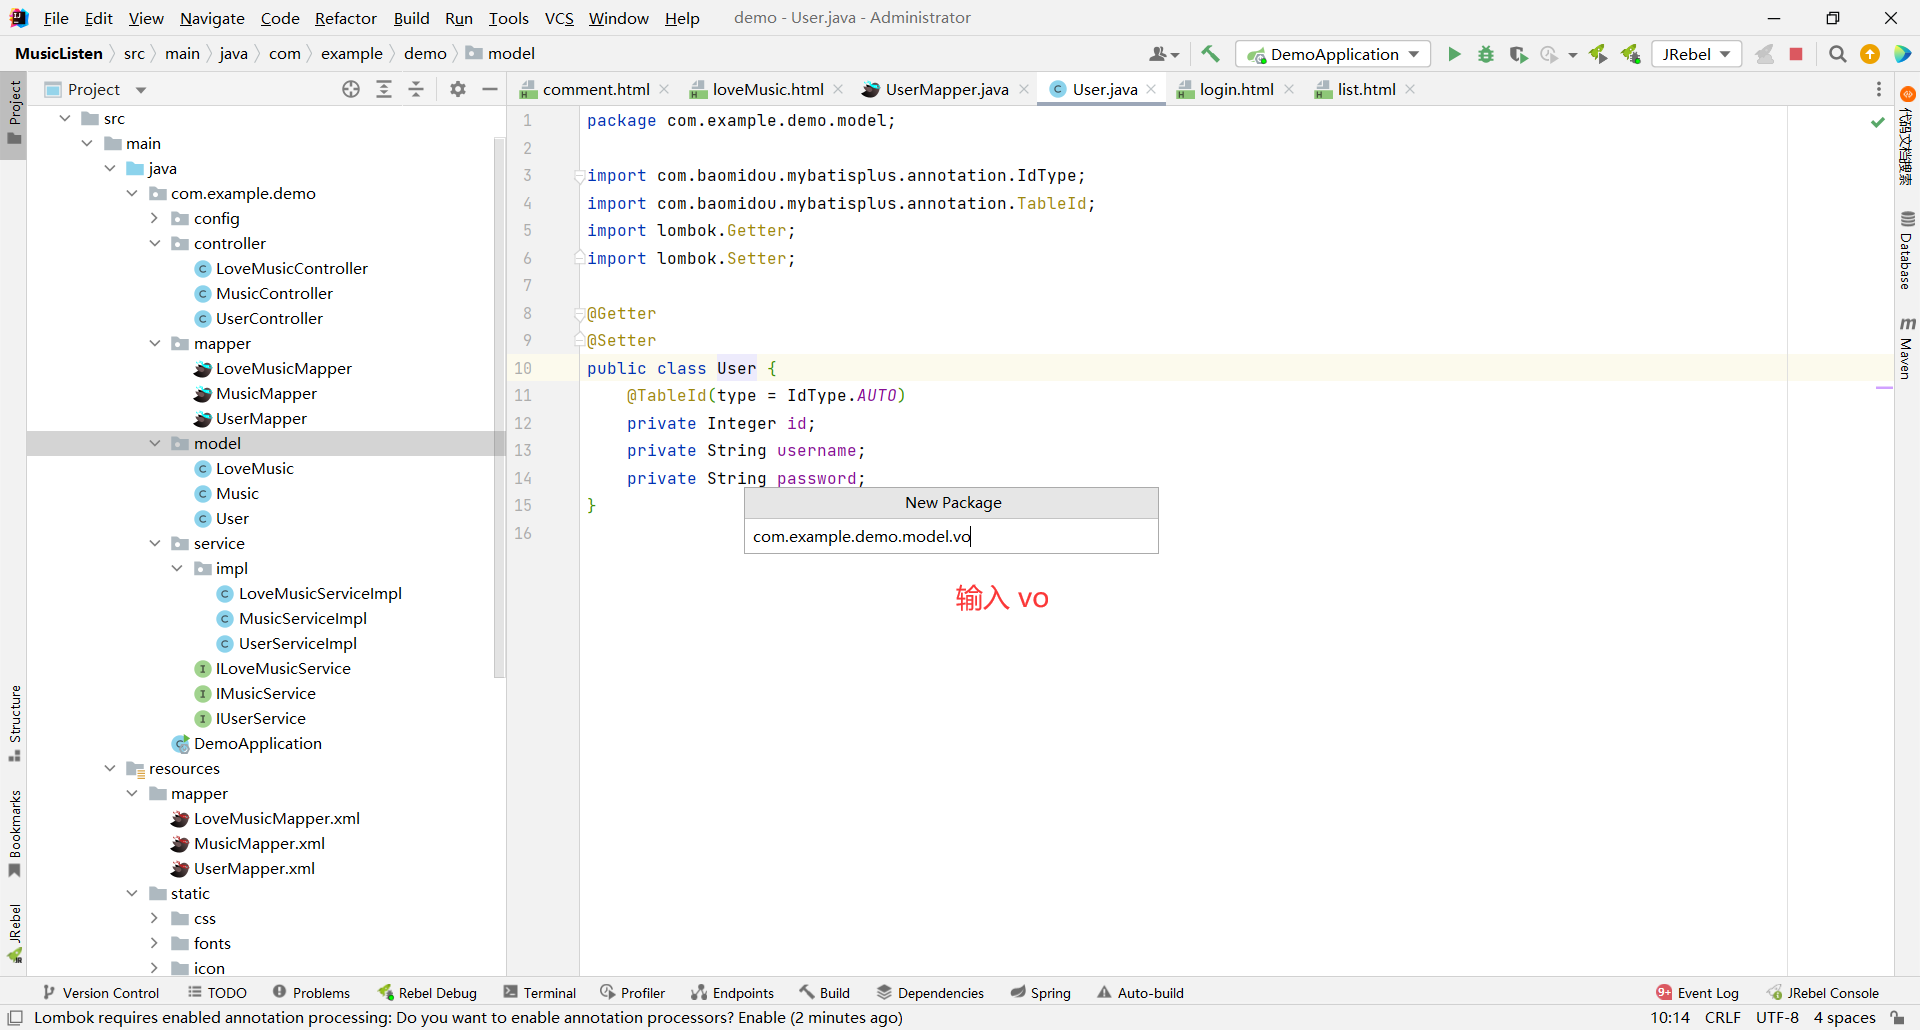
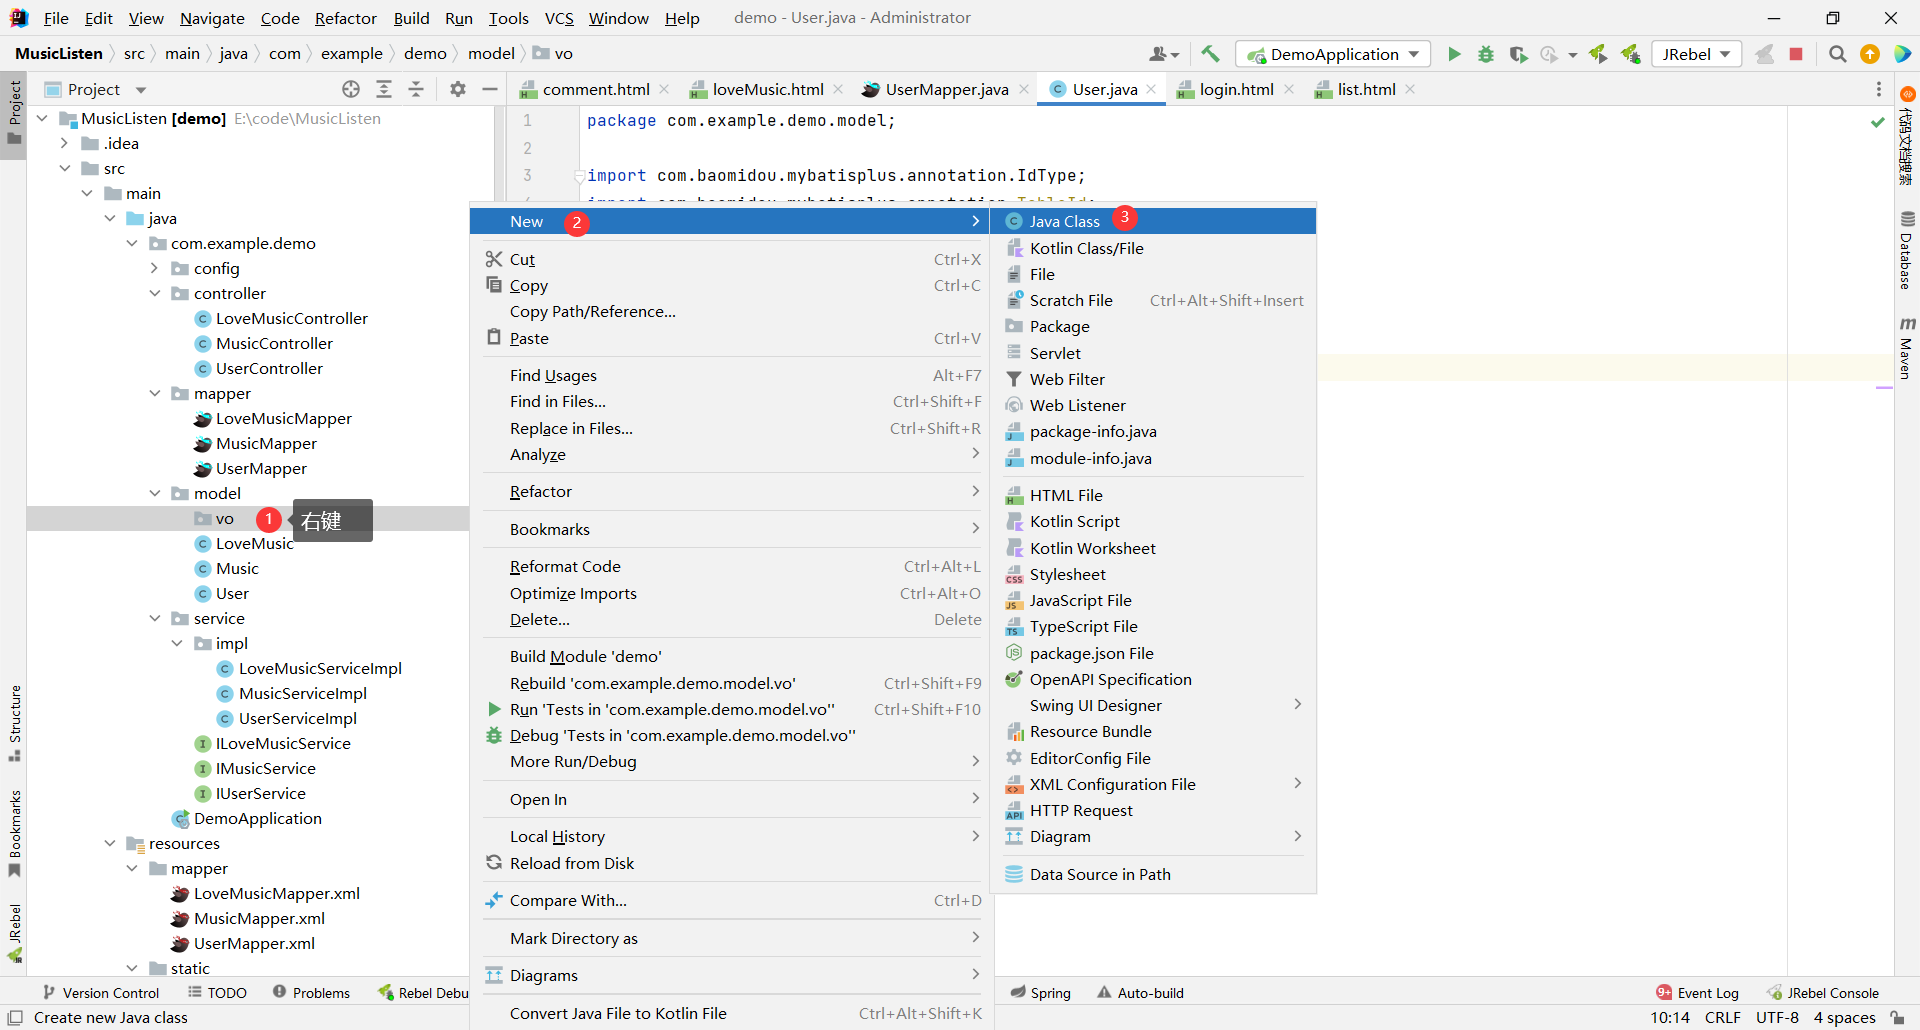
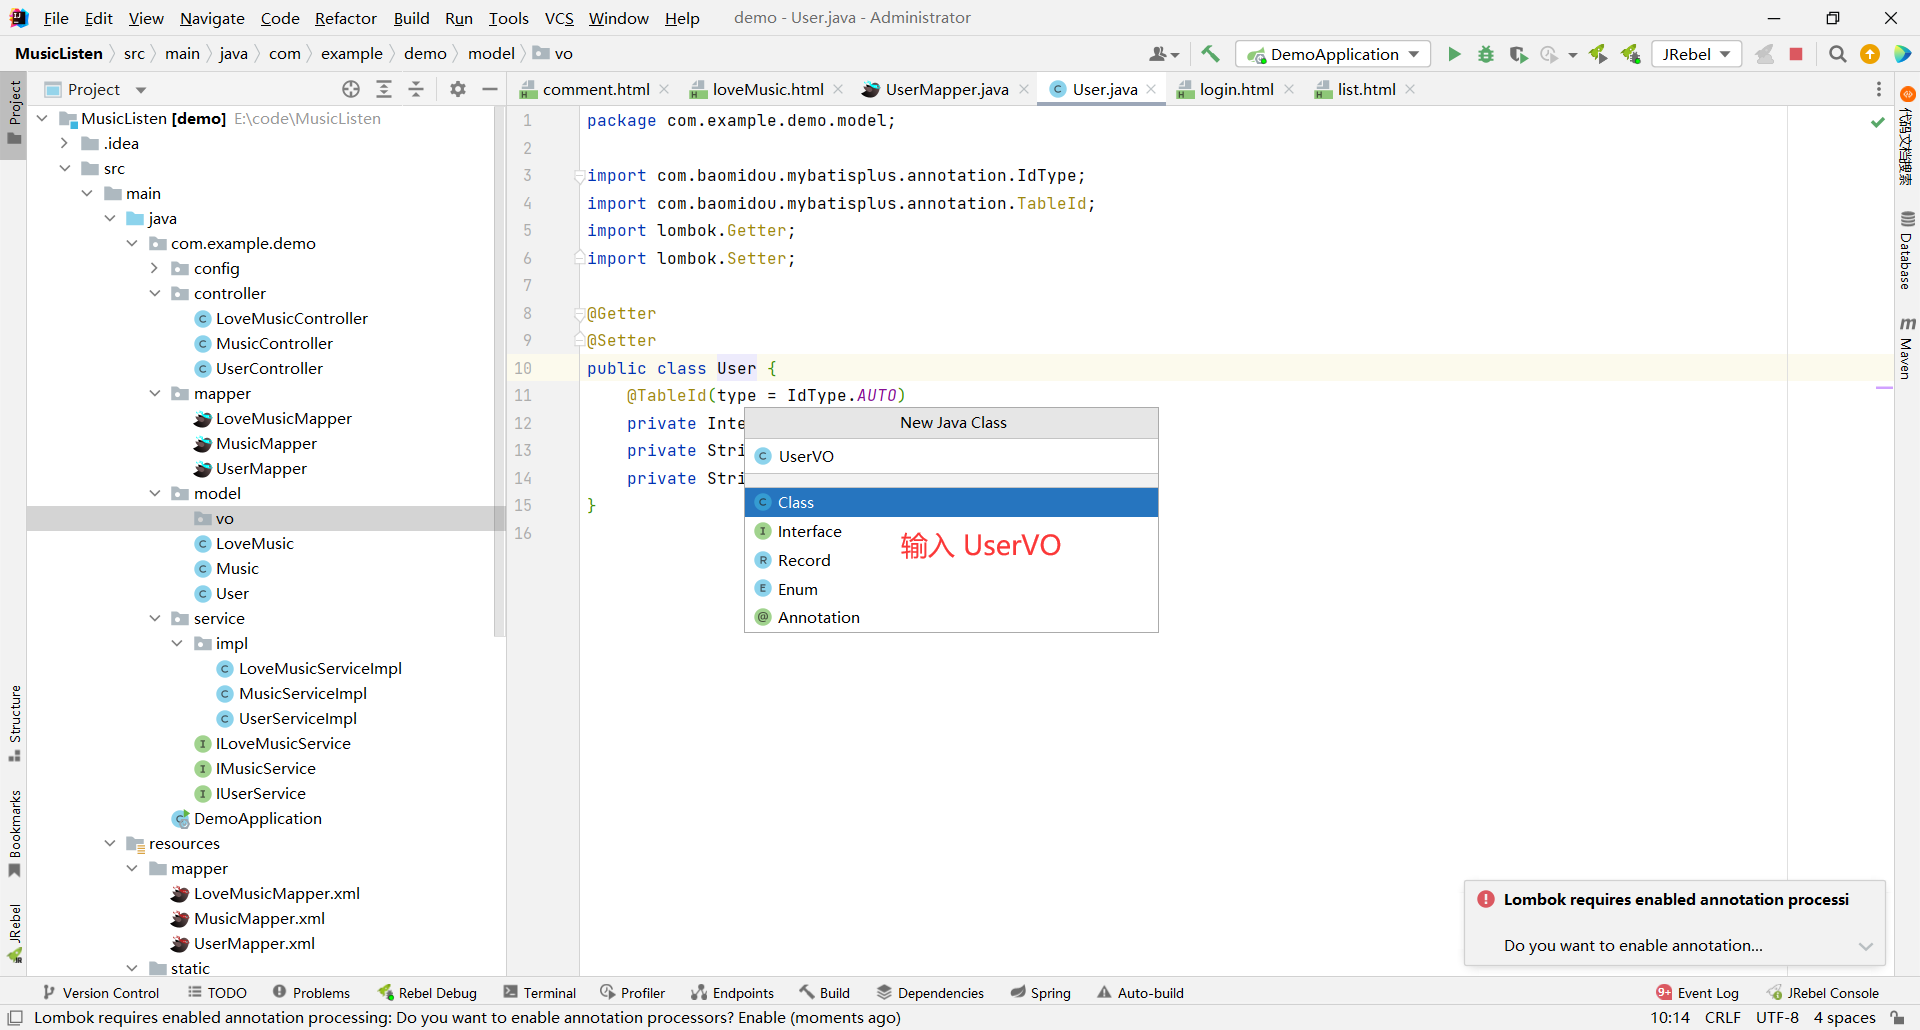
然后让 UserVO 对象去继承 User 对象 , 然后在 UserVO 中添加验证码字段
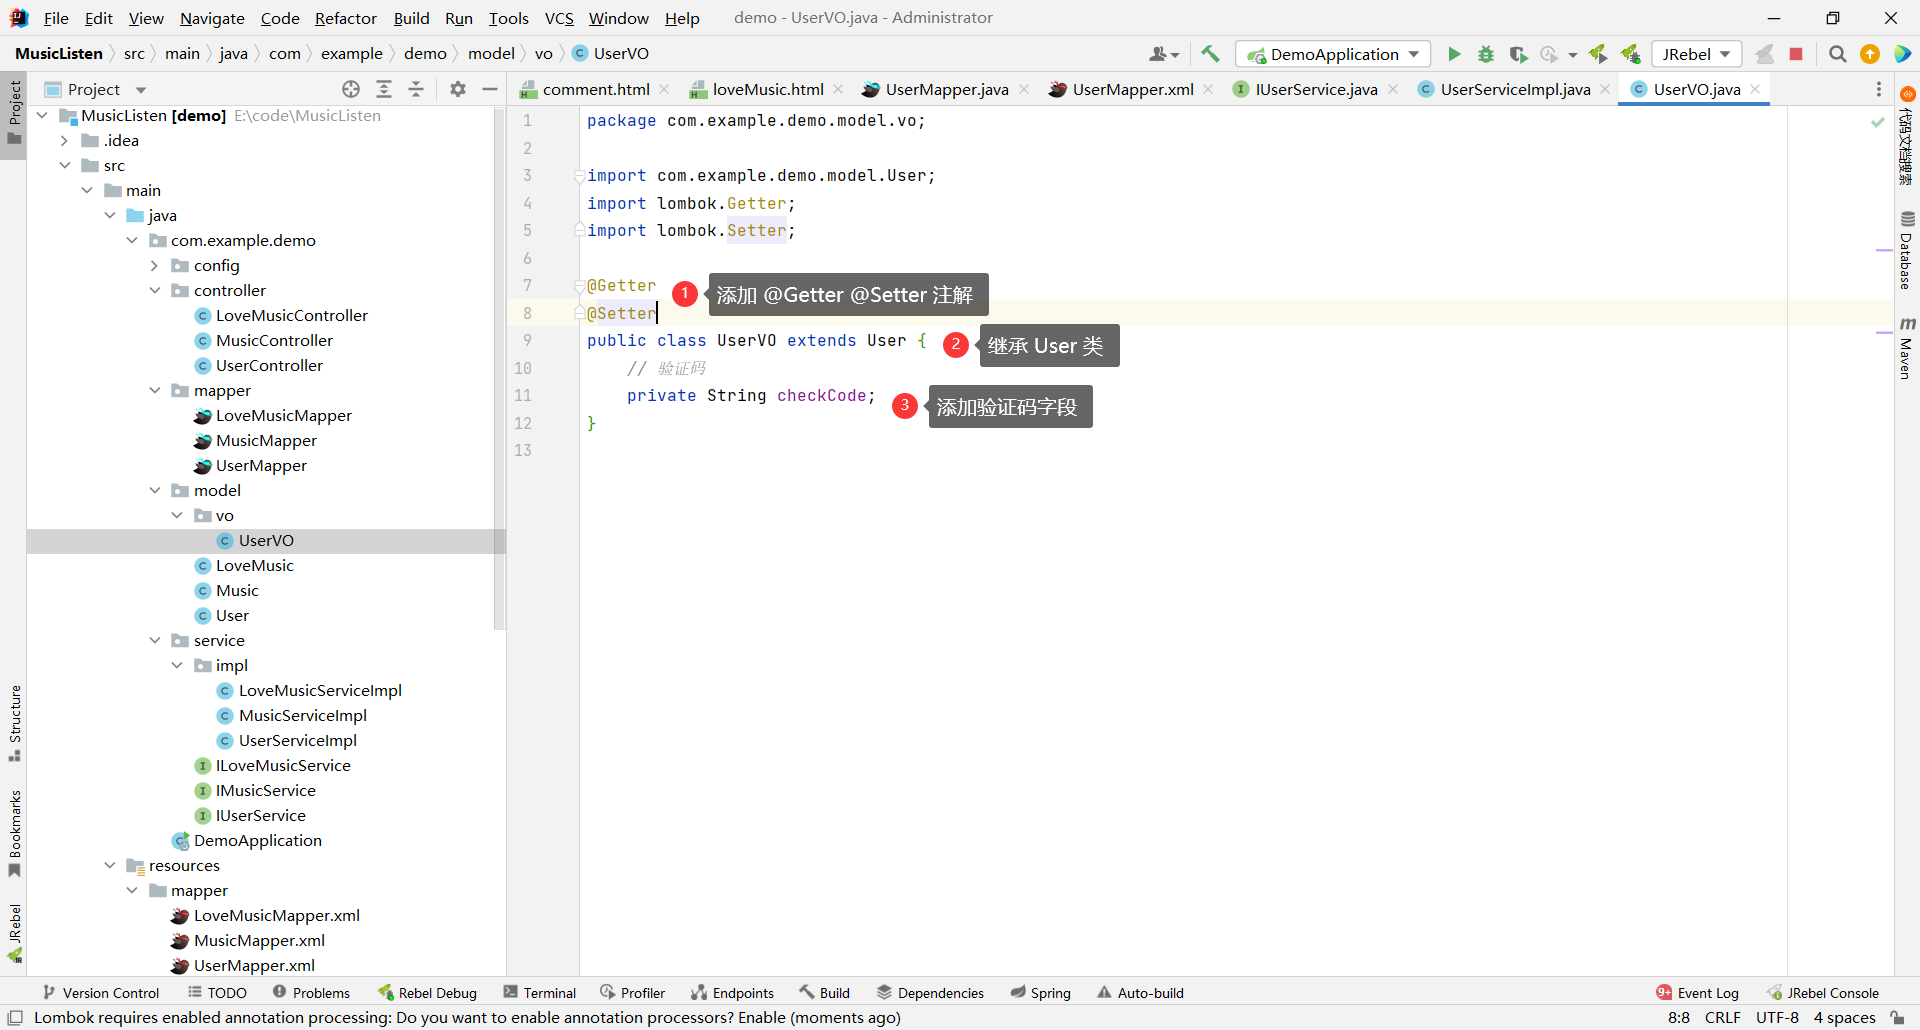
```java
package com.example.demo.model.vo;
import com.example.demo.model.User;
import lombok.Getter;
import lombok.Setter;
@Getter
@Setter
public class UserVO extends User {
// 验证码
private String checkCode;
}
```
那 UserVO 对象㠇包括了用户名、密码、验证码这三个字段了 , 我们让他作为参数
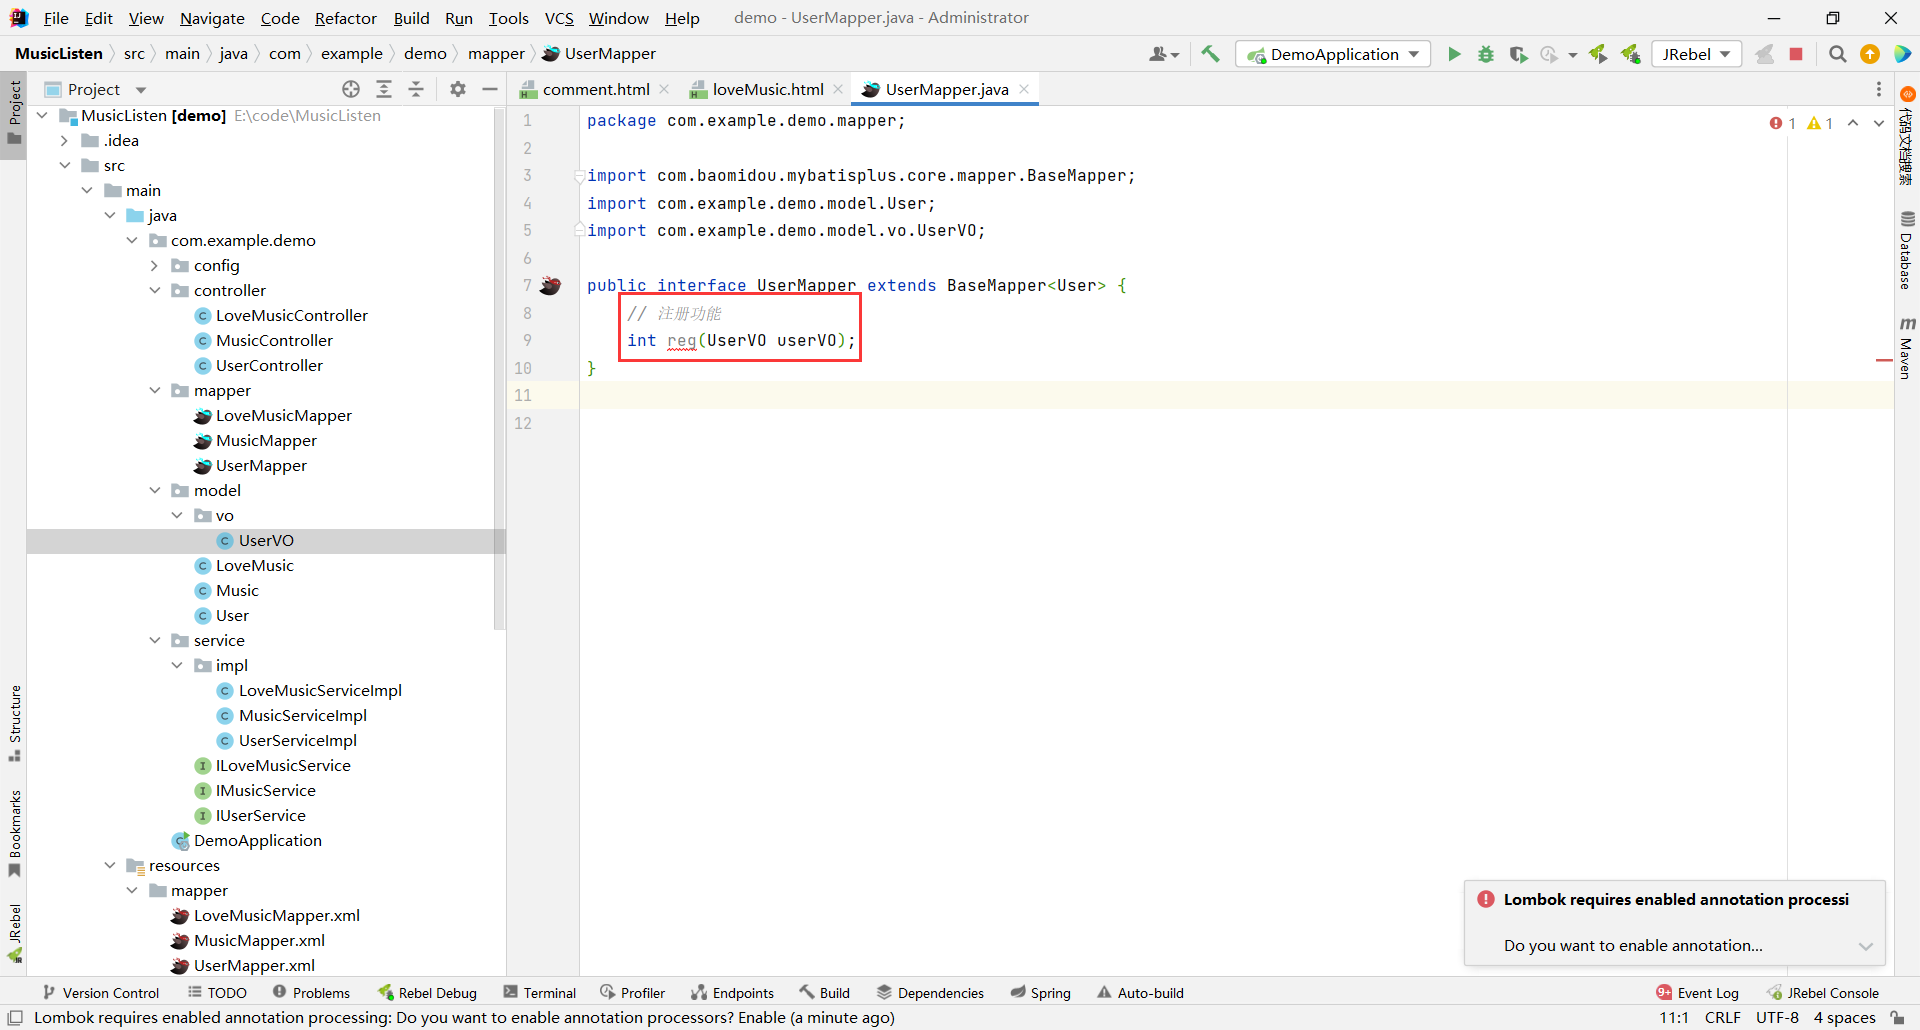
```java
package com.example.demo.mapper;
import com.baomidou.mybatisplus.core.mapper.BaseMapper;
import com.example.demo.model.User;
import com.example.demo.model.vo.UserVO;
public interface UserMapper extends BaseMapper {
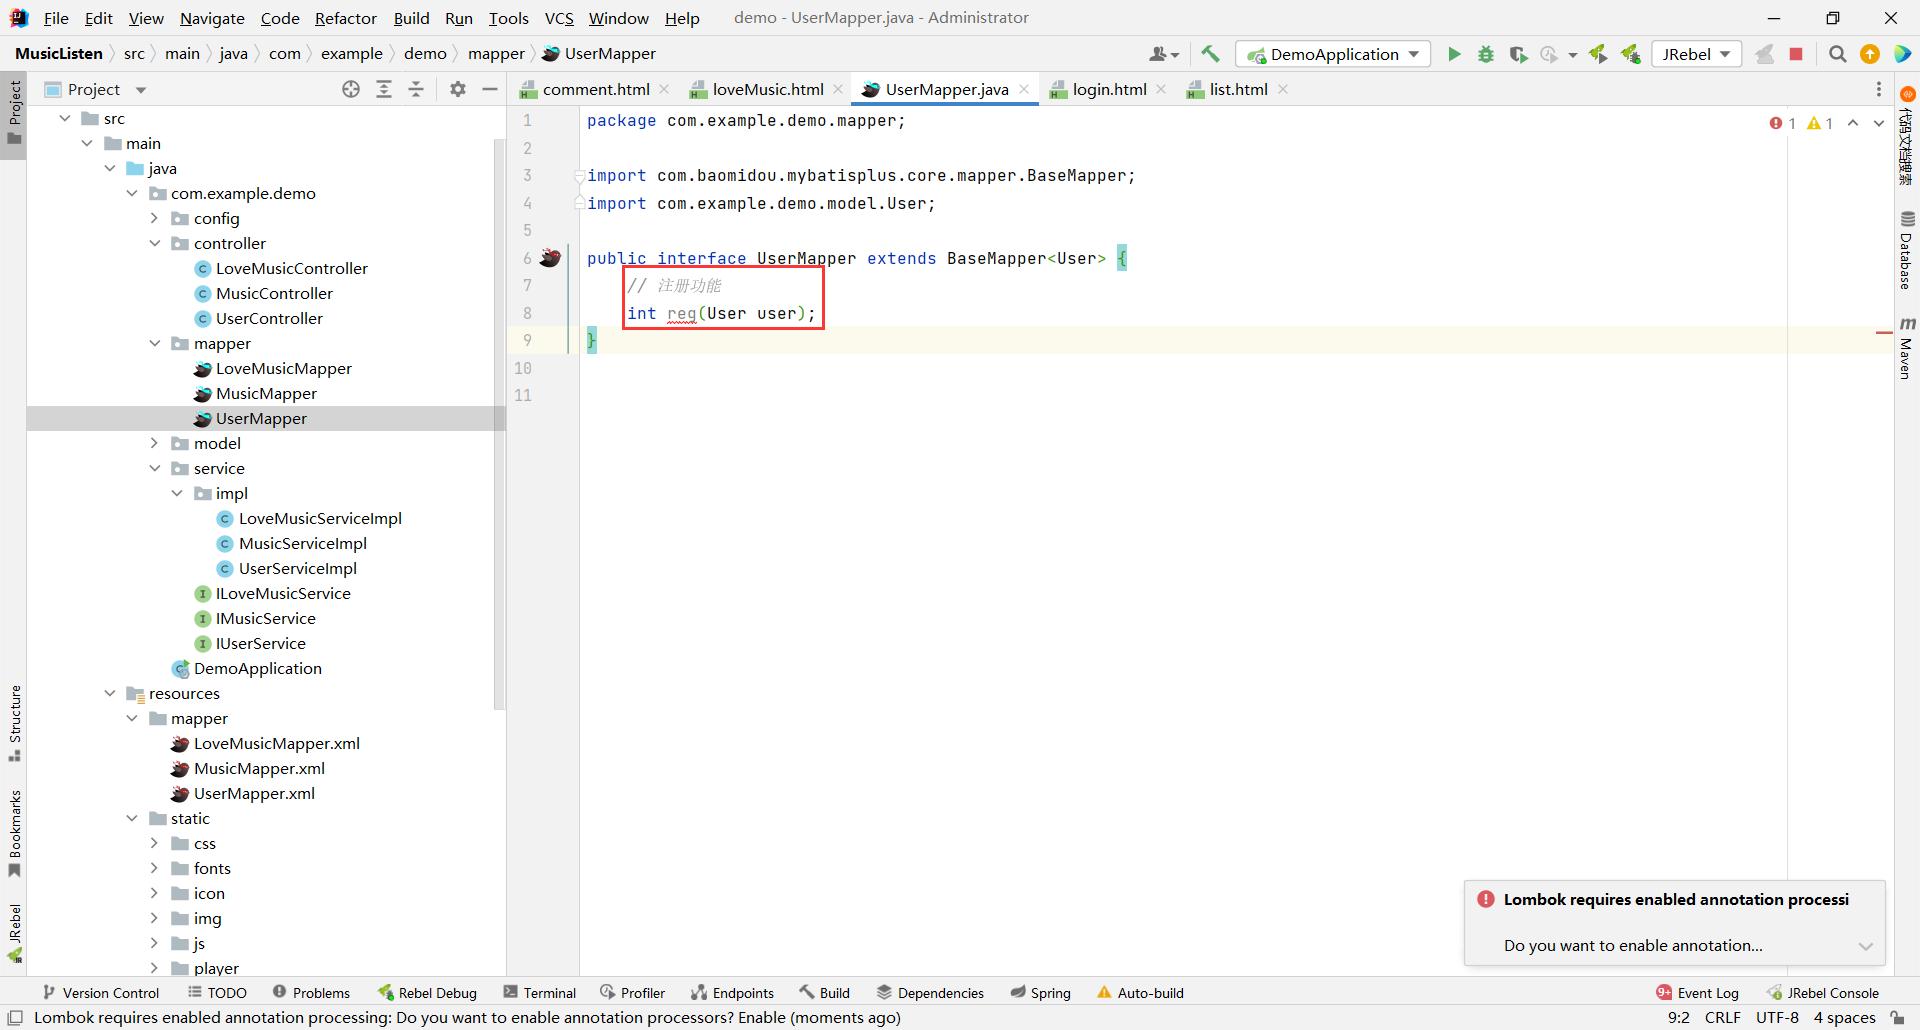
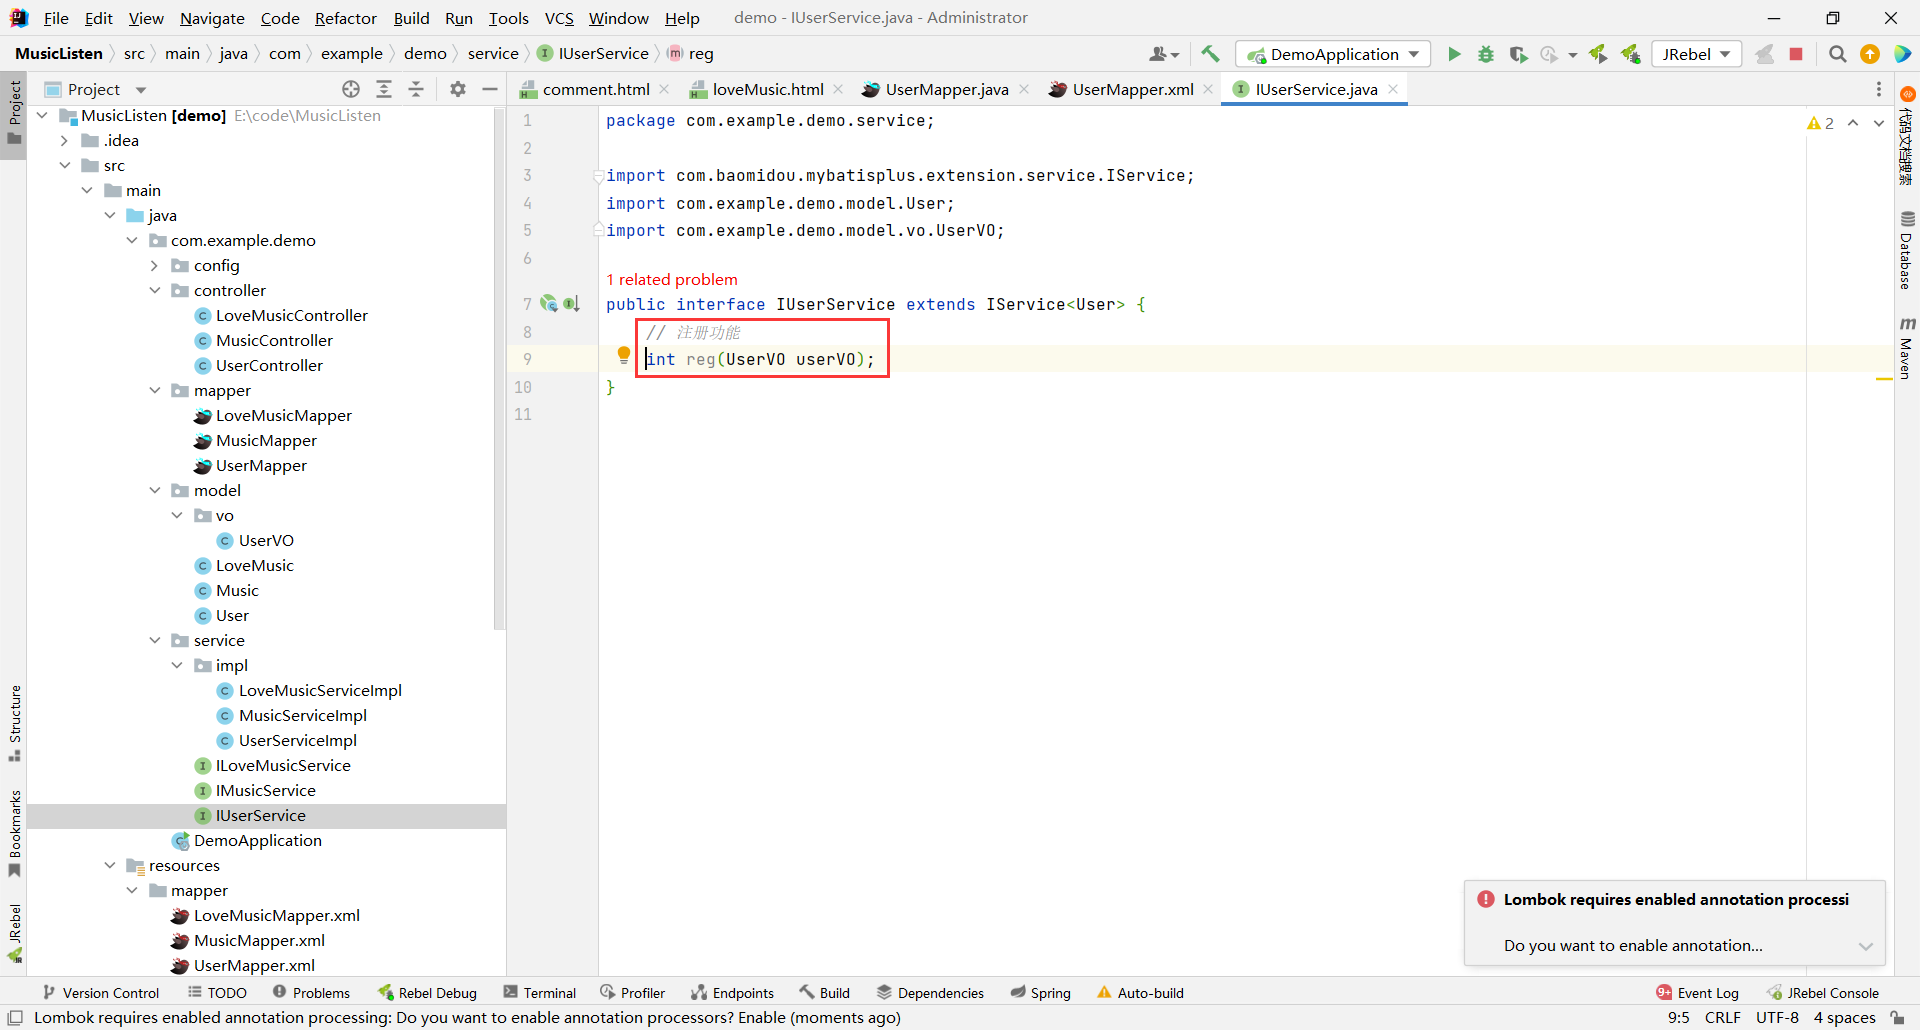
// 注册功能
int reg(UserVO userVO);
}
```
返回值为 int 代表受影响的行数 , 即 : 插入成功的行数
然后接下来实现我们的 UserMapper.xml
##### UserMapper.xml
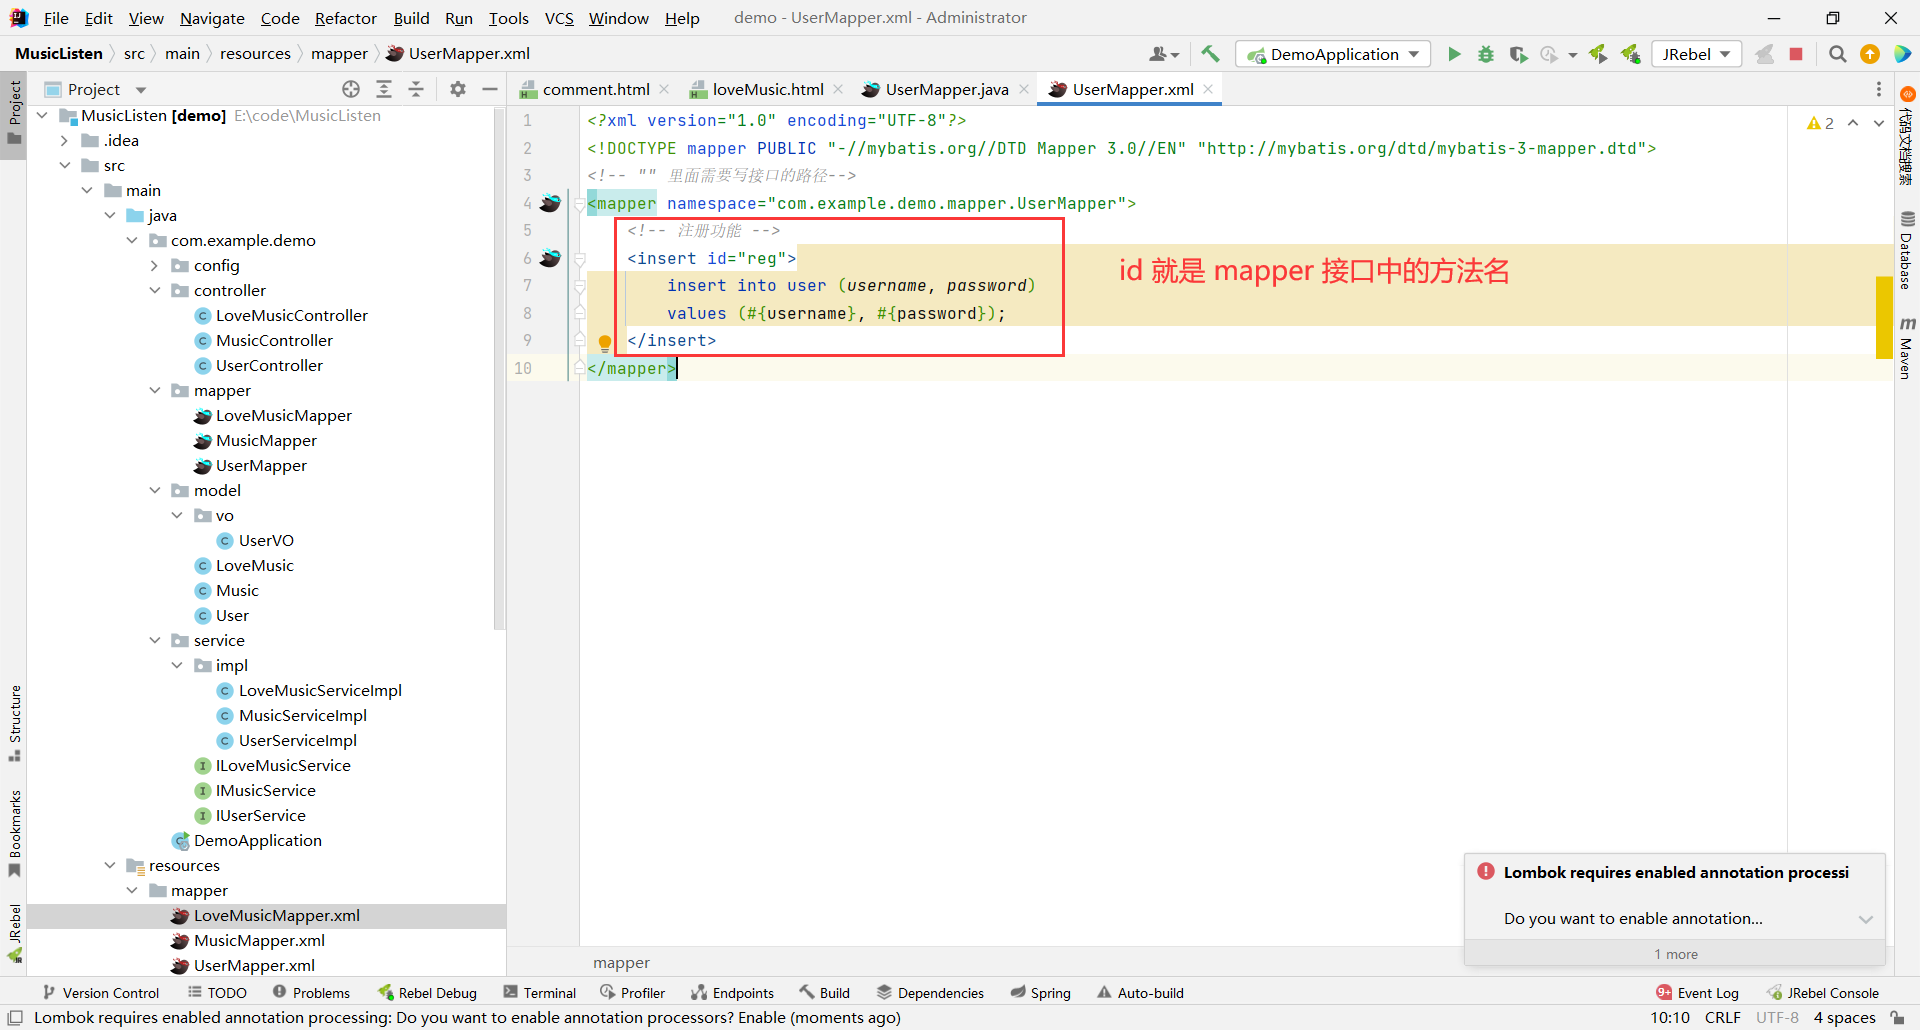
```java
insert into user (username, password)
values (#{username}, #{password});
```
那 mapper 层我们已经编写完了 , 接下来编写 service 层
#### service 层
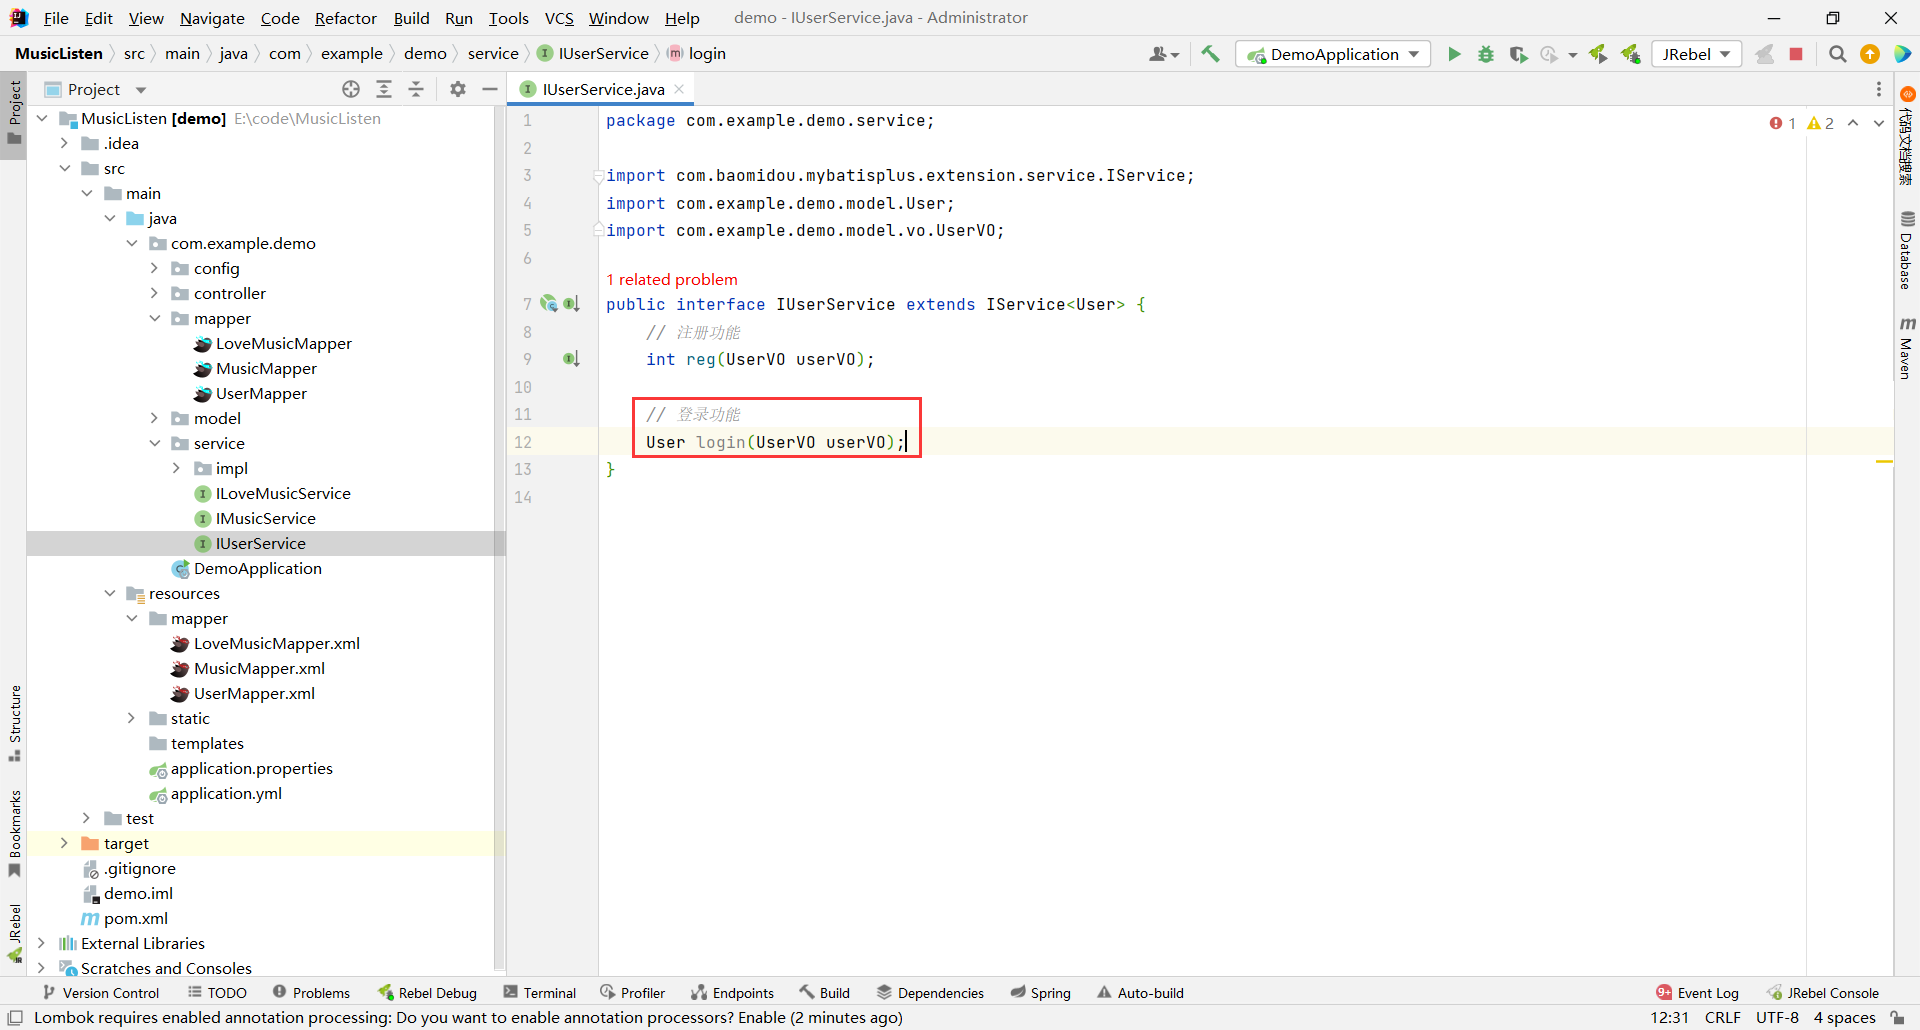
##### 接口
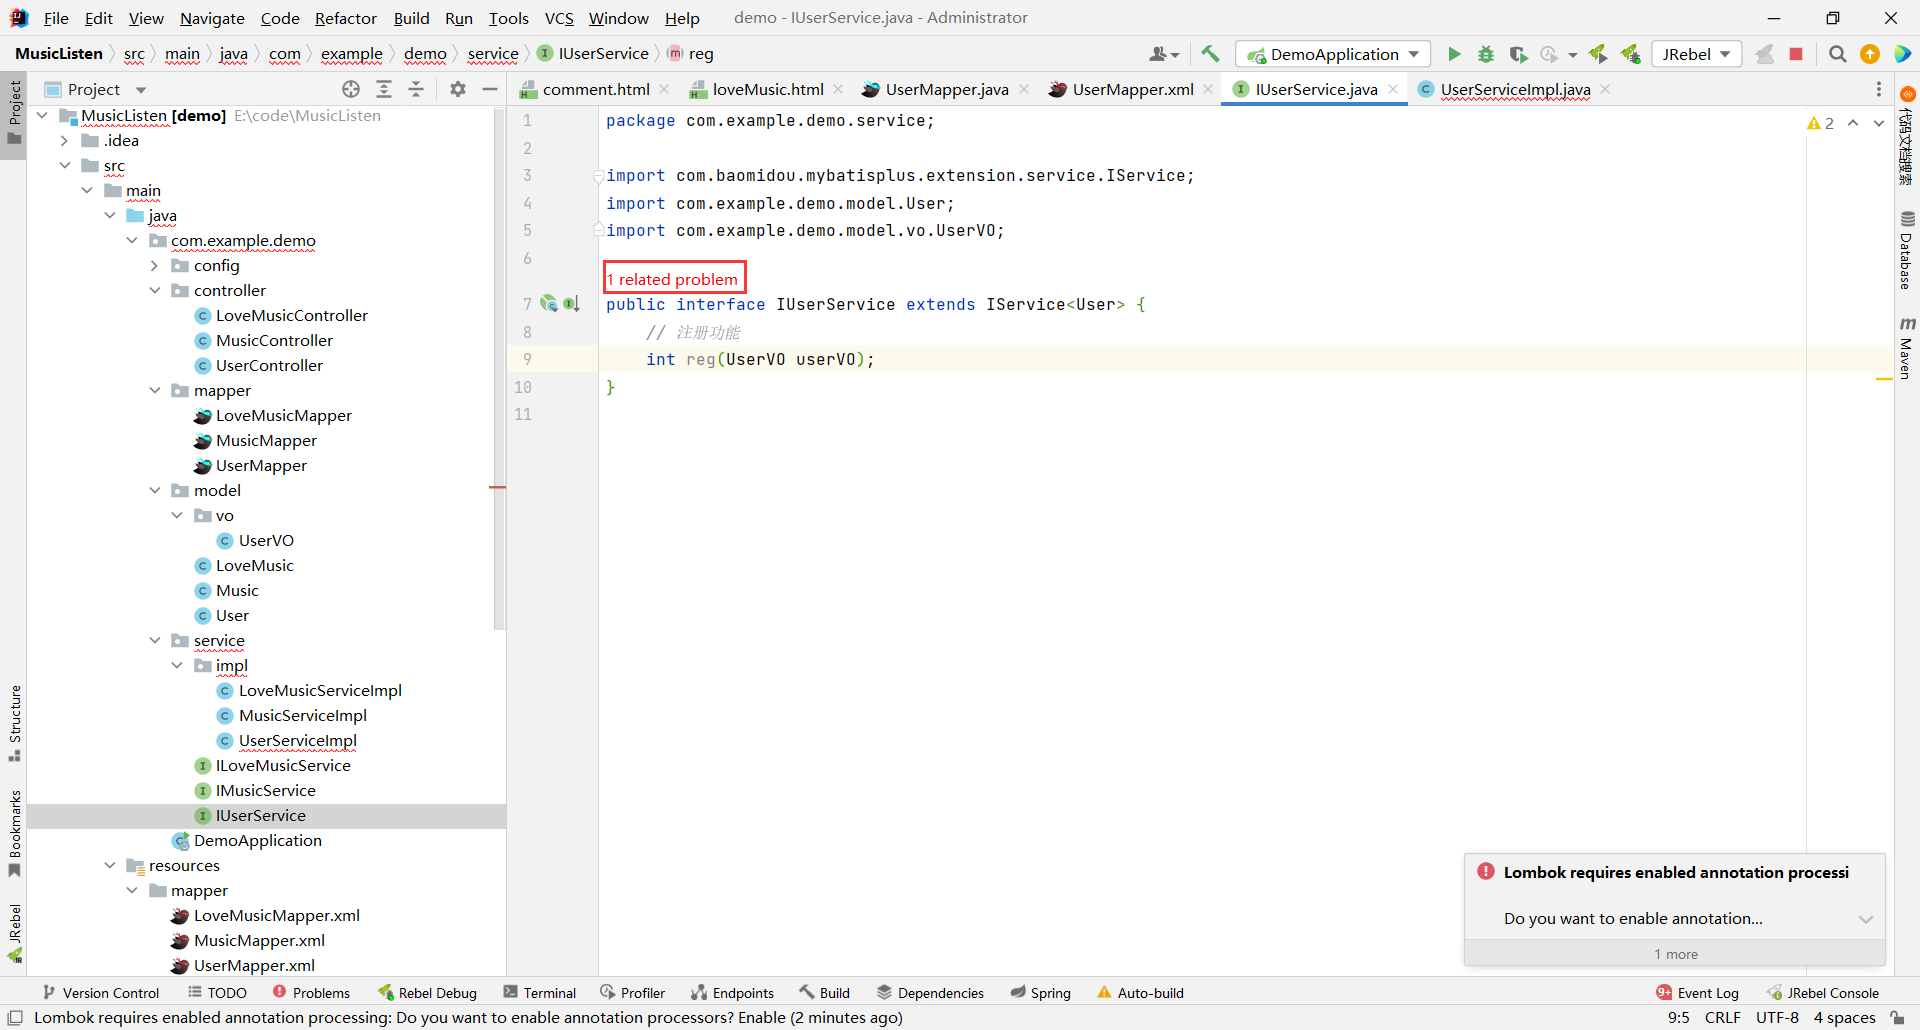
service 的接口层也是用来声明的
具体的实现在 service 层的实现
我们直接点击上面的 1 related problem 跳转到 service 层的实现
```java
package com.example.demo.service;
import com.baomidou.mybatisplus.extension.service.IService;
import com.example.demo.model.User;
import com.example.demo.model.vo.UserVO;
public interface IUserService extends IService {
// 注册功能
int reg(UserVO userVO);
}
```
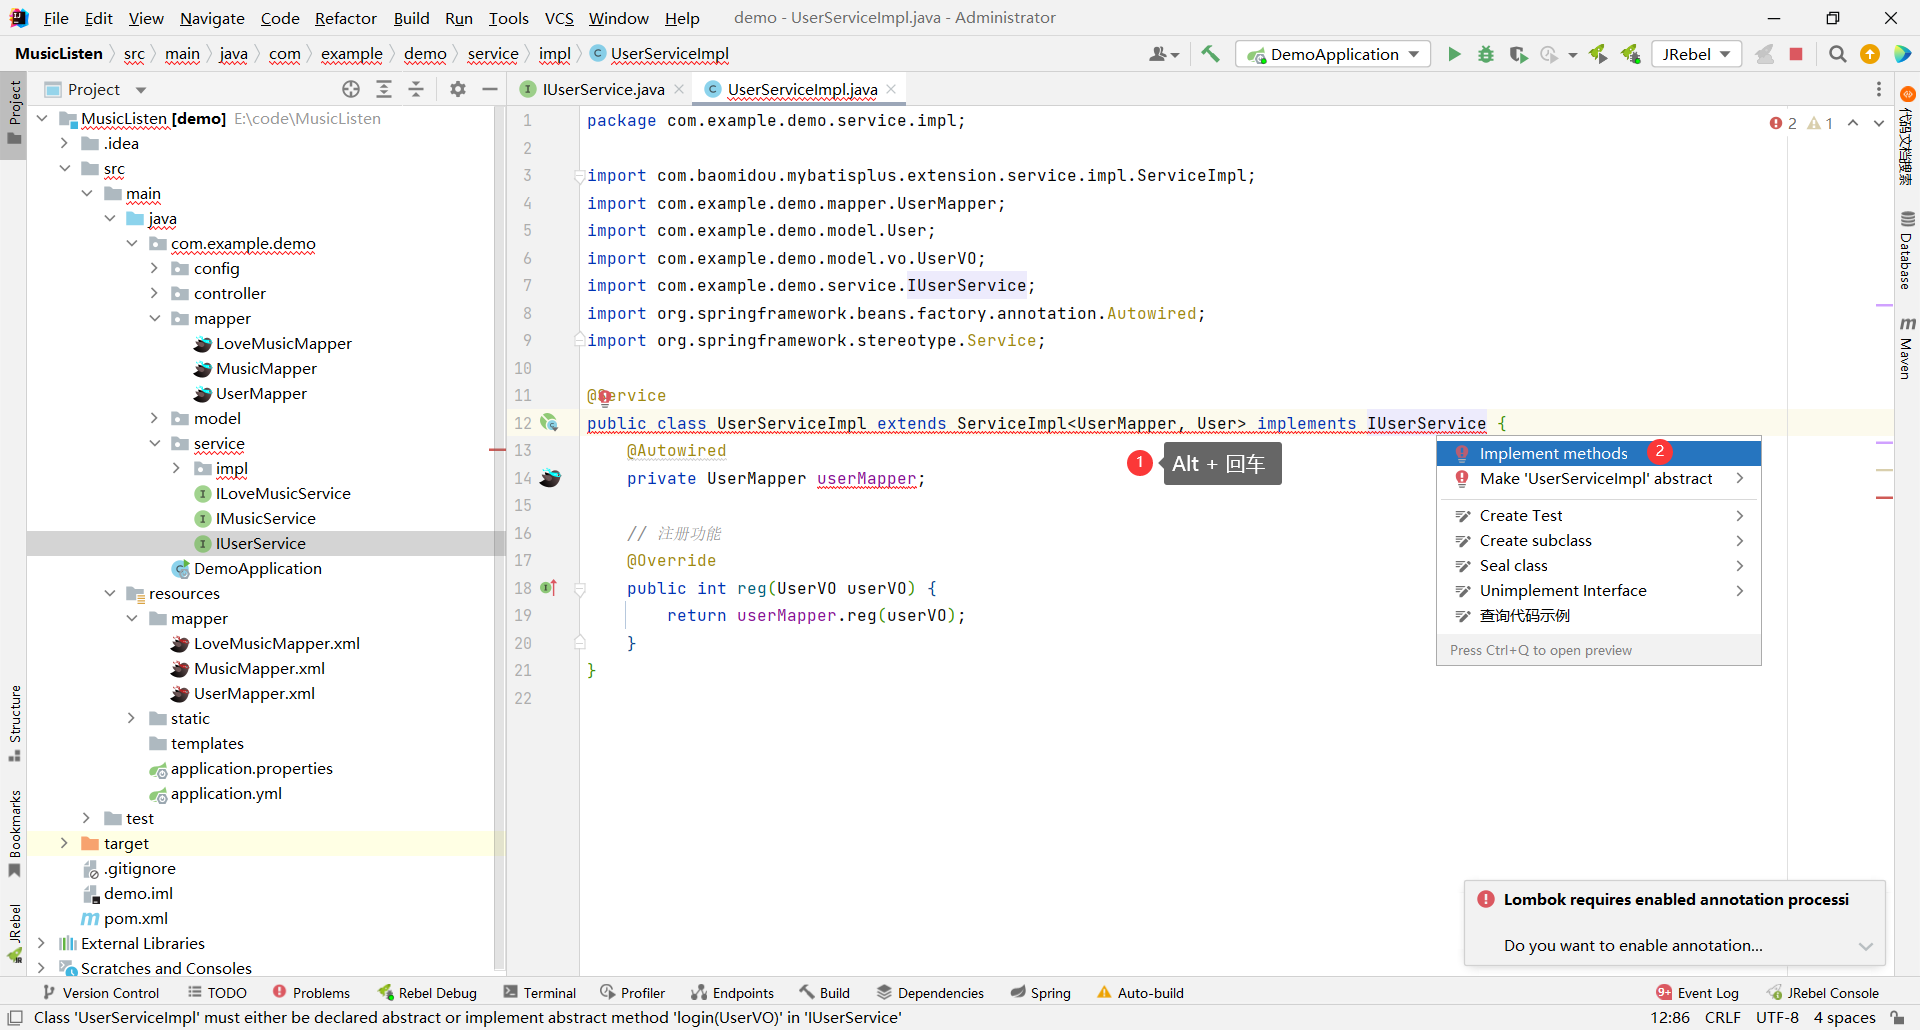
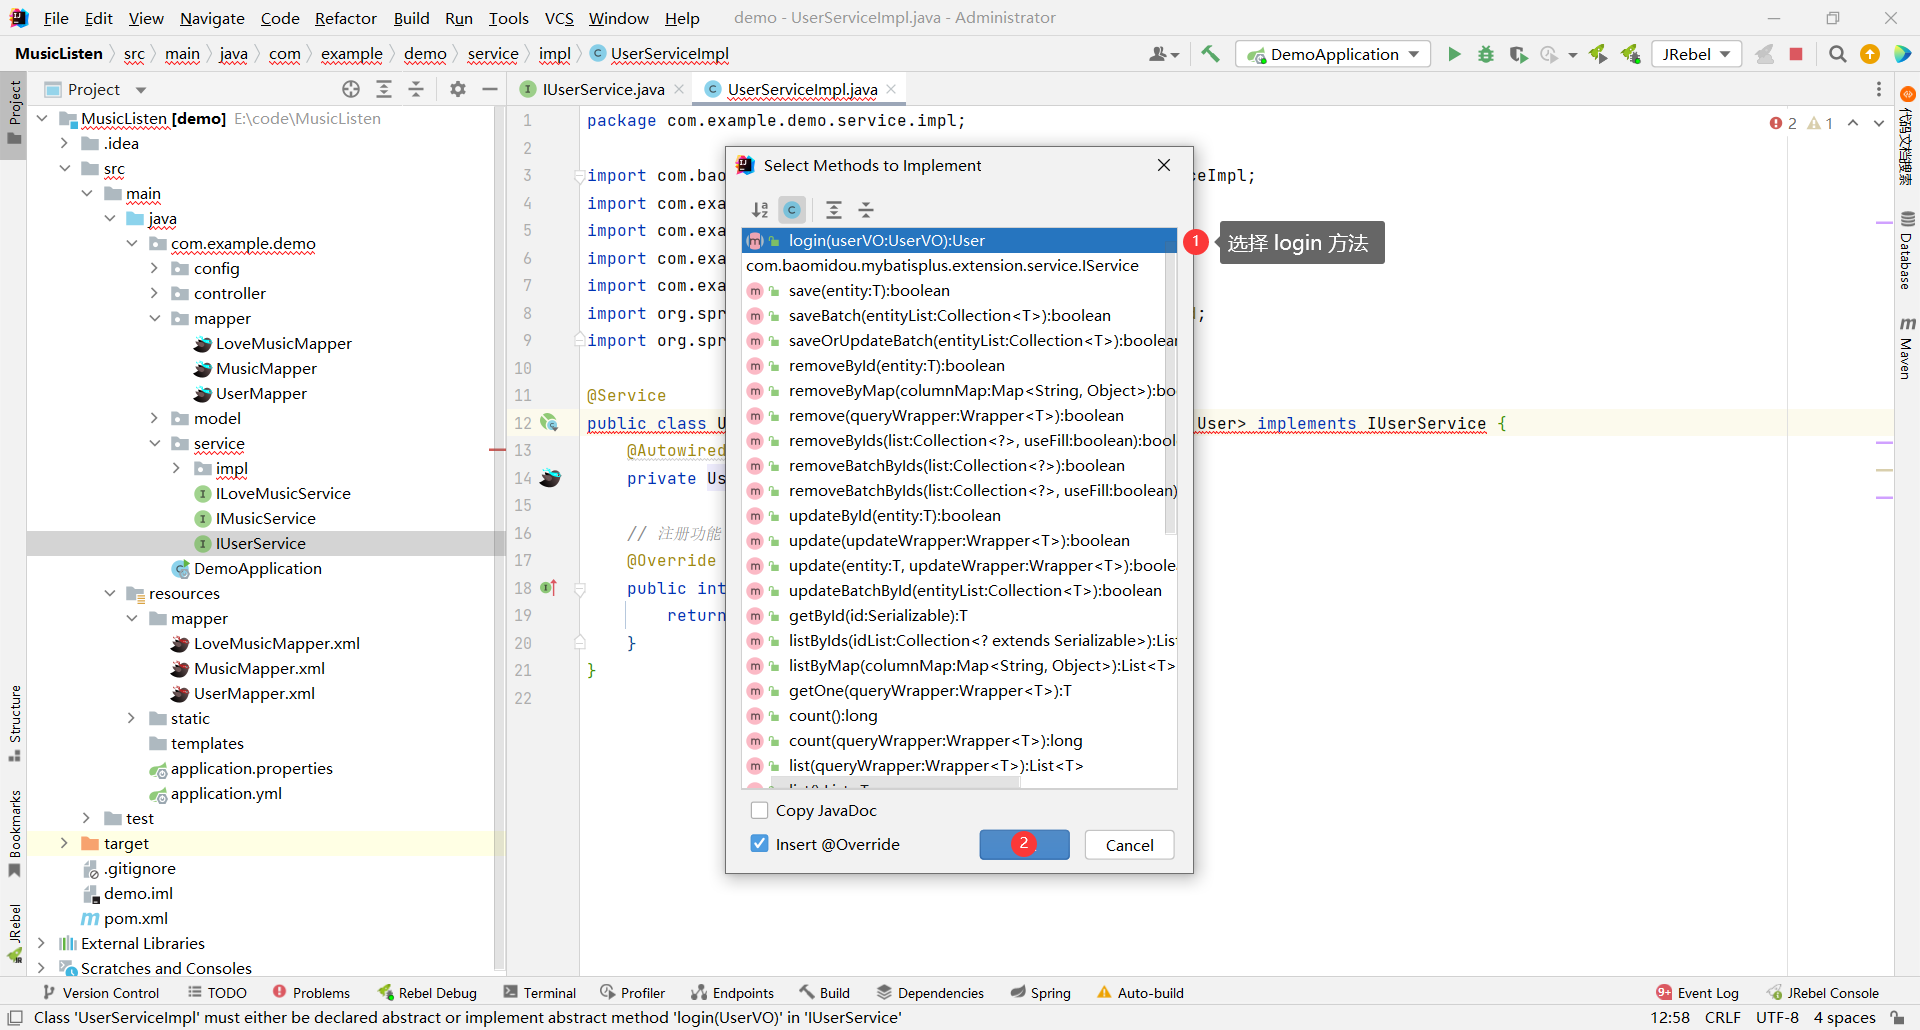
##### 实现
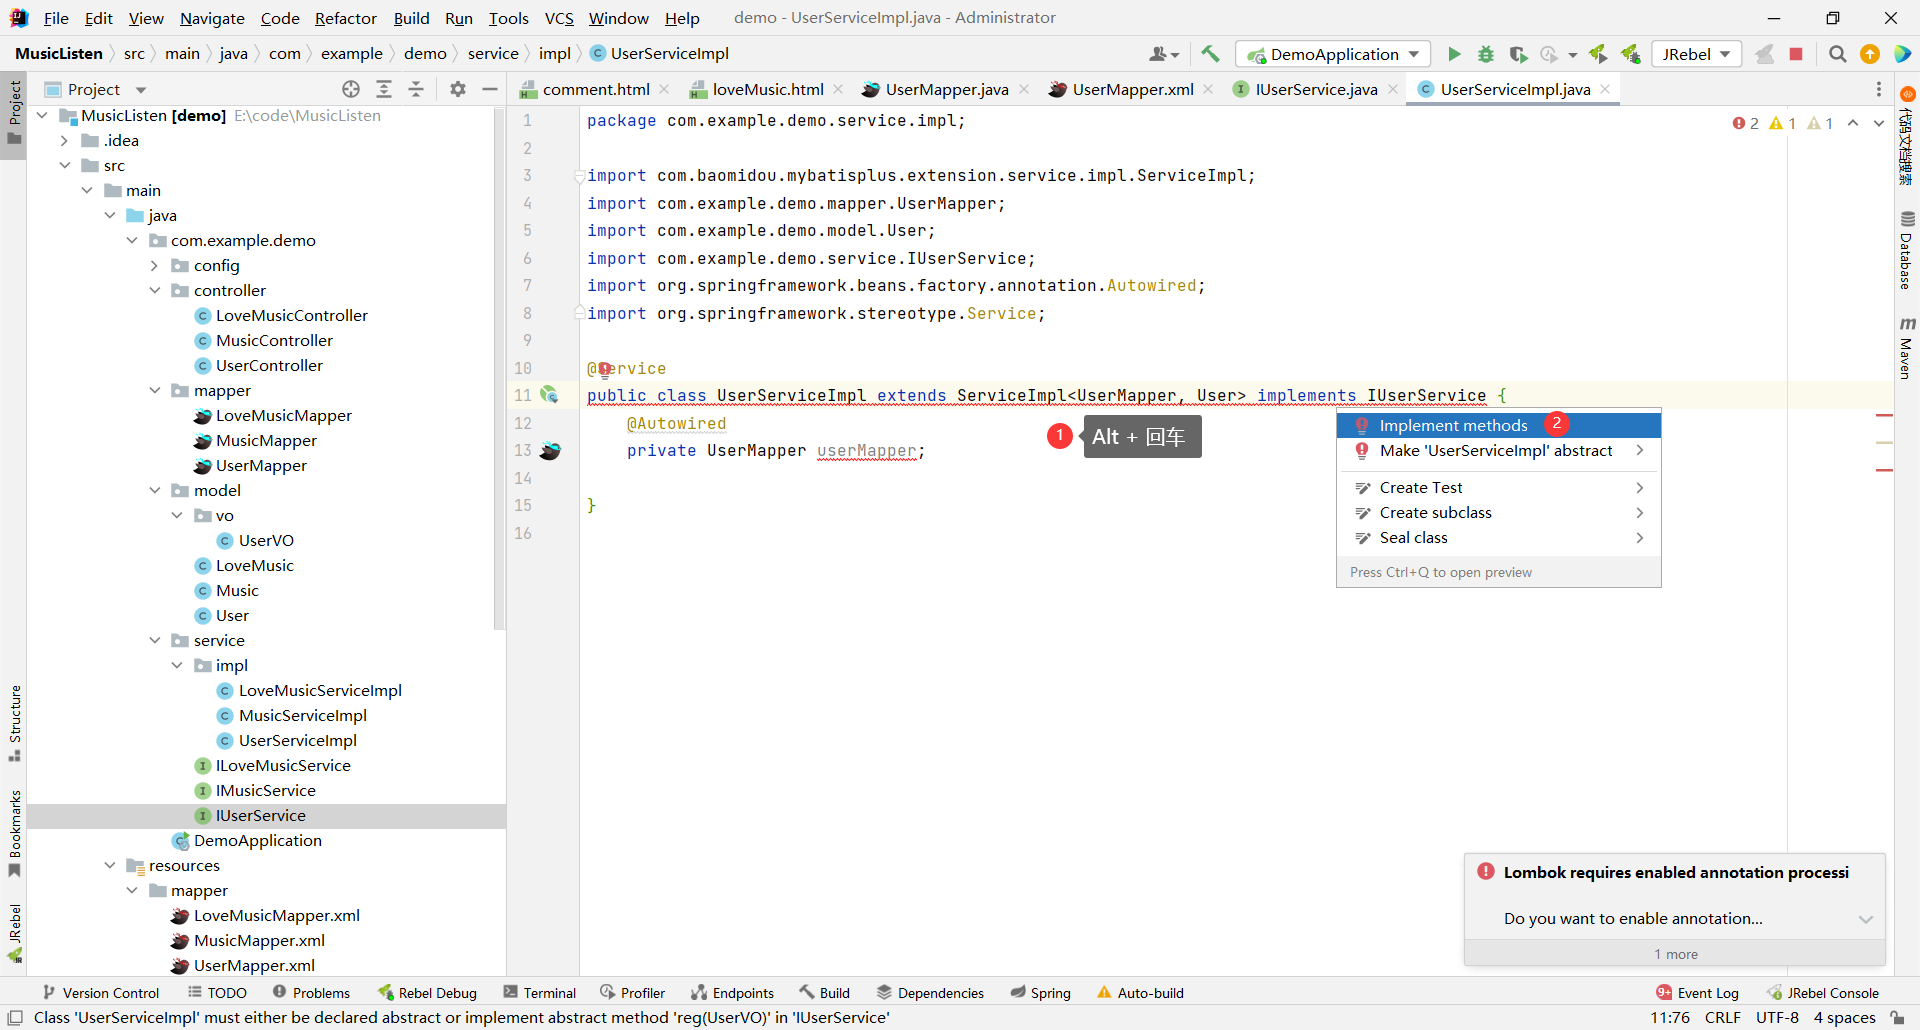
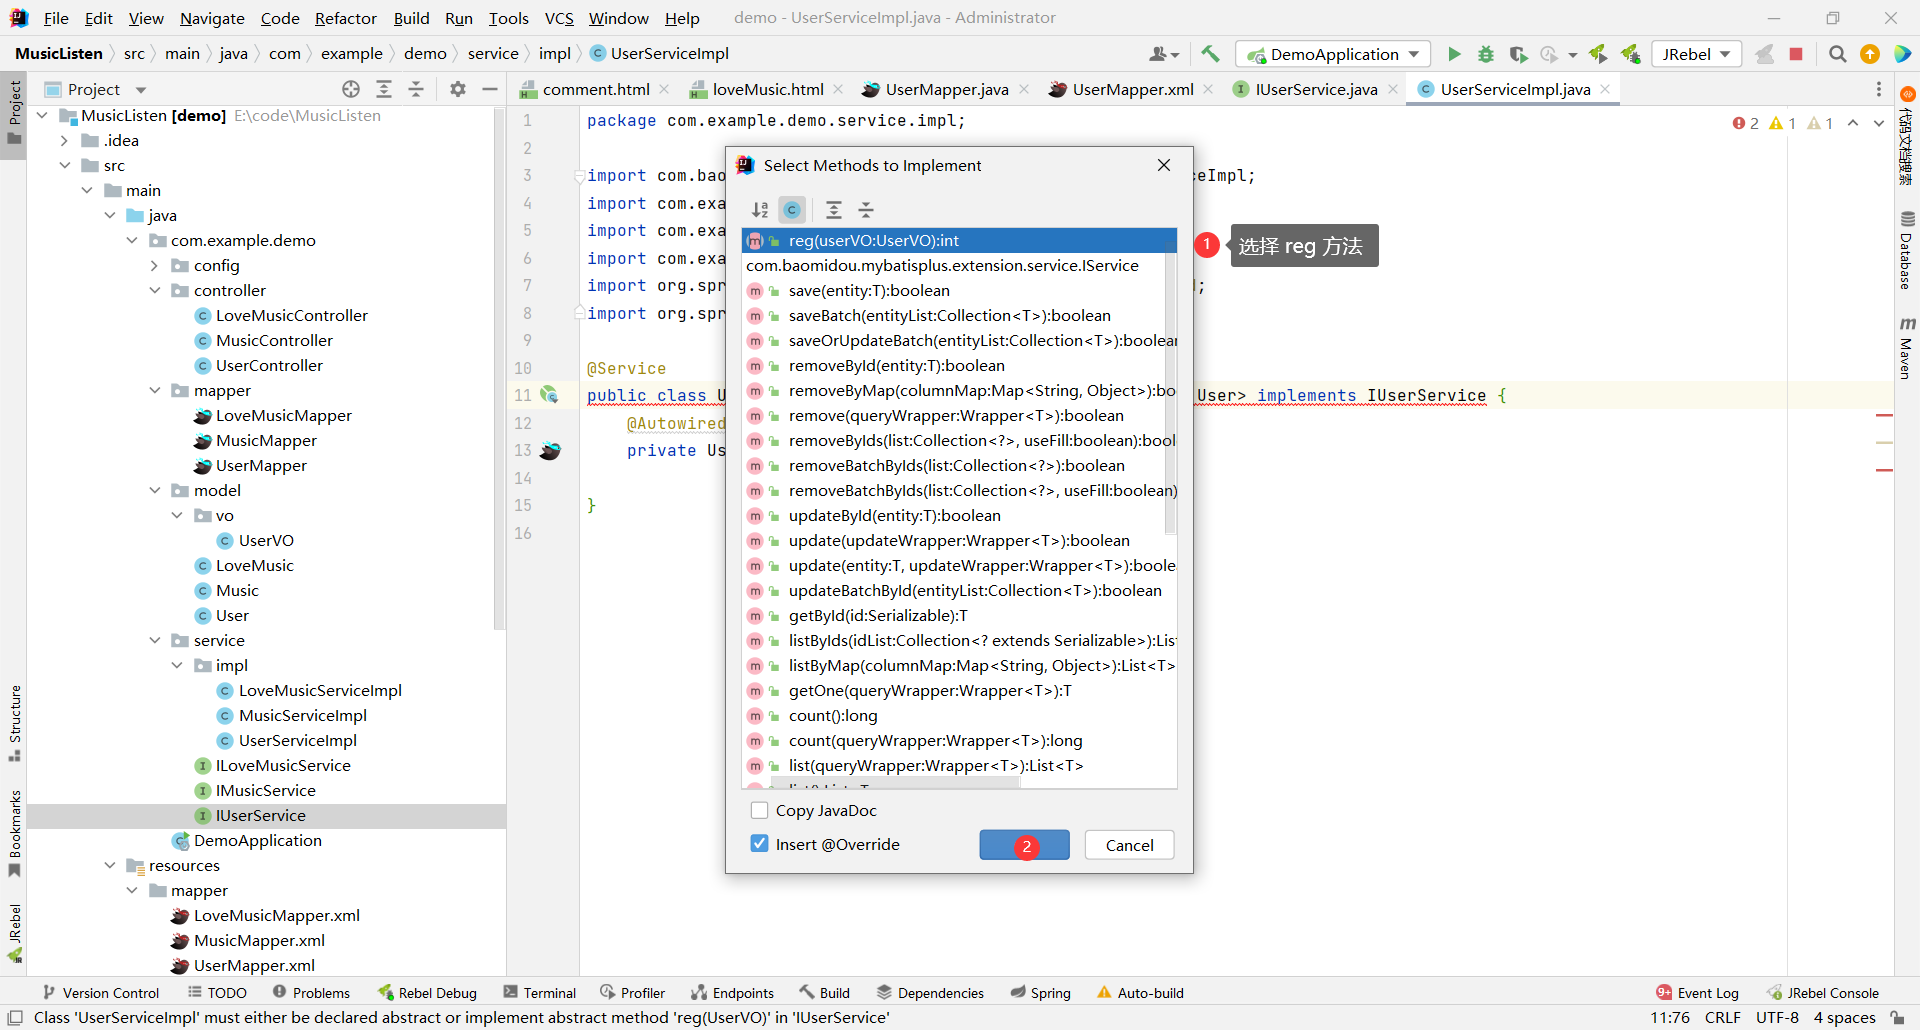
然后直接在方法里面调用 UserMapper 的 reg 方法即可

```java
package com.example.demo.service.impl;
import com.baomidou.mybatisplus.extension.service.impl.ServiceImpl;
import com.example.demo.mapper.UserMapper;
import com.example.demo.model.User;
import com.example.demo.model.vo.UserVO;
import com.example.demo.service.IUserService;
import org.springframework.beans.factory.annotation.Autowired;
import org.springframework.stereotype.Service;
@Service
public class UserServiceImpl extends ServiceImpl implements IUserService {
@Autowired
private UserMapper userMapper;
// 注册功能
@Override
public int reg(UserVO userVO) {
return userMapper.reg(userVO);
}
}
```
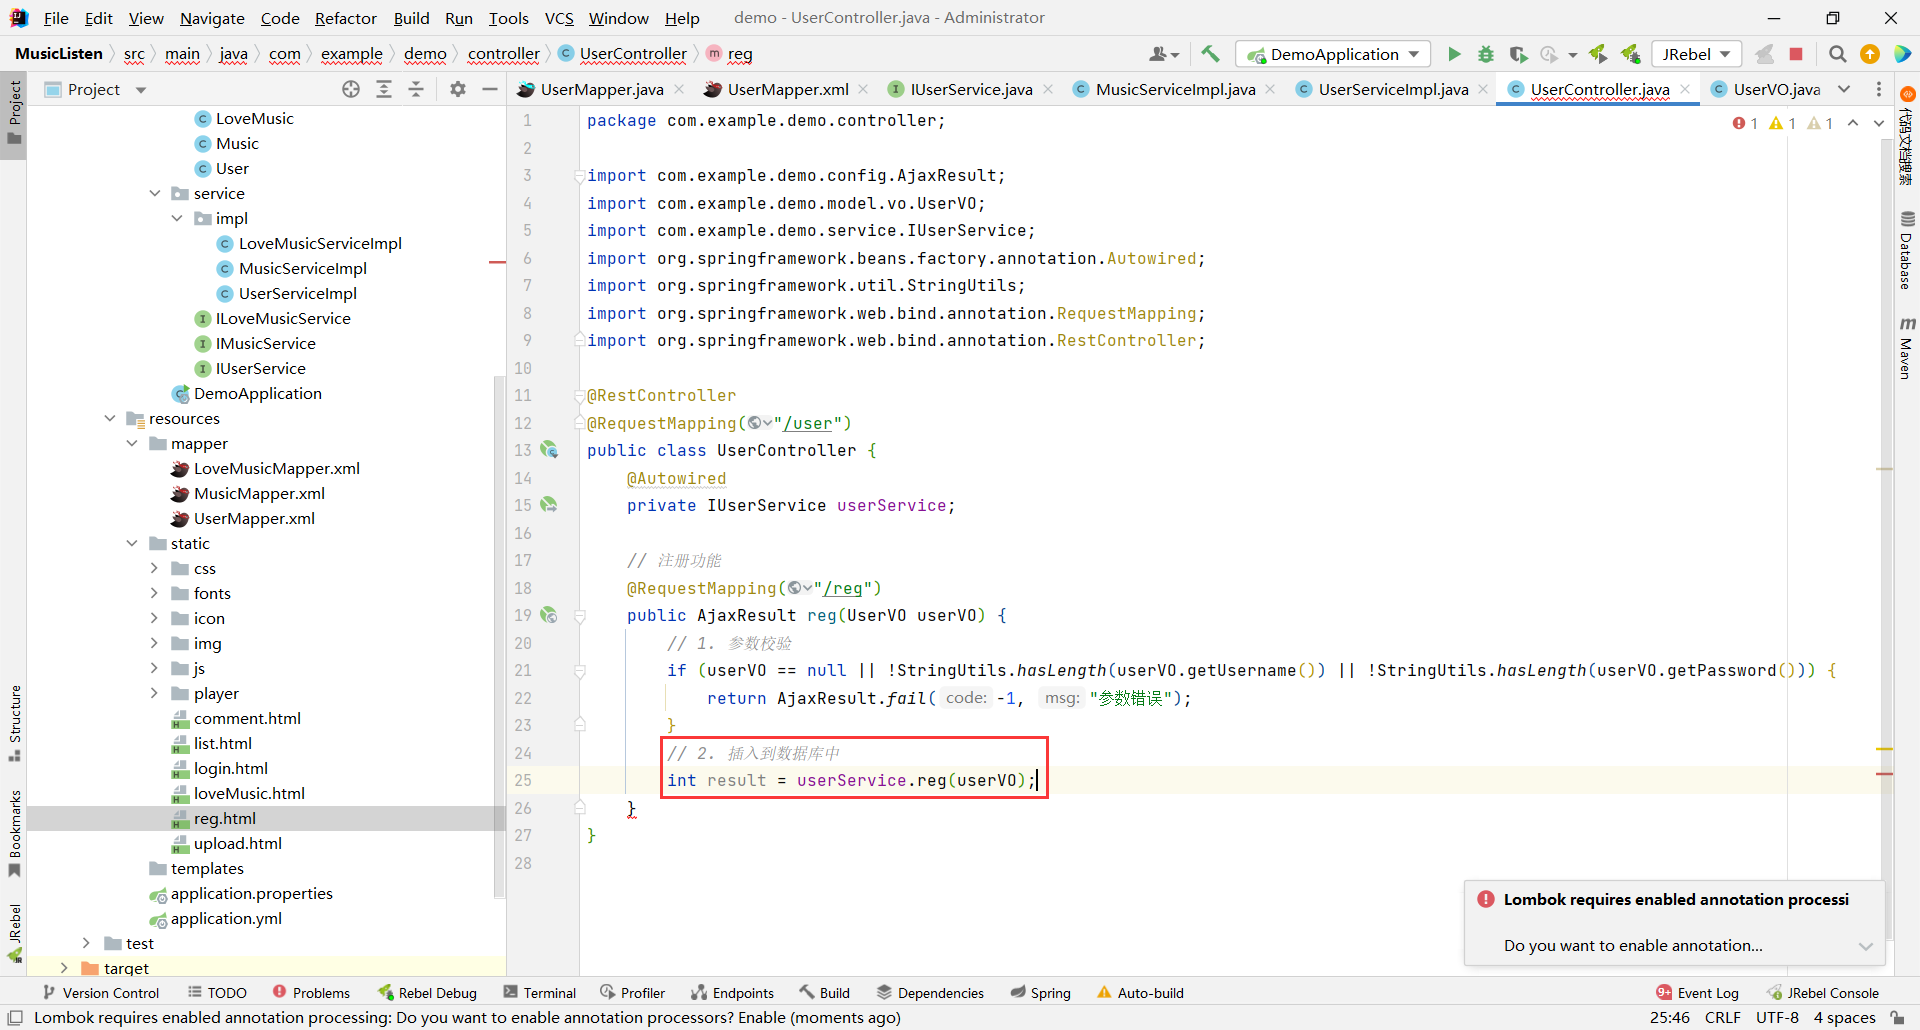
#### controller 层
controller 层我们就主要编写业务的核心代码了
我们先罗列一下基本的步骤
1. 参数校验
2. 插入到数据库中
3. 返回插入成功的数据
那我们就按照这个步骤来实现
第一步 : 参数校验 , 我们判断传输过来的对象是否为空 , 然后检查传输过来的对象中账号密码是否存在
如果不存在 , 返回给服务器状态码为 -1 , 状态码描述信息为 "参数错误"

第二步 : 插入到数据库中 , 我们直接调用 userService 的 reg 方法即可 , 返回值代表受影响的行数 , 用 result 接收
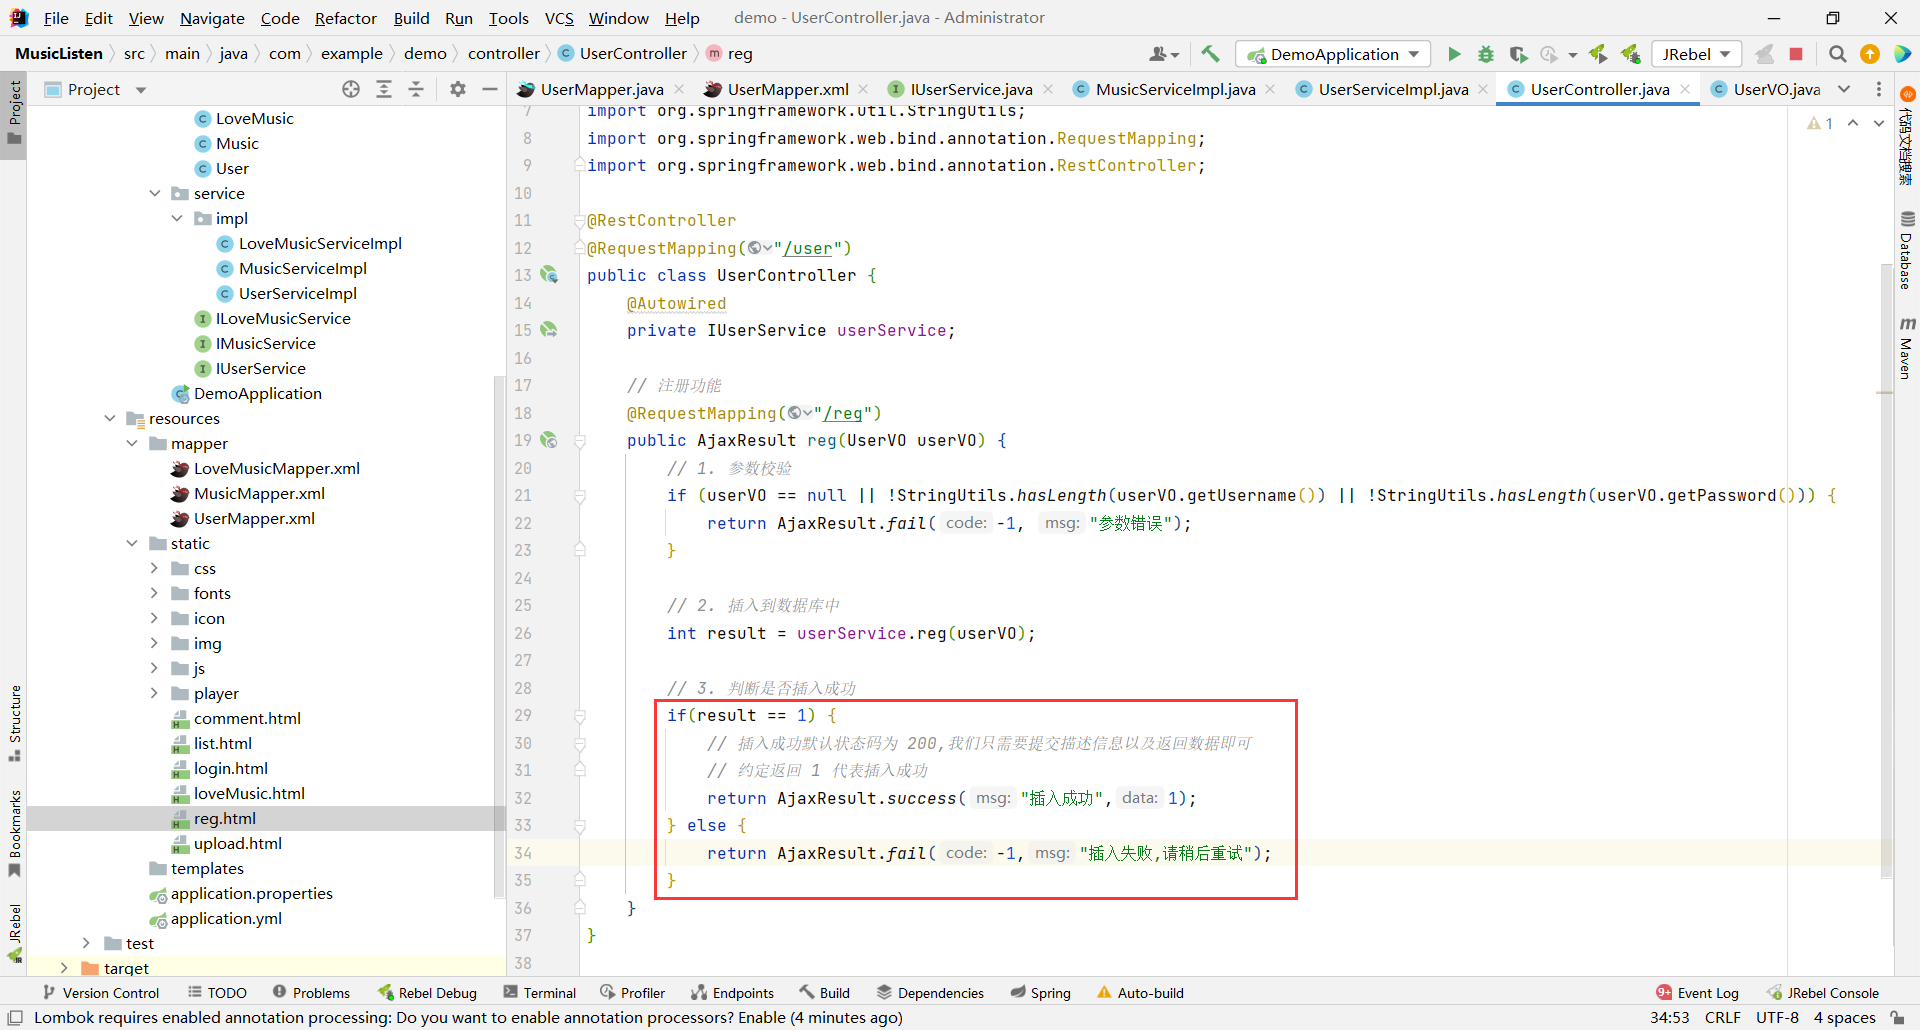
第三步 : 判断是否插入成功 , 然后返回给前端
```java
package com.example.demo.controller;
import com.example.demo.config.AjaxResult;
import com.example.demo.model.vo.UserVO;
import com.example.demo.service.IUserService;
import org.springframework.beans.factory.annotation.Autowired;
import org.springframework.util.StringUtils;
import org.springframework.web.bind.annotation.RequestMapping;
import org.springframework.web.bind.annotation.RestController;
@RestController
@RequestMapping("/user")
public class UserController {
@Autowired
private IUserService userService;
// 注册功能
@RequestMapping("/reg")
public AjaxResult reg(UserVO userVO) {
// 1. 参数校验
if (userVO == null || !StringUtils.hasLength(userVO.getUsername()) || !StringUtils.hasLength(userVO.getPassword())) {
return AjaxResult.fail(-1, "参数错误");
}
// 2. 插入到数据库中
int result = userService.reg(userVO);
// 3. 判断是否插入成功
if (result == 1) {
// 插入成功默认状态码为 200,我们只需要提交描述信息以及返回数据即可
// 约定返回 1 代表插入成功
return AjaxResult.success("插入成功", 1);
} else {
return AjaxResult.fail(-1, "插入失败,请稍后重试");
}
}
}
```
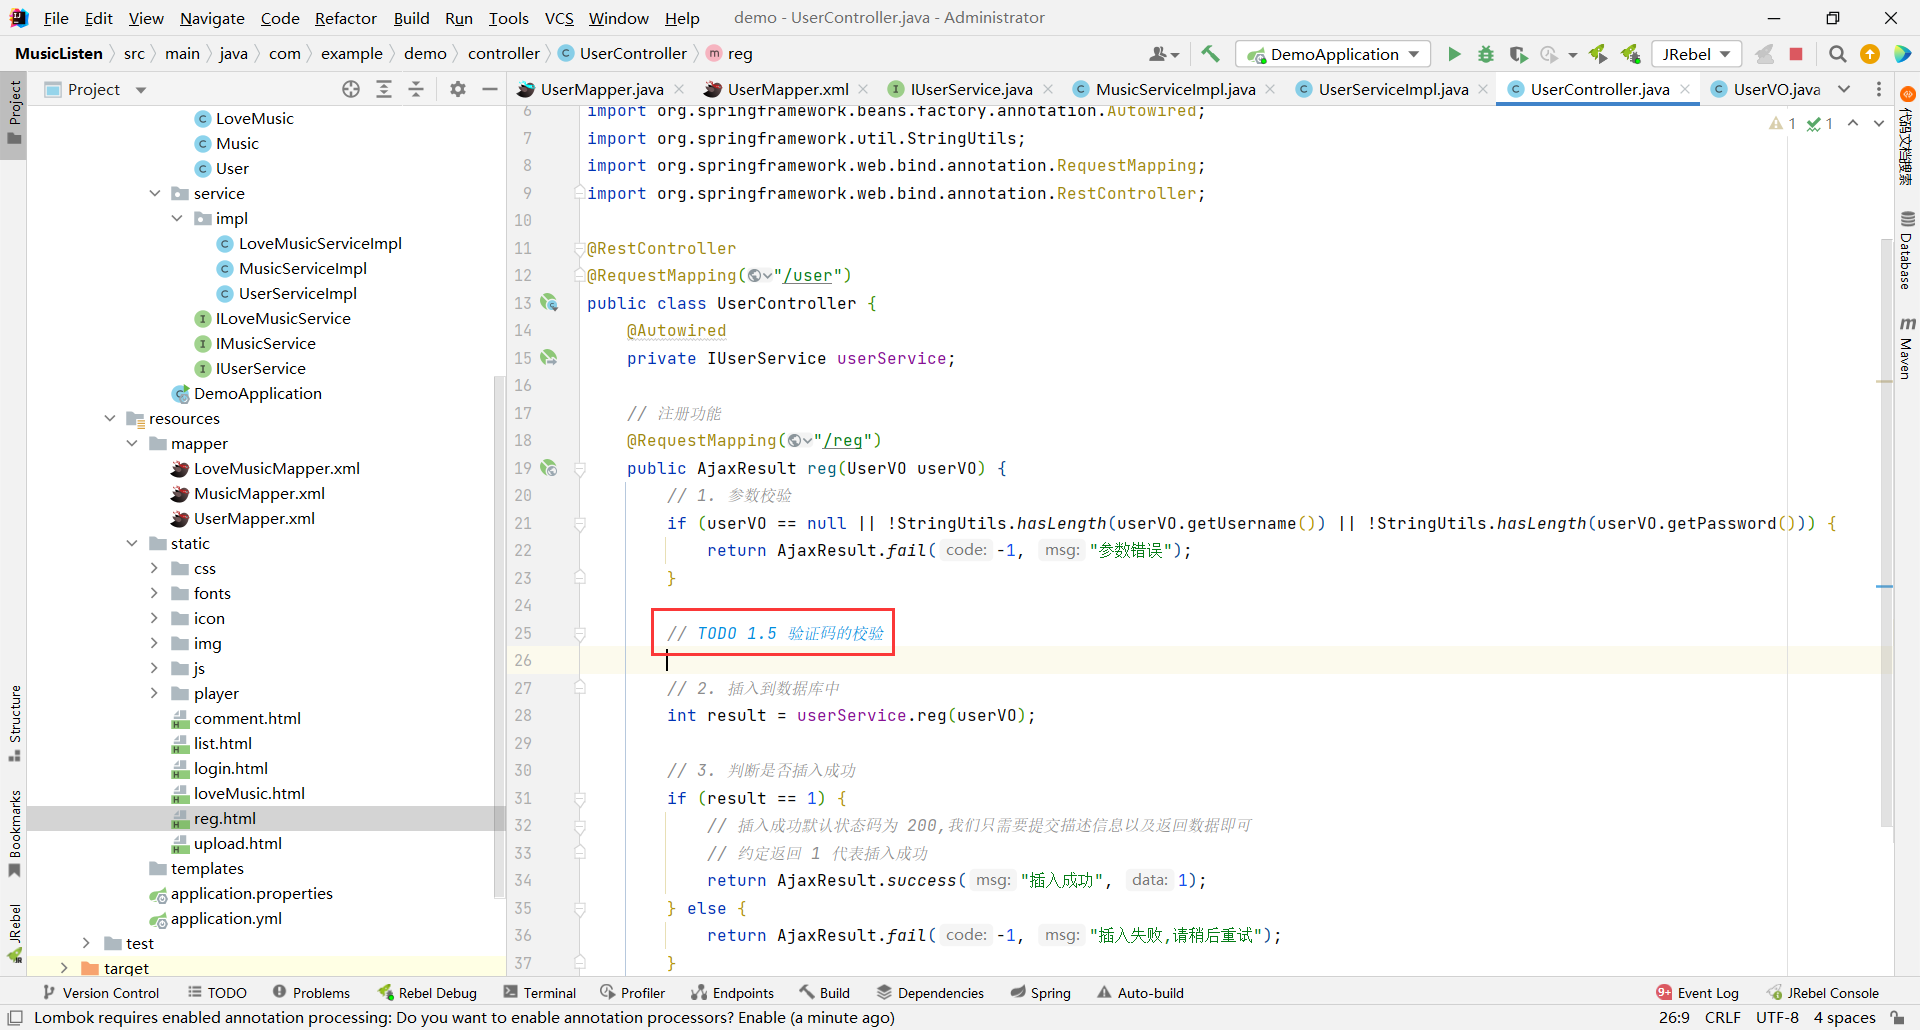
那这中间 , 还有验证码我们需要校验 , 我们之后再去实现
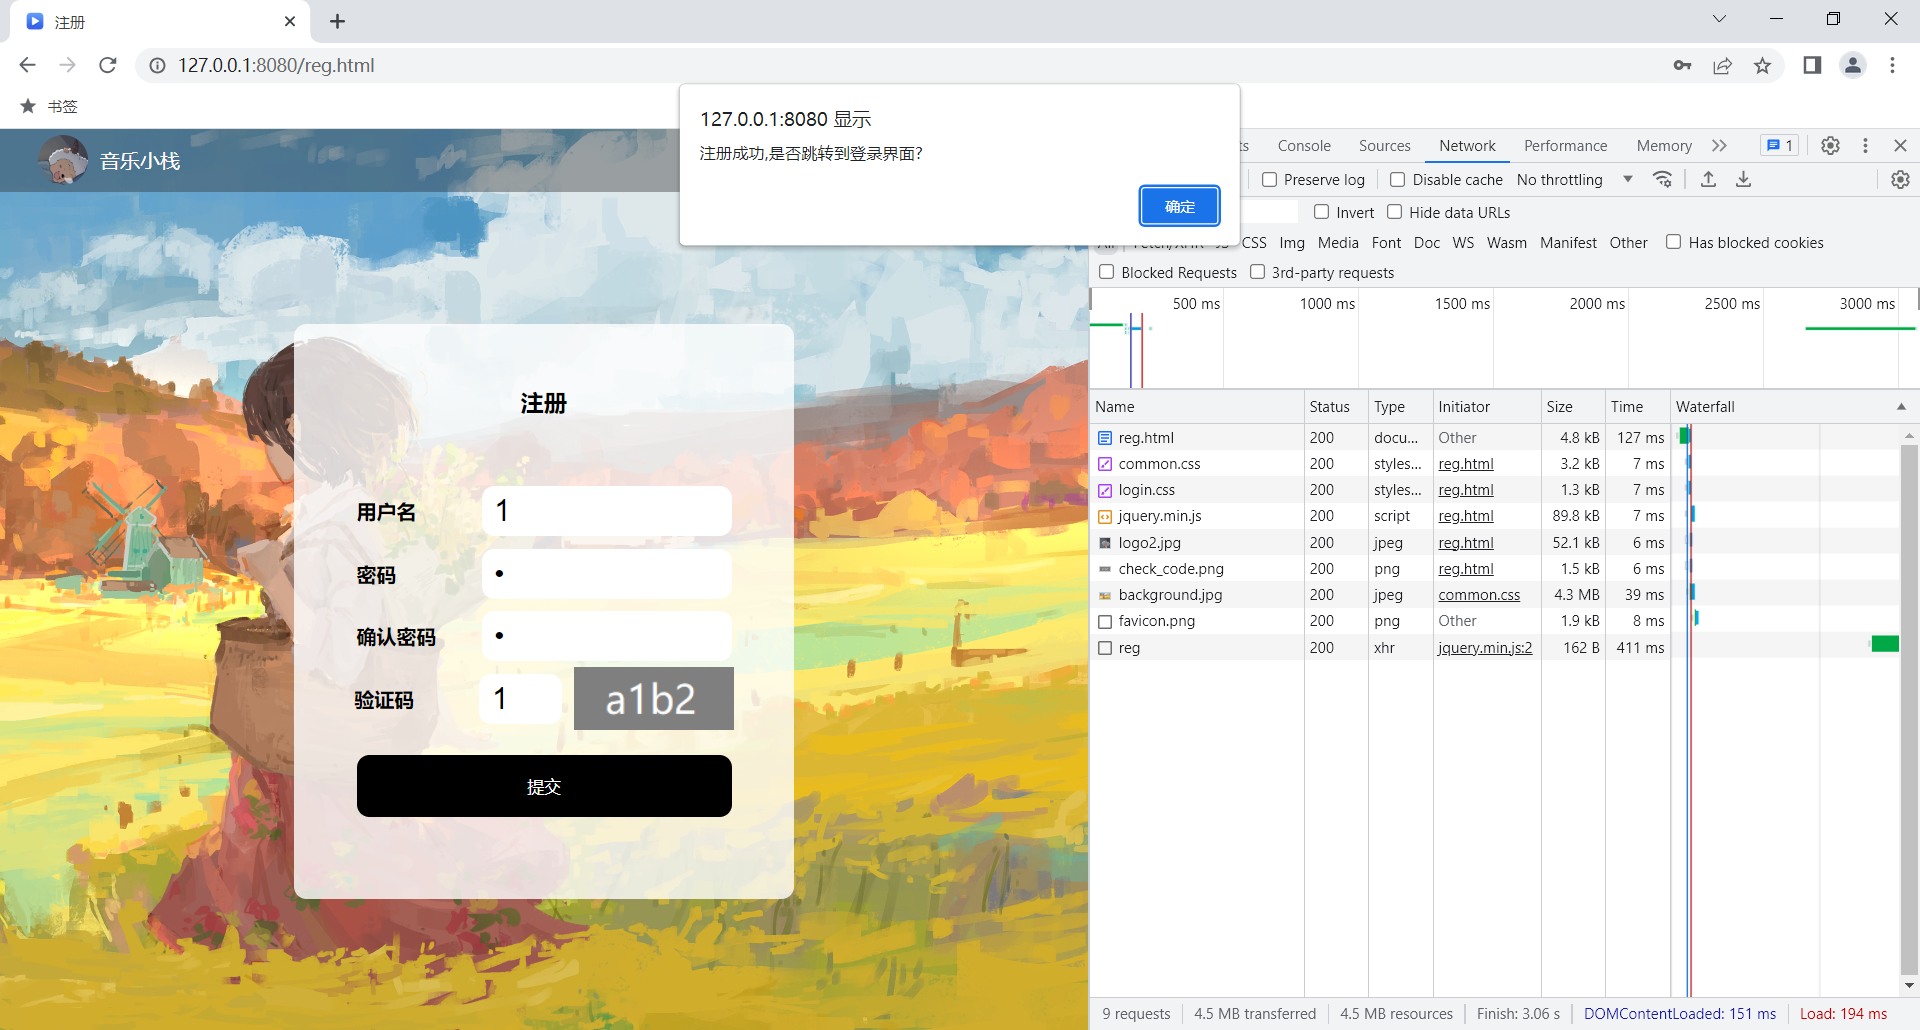
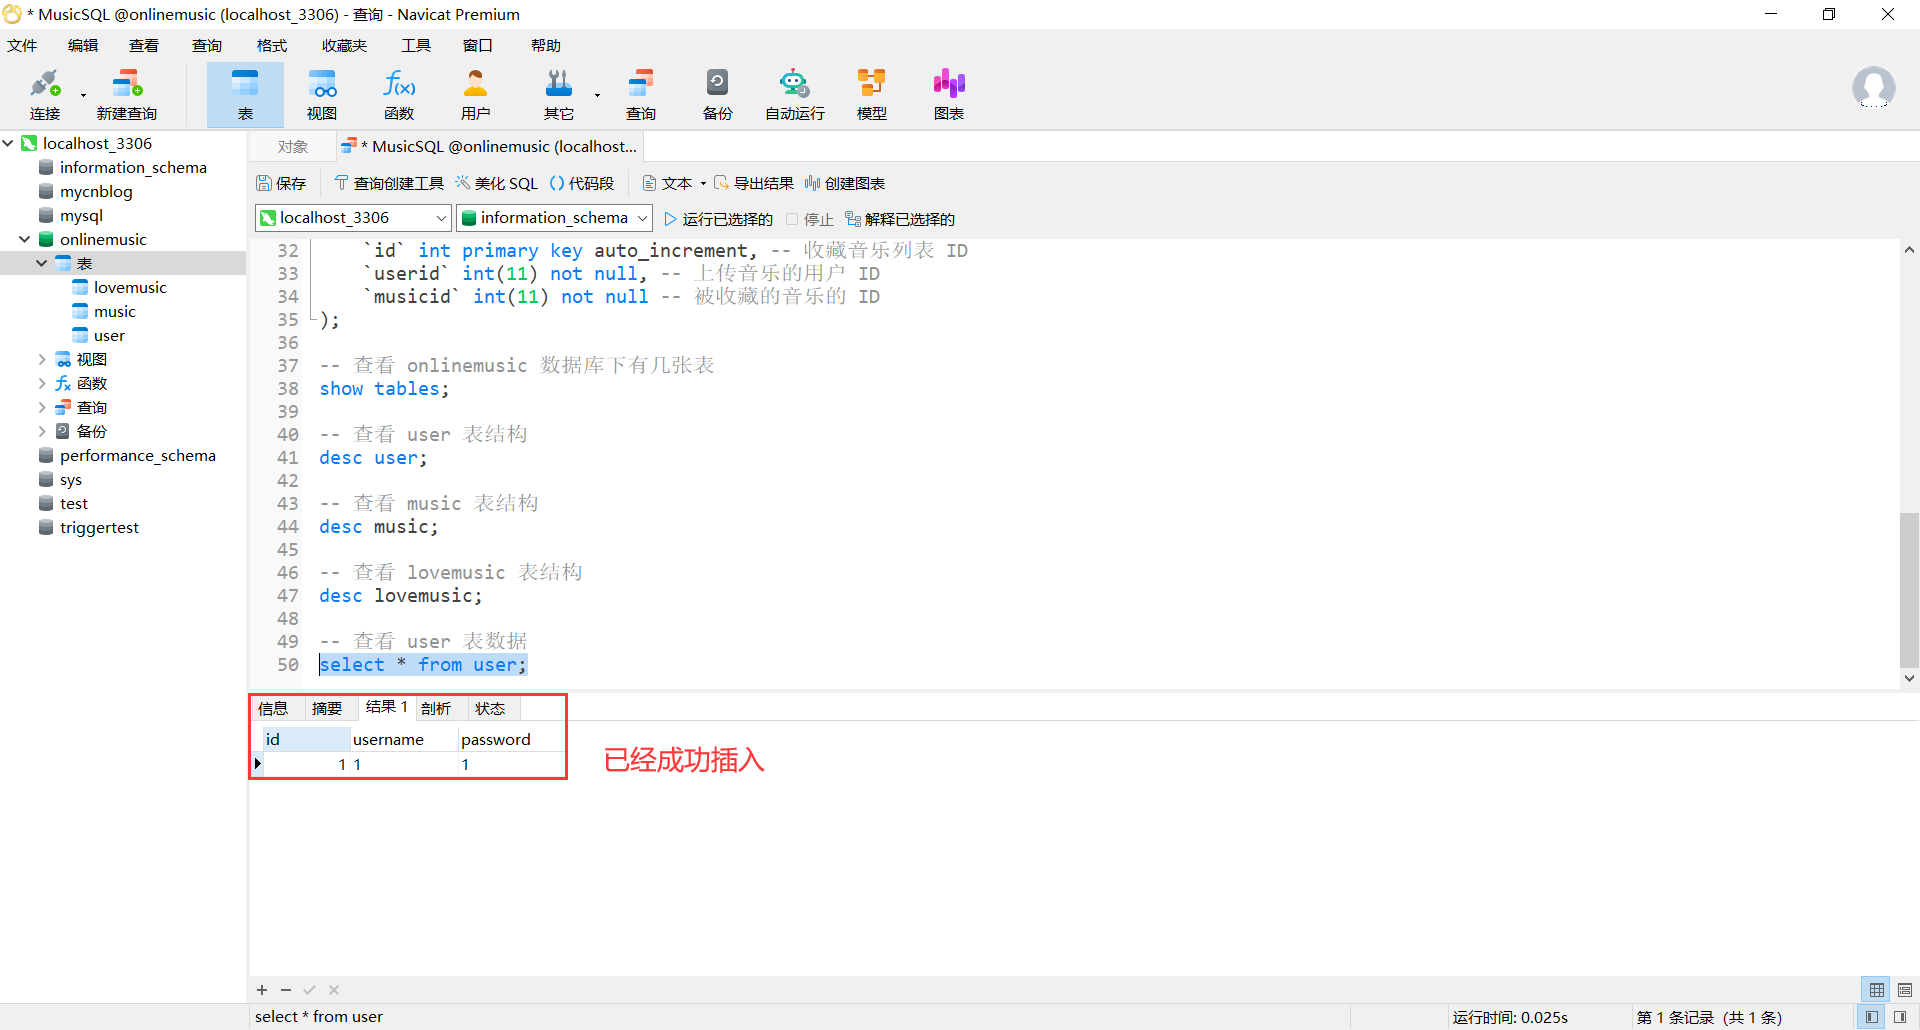
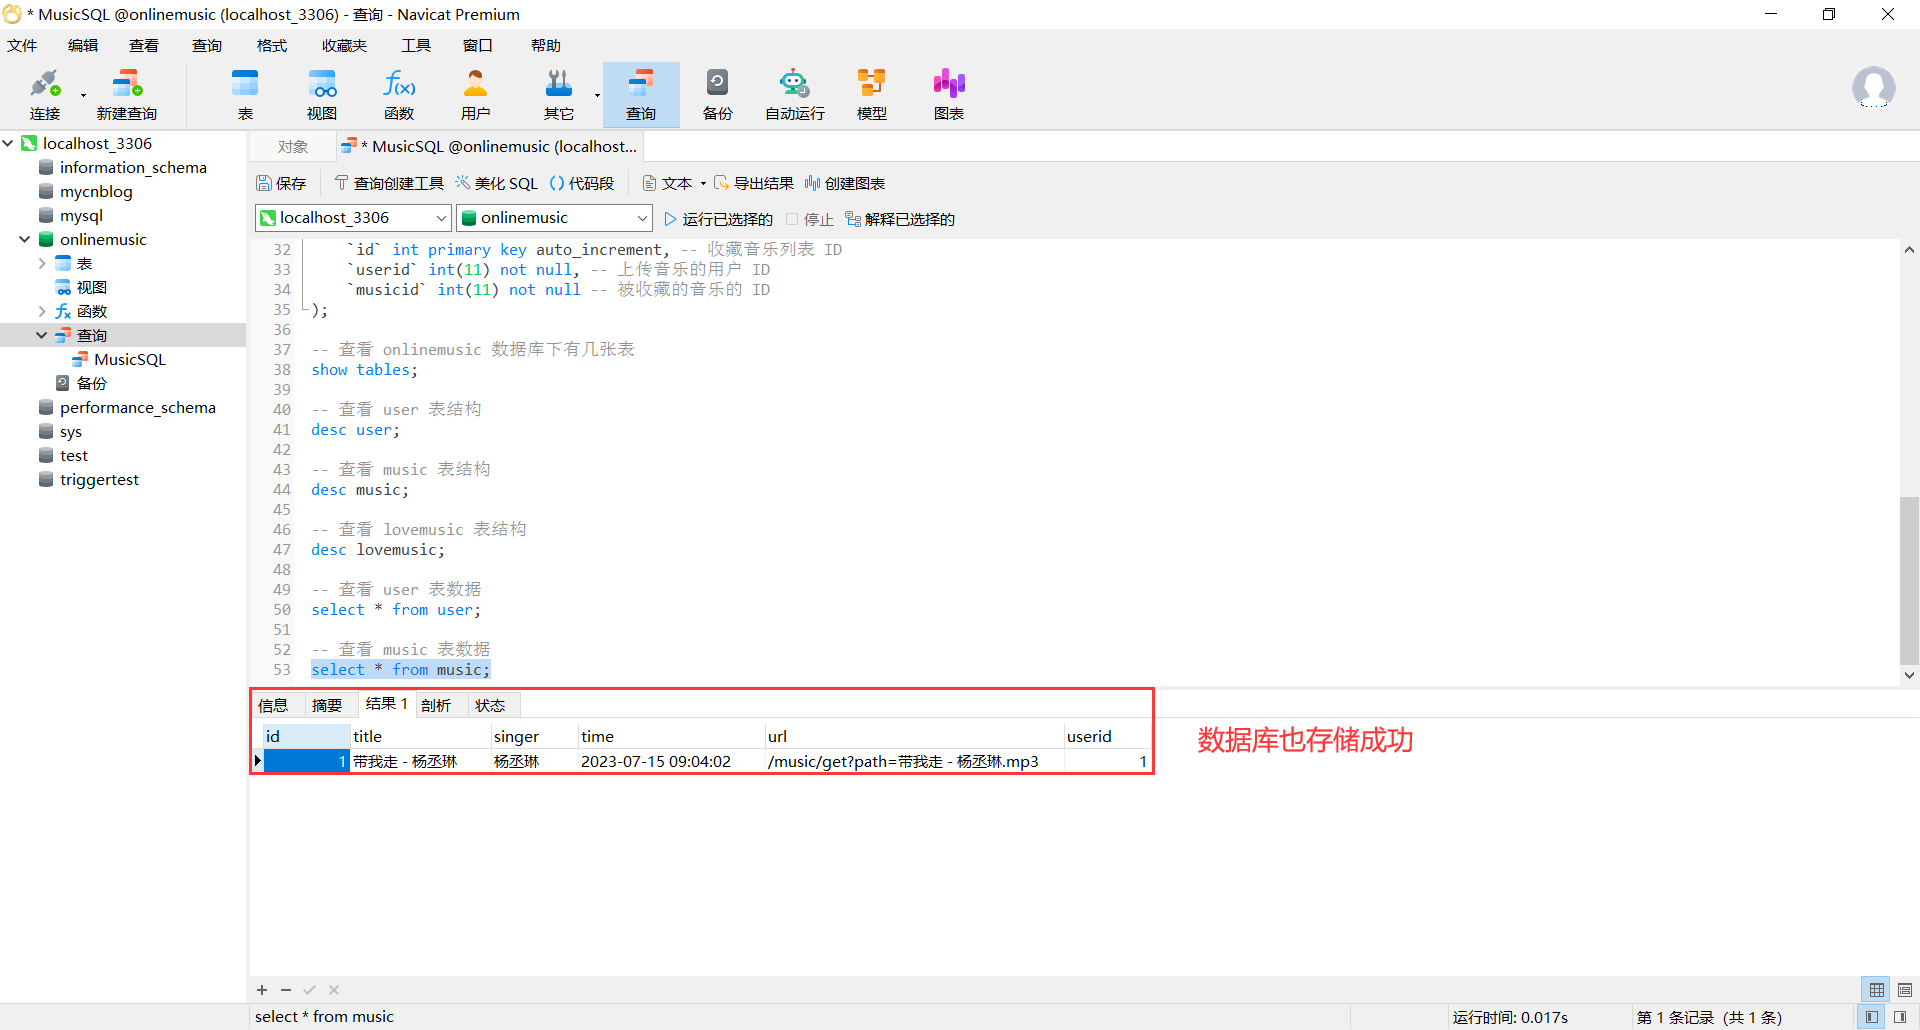
那我们整体测试一下
访问 : [http://127.0.0.1:8080/reg.html](http://127.0.0.1:8080/reg.html)
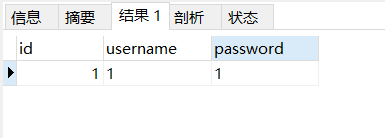
那我们来查看一下数据库 , 到底是不是真的被插入进去了
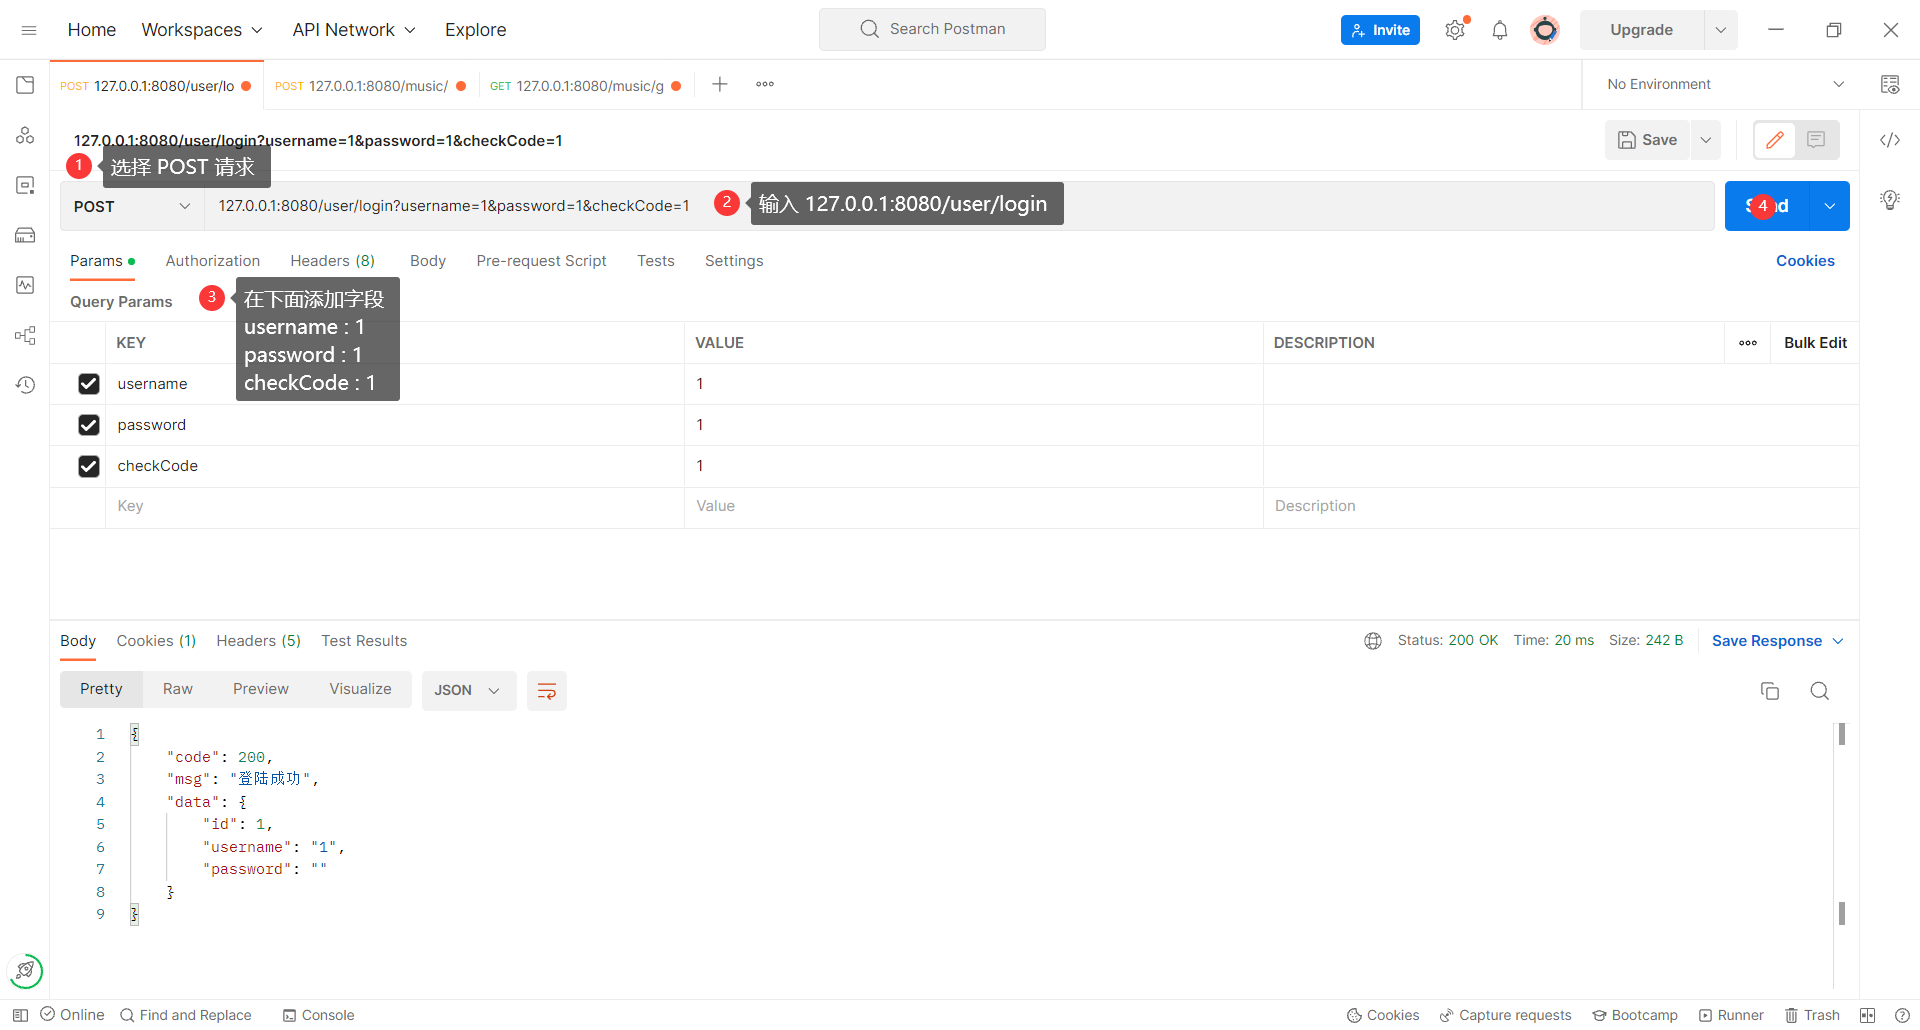
## 2.2 登录
约定前后端交互接口
```json
请求 :
[
url: "/user/login",
type: "POST",
data: {
用户名,
密码
}
]
响应 :
[
code: 200,
msg: "登陆成功",
data: 用户的信息
]
```
### 2.2.1 前端
前端页面也基本是现成的 , 不用怎么改动
还是先针对登录按钮编写事件
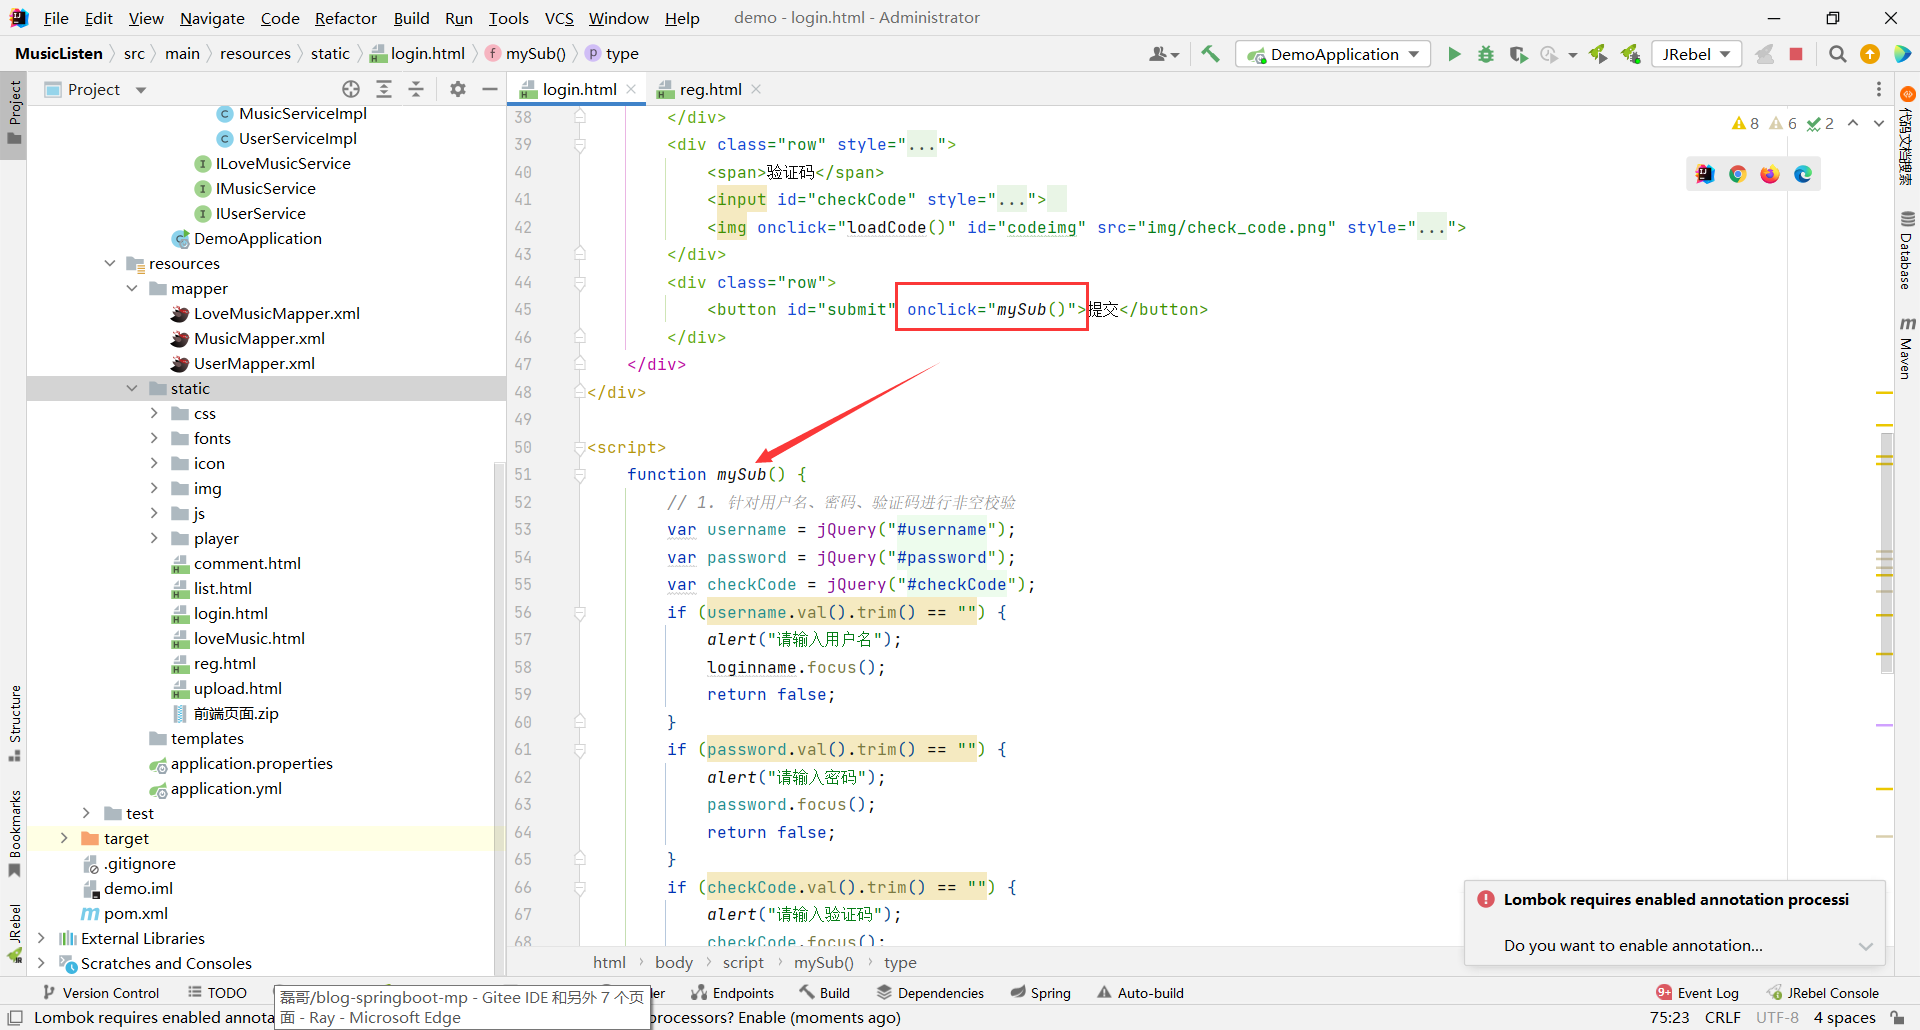
然后我们去检验用户是否输入了用户名 密码 验证码这三样信息
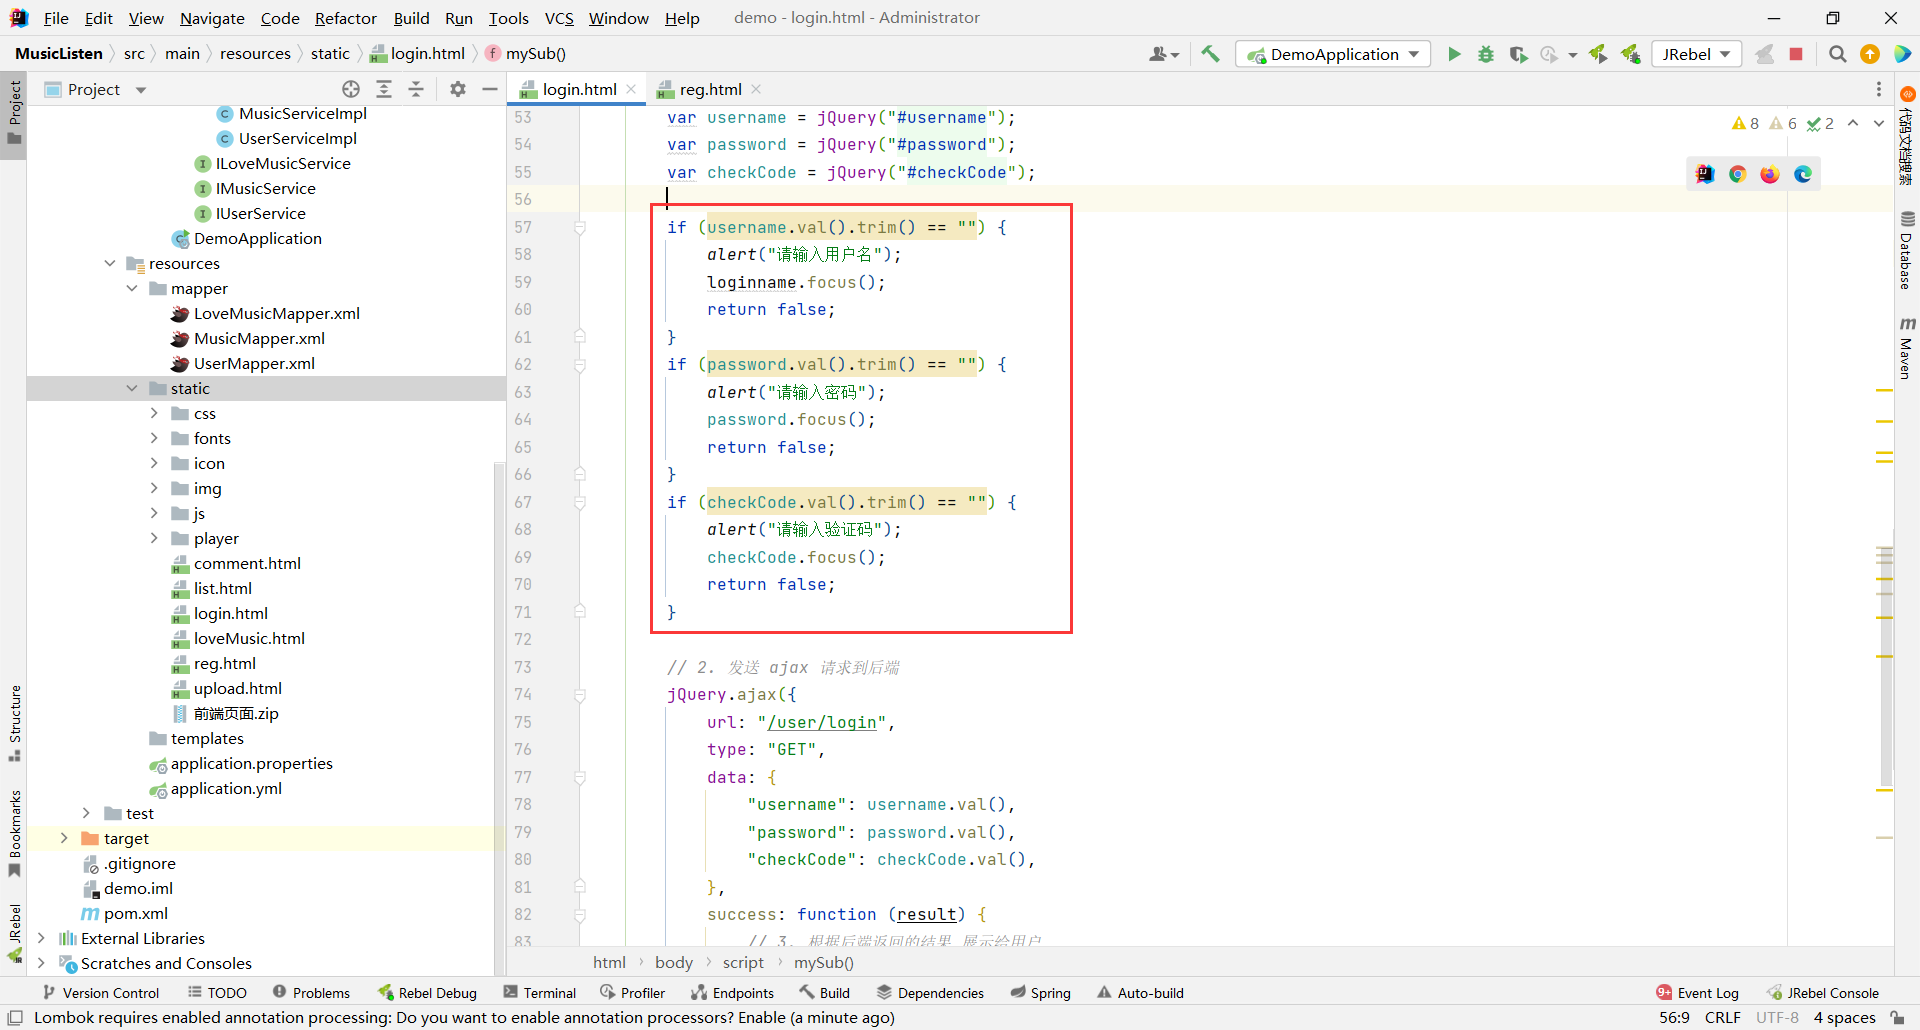
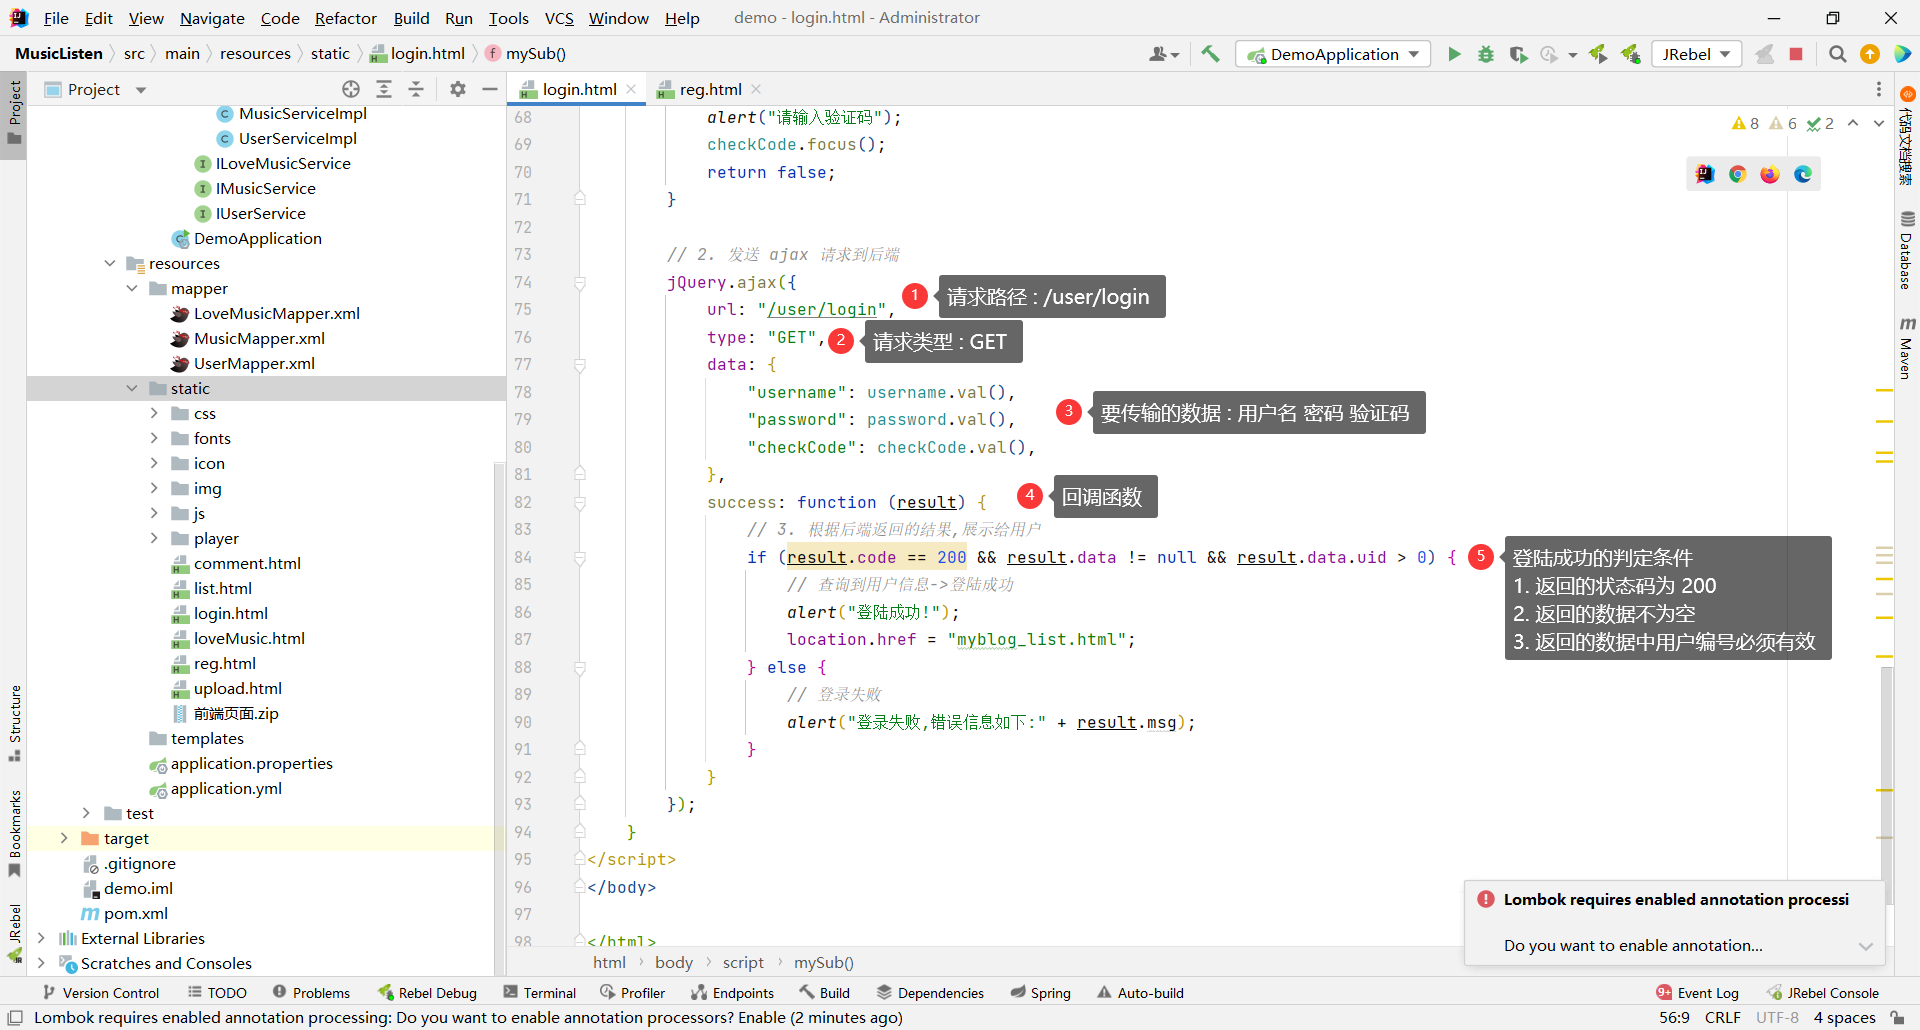
如果用户都填写了 , 那么我们就向后端发送请求
如果用户输入账号或者密码错误了 , 那我们就把输入框清空让用户重新输入
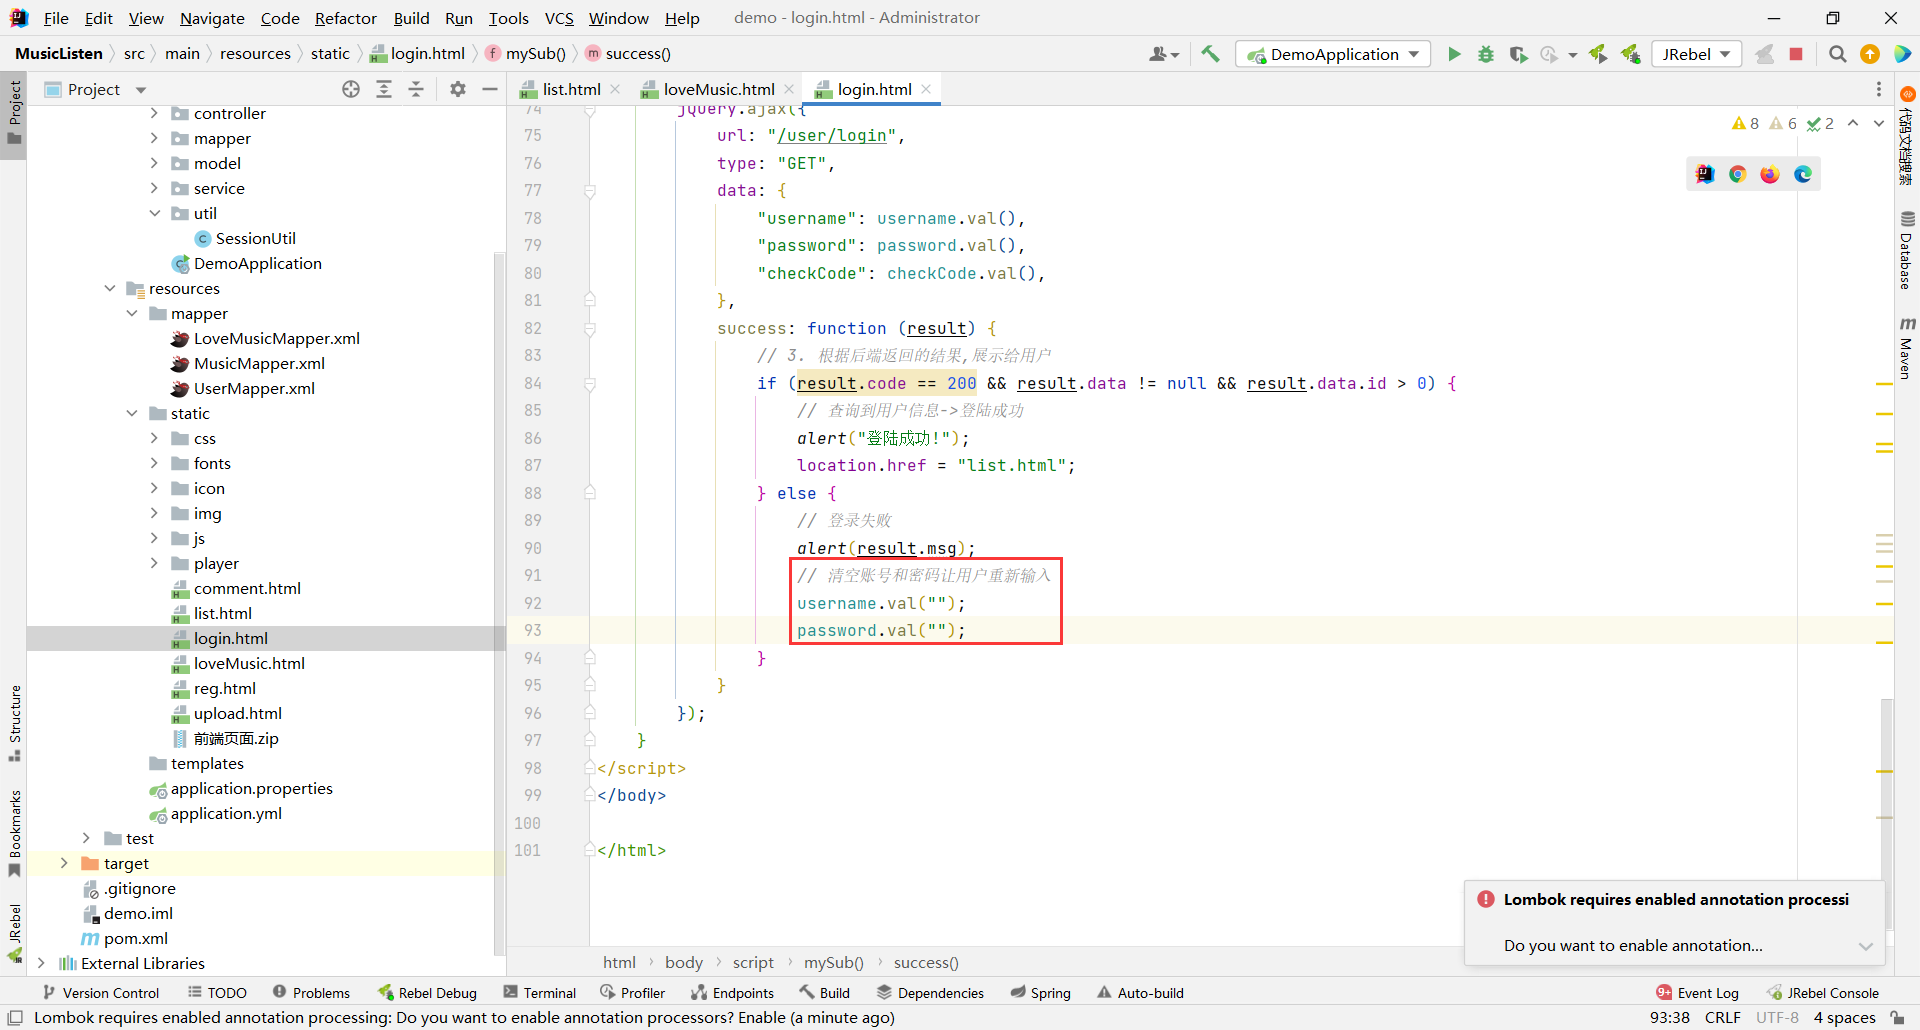
那前端就编写完了
```html
上传音乐
```
### 2.2.2 后端
#### mapper 层
##### 接口
我们登录功能实际上就是去数据库中查询当前用户是否存在于数据库
那我们前端传过来的是用户名、密码、验证码
验证码相关内容我们先不管 , 那我们能通过密码去查询吗 , 肯定不能
那我们就考虑使用用户名去数据库中查询用户是否存在 , 那如果用户有重名的 , 就不太好弄了 , 所以我们要限制用户名唯一
然后我们就可以根据用户名进行查询了
那返回值我们只需要用 User 接收即可 , User 中包含用户名、密码两个字段 , 足够能保存用户的信息了
> 不使用 UserVO 是因为 UserVO 中还包含验证码信息 , 我们用不上
```java
package com.example.demo.mapper;
import com.baomidou.mybatisplus.core.mapper.BaseMapper;
import com.example.demo.model.User;
import com.example.demo.model.vo.UserVO;
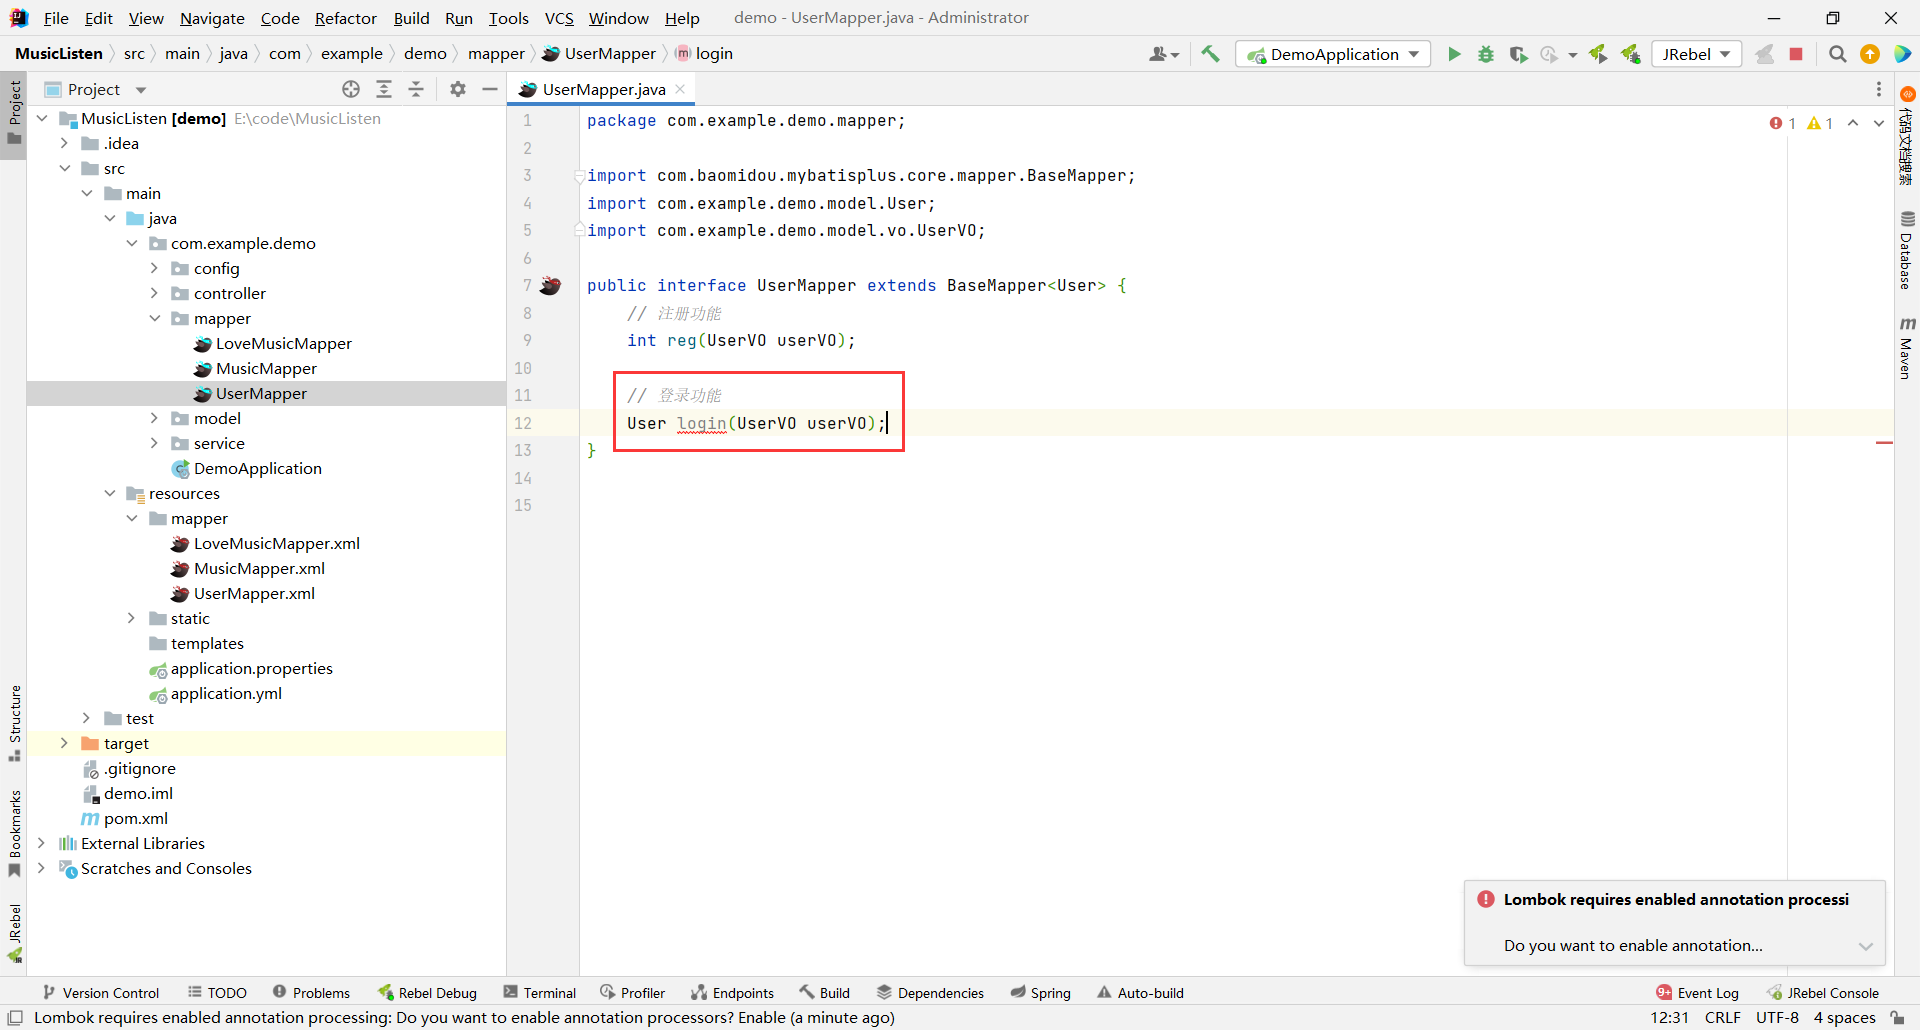
public interface UserMapper extends BaseMapper {
// 登录功能
User login(UserVO userVO);
}
```
##### UserMapper.xml
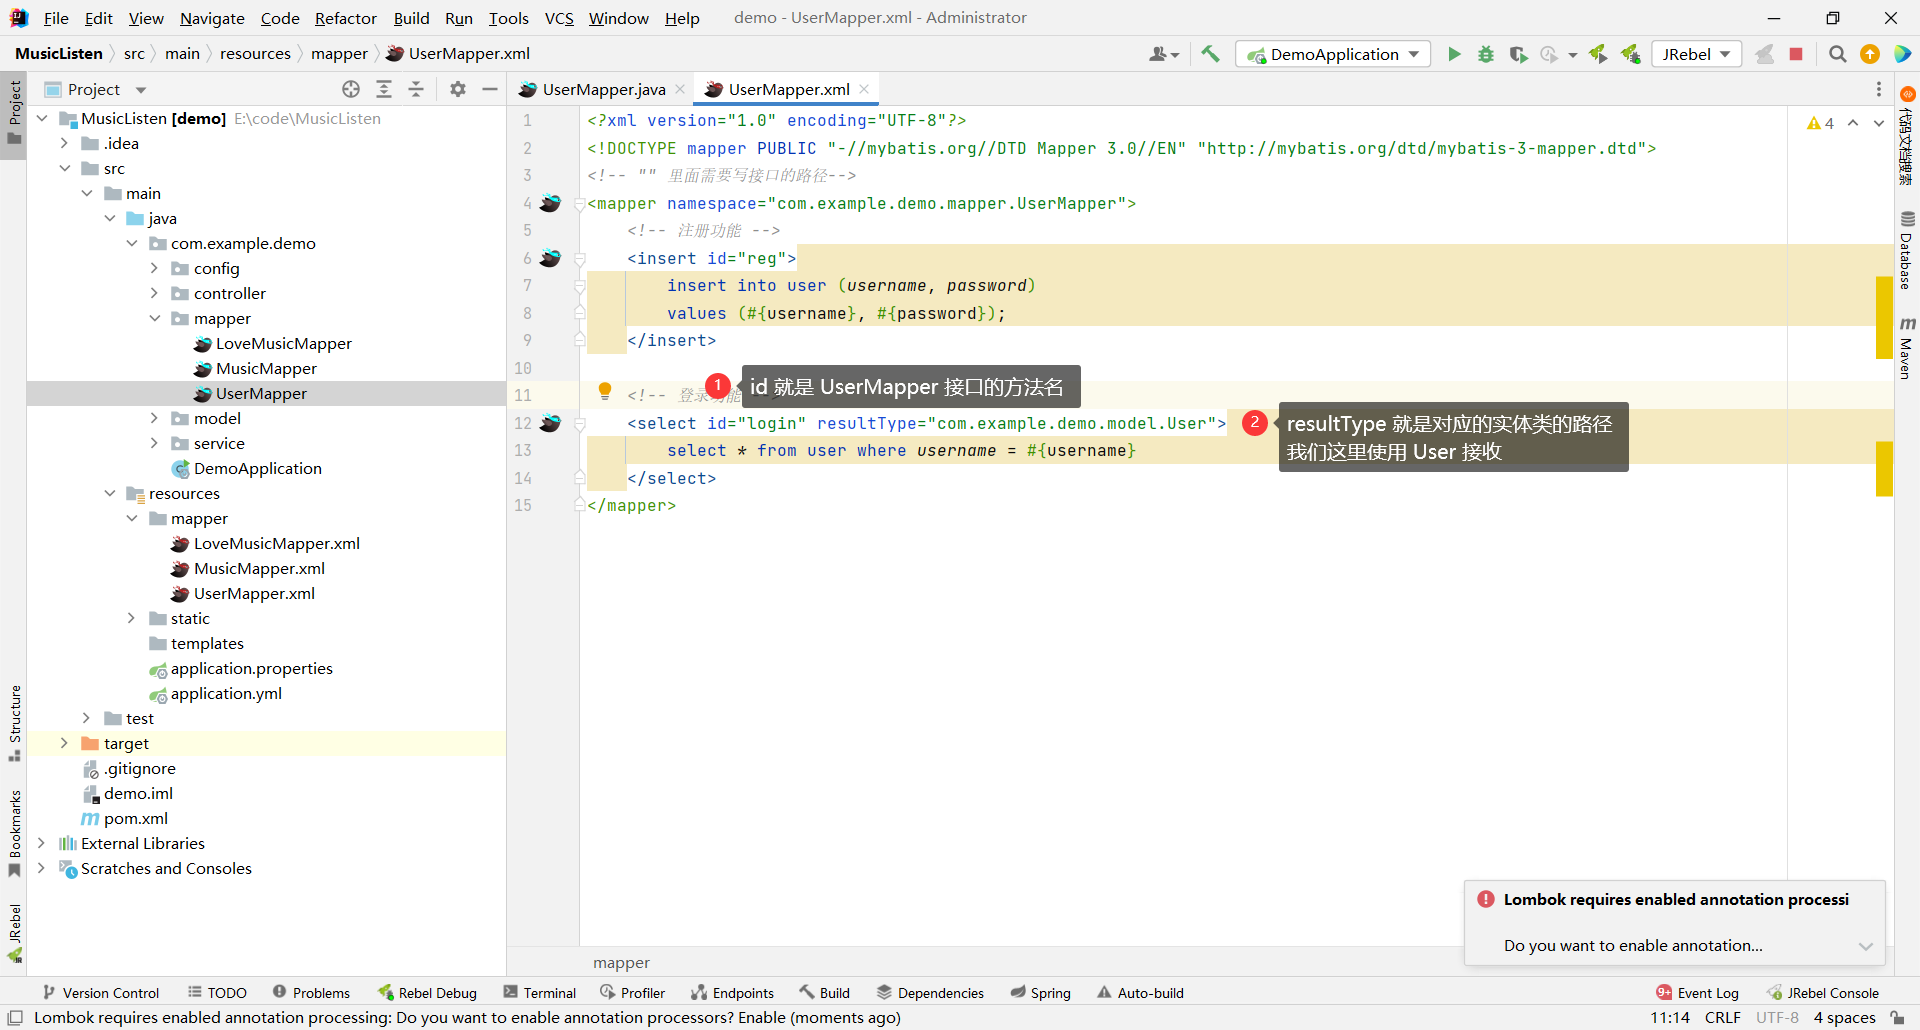
```xml
```
#### service 层
##### 接口
返回值为 User 表示查询到的对象
参数填 UserVO , 包含了用户名、密码、验证码三个信息 , 我们只需要使用用户名这个信息即可
```java
package com.example.demo.service;
import com.baomidou.mybatisplus.extension.service.IService;
import com.example.demo.model.User;
import com.example.demo.model.vo.UserVO;
public interface IUserService extends IService {
// 登录功能
User login(UserVO userVO);
}
```
##### 实现
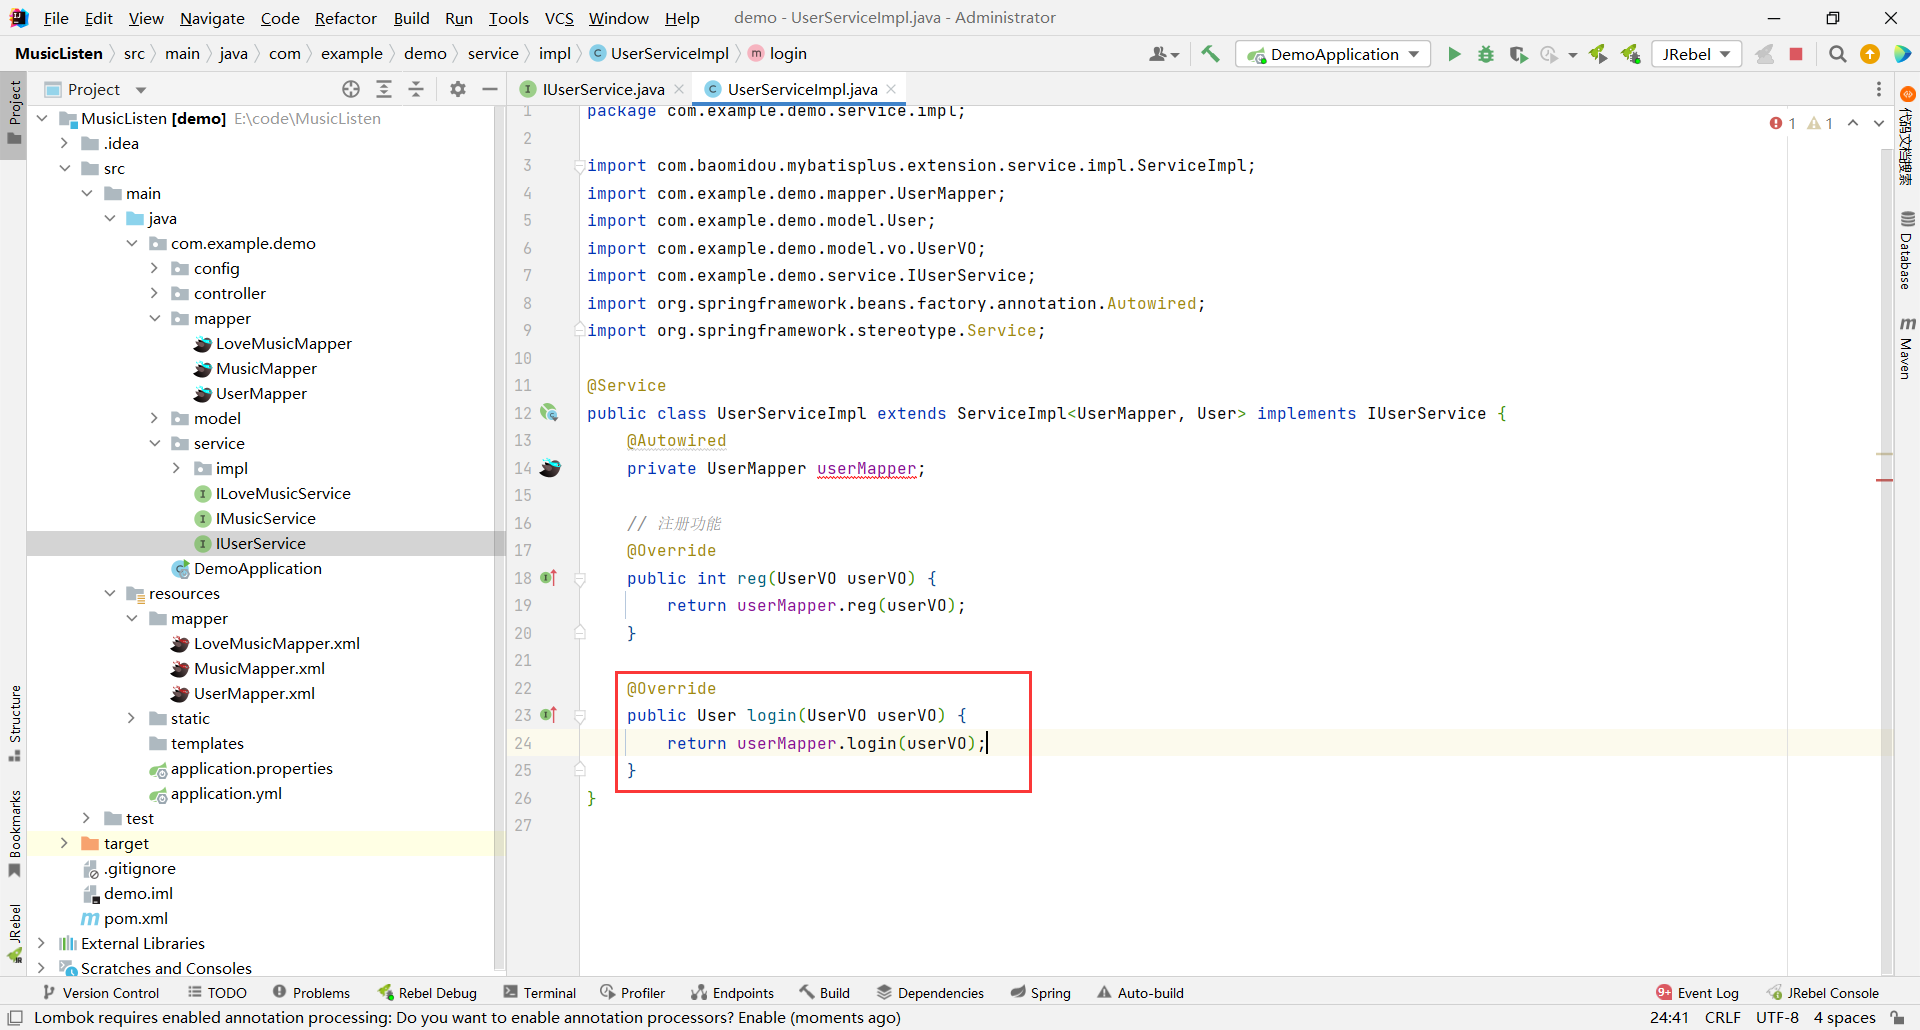
```java
package com.example.demo.service.impl;
import com.baomidou.mybatisplus.extension.service.impl.ServiceImpl;
import com.example.demo.mapper.UserMapper;
import com.example.demo.model.User;
import com.example.demo.model.vo.UserVO;
import com.example.demo.service.IUserService;
import org.springframework.beans.factory.annotation.Autowired;
import org.springframework.stereotype.Service;
@Service
public class UserServiceImpl extends ServiceImpl implements IUserService {
@Autowired
private UserMapper userMapper;
// 登录功能
@Override
public User login(UserVO userVO) {
return userMapper.login(userVO);
}
}
```
#### controller 层
我们先来罗列一下步骤
1. 参数校验
2. 根据用户名查找当前对象
3. 判断该对象是否存在
4. 比较当前用户输入的密码和数据库中存储的密码是否相同
5. 如果用户传过来的密码与数据库中的密码相同 , 将该用户保存到 session 中 , 并且返回给前端用户信息
6. 如果用户传过来的密码与数据库中的密码不同 , 返回给前端错误信息
那我们一步一步来实现
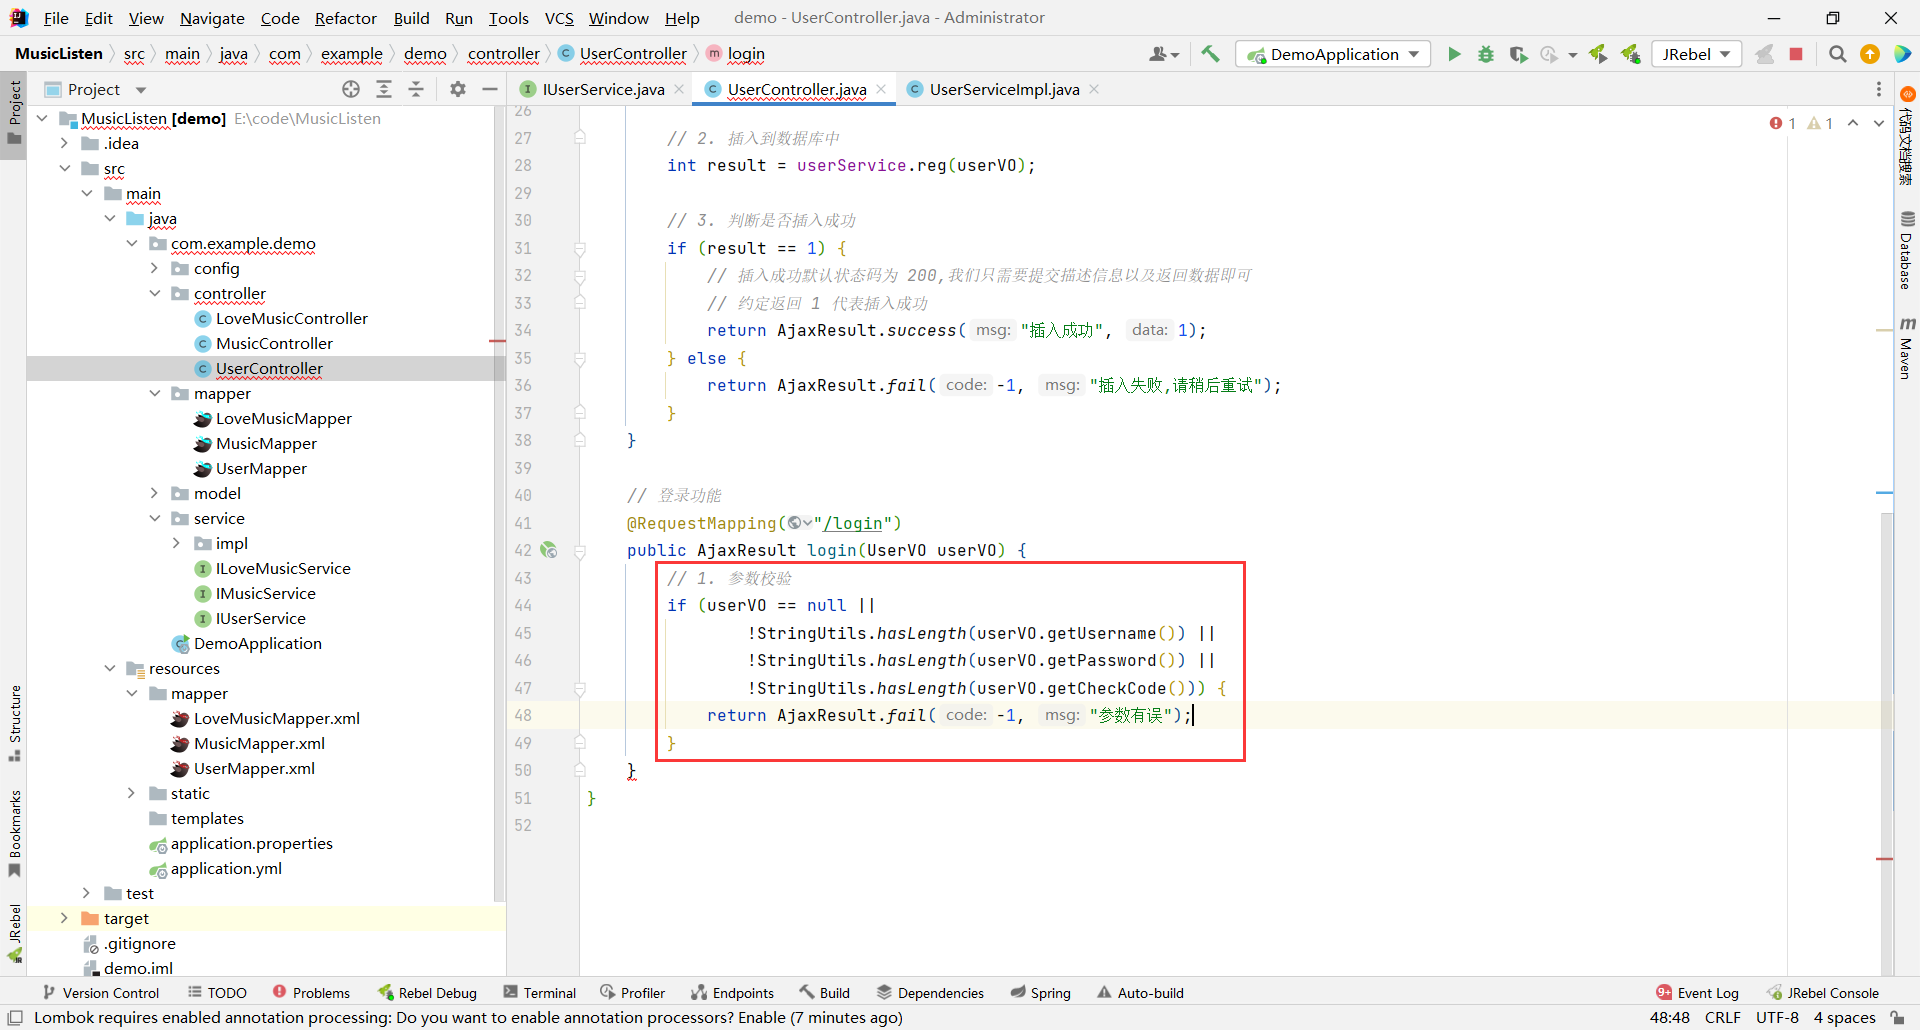
第一步 : 参数校验 , 我们需要判断前端传过来的 UserVO 对象是否为空 , 然后判断账号密码验证码是否为空
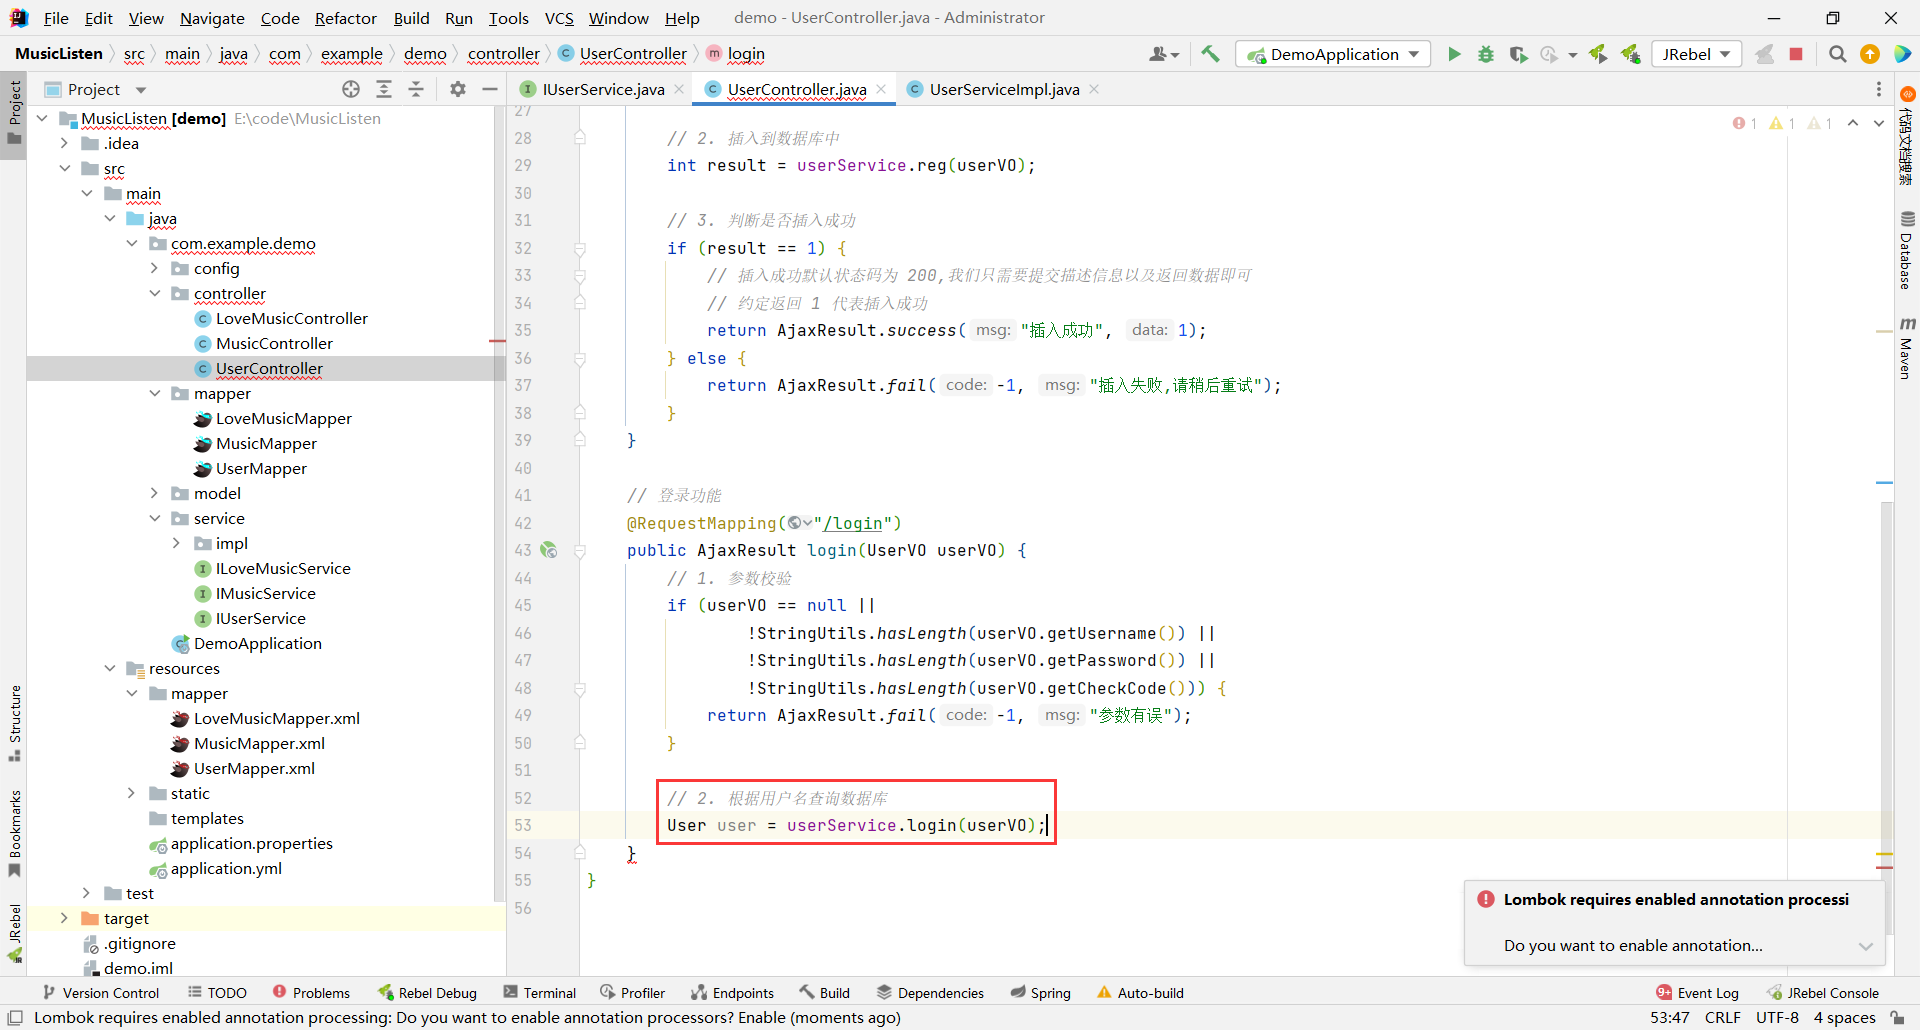
第二步 : 根据用户名查询数据库中对应的对象 , 返回给 controller
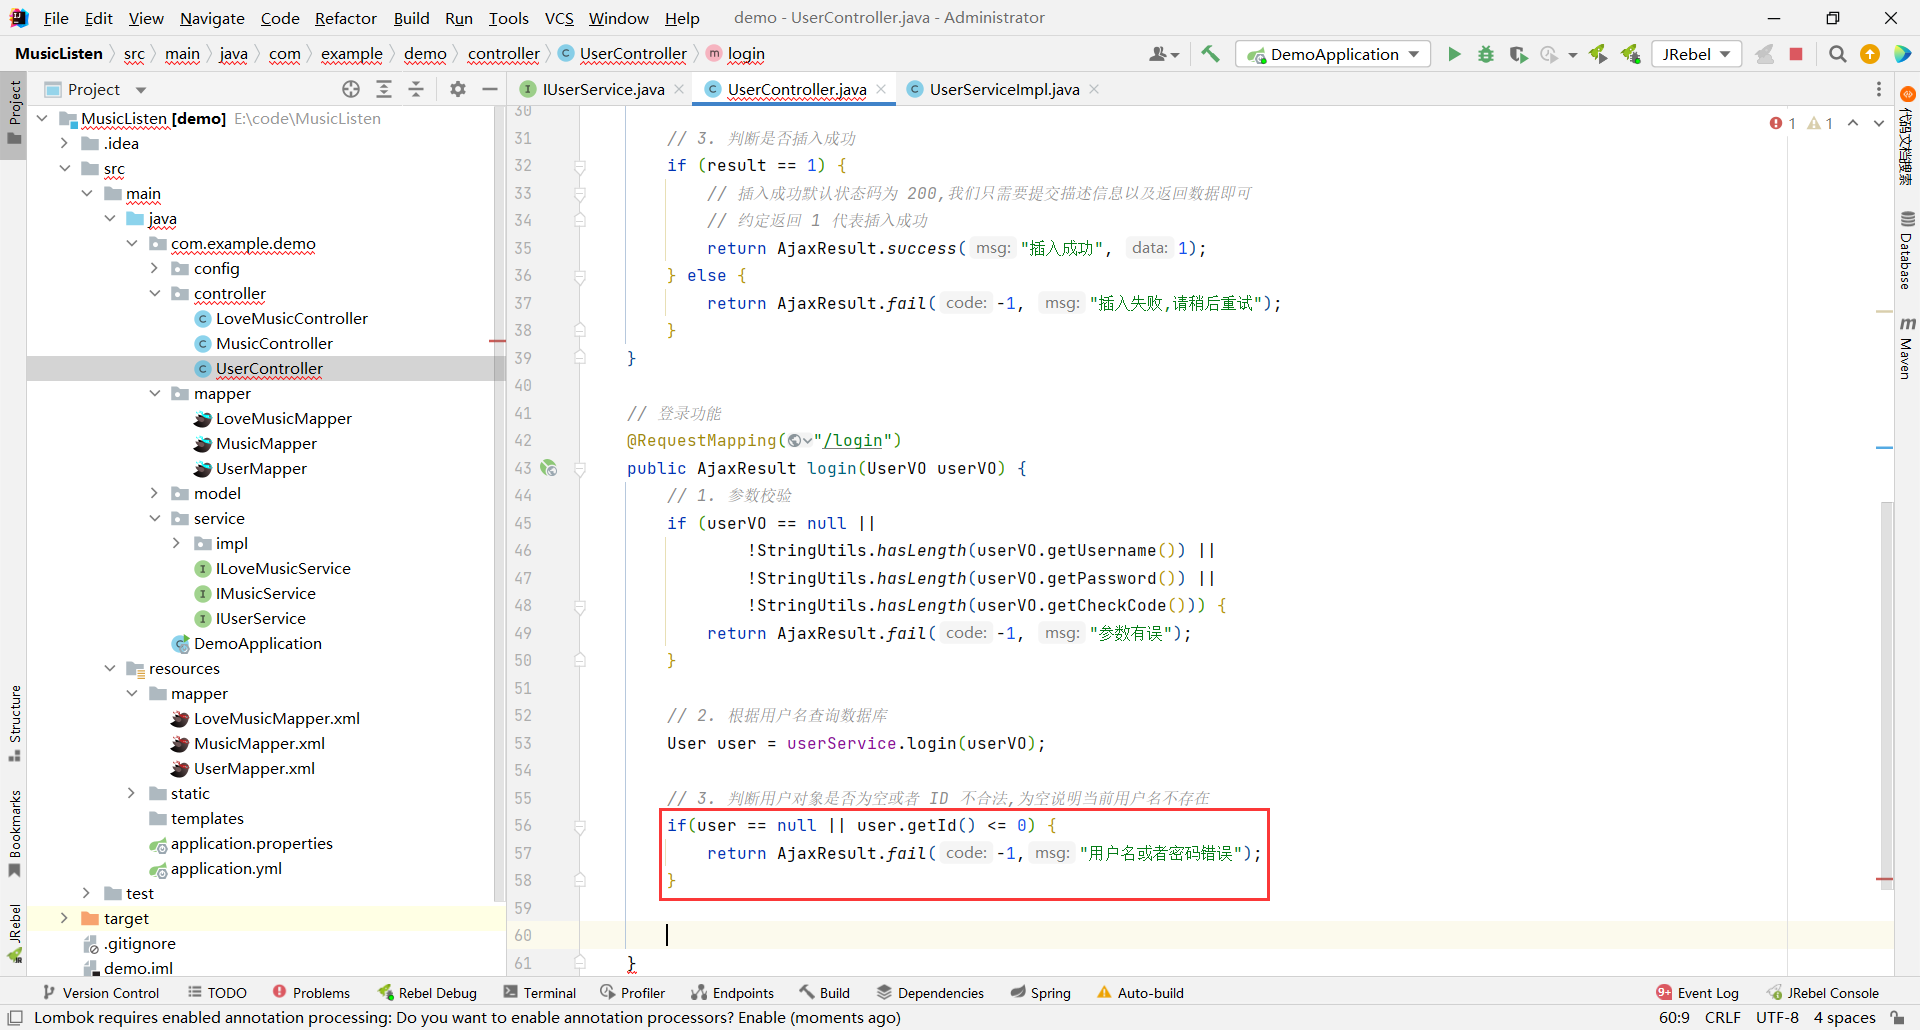
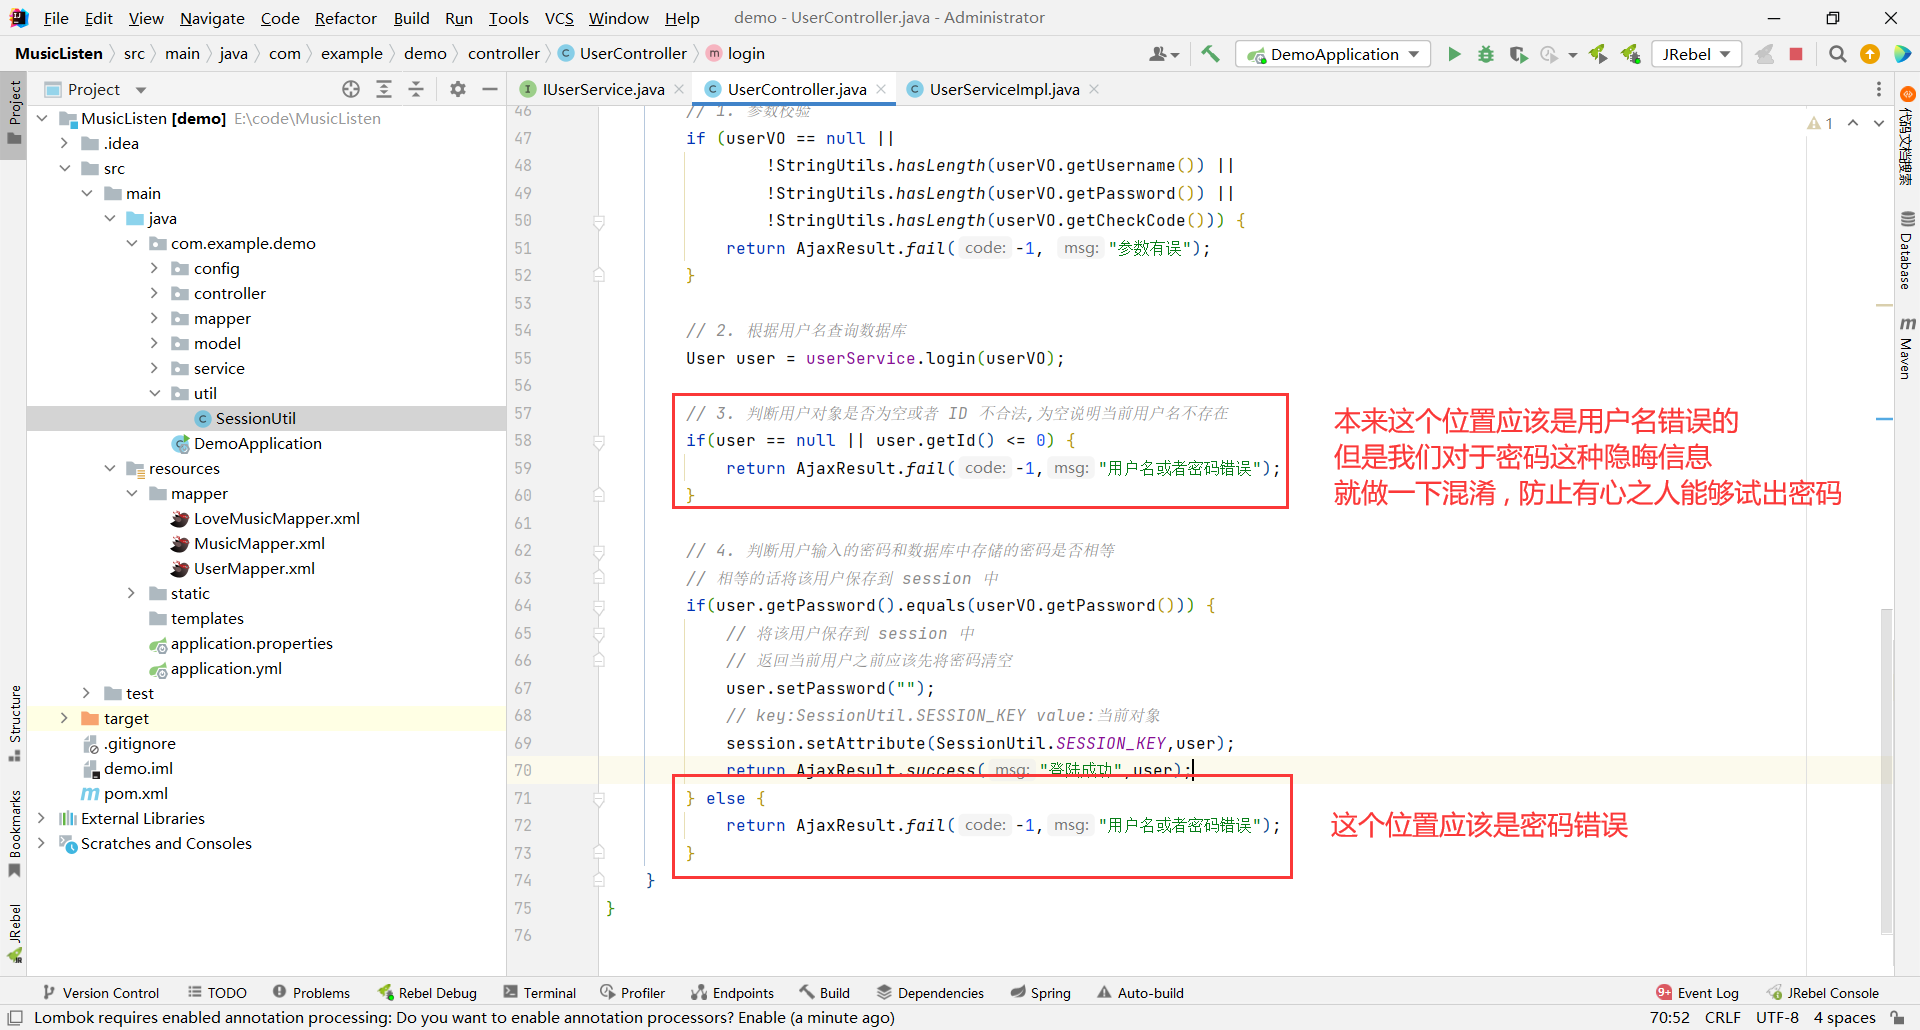
第三步 : 判断用户对象是否为空和用户的 ID 否合法 , 为空或者 ID 不合法说明当前用户名不存在
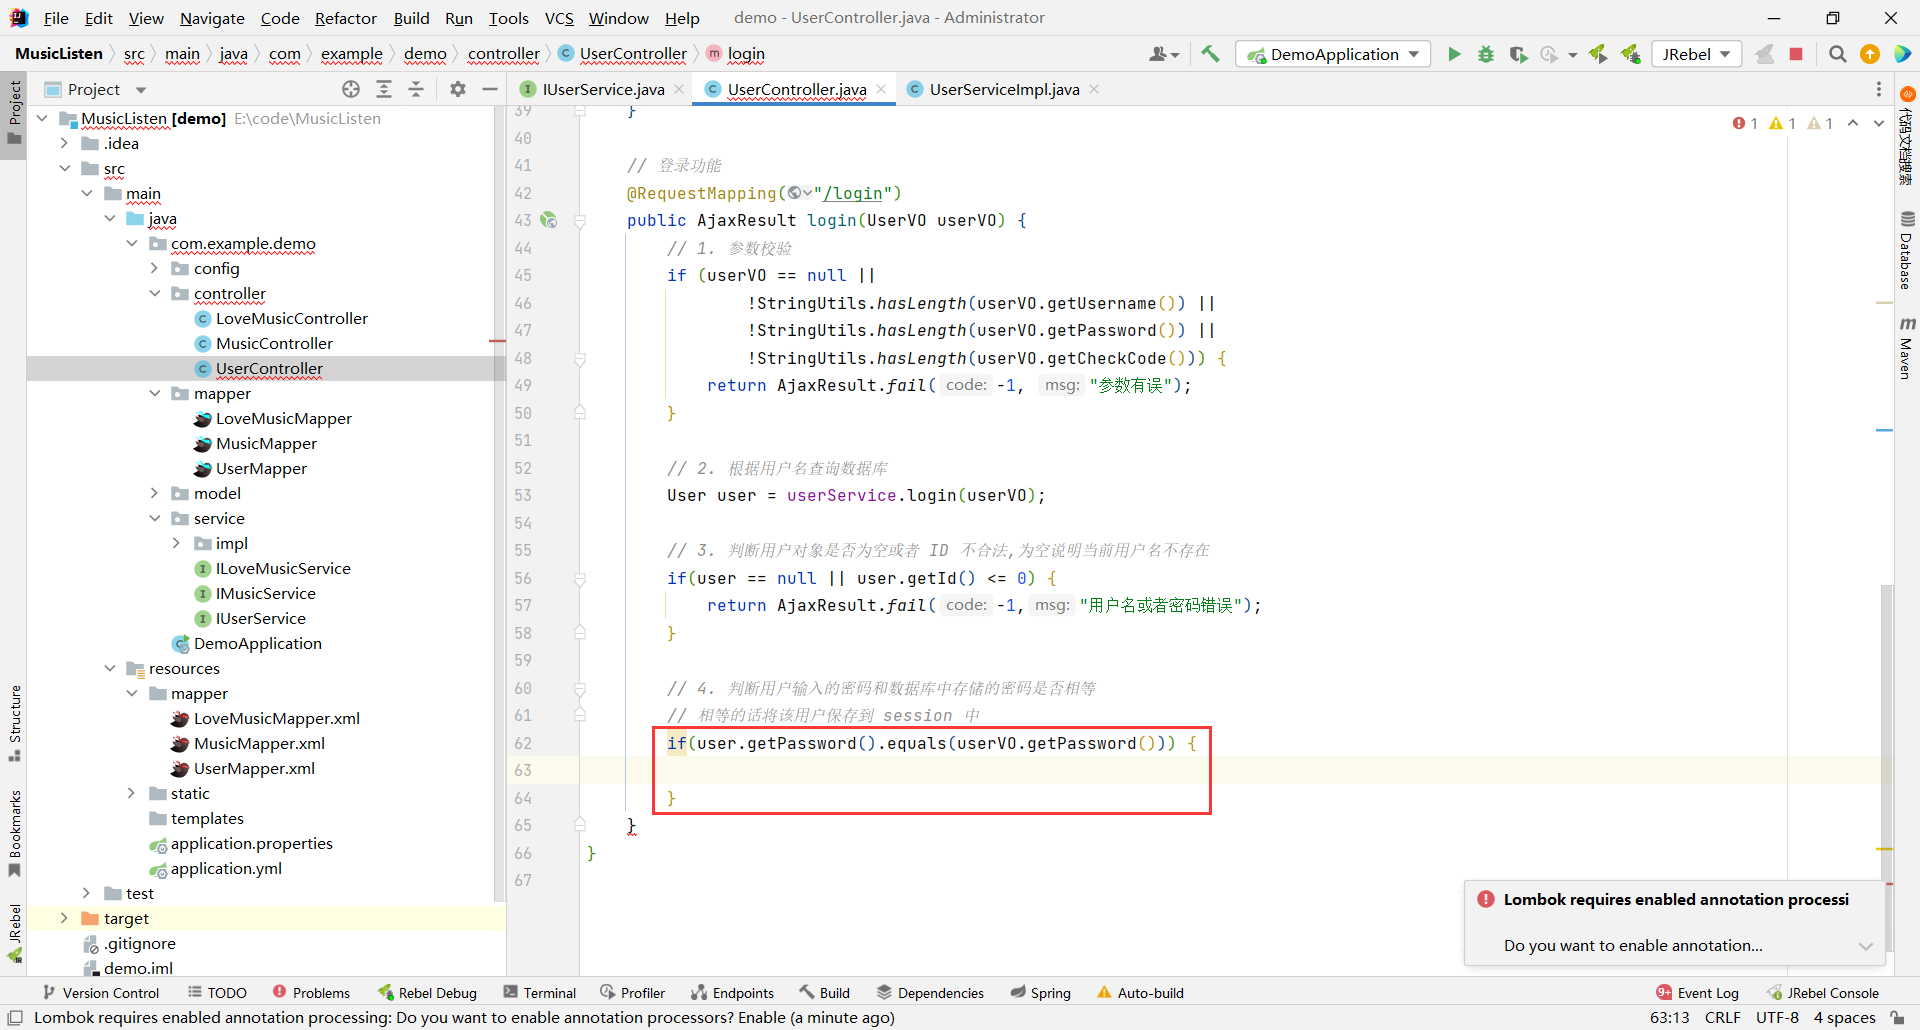
第四步 : 判断当前用户输入的密码和数据库中存储的密码是否相同
第五步 : 如果用户传过来的密码与数据库中的密码相同 , 将该用户保存到 session 中 , 并且返回给前端用户信息
但是这里有一个要注意的地方 : 我们接下来需要去存用户登录的信息 , 那就会去存储 session . 之后验证用户是否登录的时候 , 又会去取 . 那又存又取 , 而且虽然存在这里存 , 但是取就一定在这里取吗 ?
所以我们需要把 session.setAttribute("xxx") 里面的 key 值单独保存到一个公共类中
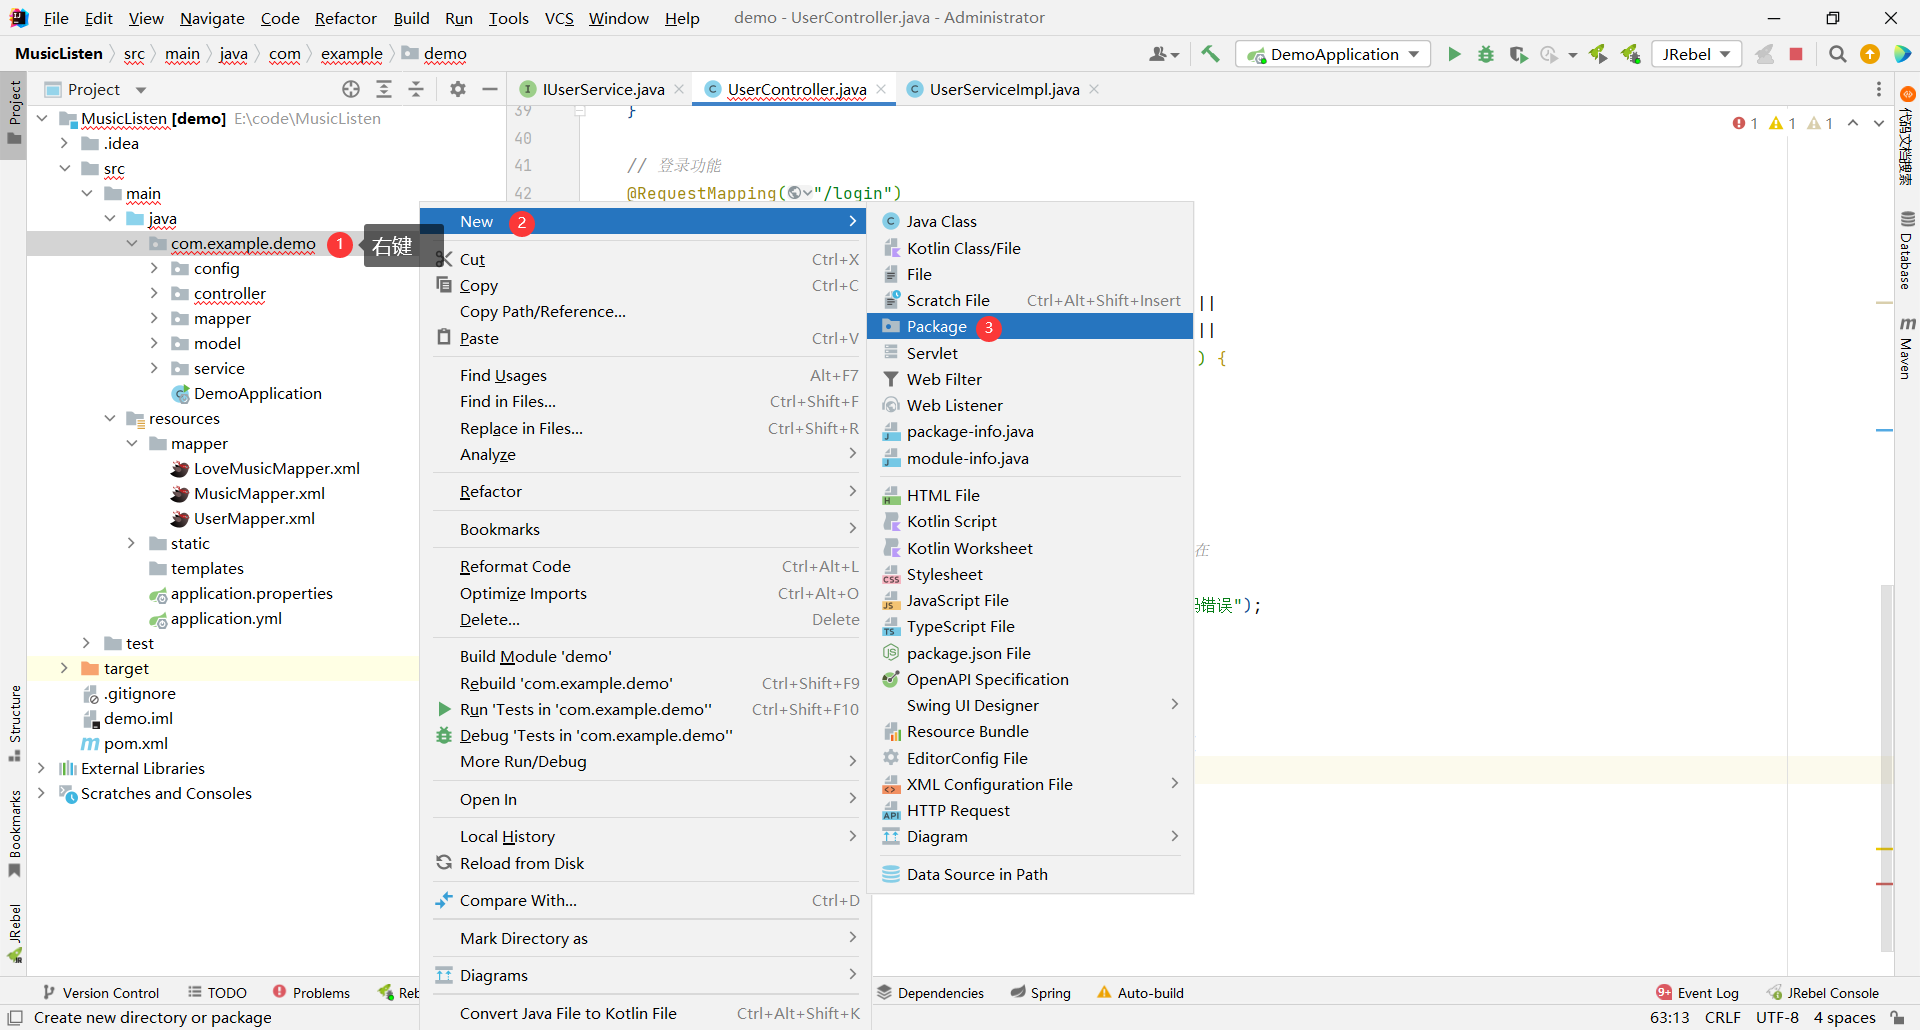
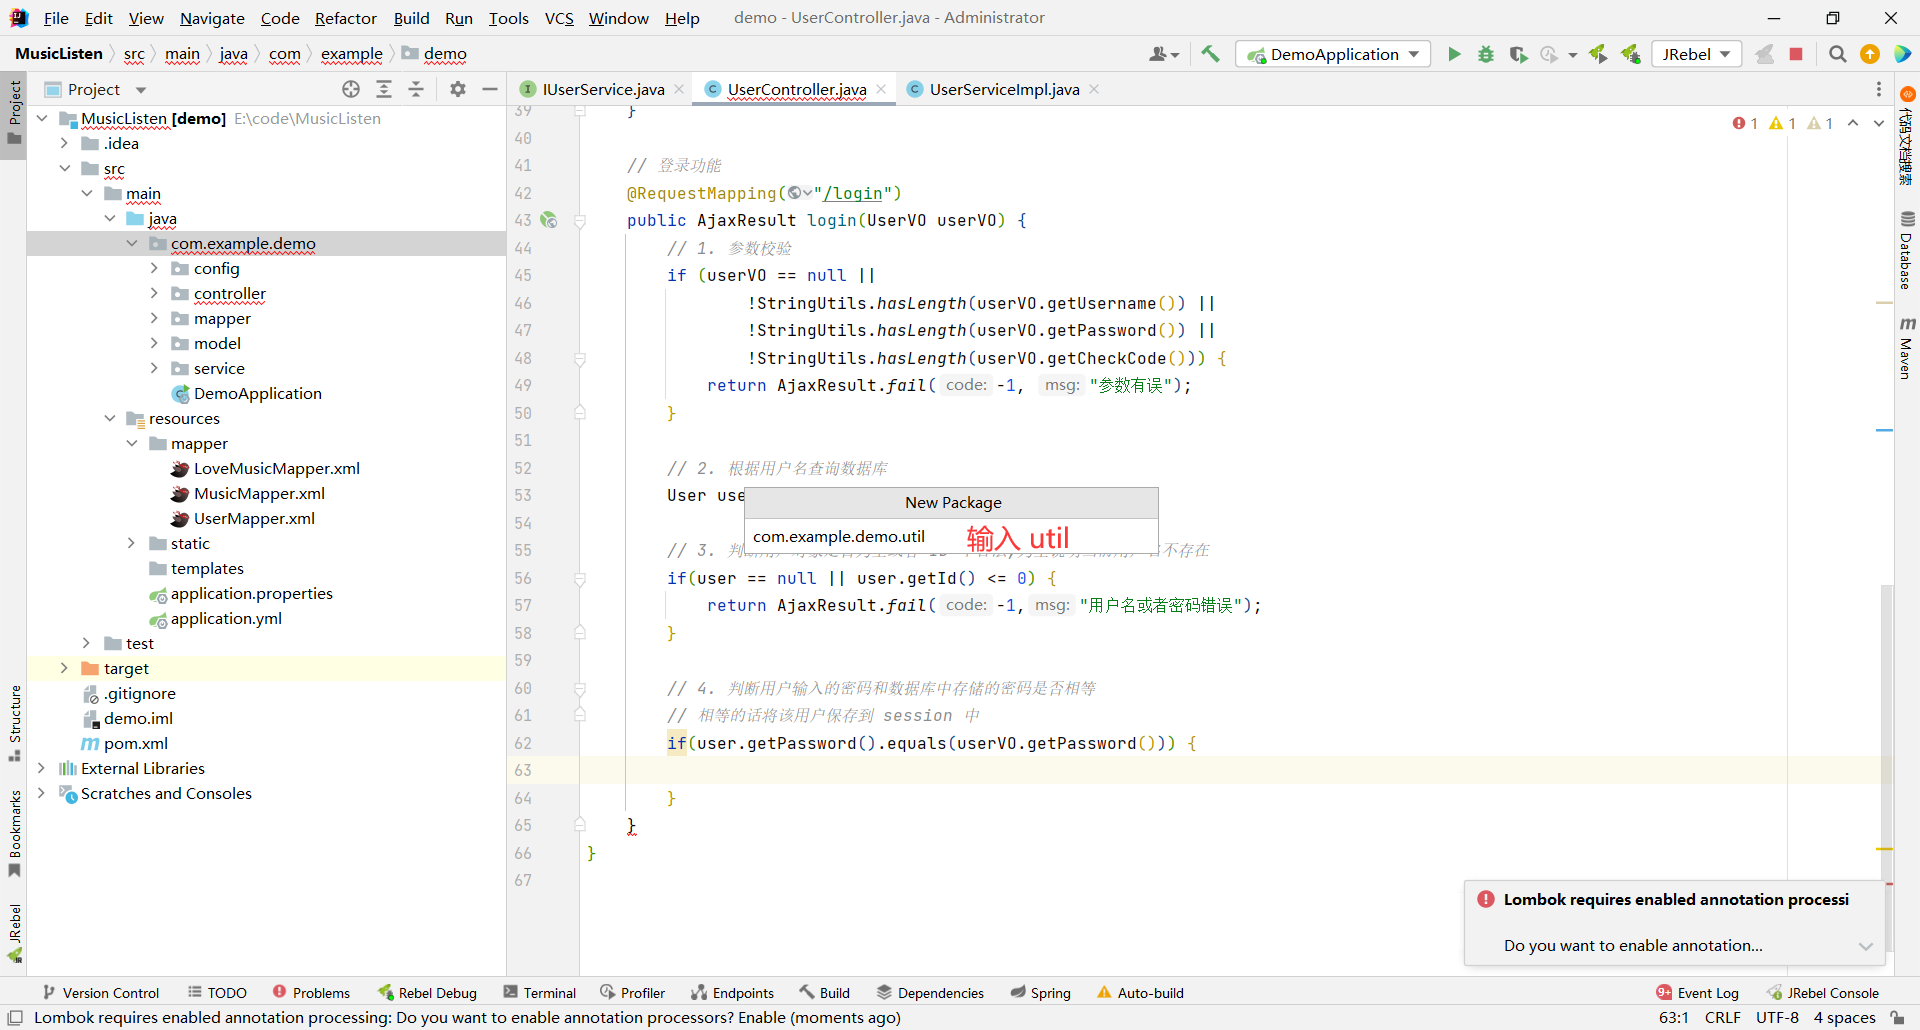
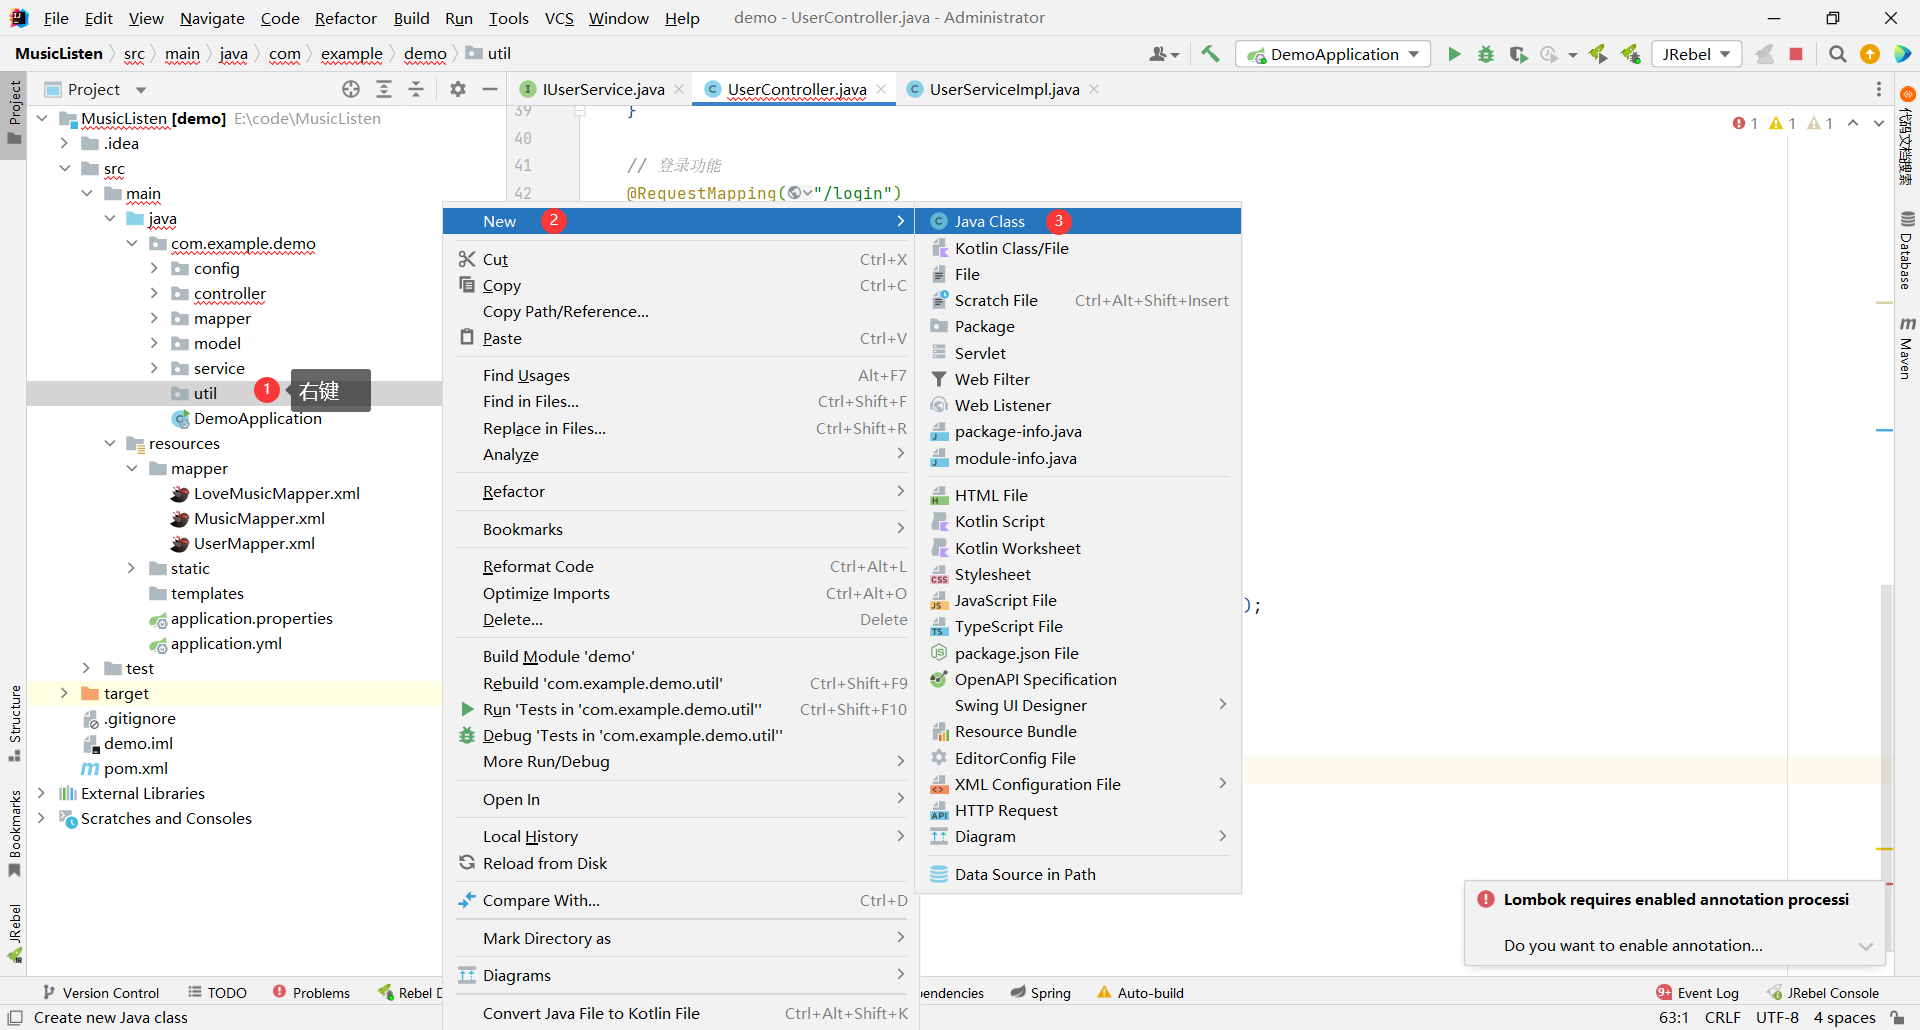
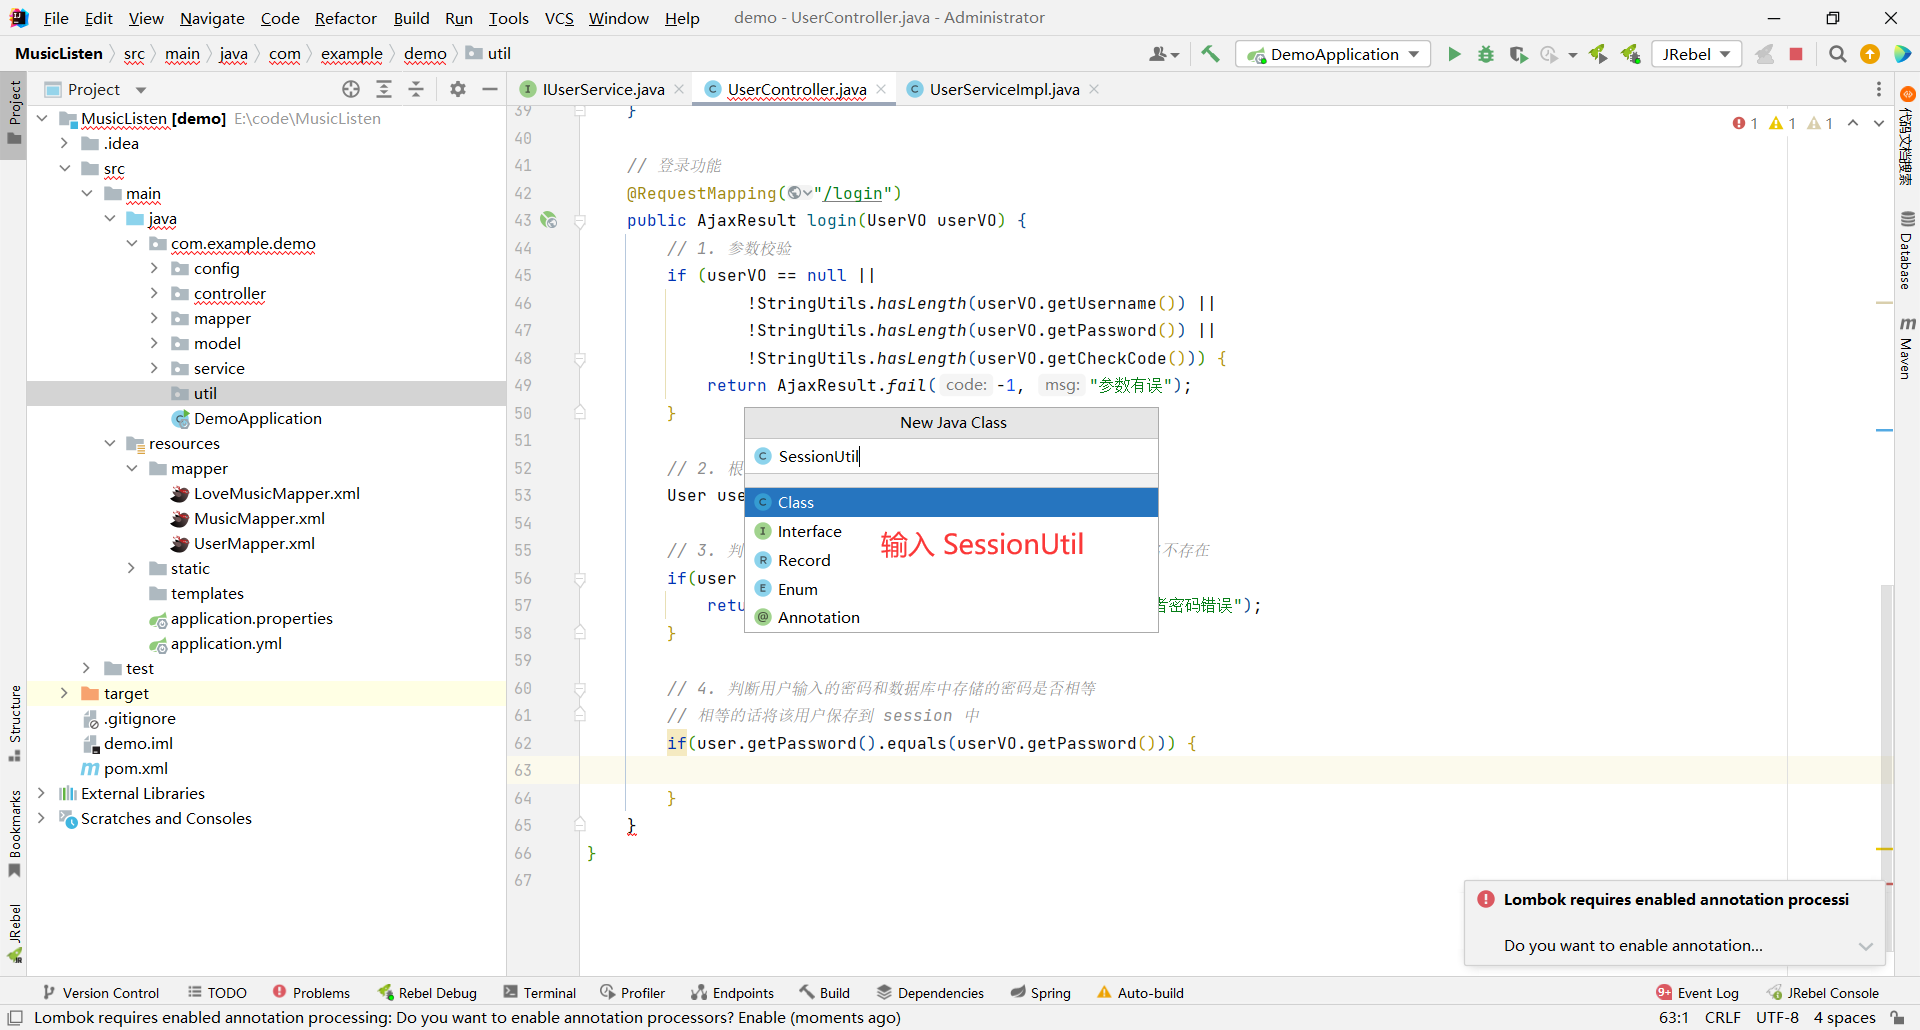
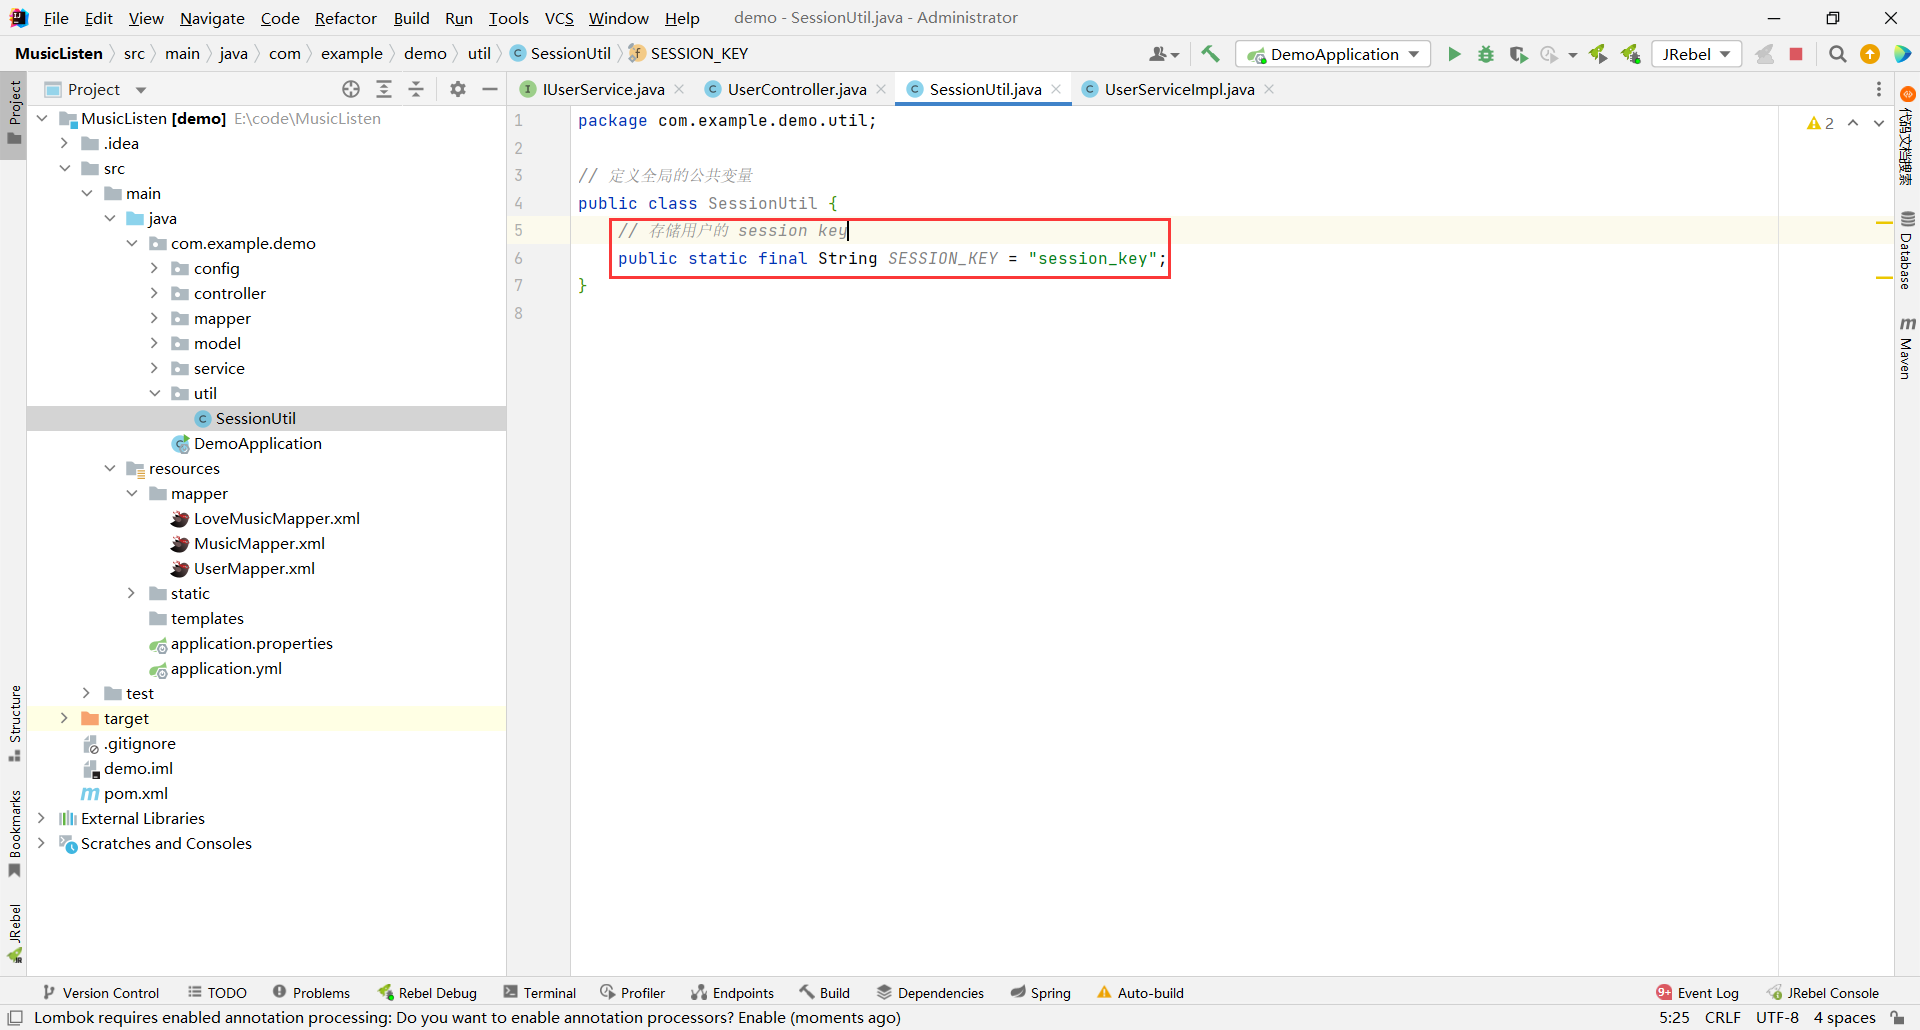
```java
package com.example.demo.util;
// 定义全局的公共变量
public class SessionUtil {
// 存储用户的 session key
public static final String SESSION_KEY = "session_key";
}
```
那我们的 session 的 key 就通过 SessionUtil.SESSION_KEY 获取
那回到我们的登录功能 , 我们现在需要获取到 session 对象 , 然后将该用户保存到会话中
我们可以直接在参数传 HttpSession session , 这样方法内就能获取到 session 对象了
然后通过 session 的 setAttribute 方法设置会话
键 : 我们刚才设置的全局变量 SESSSION_KEY
值 : 当前用户
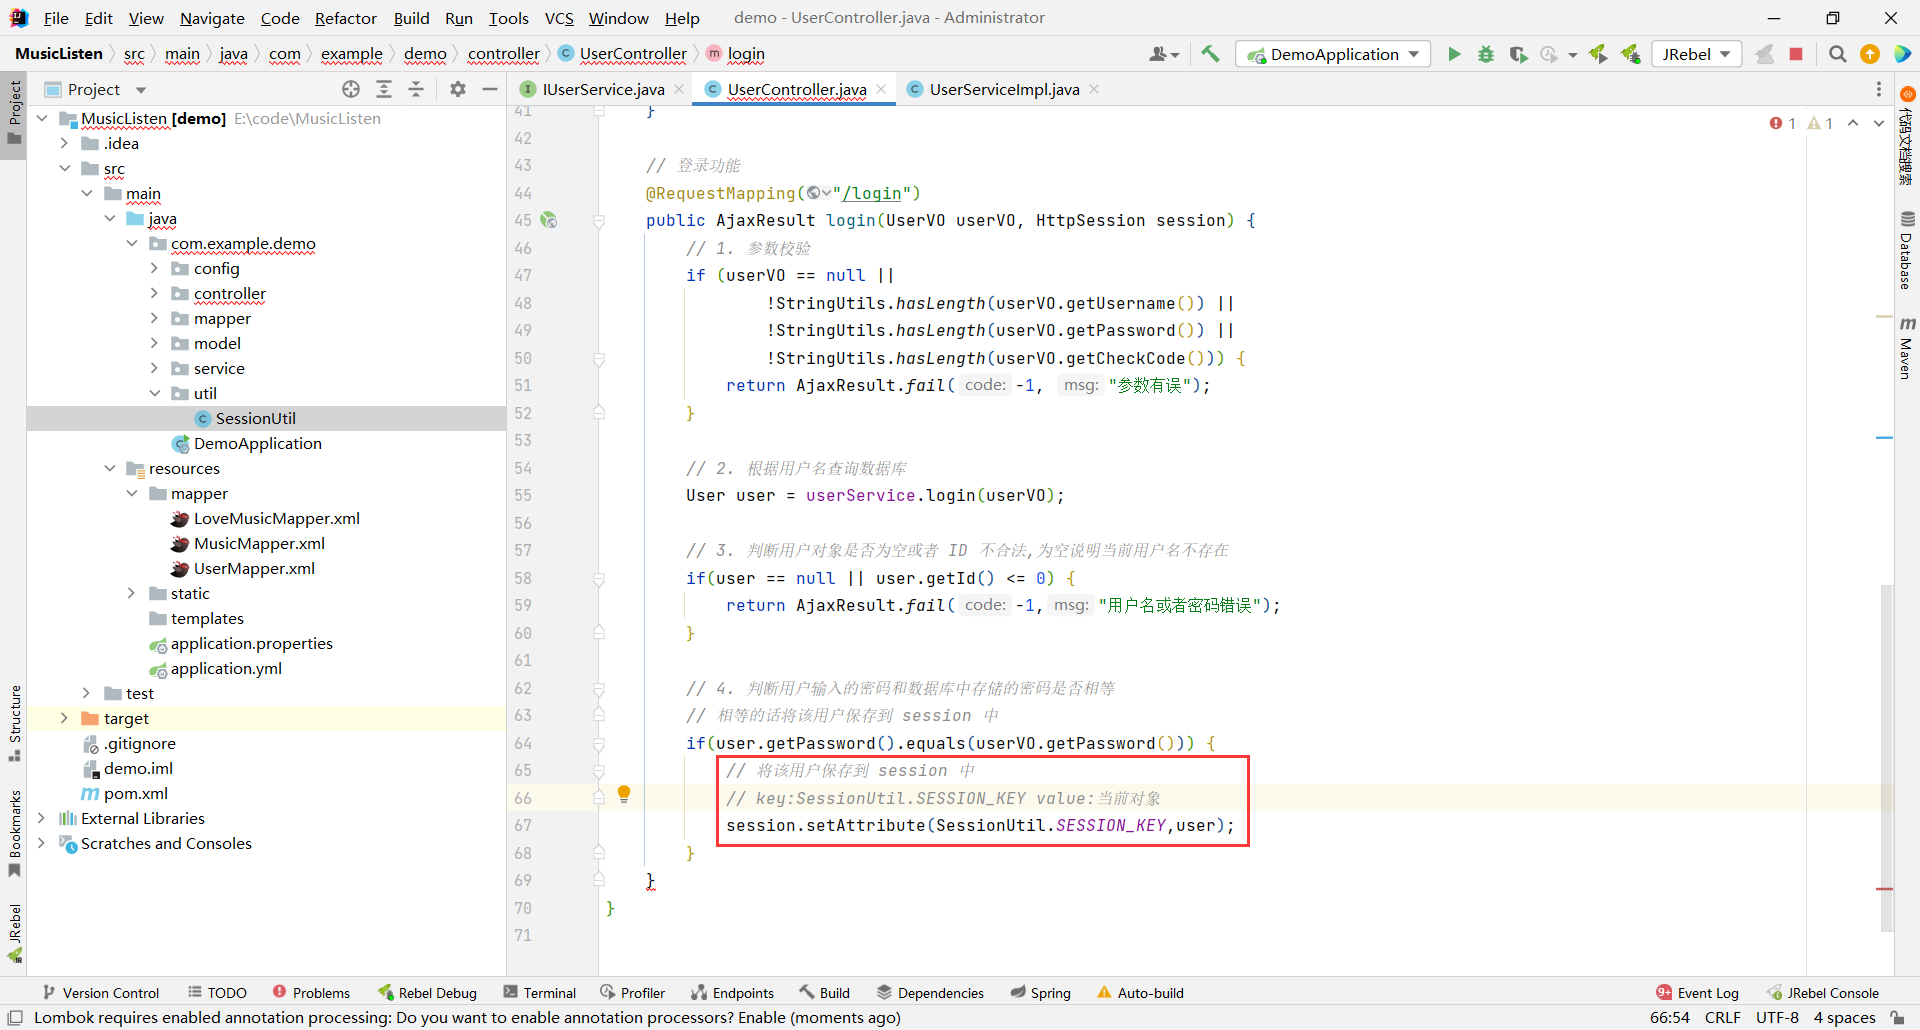
那这里还有一个比较隐晦的问题 , 我们后台返回数据 , 能直接把用户的密码返回回去吗 ?
肯定是不可以的 , 一被抓包账号密码就全被抓包了
所以我们在返回用户对象之前可以先将密码清空 , 然后再返回给前端

第六步 : 如果用户传过来的密码与数据库中的密码不同 , 返回给前端错误信息
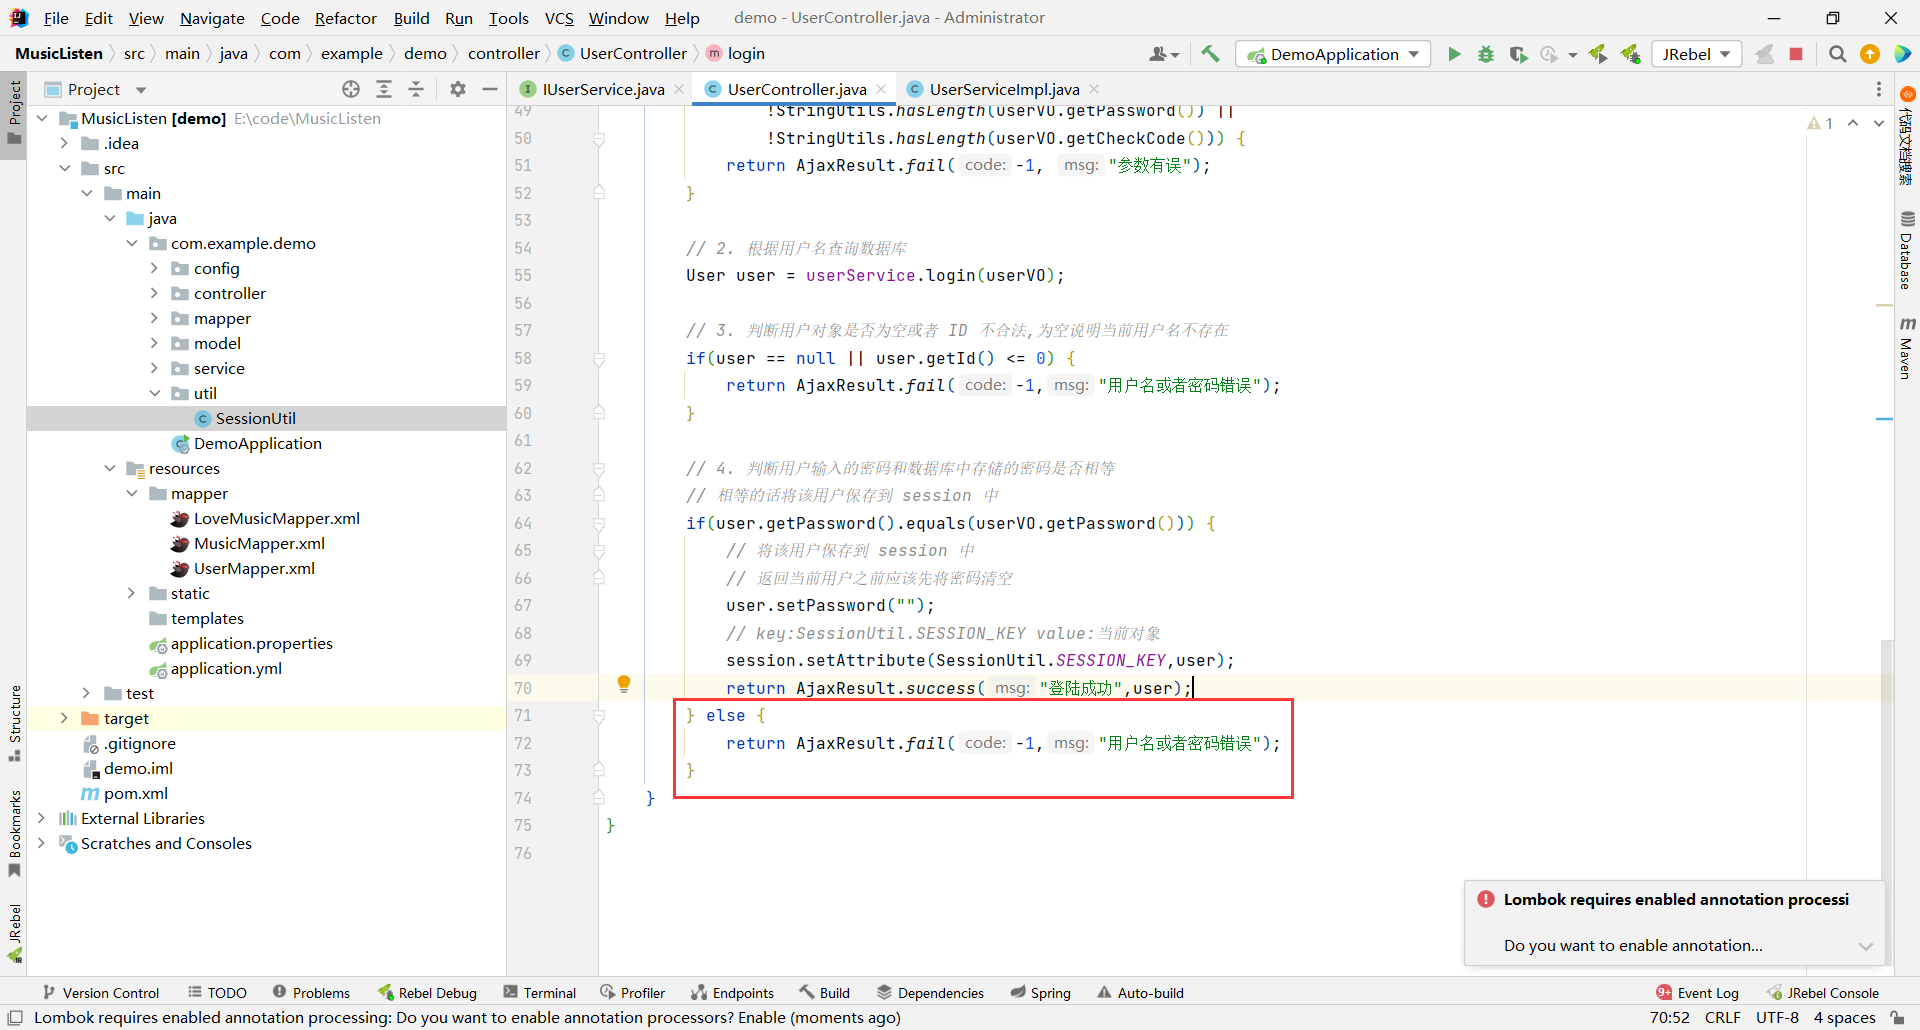
> 那他跟上面的第三步不是重了吗 ?
> 
```java
package com.example.demo.controller;
import com.example.demo.config.AjaxResult;
import com.example.demo.model.User;
import com.example.demo.model.vo.UserVO;
import com.example.demo.service.IUserService;
import com.example.demo.util.SessionUtil;
import jakarta.servlet.http.HttpSession;
import org.springframework.beans.factory.annotation.Autowired;
import org.springframework.util.StringUtils;
import org.springframework.web.bind.annotation.RequestMapping;
import org.springframework.web.bind.annotation.RestController;
@RestController
@RequestMapping("/user")
public class UserController {
@Autowired
private IUserService userService;
// 登录功能
@RequestMapping("/login")
public AjaxResult login(UserVO userVO, HttpSession session) {
// 1. 参数校验
if (userVO == null ||
!StringUtils.hasLength(userVO.getUsername()) ||
!StringUtils.hasLength(userVO.getPassword()) ||
!StringUtils.hasLength(userVO.getCheckCode())) {
return AjaxResult.fail(-1, "参数有误");
}
// 2. 根据用户名查询数据库
User user = userService.login(userVO);
// 3. 判断用户对象是否为空或者 ID 不合法,为空说明当前用户名不存在
if (user == null || user.getId() <= 0) {
return AjaxResult.fail(-1, "用户名或者密码错误");
}
// 4. 判断用户输入的密码和数据库中存储的密码是否相等
// 相等的话将该用户保存到 session 中
if (user.getPassword().equals(userVO.getPassword())) {
// 将该用户保存到 session 中
// 返回当前用户之前应该先将密码清空
user.setPassword("");
// key:SessionUtil.SESSION_KEY value:当前对象
session.setAttribute(SessionUtil.SESSION_KEY, user);
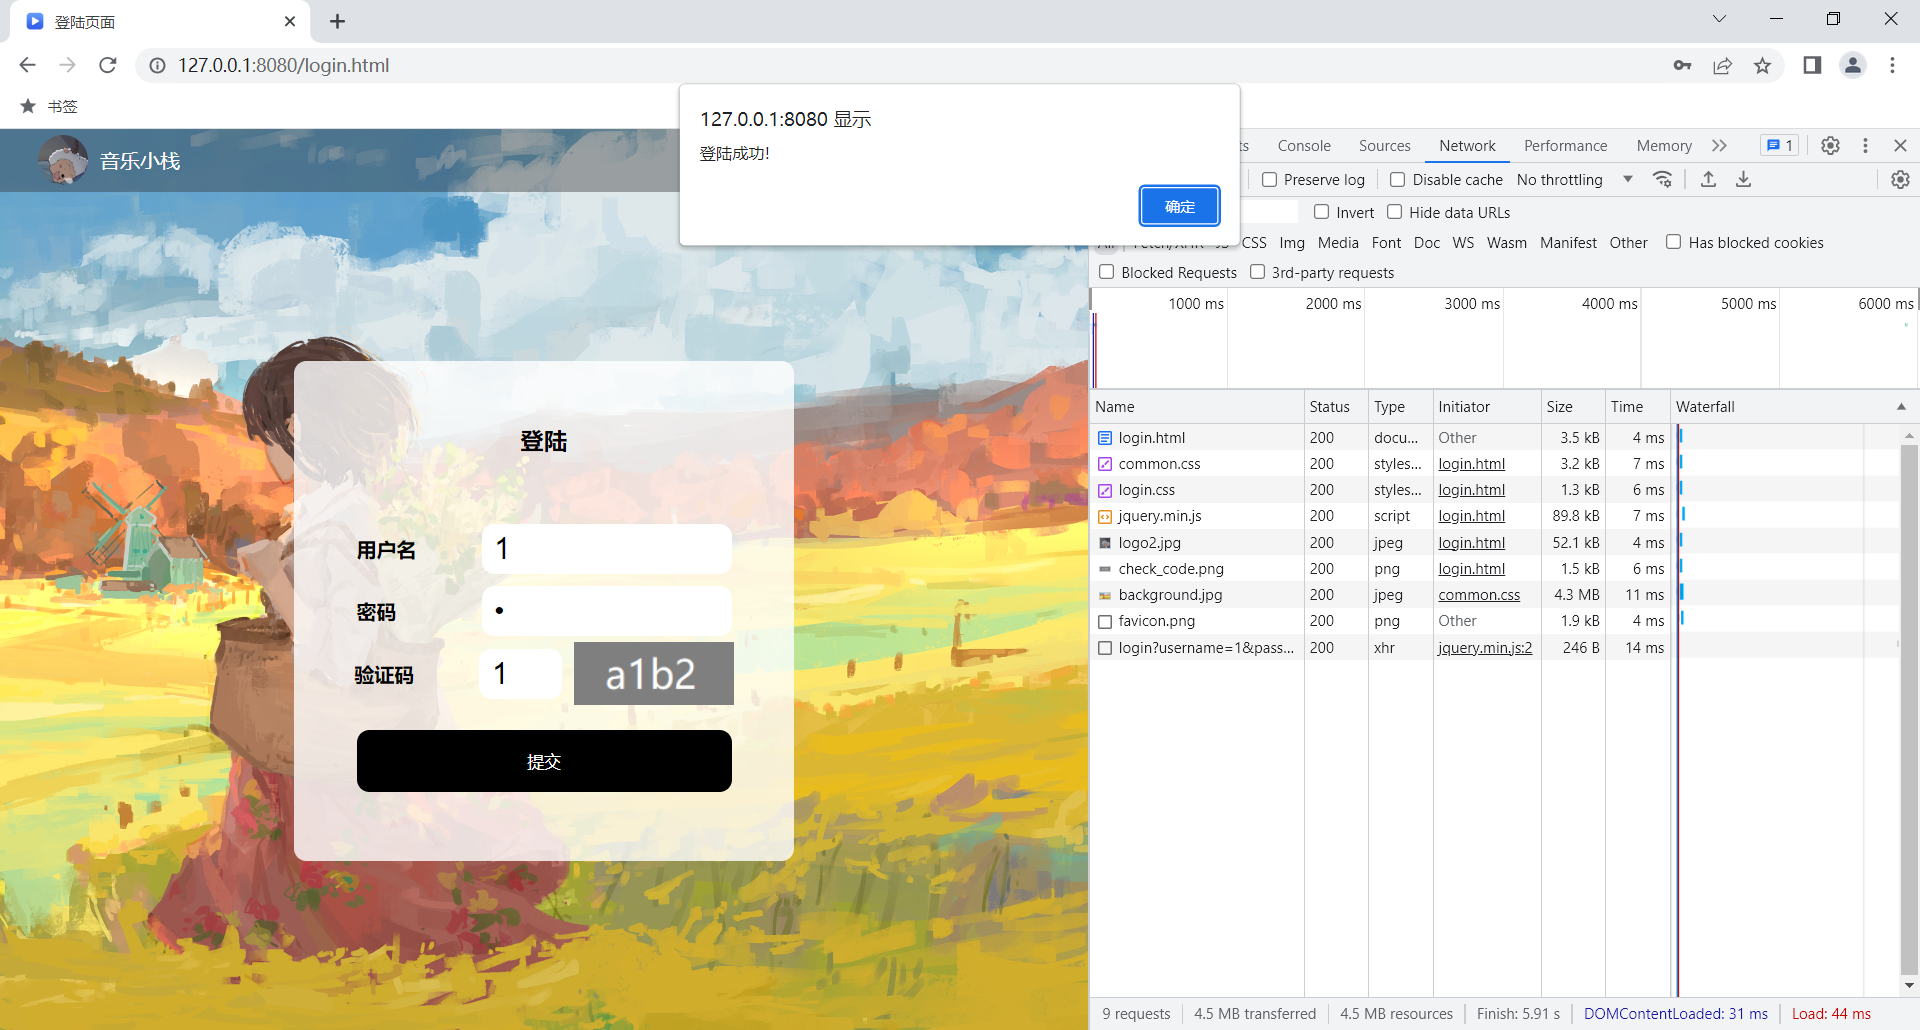
return AjaxResult.success("登陆成功", user);
} else {
return AjaxResult.fail(-1, "用户名或者密码错误");
}
}
}
```
我们测试一下
当前数据库中已经有 1 这个用户了 , 那我们就测试 1 这个账号能否登陆
我们再试一下错误的账号密码是否能够登陆成功

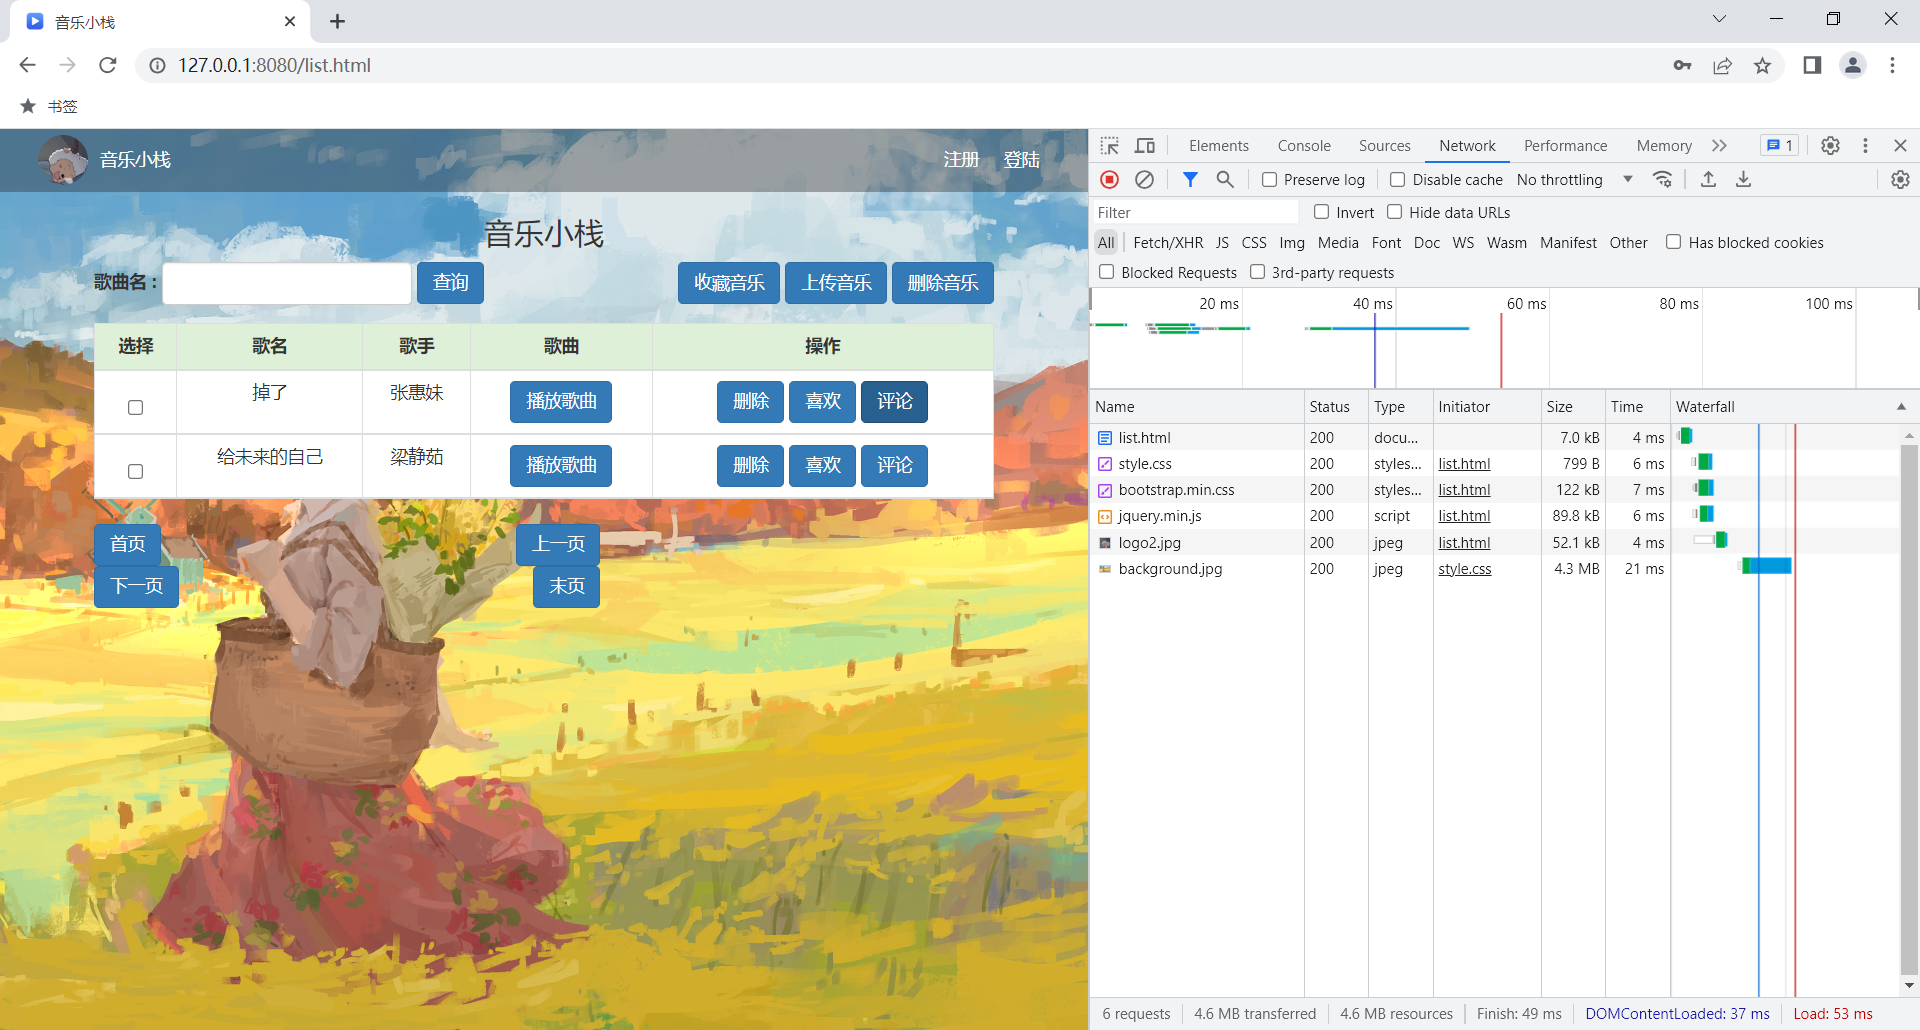
那接下来就来到了我们的主页
## 2.3 上传音乐
我们先来约定一下前后端交互接口
```json
请求 :
{
"url": "/music/upload",
"method": "POST",
"data": {
音乐文件,
歌手
}
}
响应 :
{
"status": 200,
"message": "上传成功!",
"data": 1 // 为 1 表示成功
}
```
### 2.3.1 前端
上面的 form 表单我们不用去管 , 我们采用 ajax 的方式来取代他
> 实际上就是 ajax 要利用这个 form 表单 , 实现更好的功能
我们首先 , 要判断用户是否上传了文件和歌手名称
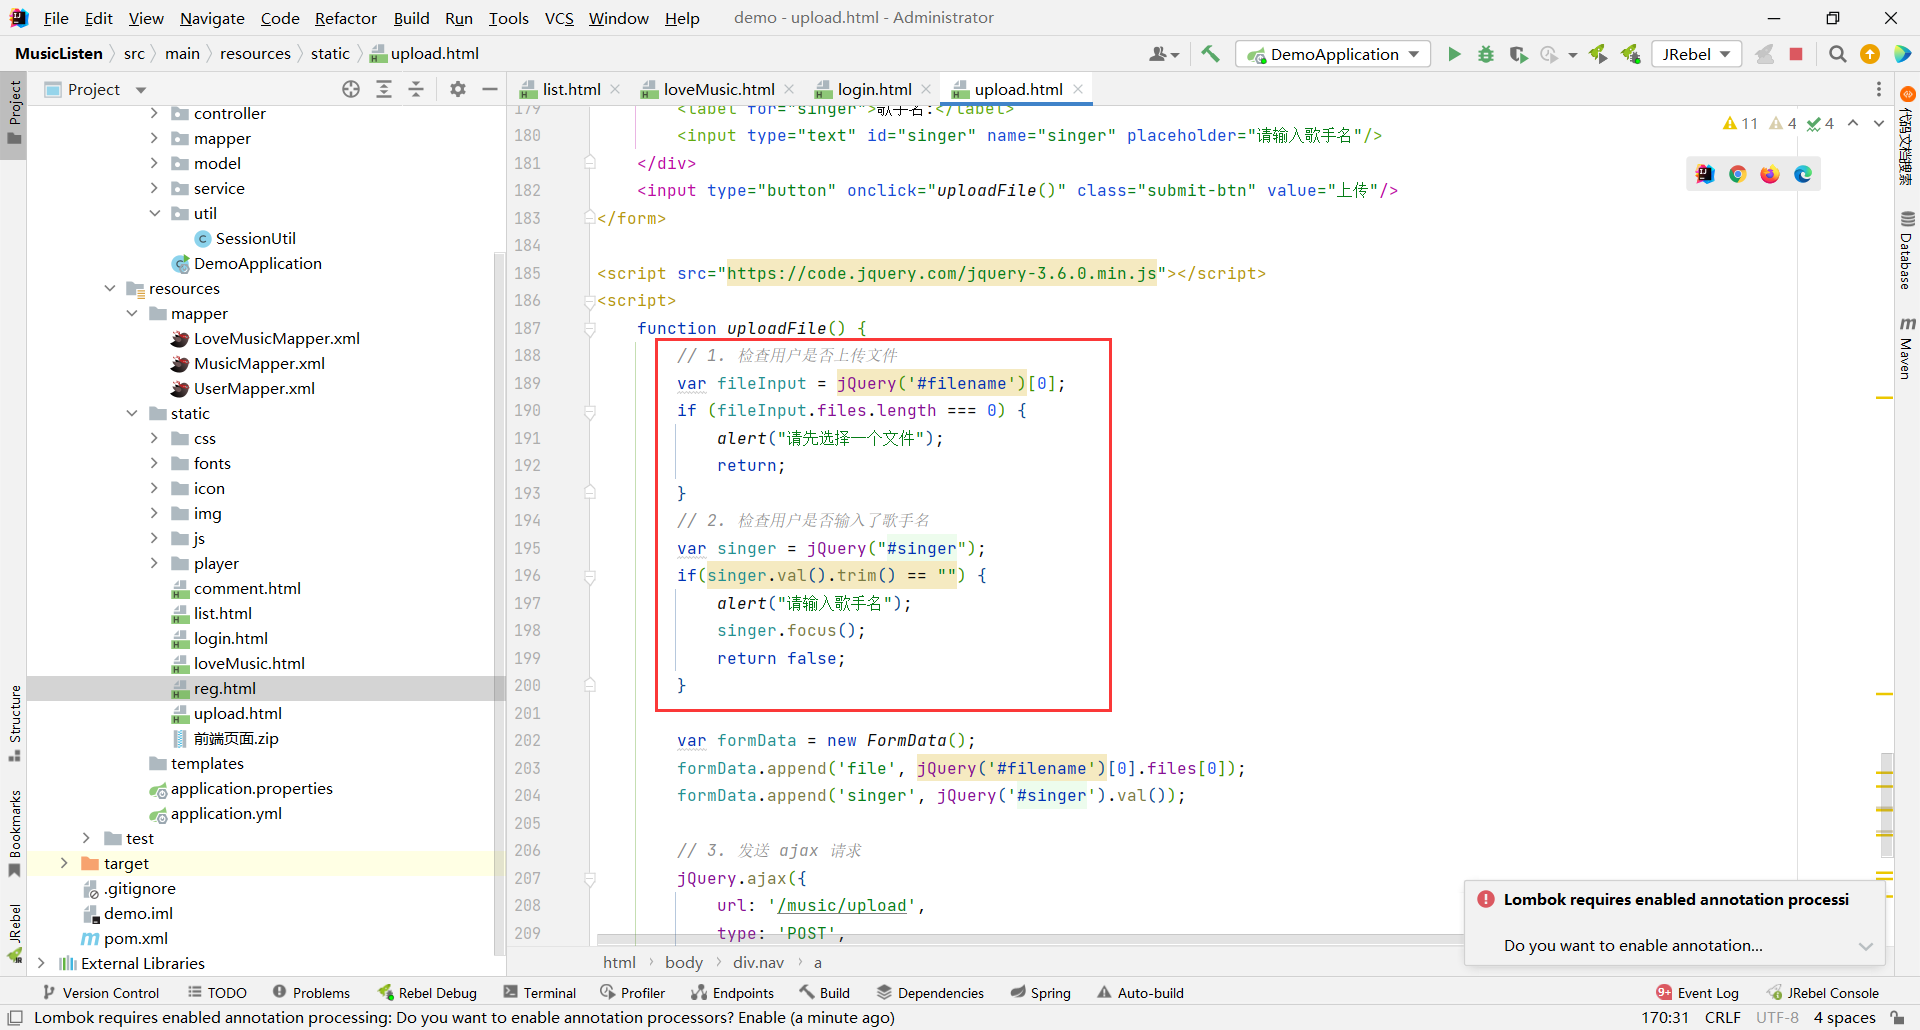
如果用户文件也上传了 , 歌手名也输入了 , 那么我们就往后端发送 ajax 请求
路径 : /music/upload
请求类型 : POST
传输的数据 : 歌曲、歌手信息
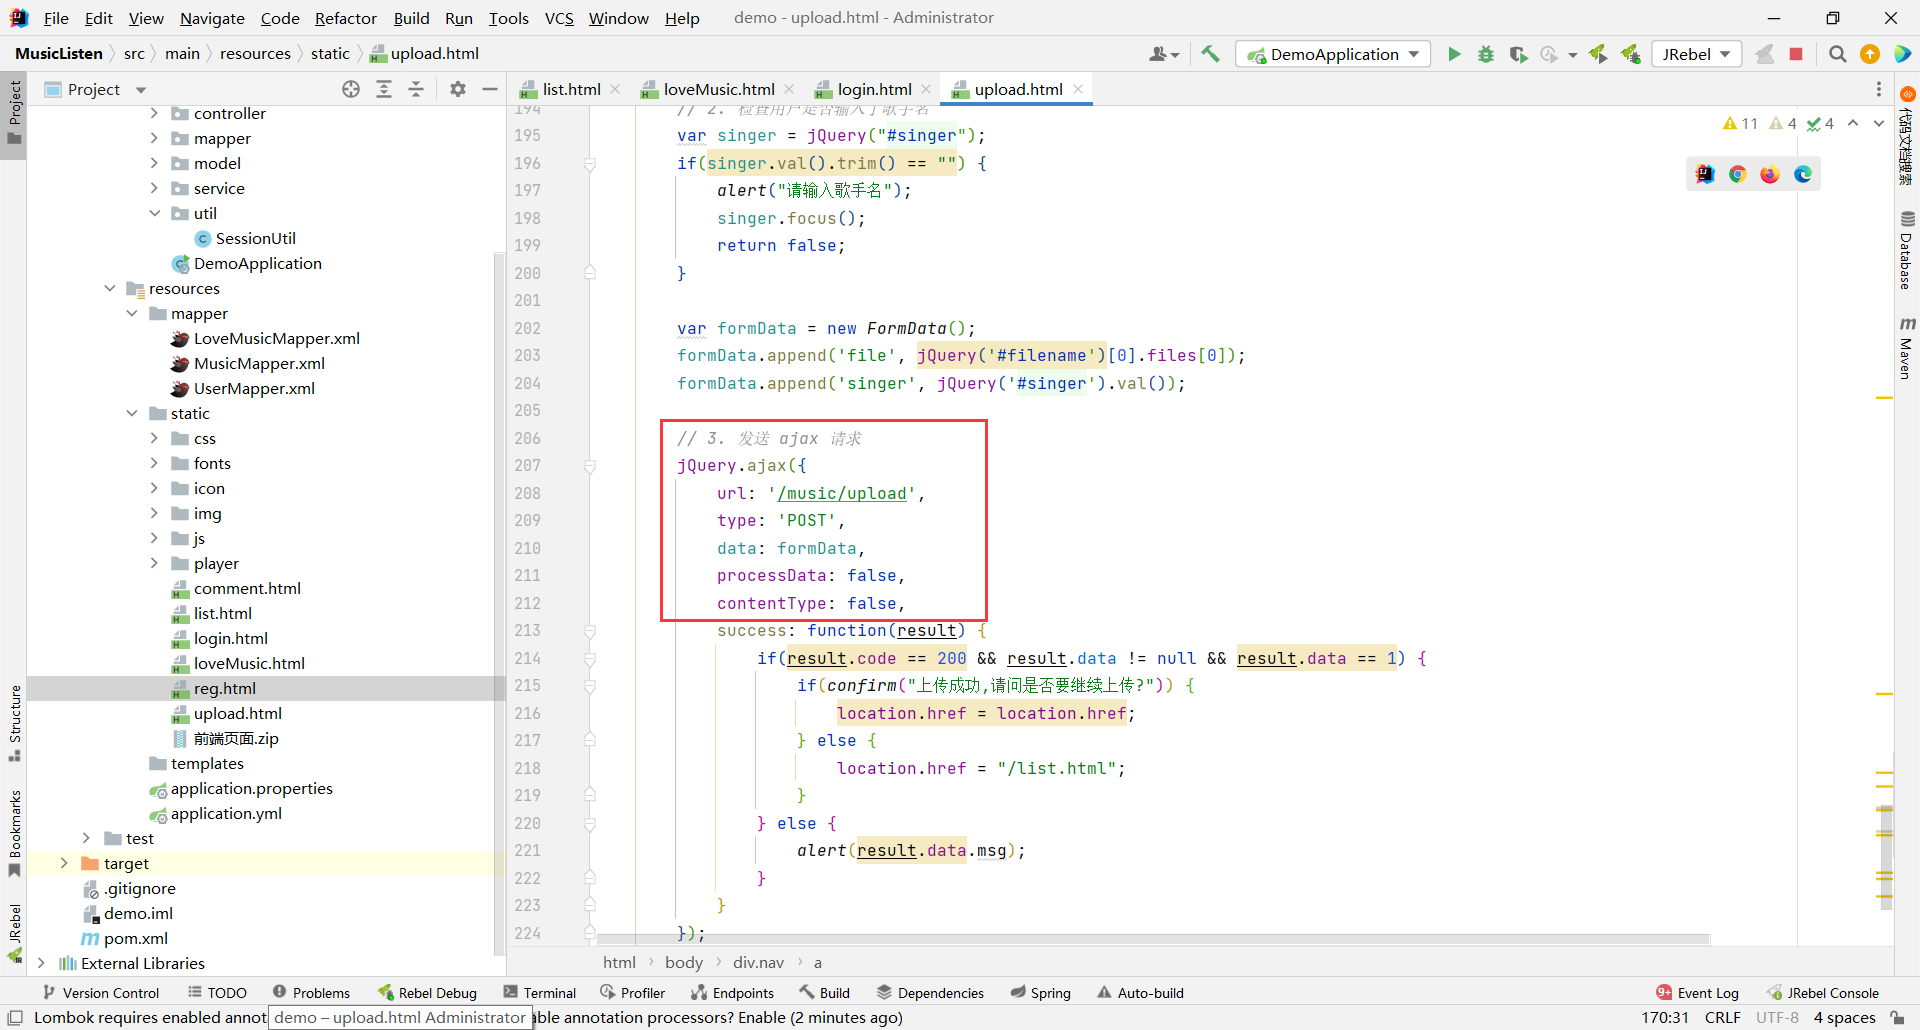
接下来执行回调函数 , 如果返回的数据没问题的话 , 我们就请求用户是否继续插入

```html
上传音乐
```
### 2.3.2 后端
根据我们之前约定好的前后端交互接口
```json
请求 :
{
"url": "/music/upload",
"method": "POST",
"data": {
音乐文件,
歌手
}
}
```
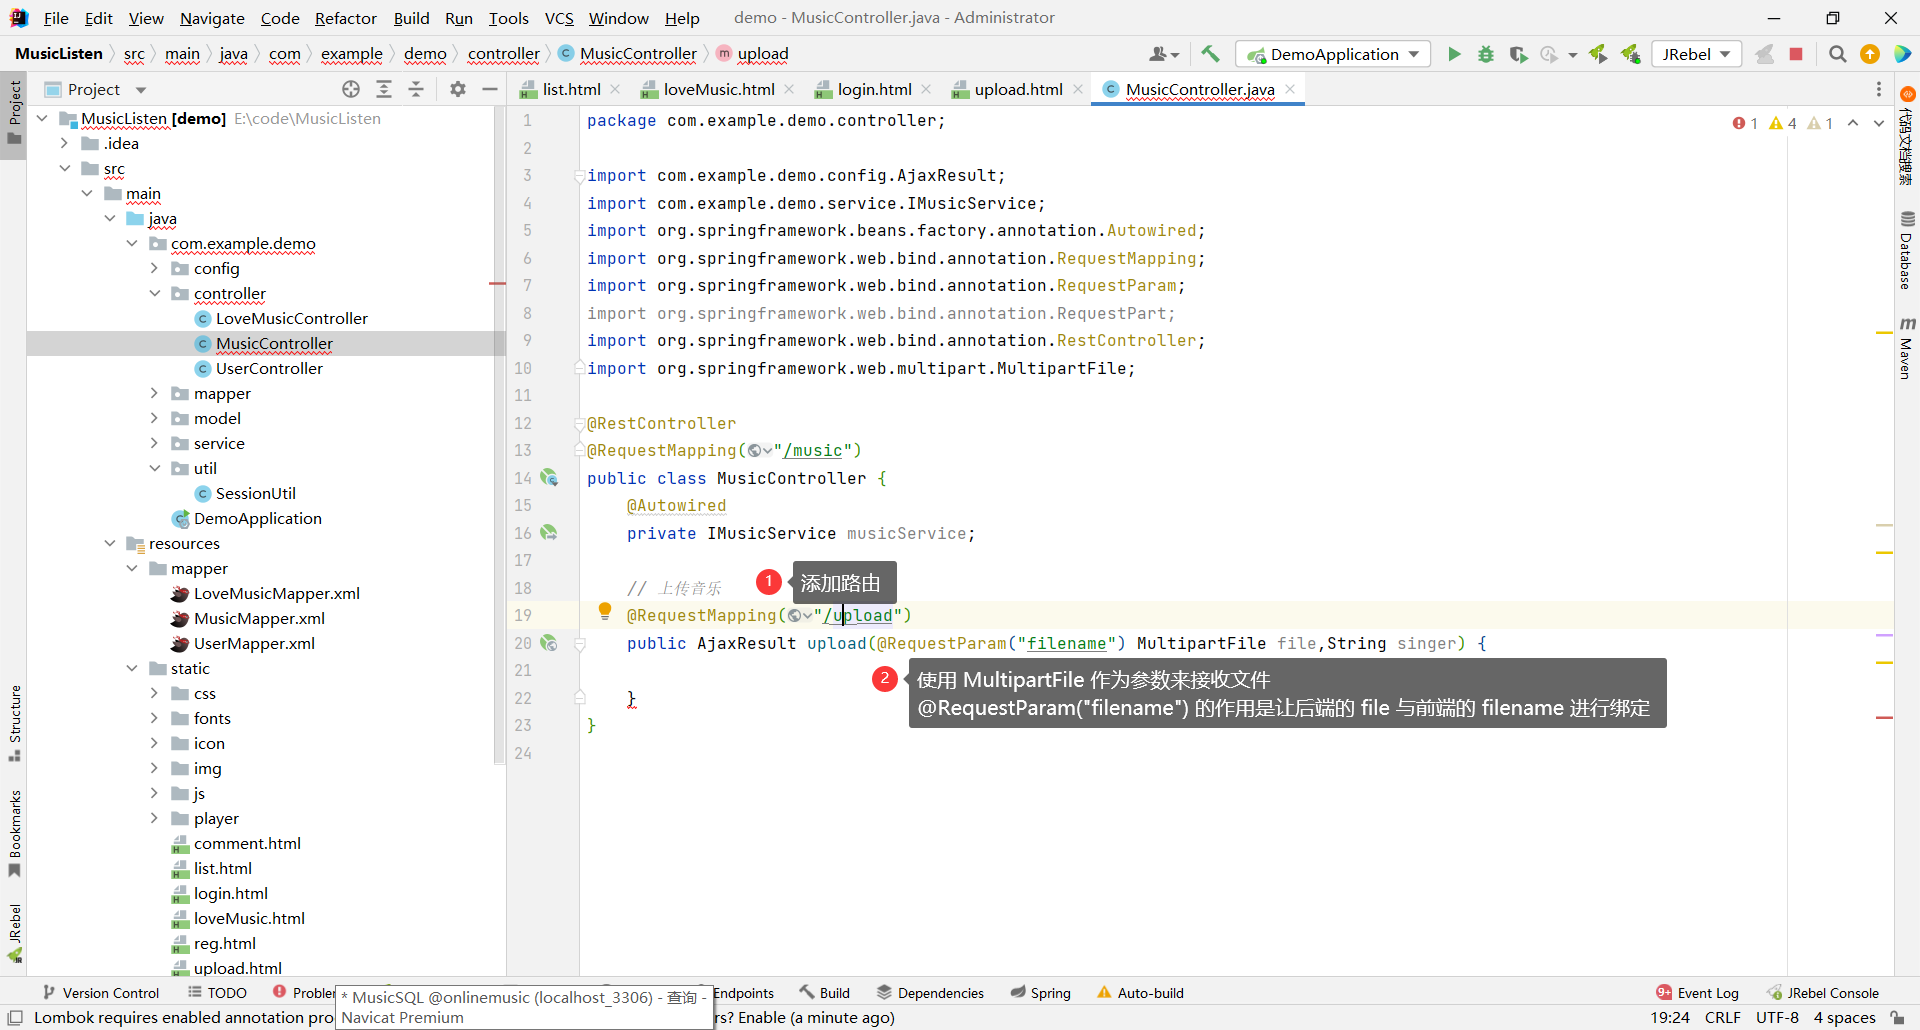
我们能够得到两个信息
1. 接口路径为 : /music/upload
2. 方法参数 : MultipartFile file、String singer
那么我们先把框架搭出来
#### controller 层
那我们上传音乐 , 能把音乐上传到数据库吗 ?
万万不可以 , 一首歌曲转换成二进制是非常长的 , 数据库会承受非常大的压力
我们一般的做法就是将该文件上传到服务器的一个路径下 , 然后将该路径保存到数据库中
那我们先把这个文件保存的路径指定出来
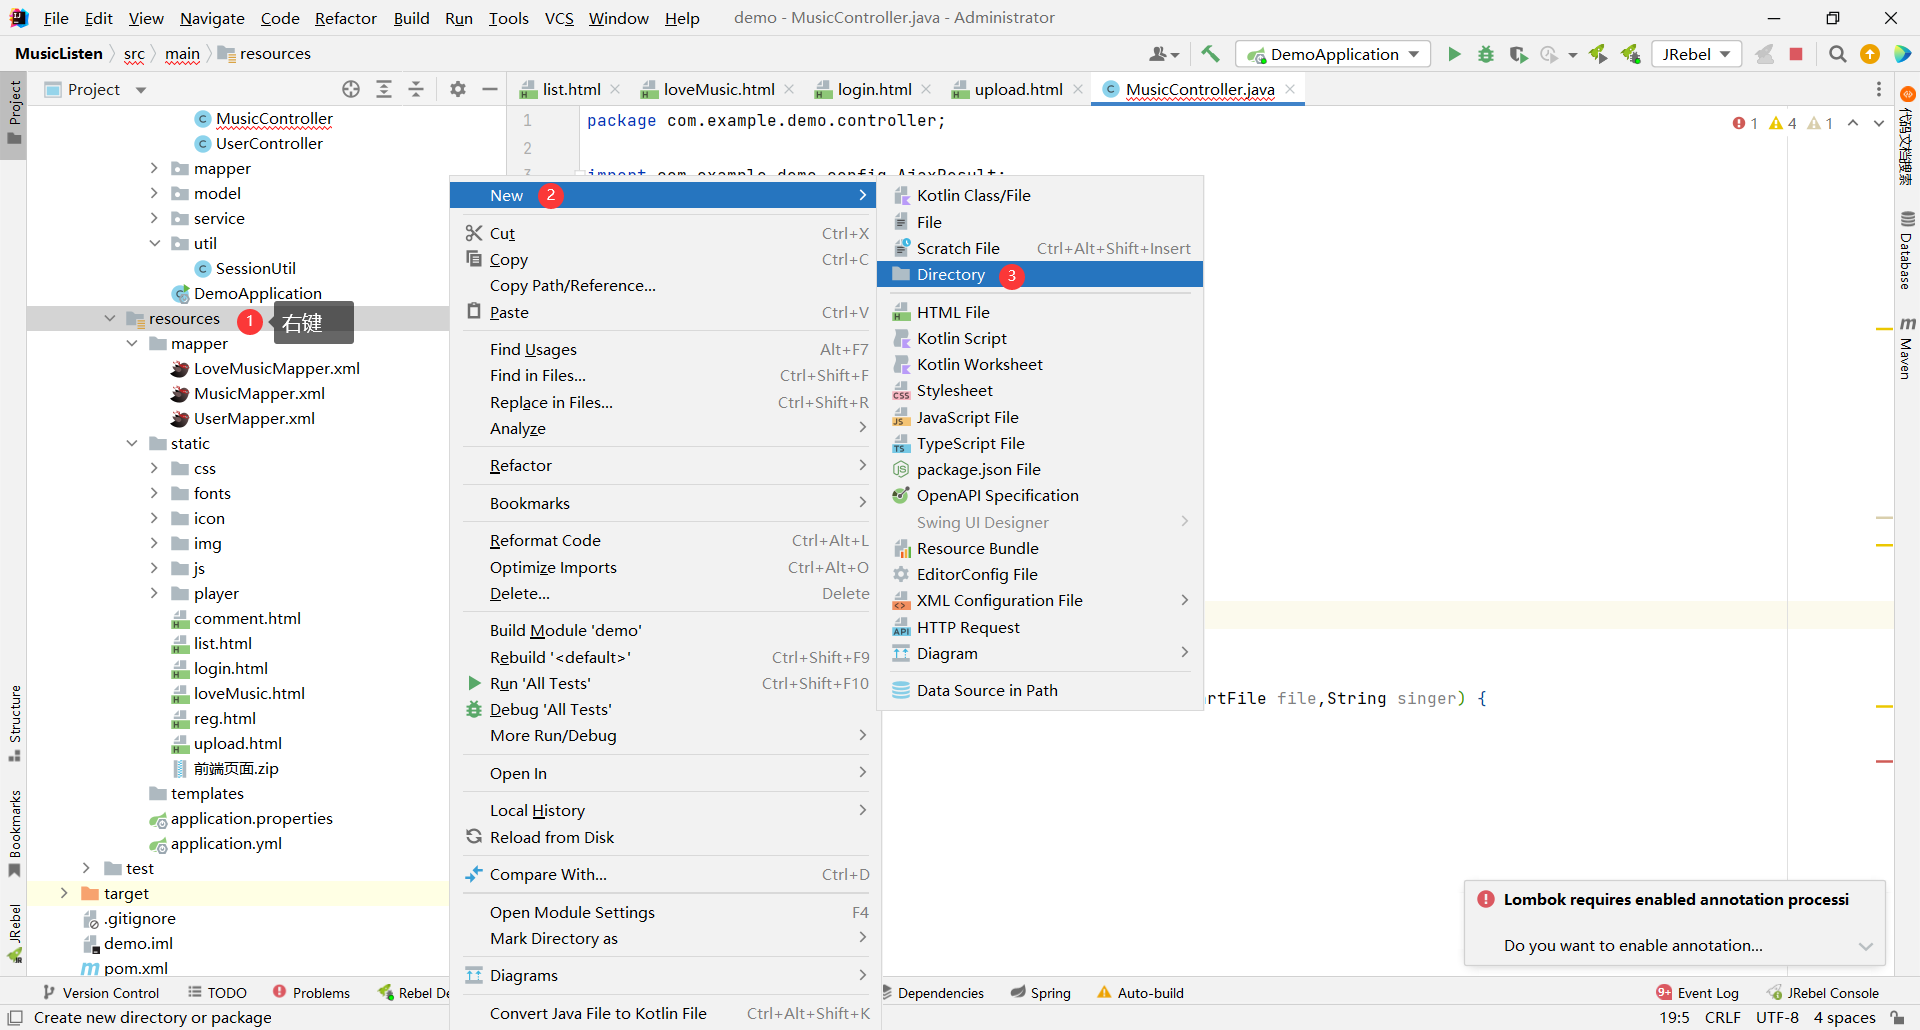
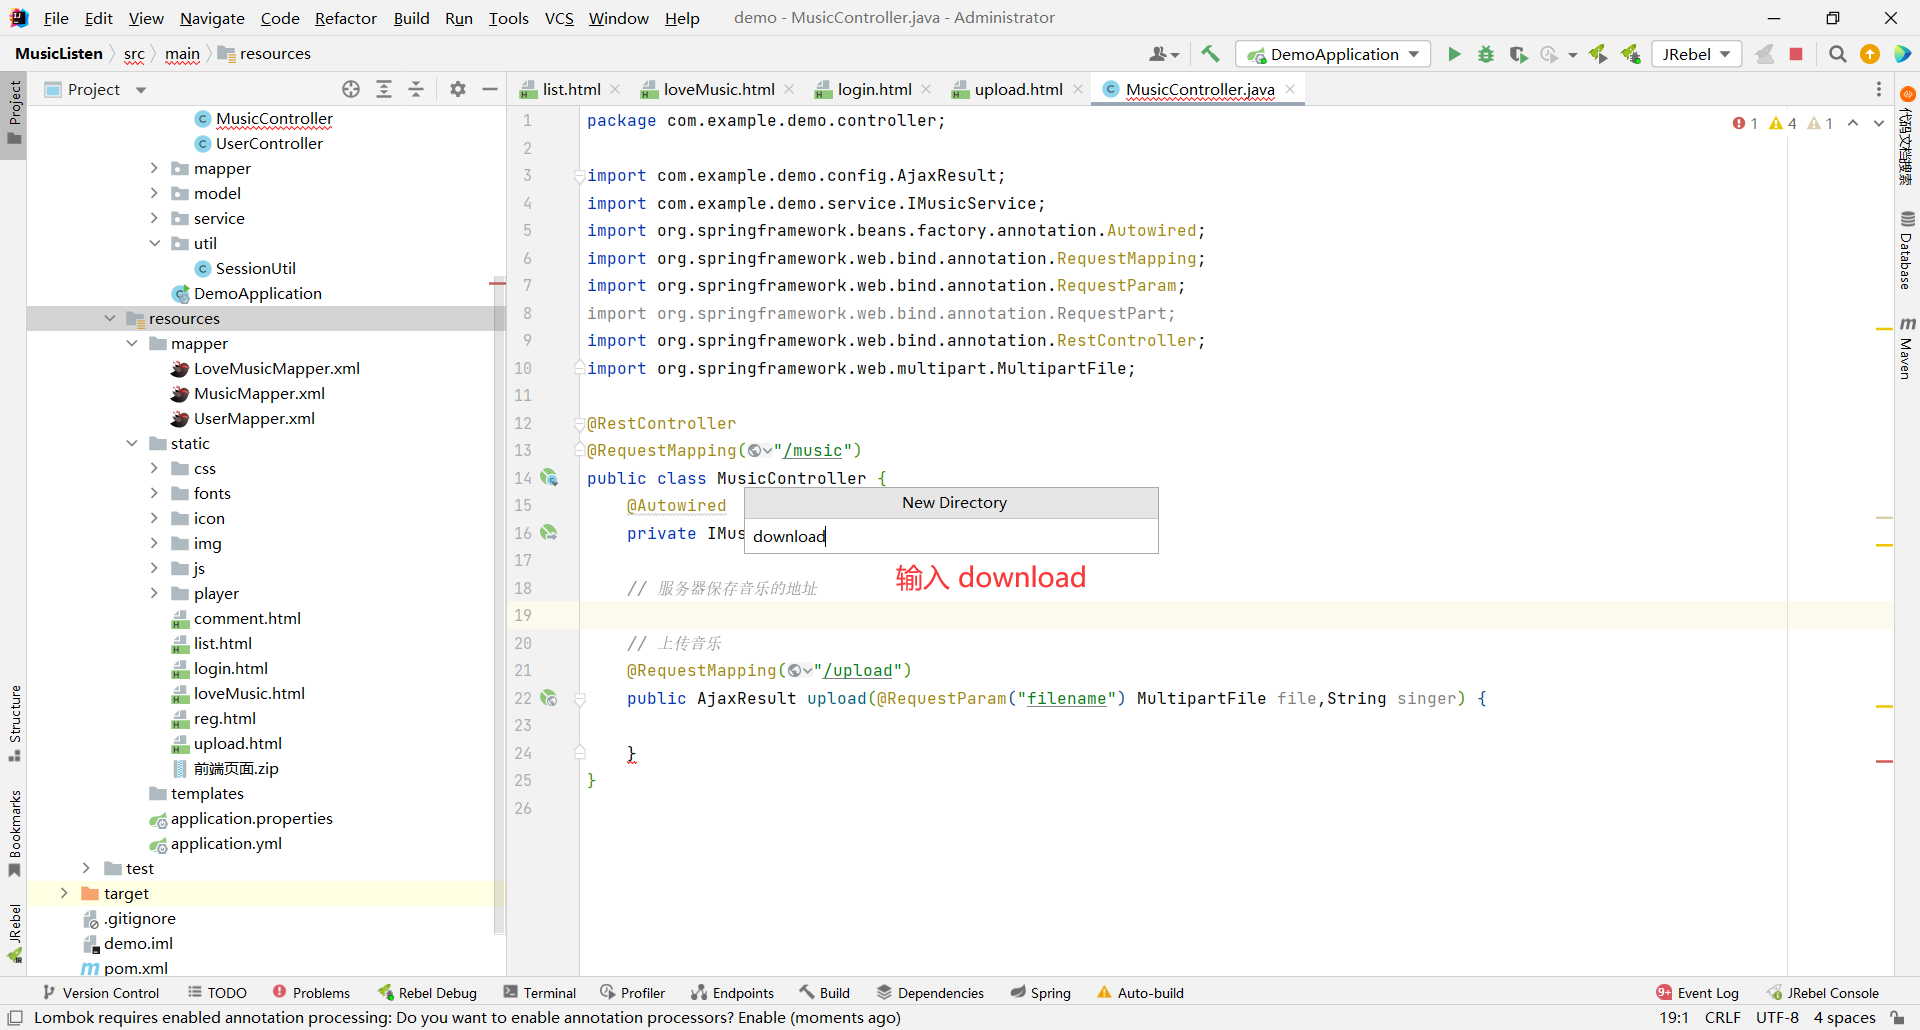
我们就将用户上传的音乐保存到此文件夹下 , 然后在上面指定他的位置
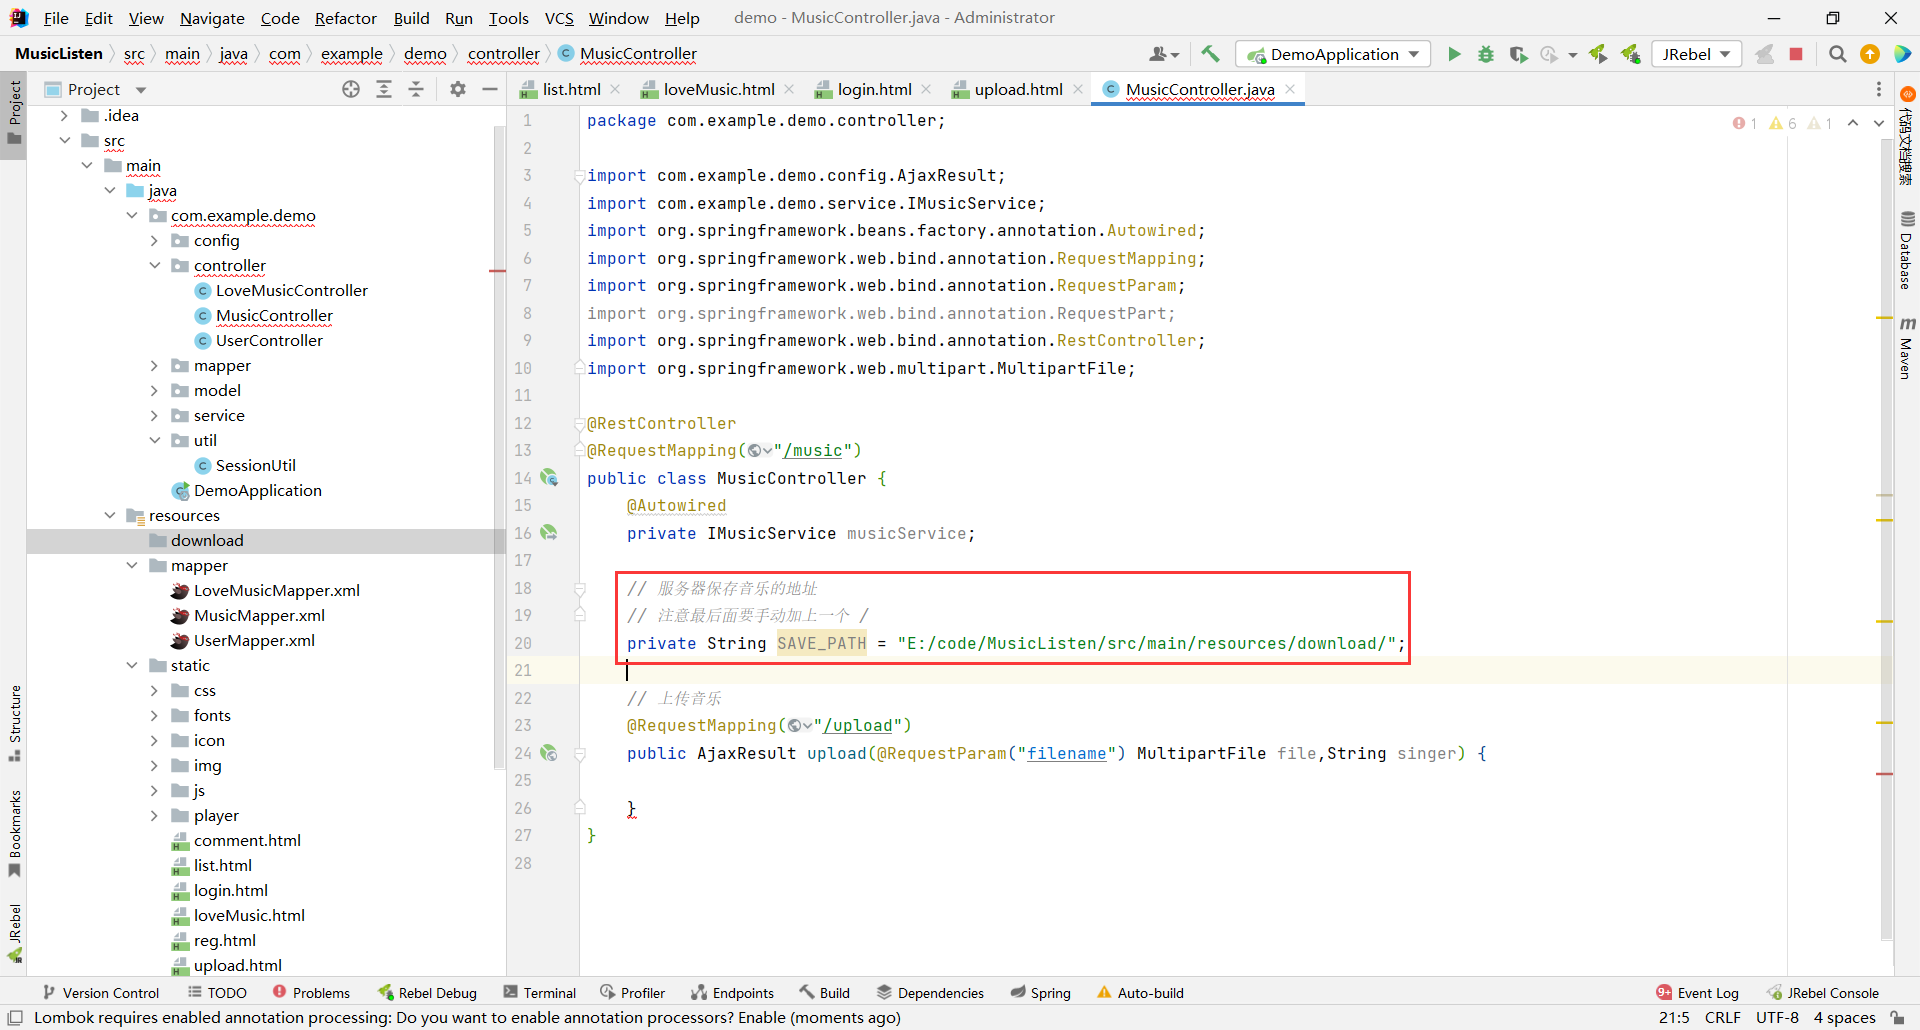
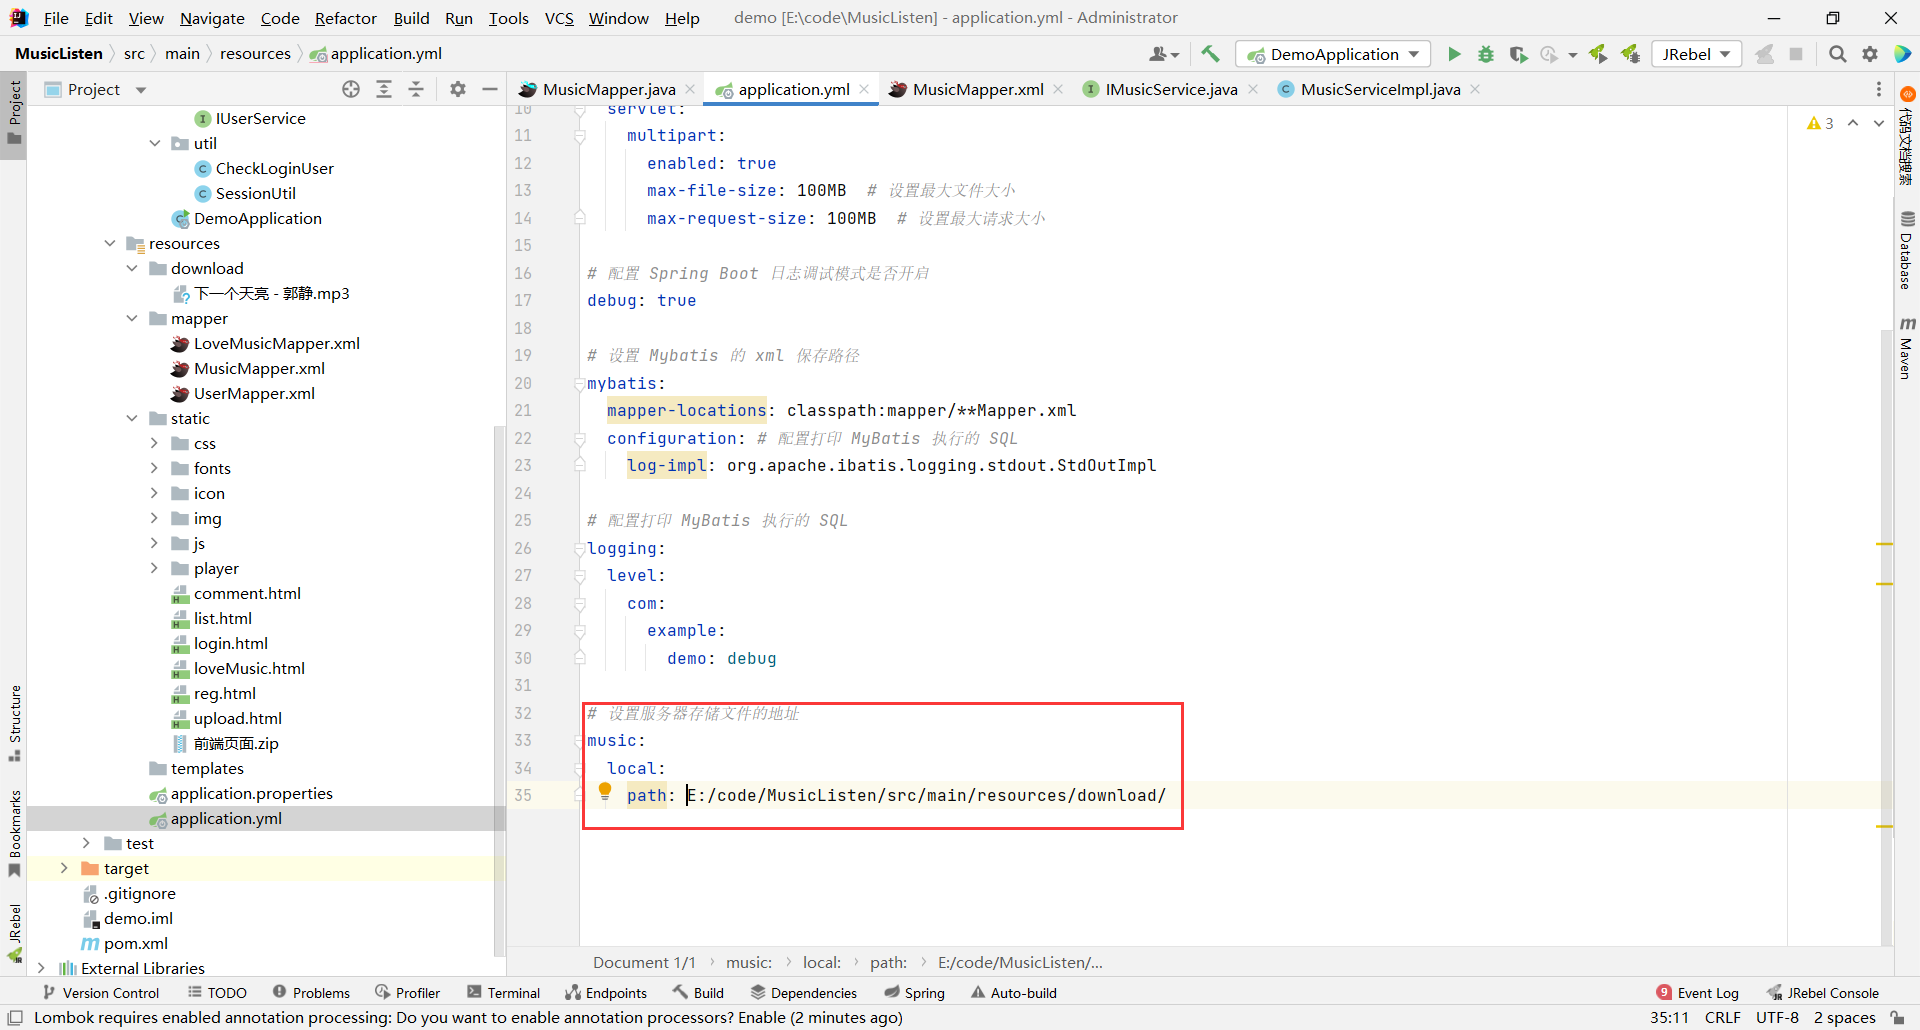
我们也可以把这个路径保存到配置文件中
```yaml
spring:
# 配置数据库的连接字符串
datasource:
url: jdbc:mysql://127.0.0.1:3306/onlinemusic?characterEncoding=utf8
username: root
password: root
driver-class-name: com.mysql.cj.jdbc.Driver
# 配置 Spring Boot 上传文件的大小
# 默认每个文件的配置最大为 10MB,单次请求的文件的总数不能超过 10MB
servlet:
multipart:
enabled: true
max-file-size: 100MB # 设置最大文件大小
max-request-size: 100MB # 设置最大请求大小
# 配置 Spring Boot 日志调试模式是否开启
debug: true
# 设置 Mybatis 的 xml 保存路径
mybatis:
mapper-locations: classpath:mapper/**Mapper.xml
configuration: # 配置打印 MyBatis 执行的 SQL
log-impl: org.apache.ibatis.logging.stdout.StdOutImpl
# 配置打印 MyBatis 执行的 SQL
logging:
level:
com:
example:
demo: debug
# 设置服务器存储文件的地址
music:
local:
path: E:/code/MusicListen/src/main/resources/download/
```
然后读取配置文件
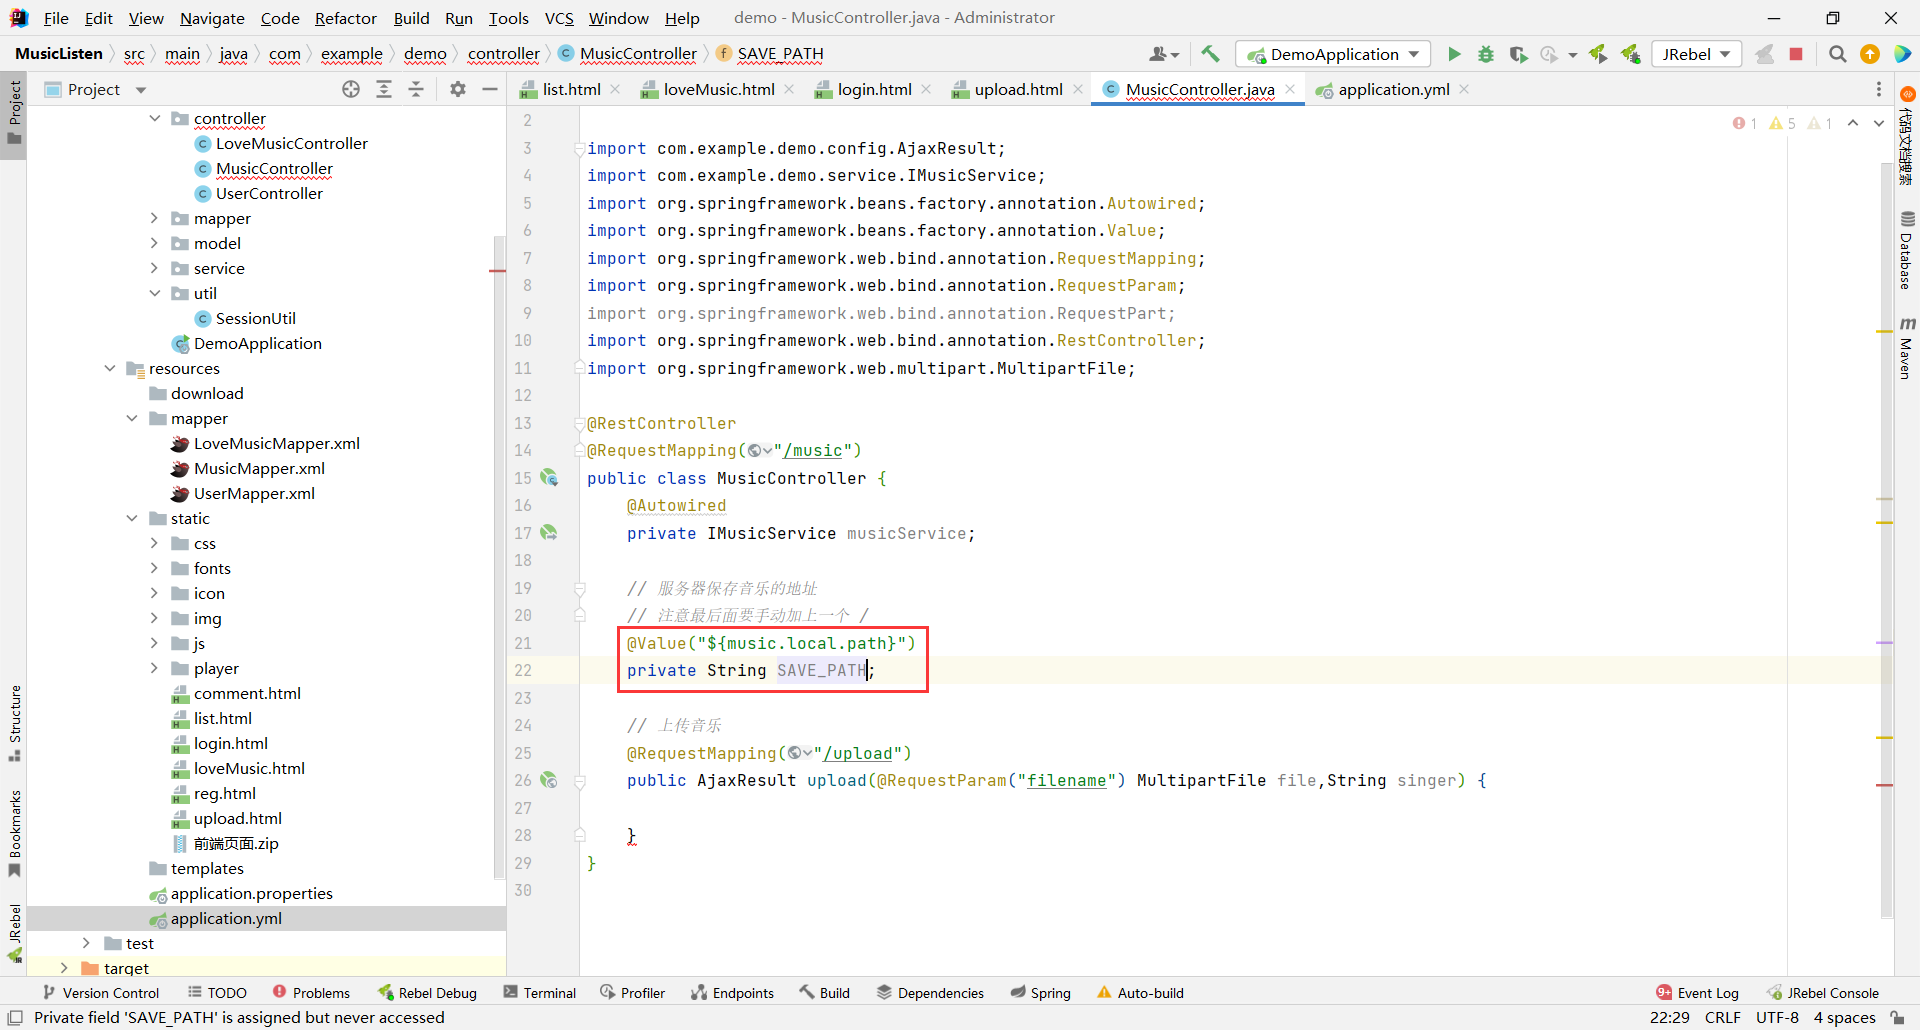
这样的话 , SAVE_PATH 中就保存了我们服务器存储文件的地址
然后接下来就列举一下我们 controller 层的逻辑
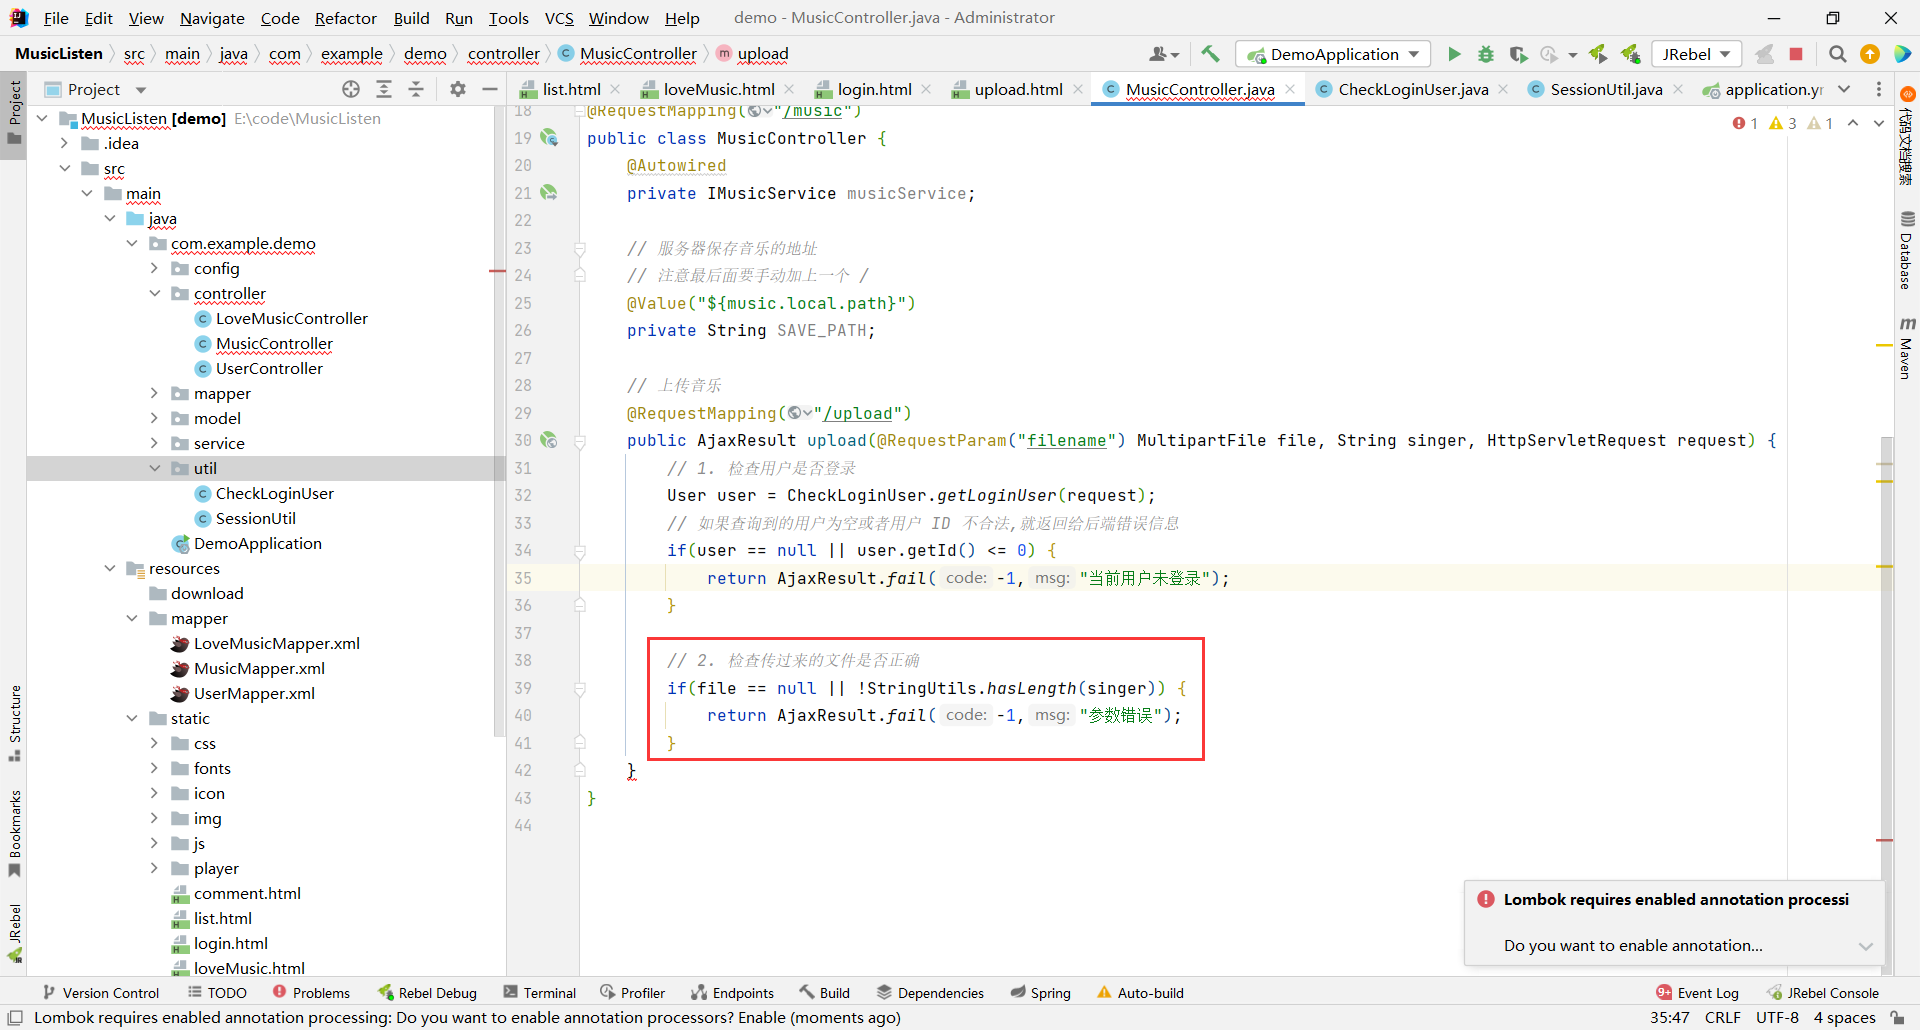
**前置操作**
1. 检查当前用户是否登录
2. 检查传过来的参数是否正确
**将数据保存到服务器上**
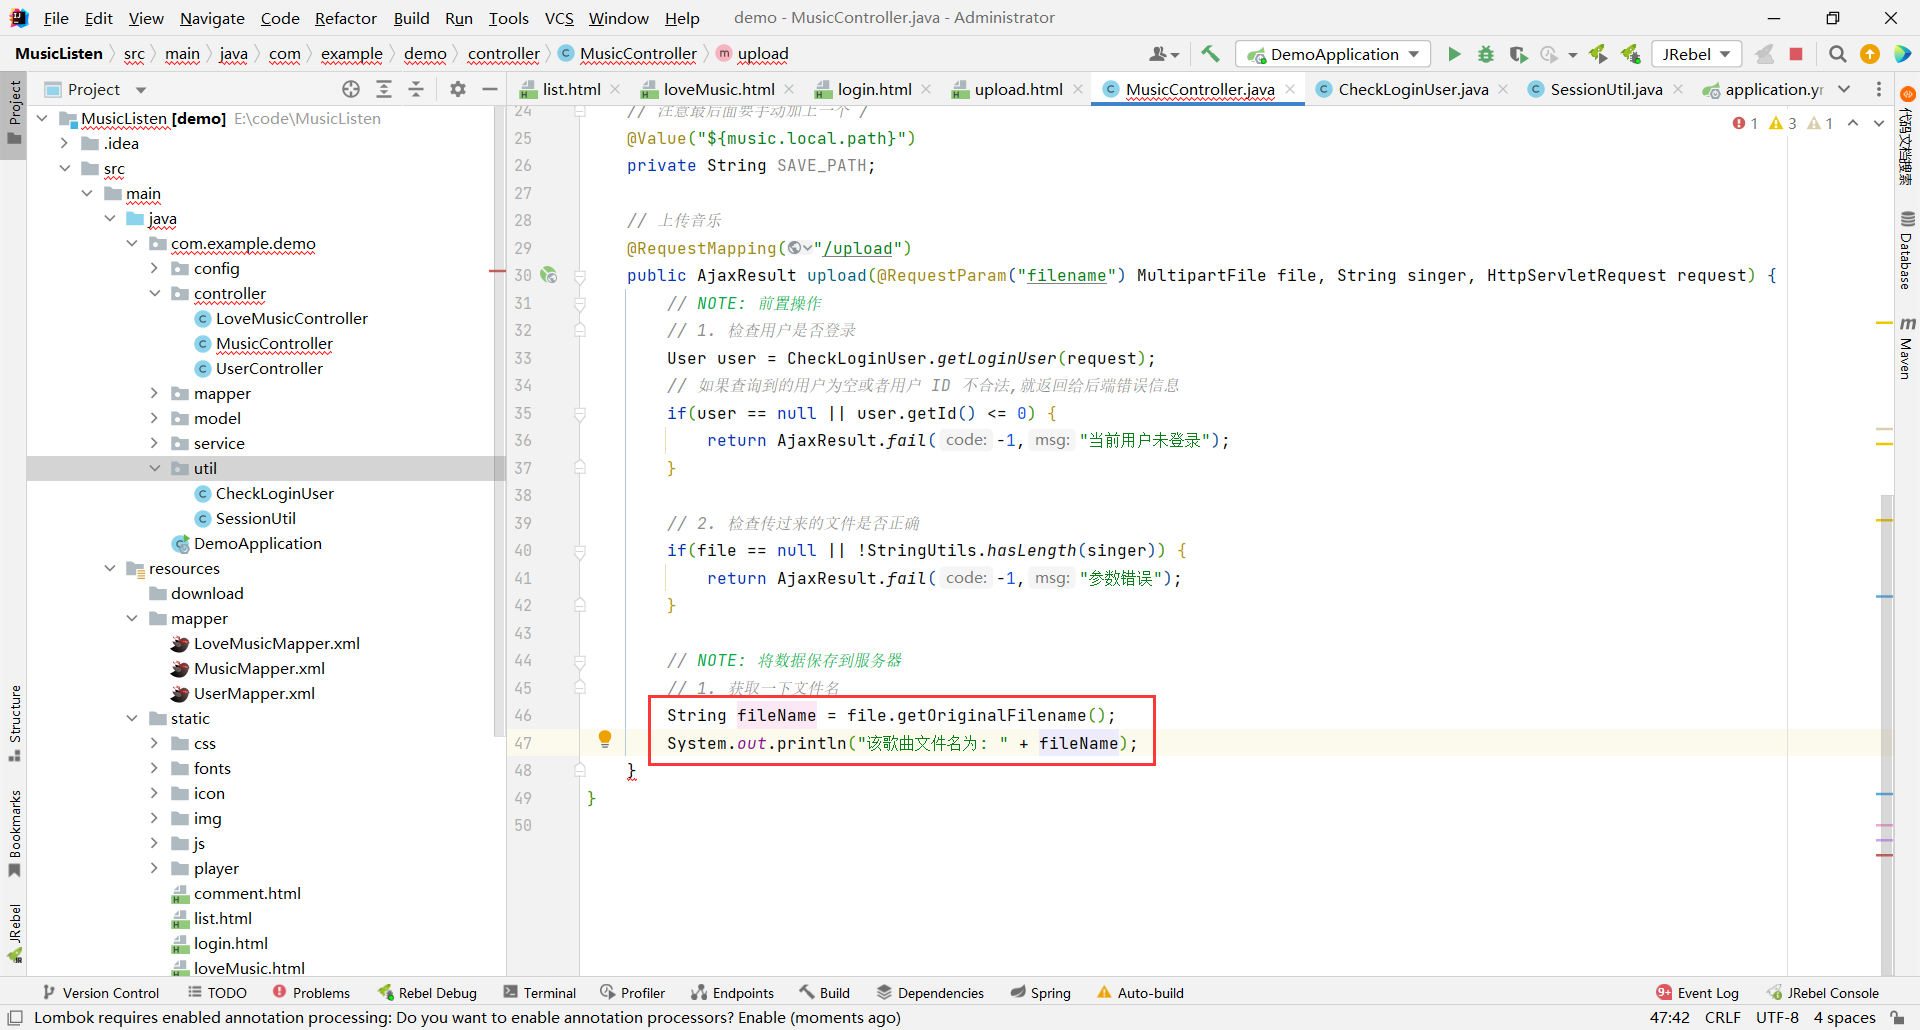
2. 获取该文件名
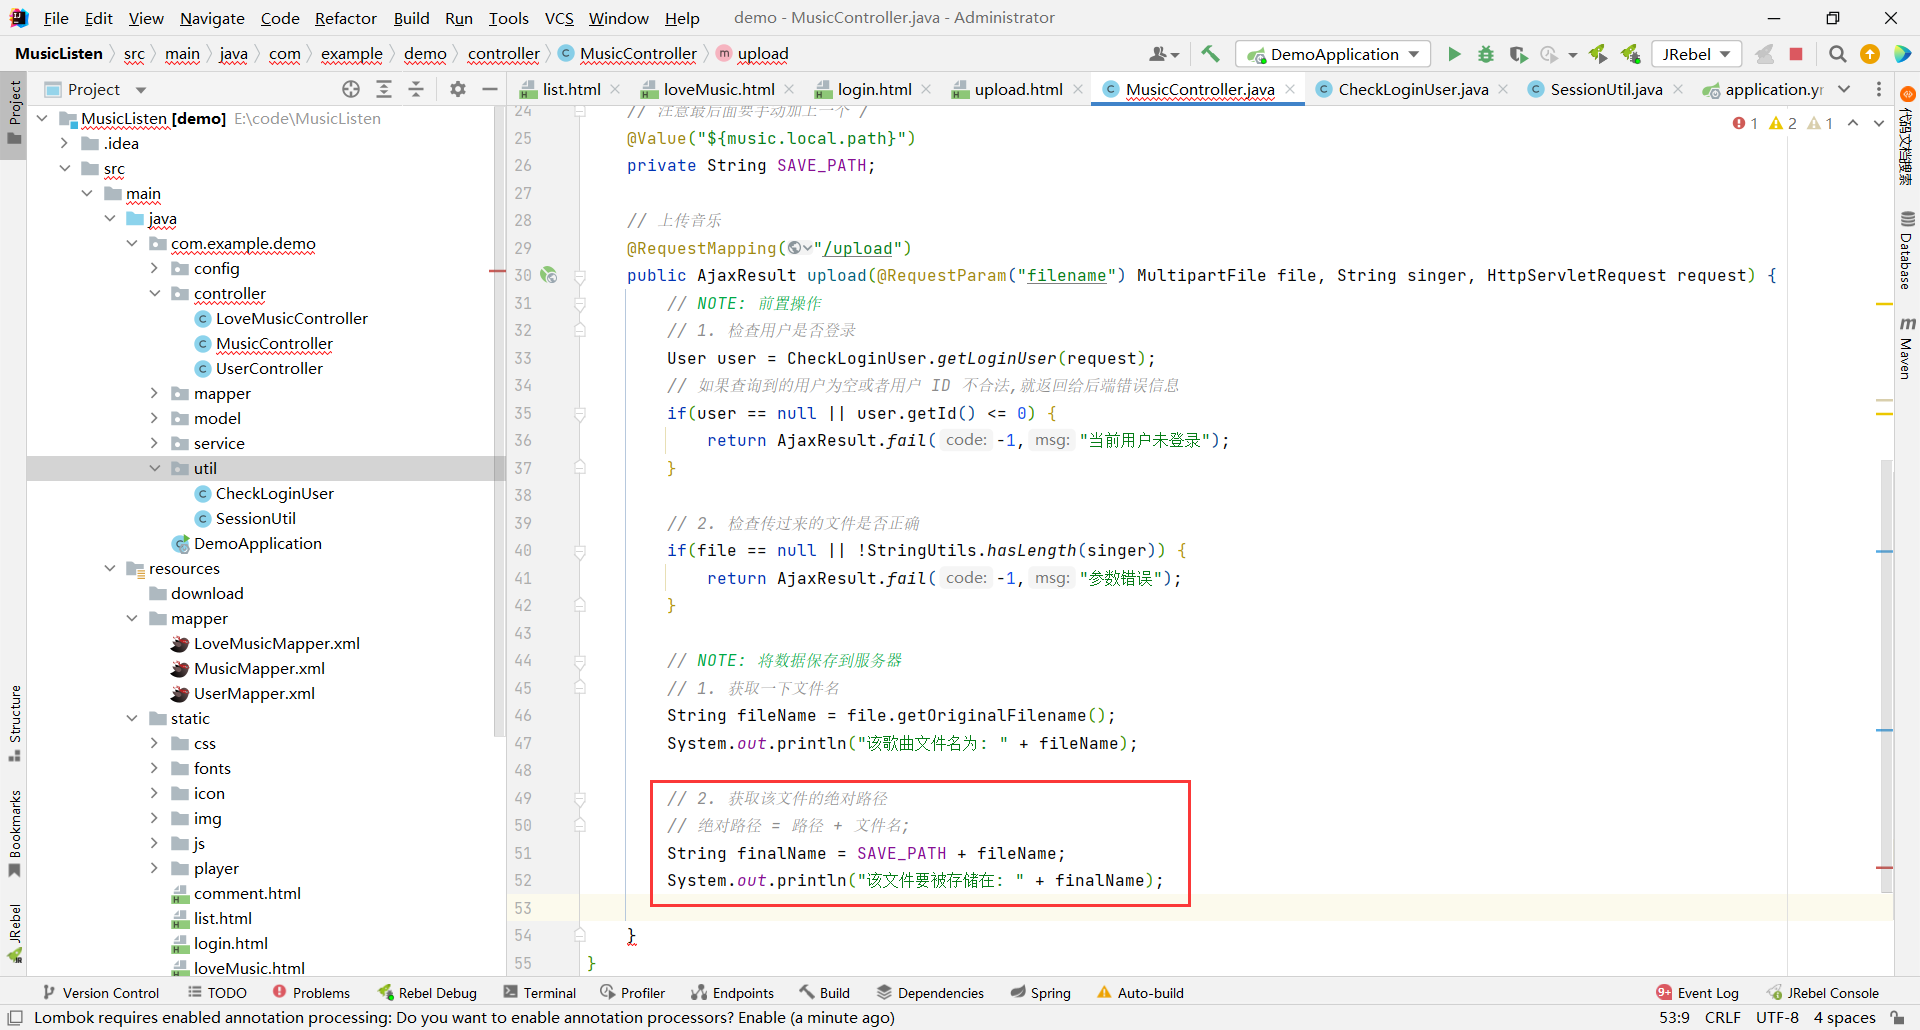
3. 将路径和文件名拼接,形成绝对路径
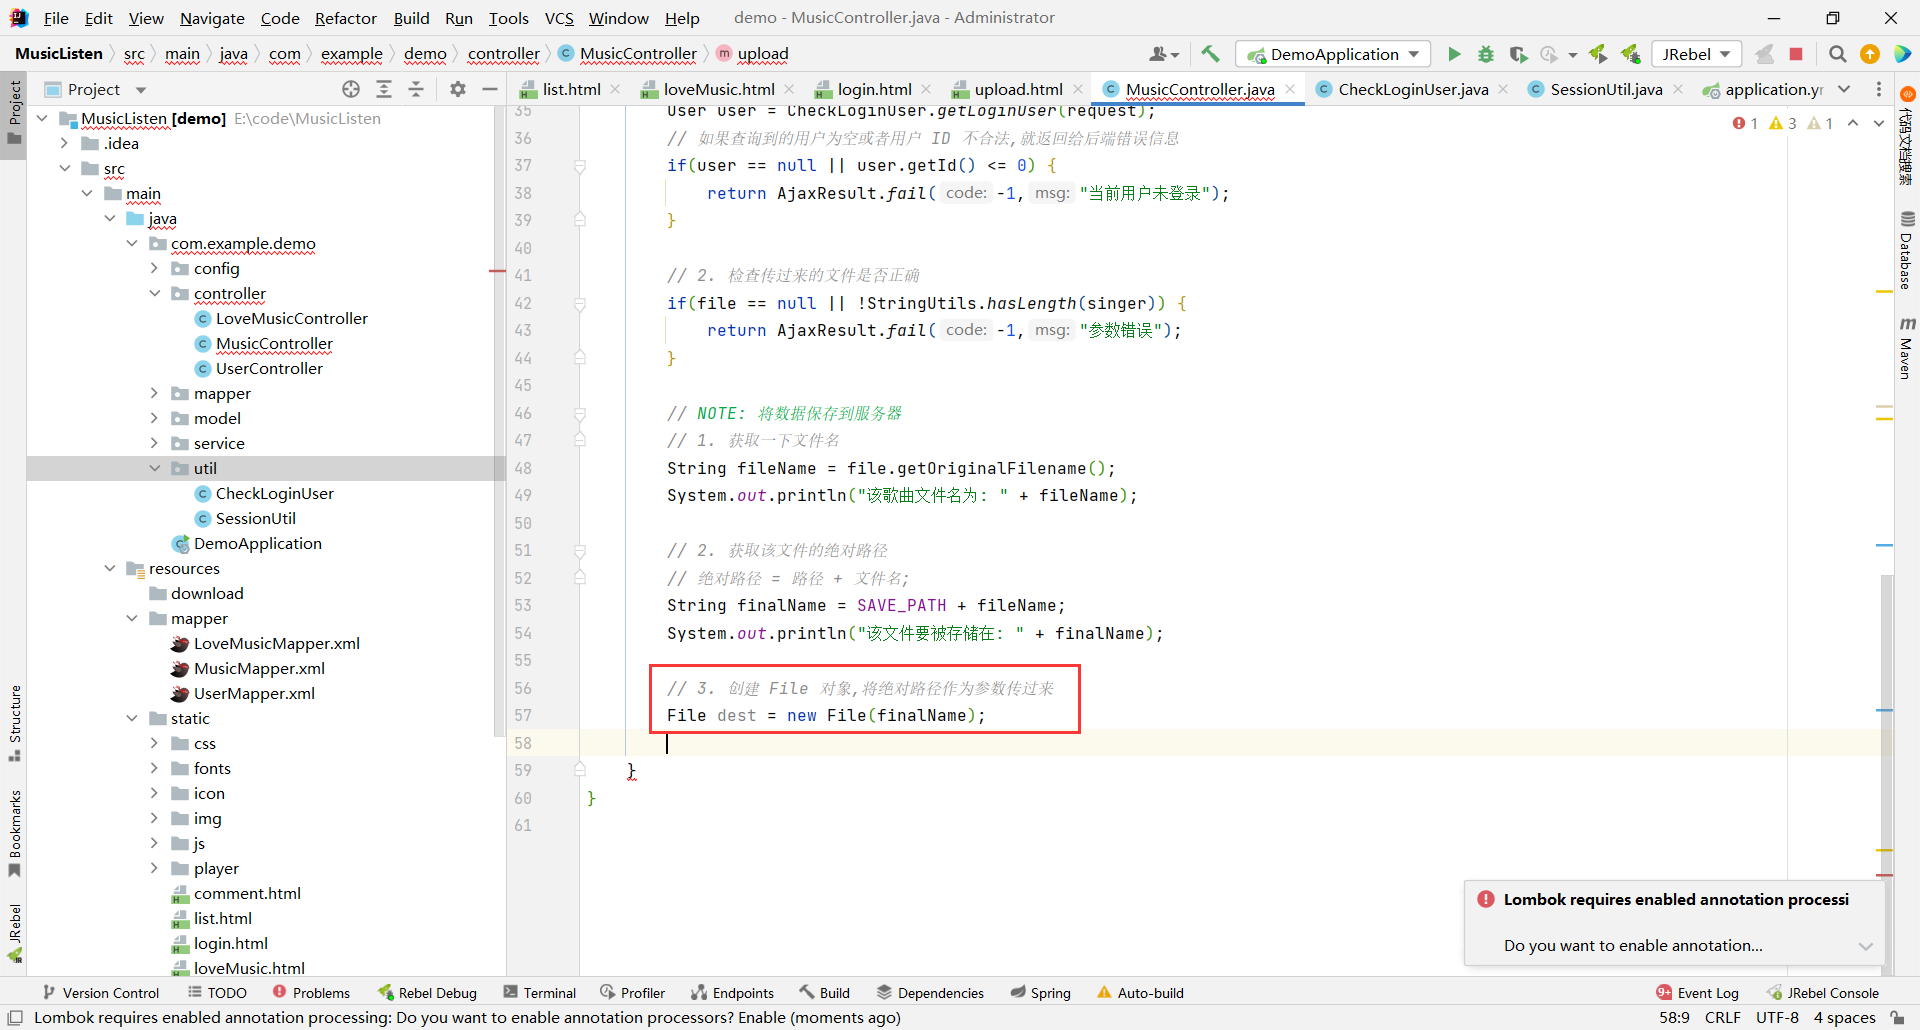
4. 定义文件类,将绝对路径传进去
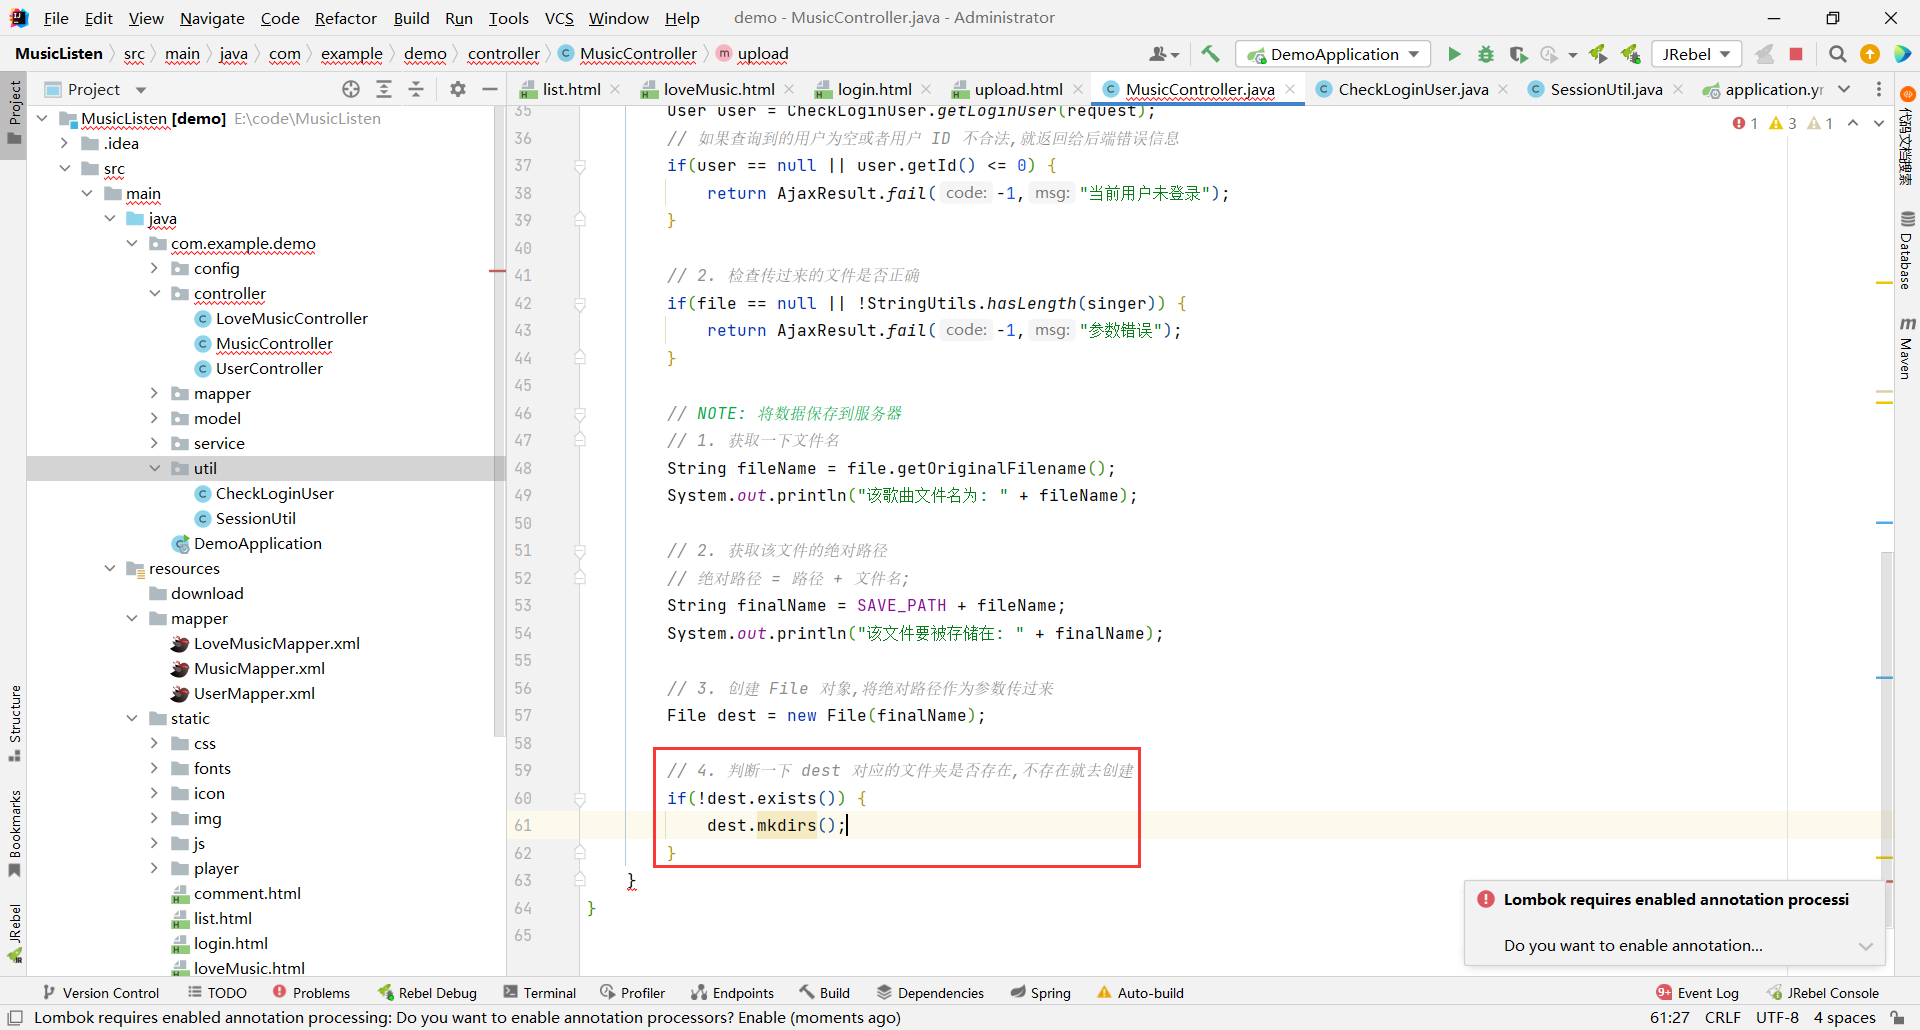
5. 判断路径是否存在,不存在就去创建
6. 路径存在的话,就需要上传文件到服务器指定路径上
**将数据保存到服务器上**
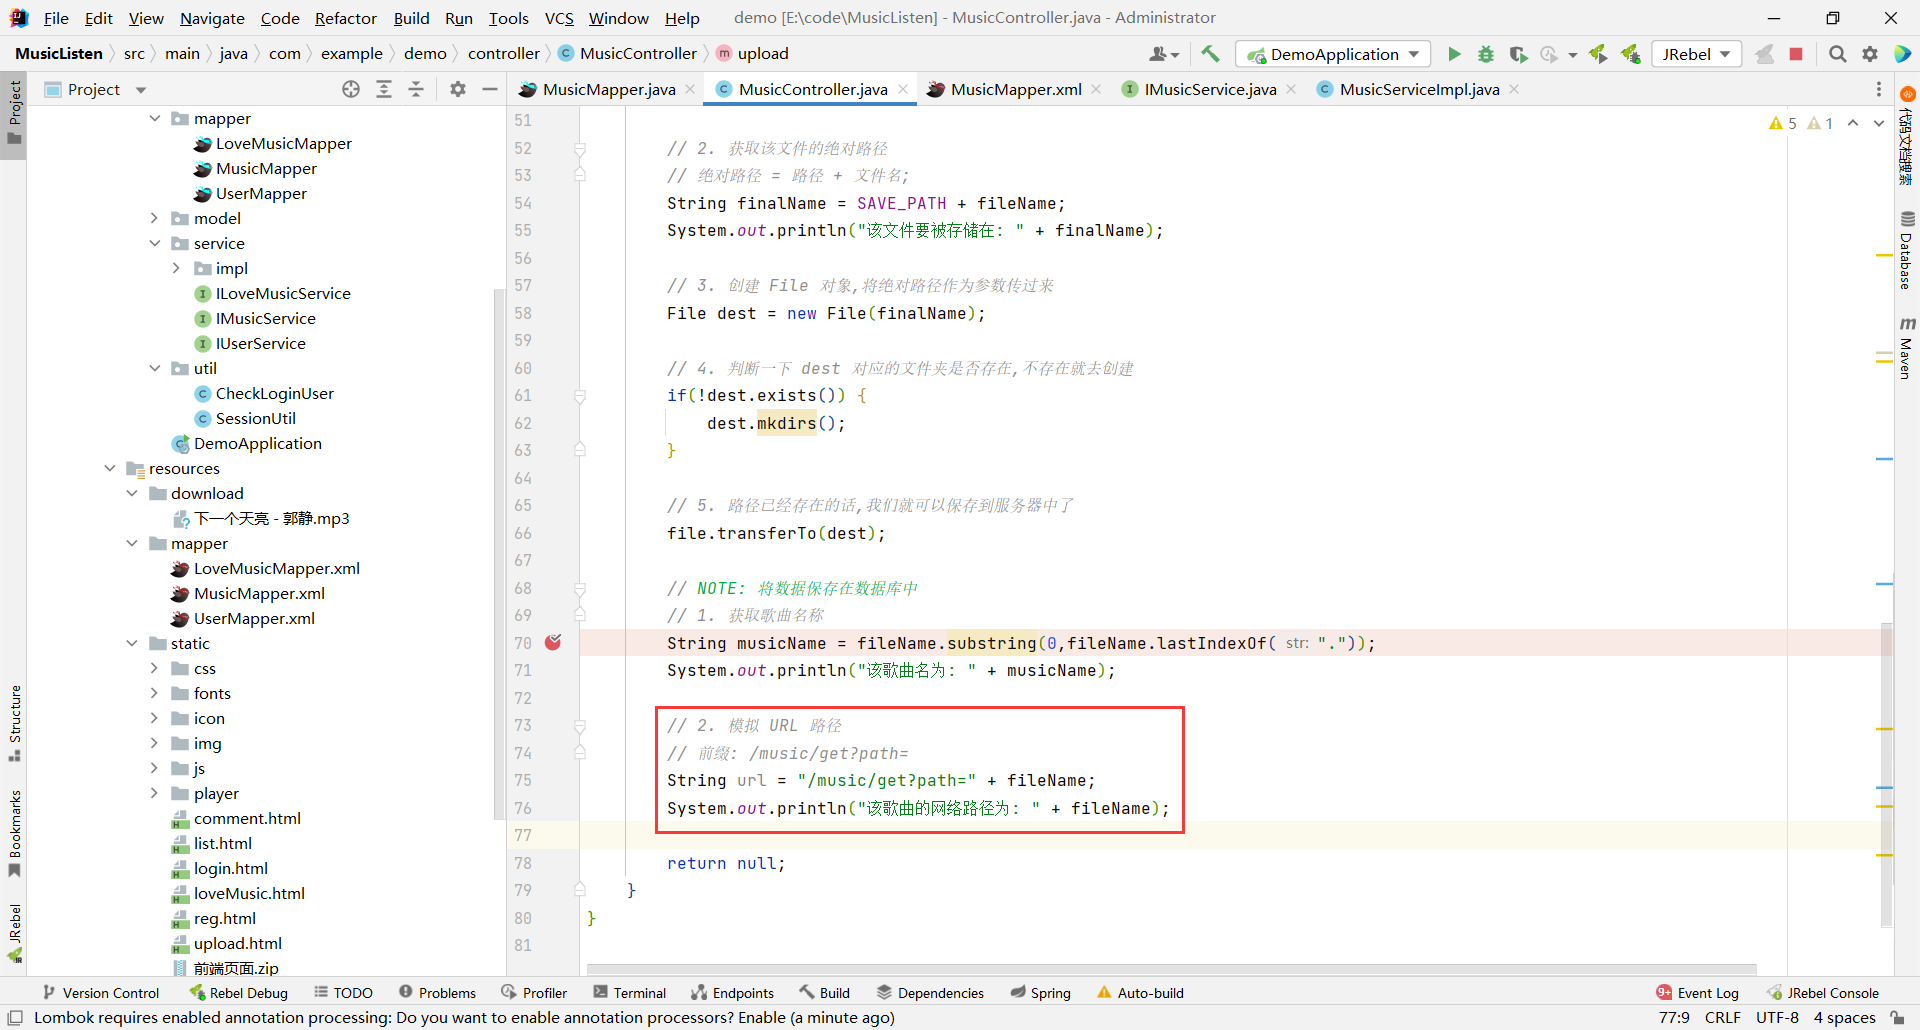
7. 获取歌曲名称
8. 模拟 URL 路径
8. 上传到数据库(歌曲名 歌手名 路径)
##### 前置操作
首先 , 我们需要验证用户是否登录 , 如果用户没登录的话 , 是不能够上传音乐的
我们将来肯定还会在很多地方需要获取到用户的登录状态 , 那我们直接把他实现成一个公共的方法
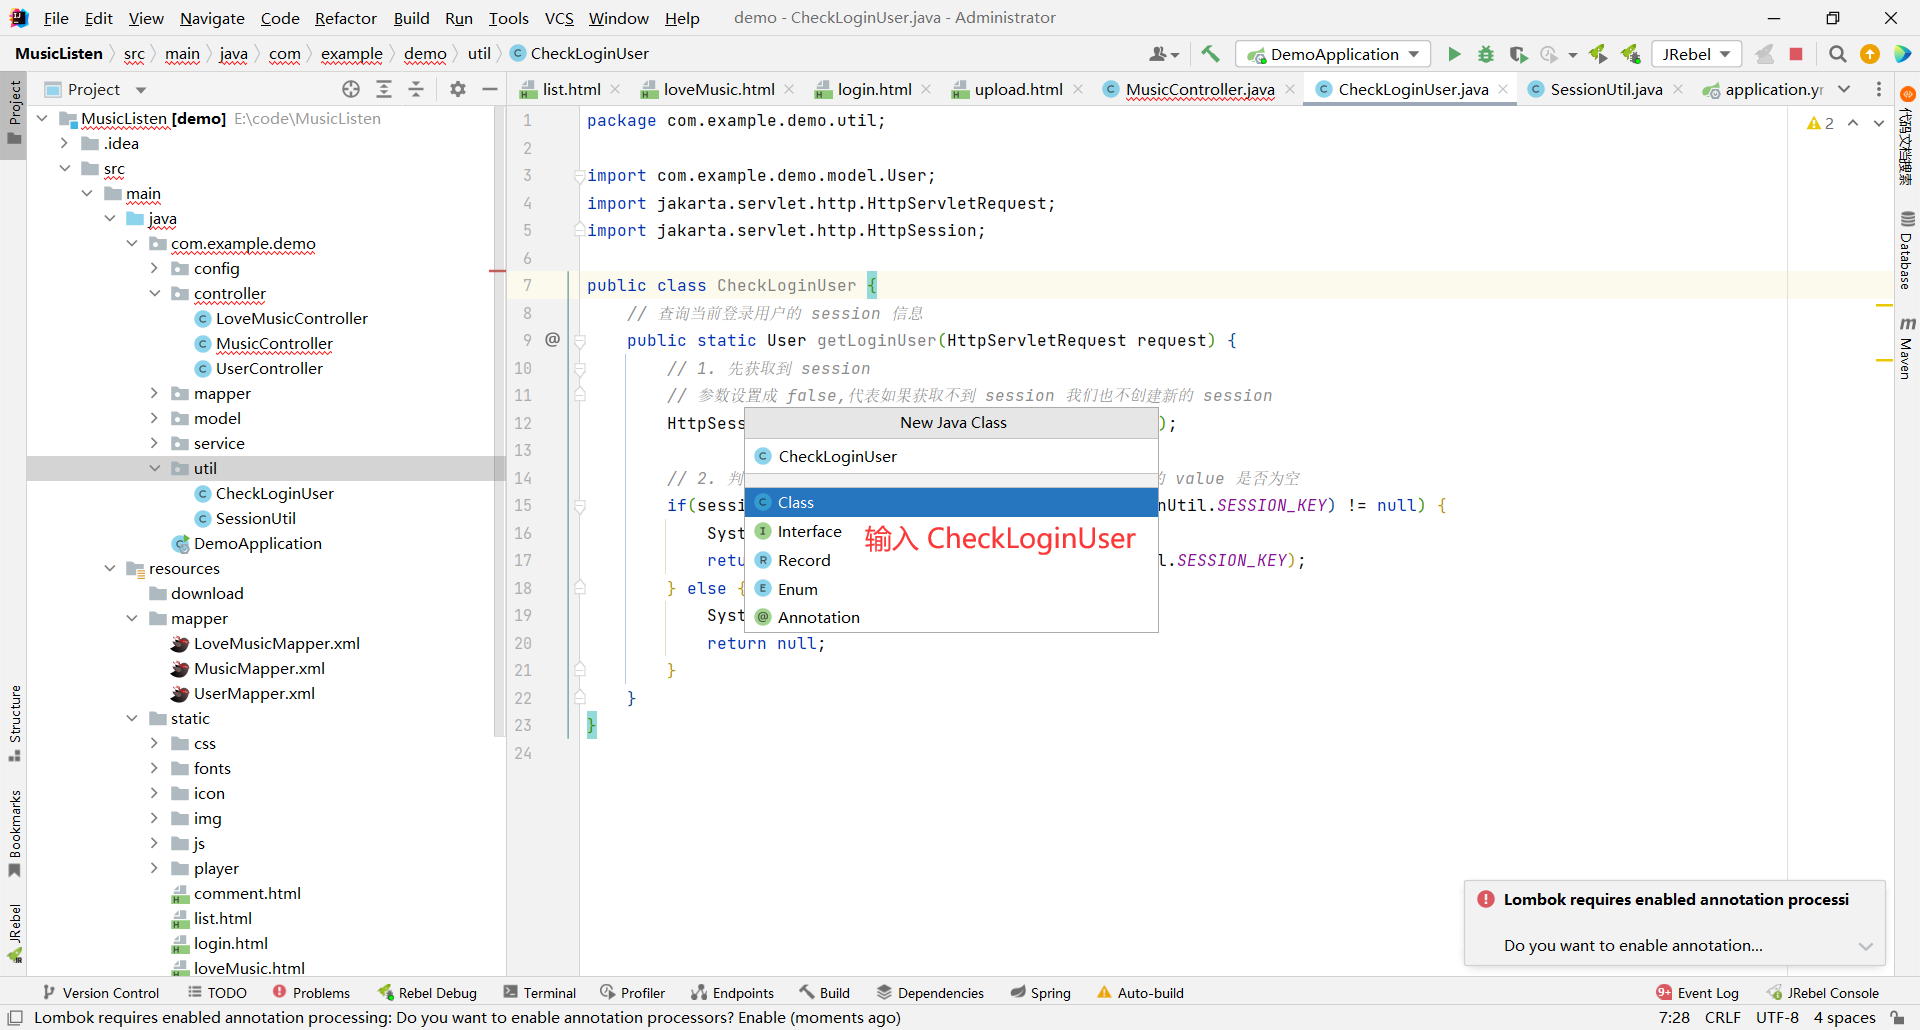
我们的思路就是先获取 session , 如果 session 存在并且它里面的 value 也存在 , 那整个 session 就是存在的
> HttpSession session = request.getSession(true); 表示找到 session 的时候使用该 session ; 找不到 session 的时候新创建一个 session , 我们的目的就是为了判断当前是否有 session , 所以不能让他重新创建
> HttpSession session = request.getSession(false); 表示找到 session 的时候使用该 session ; 找不到 session 的时候什么也不干
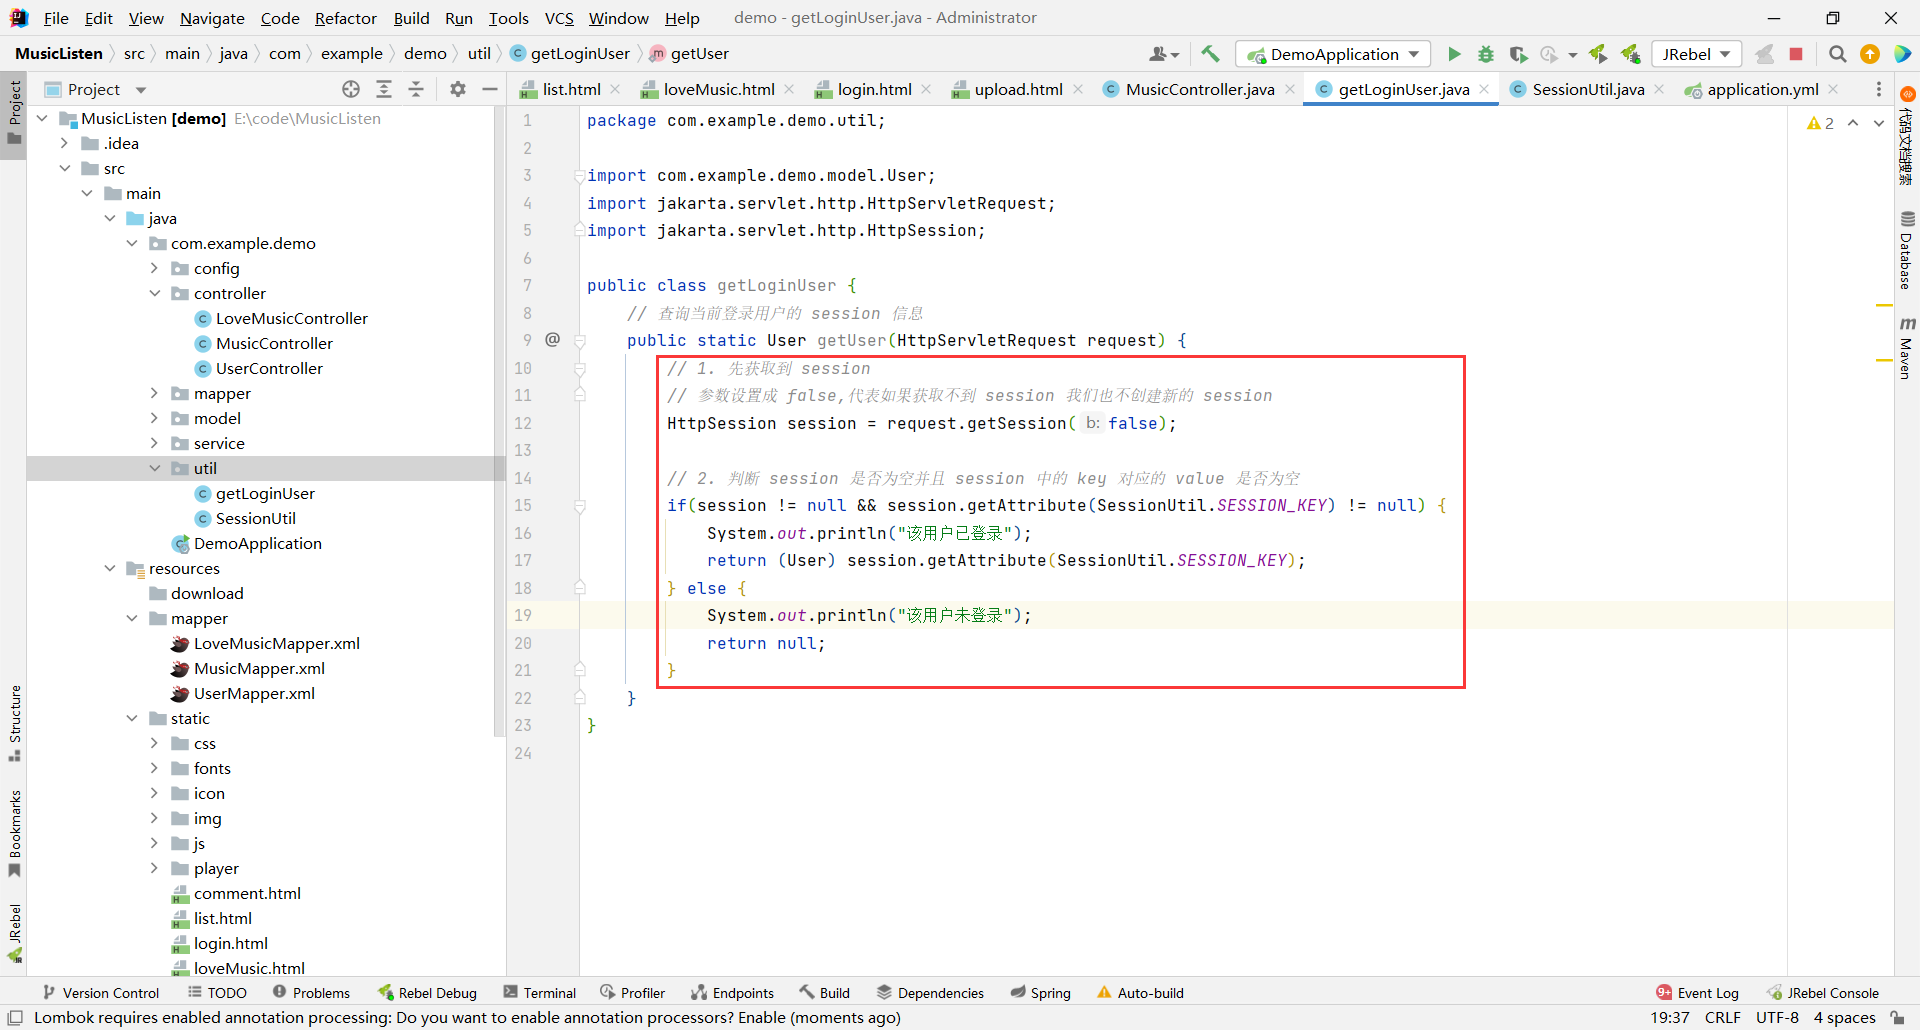
```java
package com.example.demo.util;
import com.example.demo.model.User;
import jakarta.servlet.http.HttpServletRequest;
import jakarta.servlet.http.HttpSession;
public class CheckLoginUser {
// 查询当前登录用户的 session 信息
public static User getLoginUser(HttpServletRequest request) {
// 1. 先获取到 session
// 参数设置成 false,代表如果获取不到 session 我们也不创建新的 session
HttpSession session = request.getSession(false);
// 2. 判断 session 是否为空并且 session 中的 key 对应的 value 是否为空
if(session != null && session.getAttribute(SessionUtil.SESSION_KEY) != null) {
System.out.println("该用户已登录");
return (User) session.getAttribute(SessionUtil.SESSION_KEY);
} else {
System.out.println("该用户未登录");
return null;
}
}
}
```
那接下来 , 我们的代码中就来调用这个方法来去判断用户是否登录
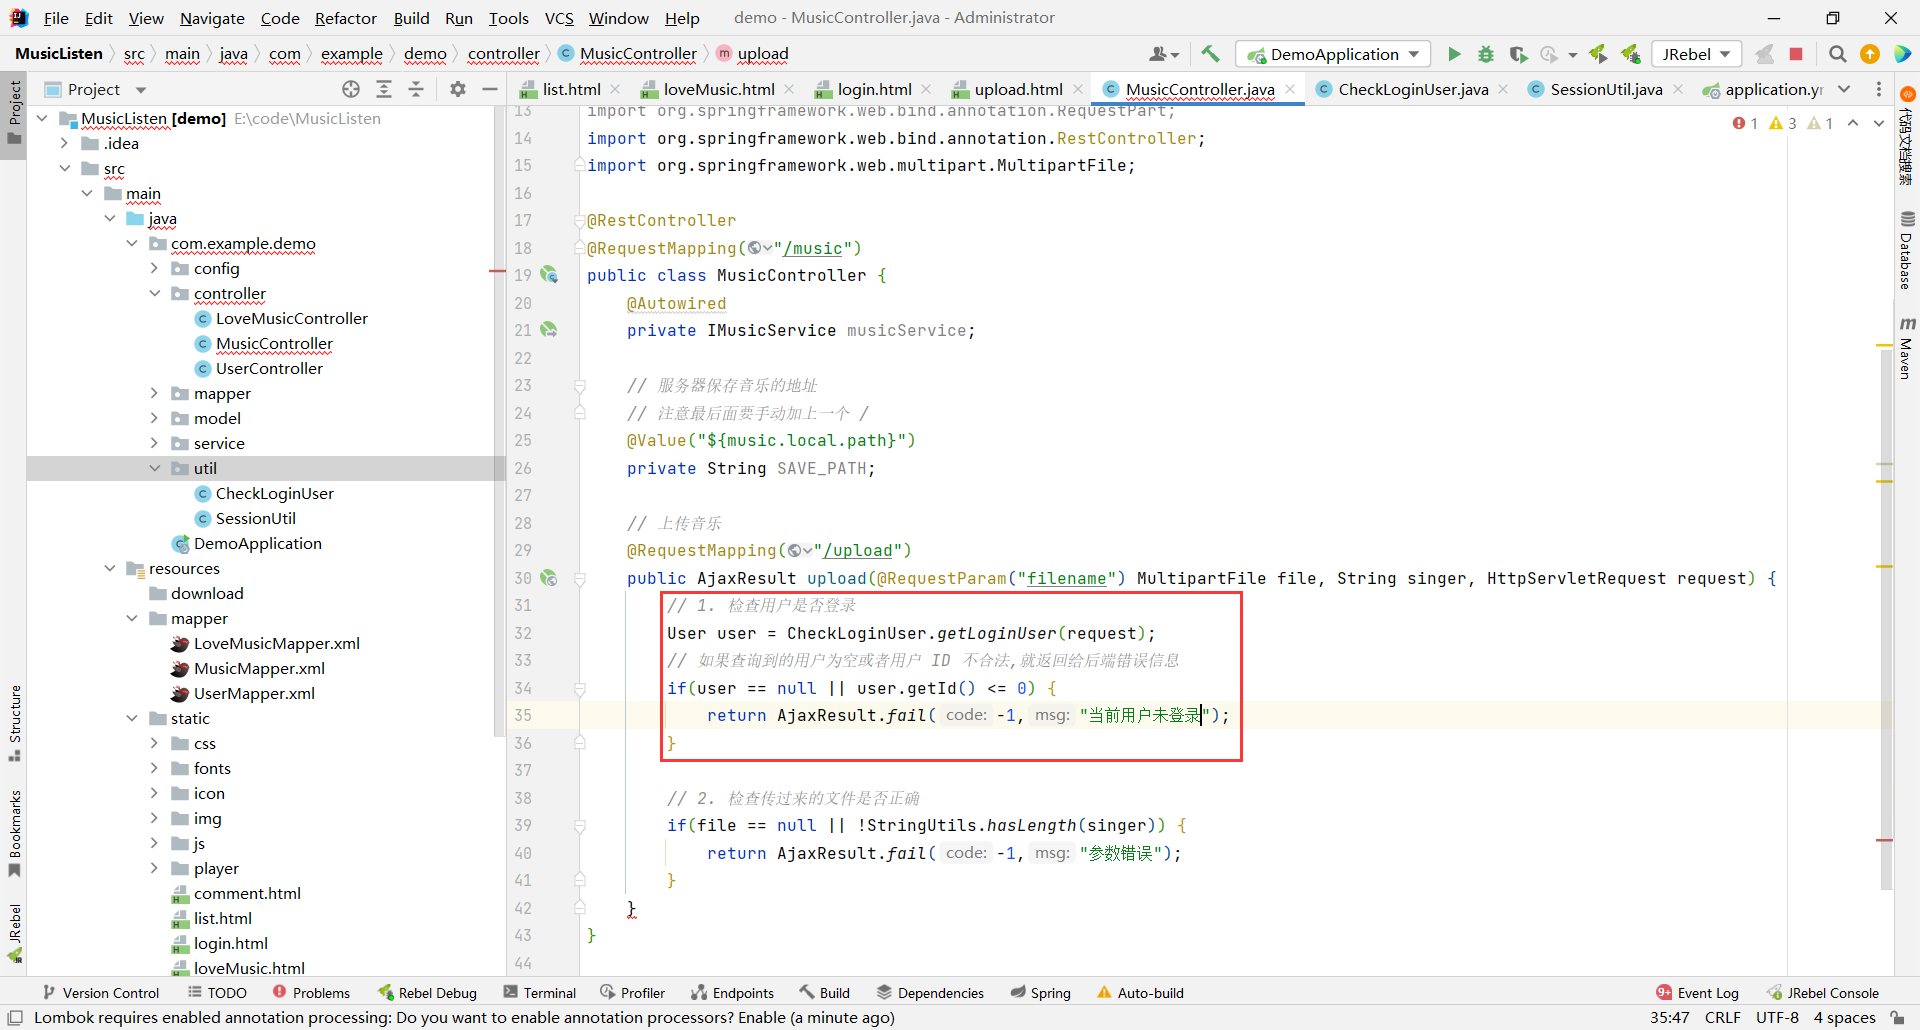
然后我们去检查用户传过来的文件和歌手名是否有误
那接下来我们就要实现将数据保存到服务器上的操作
##### 将数据保存到服务器上
首先我们获取一下文件名
然后我们再定义一个变量 , 让这个变量存储路径和文件名拼接的结果
类似 : E:/code/test.txt
然后我们将这个路径转换成 File 对象便于操作
接下来我需要去判断一下构造出来的路径是否存在 , 不存在我们还得去创建一下
路径也没问题的话 , 我们就可以保存数据到服务器中了
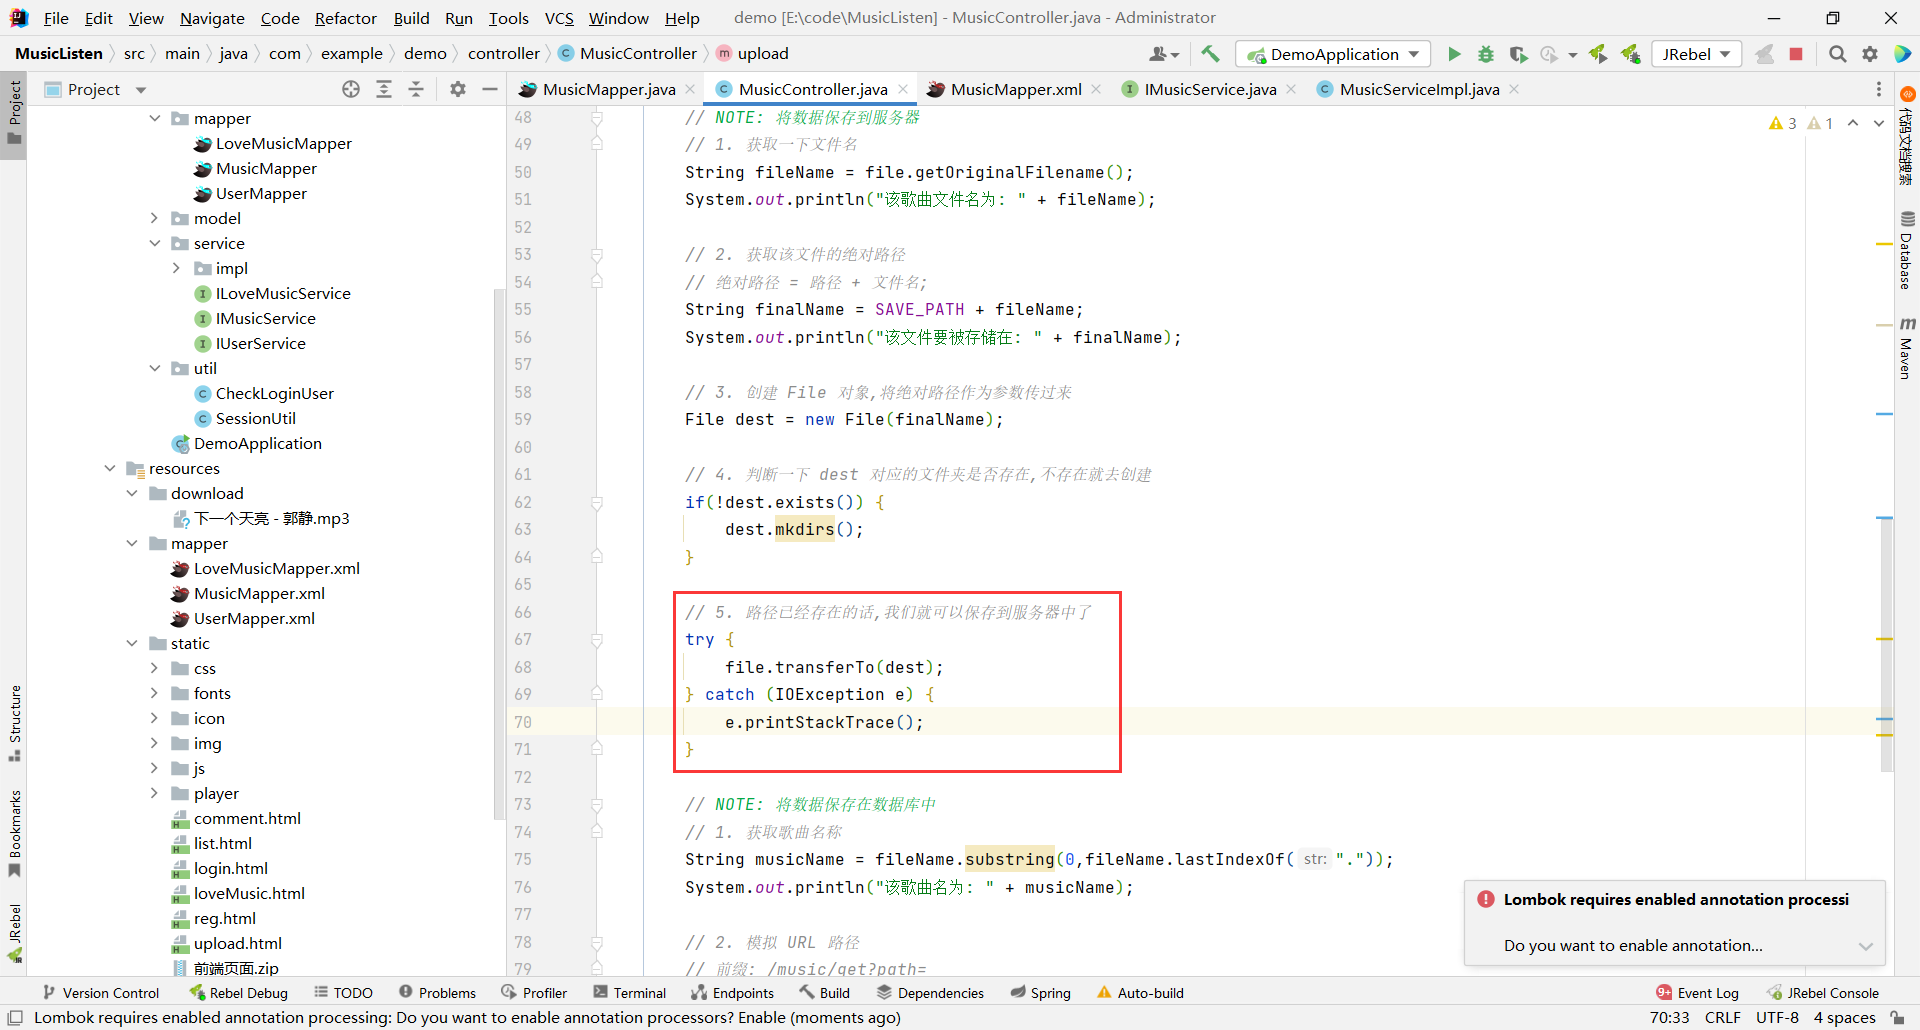
那如果保存文件这个部分抛出异常了 , 我们可以在抛出异常的部分给前端返回错误信息

```java
package com.example.demo.controller;
import com.example.demo.config.AjaxResult;
import com.example.demo.model.User;
import com.example.demo.service.IMusicService;
import com.example.demo.util.CheckLoginUser;
import jakarta.servlet.http.HttpServletRequest;
import org.springframework.beans.factory.annotation.Autowired;
import org.springframework.beans.factory.annotation.Value;
import org.springframework.util.StringUtils;
import org.springframework.web.bind.annotation.RequestMapping;
import org.springframework.web.bind.annotation.RequestParam;
import org.springframework.web.bind.annotation.RequestPart;
import org.springframework.web.bind.annotation.RestController;
import org.springframework.web.multipart.MultipartFile;
import java.io.File;
import java.io.IOException;
@RestController
@RequestMapping("/music")
public class MusicController {
@Autowired
private IMusicService musicService;
// 服务器保存音乐的地址
// 注意最后面要手动加上一个 /
@Value("${music.local.path}")
private String SAVE_PATH;
// 上传音乐
@RequestMapping("/upload")
public AjaxResult upload(@RequestParam("filename") MultipartFile file, String singer, HttpServletRequest request) throws IOException {
// NOTE: 前置操作
// 1. 检查用户是否登录
User user = CheckLoginUser.getLoginUser(request);
// 如果查询到的用户为空或者用户 ID 不合法,就返回给后端错误信息
if(user == null || user.getId() <= 0) {
return AjaxResult.fail(-1,"当前用户未登录");
}
// 2. 检查传过来的文件是否正确
if(file == null || !StringUtils.hasLength(singer)) {
return AjaxResult.fail(-1,"参数错误");
}
// NOTE: 将数据保存到服务器
// 1. 获取一下文件名
String fileName = file.getOriginalFilename();
System.out.println("该歌曲文件名为: " + fileName);
// 2. 获取该文件的绝对路径
// 绝对路径 = 路径 + 文件名;
String finalName = SAVE_PATH + fileName;
System.out.println("该文件要被存储在: " + finalName);
// 3. 创建 File 对象,将绝对路径作为参数传过来
File dest = new File(finalName);
// 4. 判断一下 dest 对应的文件夹是否存在,不存在就去创建
if(!dest.exists()) {
dest.mkdirs();
}
// 5. 路径已经存在的话,我们就可以保存到服务器中了
try {
file.transferTo(dest);
} catch (IOException e) {
e.printStackTrace();
return AjaxResult.fail(-1,"上传至服务器失败");
}
return null;
}
}
```
我们先来验证一下存储到服务器的逻辑是否正确
打开 Postman
先模拟登录的场景 , 因为只有登陆成功才能上传音乐
登陆之后 , 我们就模拟上传音乐的场景
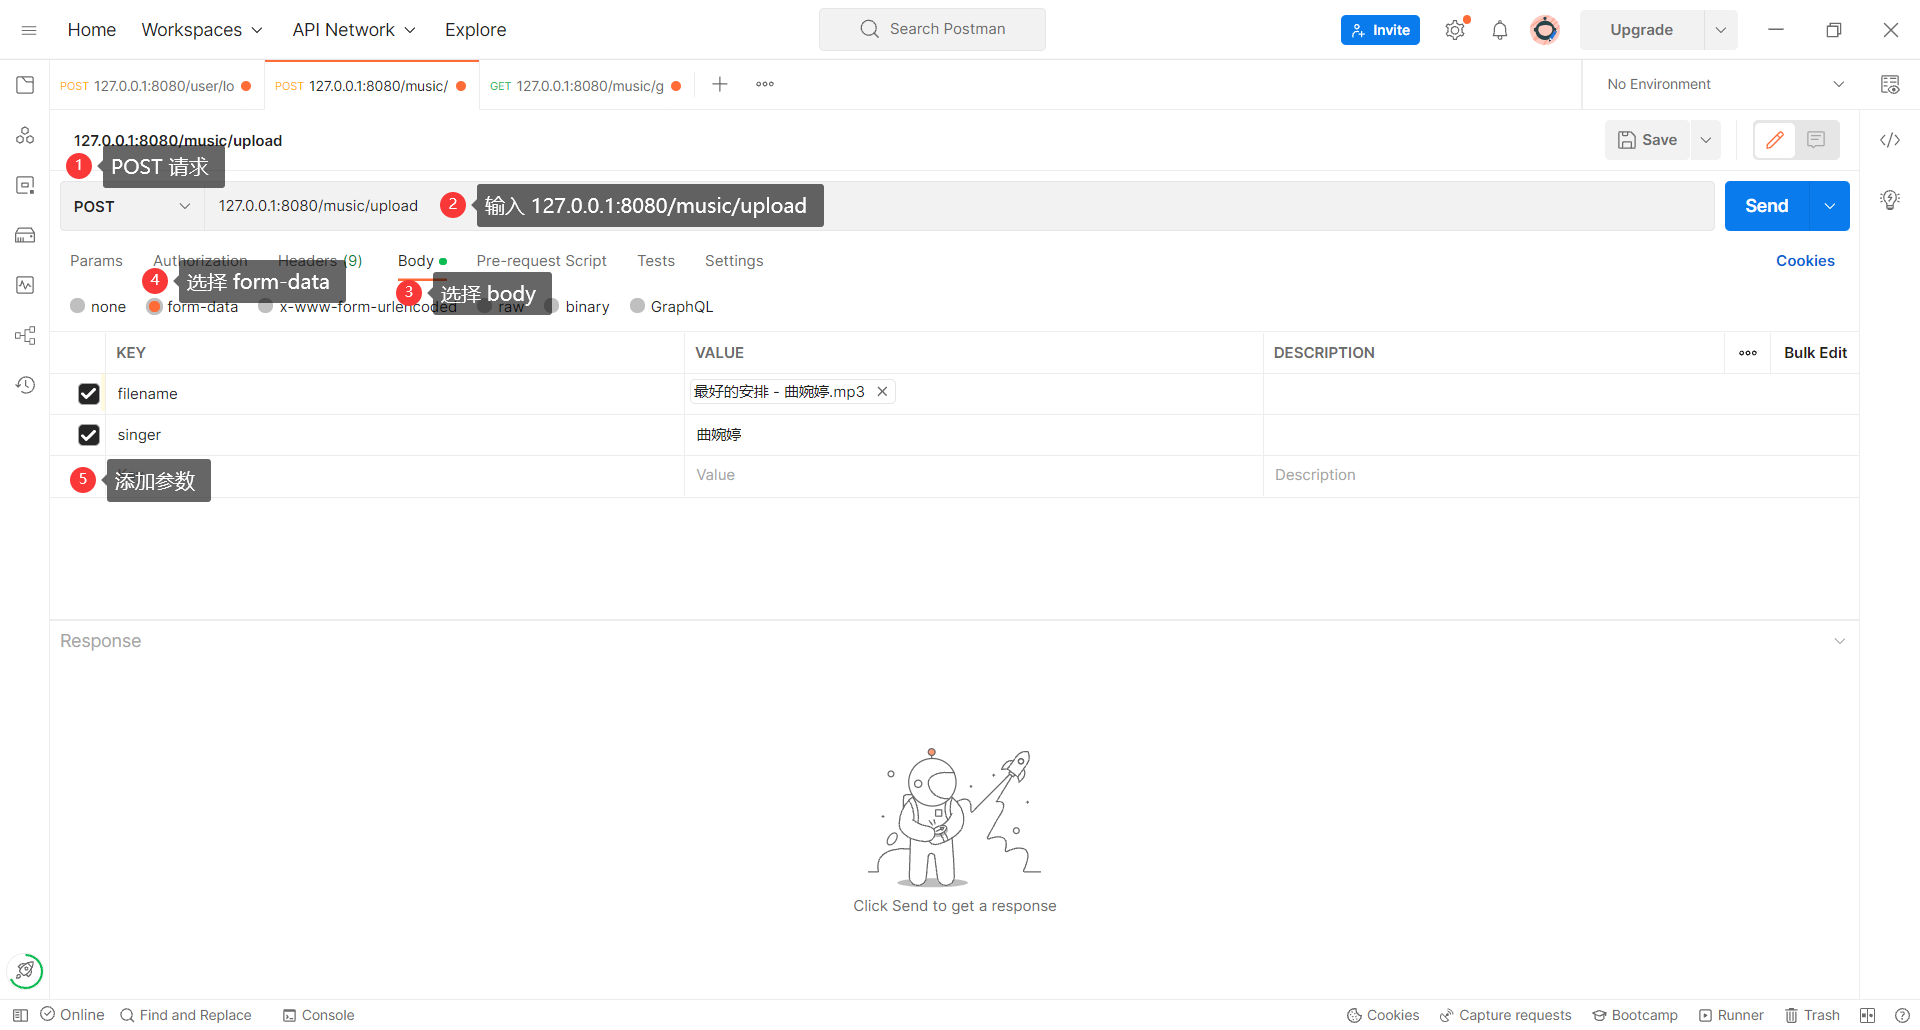
点击 Send
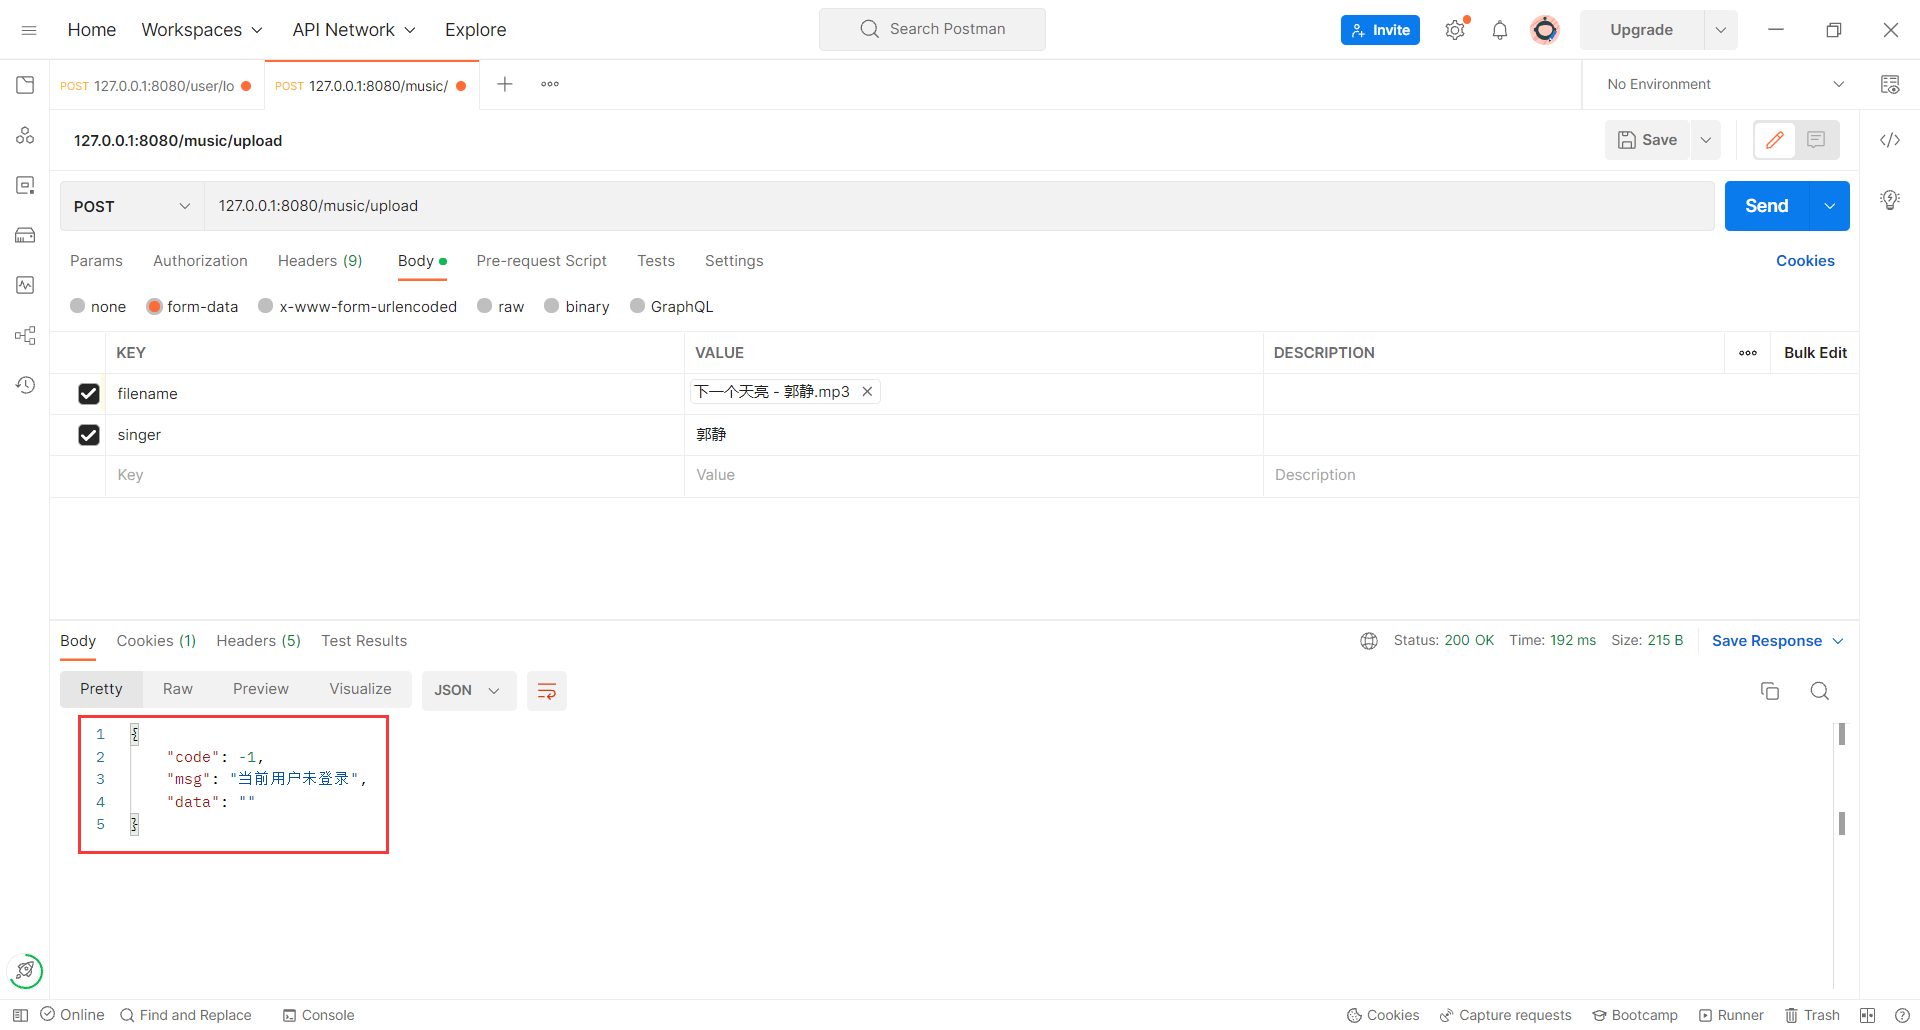
[]()那我试一下没登录的情况下能否提交音乐
##### 扩展 : 检查一个文件是不是 mp3 文件
我们目前并未限制上传文件的类型 , 这就有可能会造成用户上传一些莫名其妙的文件
所以我们需要检查一下当前用户上传的文件是不是 mp3 文件
或者用户把一个 jpg 文件重命名为 mp3 , 然后上传到我们的系统 , 但是也播放不了啊
所以我们需要去检测当前上传文件的格式 , 判断这个文件的格式是不是 mp3 格式
> 不能光去判断后缀是不是 mp3
要判断一个文件是否是 MP3 文件,可以检查文件的扩展名和文件的头部信息。
1. 检查文件扩展名: MP3 文件的常见扩展名是 ".mp3"。可以通过检查文件的扩展名是否以 ".mp3" 结尾来判断文件是否是 MP3 文件。请注意,这种方式并不是绝对可靠的,因为文件的扩展名可以被修改或伪装。
2. 检查文件头部信息: MP3 文件的头部信息包含了特定的标识码。可以读取文件的前几个字节,并比较这些字节与 MP3 文件头的标识码进行匹配。MP3 文件的头部标识码通常是 "ID3" 或 "TAG"。
如果以上两种方式都符合,那么你可以相对可靠地认定该文件是 MP3 文件。
那我们去实现一个工具类 , 专门来完成这个功能
我们的思路就是将 ID3 和 TAG 转成字节数组 , 然后将我们的文件前三个字节的数据与 ID3/TAG 进行比较
主要是符合一个 , 那这个文件就是 mp3 文件
```java
package com.example.demo.common;
import java.io.FileInputStream;
import java.io.IOException;
public class MP3FileChecker {
// 获取 ID3/TAG 的字节码
private static final byte[] MP3_ID3 = "ID3".getBytes(); // MP3 文件头标识码 "ID3"
private static final byte[] MP3_TAG = "TAG".getBytes(); // MP3 文件头标识码 "TAG"
/**
* 判断给定的文件是否为MP3文件
*
* @param filePath 文件路径
* @return 如果是MP3文件,返回true;否则返回false
*/
public static boolean isMP3File(String filePath) {
try (FileInputStream stream = new FileInputStream(filePath)) { // 打开文件输入流
byte[] bytes = new byte[3];
int bytesRead = stream.read(bytes); // 读取文件的前 3 个字节
if (bytesRead == 3) {
if (compareBytes(bytes, MP3_ID3) || compareBytes(bytes, MP3_TAG)) {
return true; // 文件头部与 MP3 文件标识码匹配,判断为 MP3 文件
}
}
} catch (IOException e) {
e.printStackTrace();
}
return false; // 文件不是 MP3 文件或读取过程中出错,判断为非 MP3 文件
}
/**
* 比较两个字节数组的内容是否完全一致
*
* @param bytes1 字节数组1
* @param bytes2 字节数组2
* @return 如果两个字节数组内容一致,返回 true;否则返回 false
*/
private static boolean compareBytes(byte[] bytes1, byte[] bytes2) {
for (int i = 0; i < bytes1.length; i++) {
if (bytes1[i] != bytes2[i]) {
return false; // 字节数组内容不一致
}
}
return true; // 字节数组内容完全一致
}
}
```
我们的代码中就可以进行调用了
那根据接收到的返回值 , 如果为 false 的话 , 就返回状态码 -1 代表当前文件不是 mp3 文件
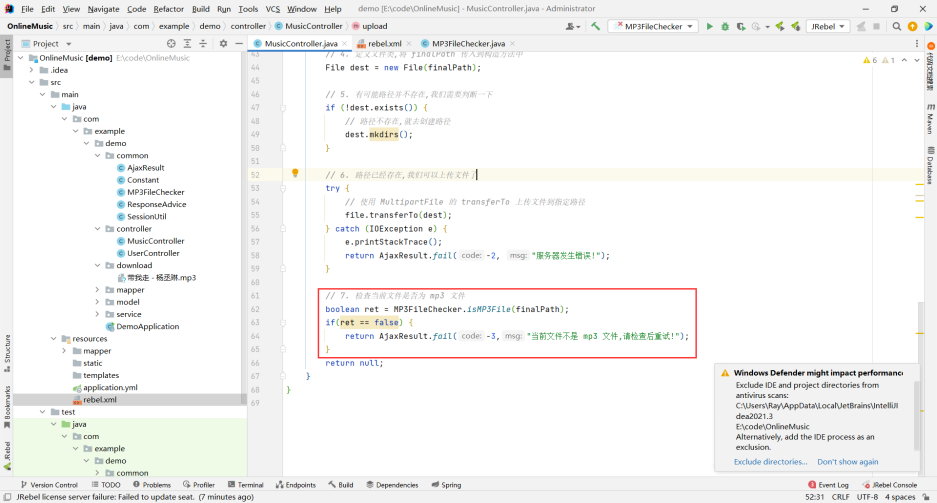
但是这种方法 , 还是有漏洞 , 会导致某一小部分 mp3 文件仍然无法上传
所以我们采用前端校验的方式
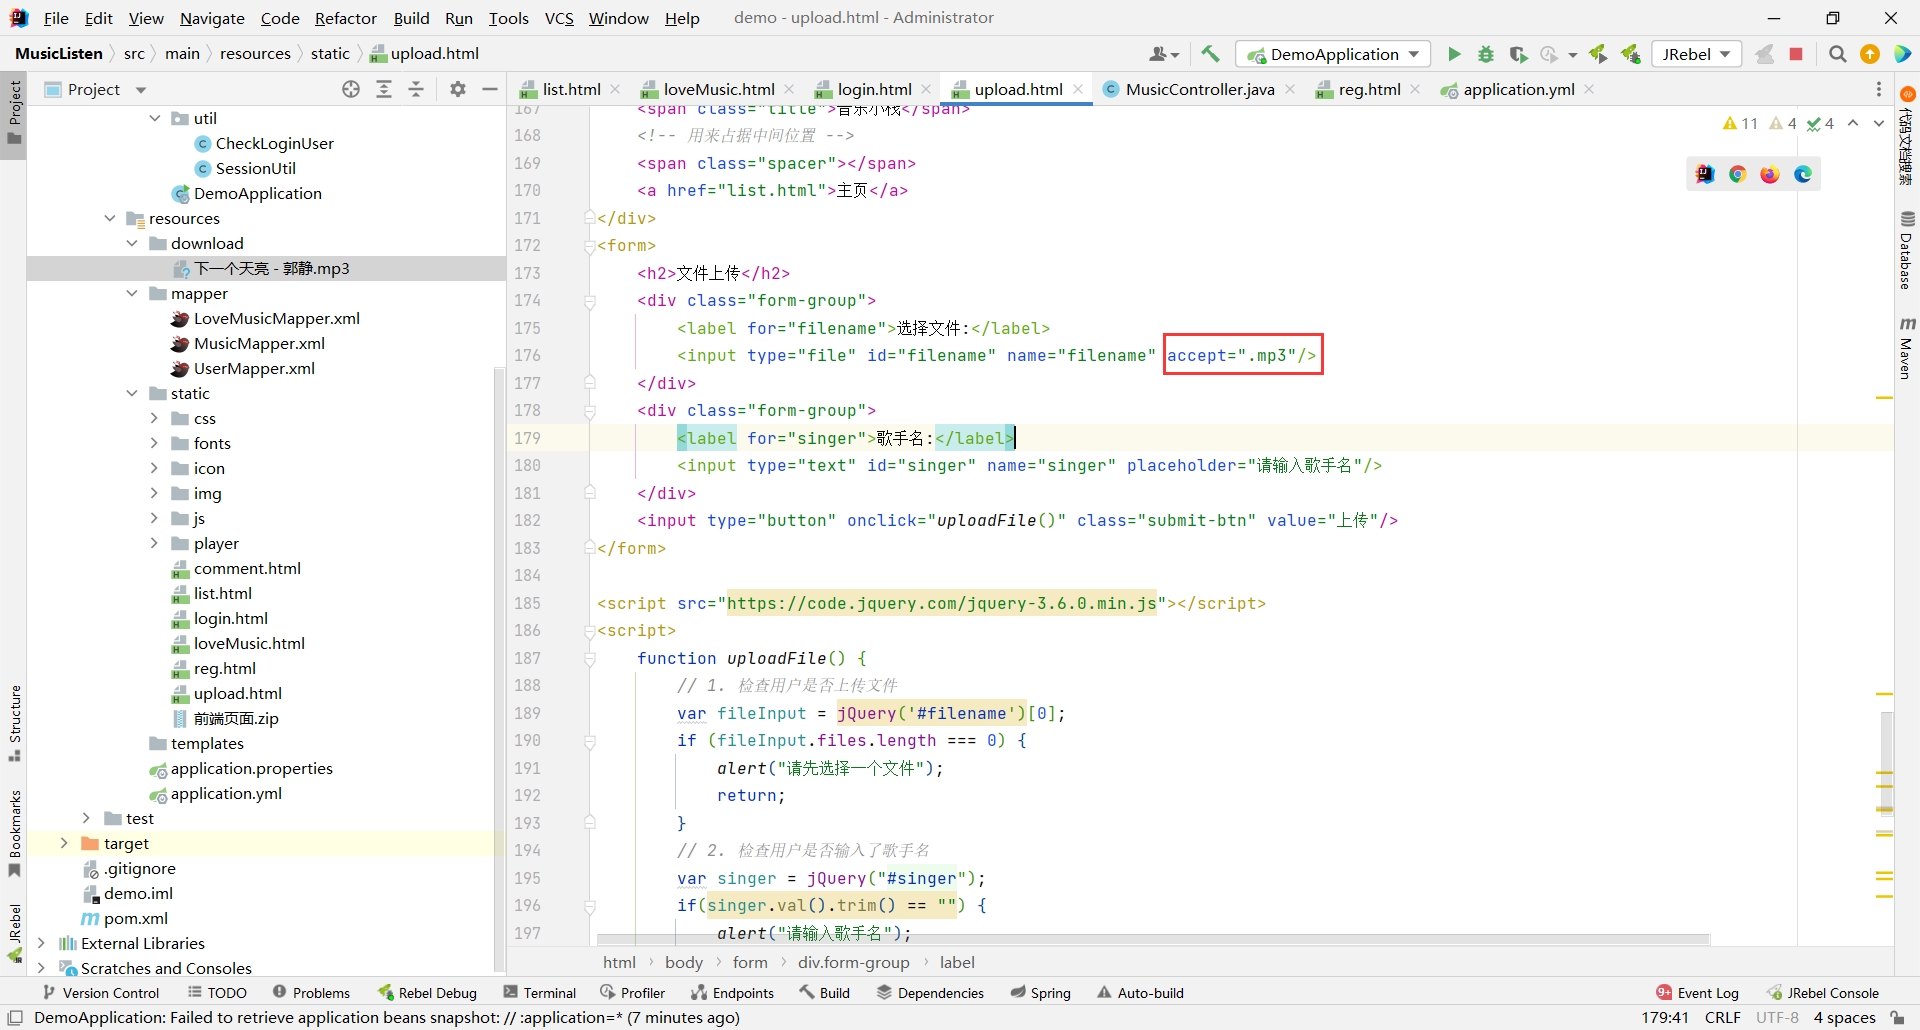
##### 将数据上传到数据库上
我们刚才也已经进行了分析 , 我们不能在数据库中存储二进制文件 , 但是我们可以把这个二进制文件对应的路径存储到数据库中 , 用户就可以通过路径请求到该音乐
比如 : 127.0.0.1:8080/music/get?path=最好的安排 - 曲婉婷.mp3
那我们先来编写 mapper 层
#### mapper 层
我们先来查看一下 music 表的结构
```sql
+--------+---------------+------+-----+-------------------+----------------+
| Field | Type | Null | Key | Default | Extra |
+--------+---------------+------+-----+-------------------+----------------+
| id | int(11) | NO | PRI | NULL | auto_increment |
| title | varchar(50) | NO | UNI | NULL | |
| singer | varchar(30) | NO | | NULL | |
| time | timestamp | NO | | CURRENT_TIMESTAMP | |
| url | varchar(1000) | NO | | NULL | |
| userid | int(11) | NO | | NULL | |
+--------+---------------+------+-----+-------------------+----------------+
```
id 字段是默认自增的 , 我们不用去处理
title 是歌曲名称 , 我们需要将它存储到数据库中
singer 是歌手名称 , 我们也需要将他存储到数据库当中
time 字段默认就是当前时间 , 我们也不用理会
url 需要我们构造好类似于 /music/get?path= 这样的路径
userid 我们也去要存储进去
那我们需要操作的字段有 : title、singer、url、userid
那我们就在 ArticleMapper 接口中先进行声明
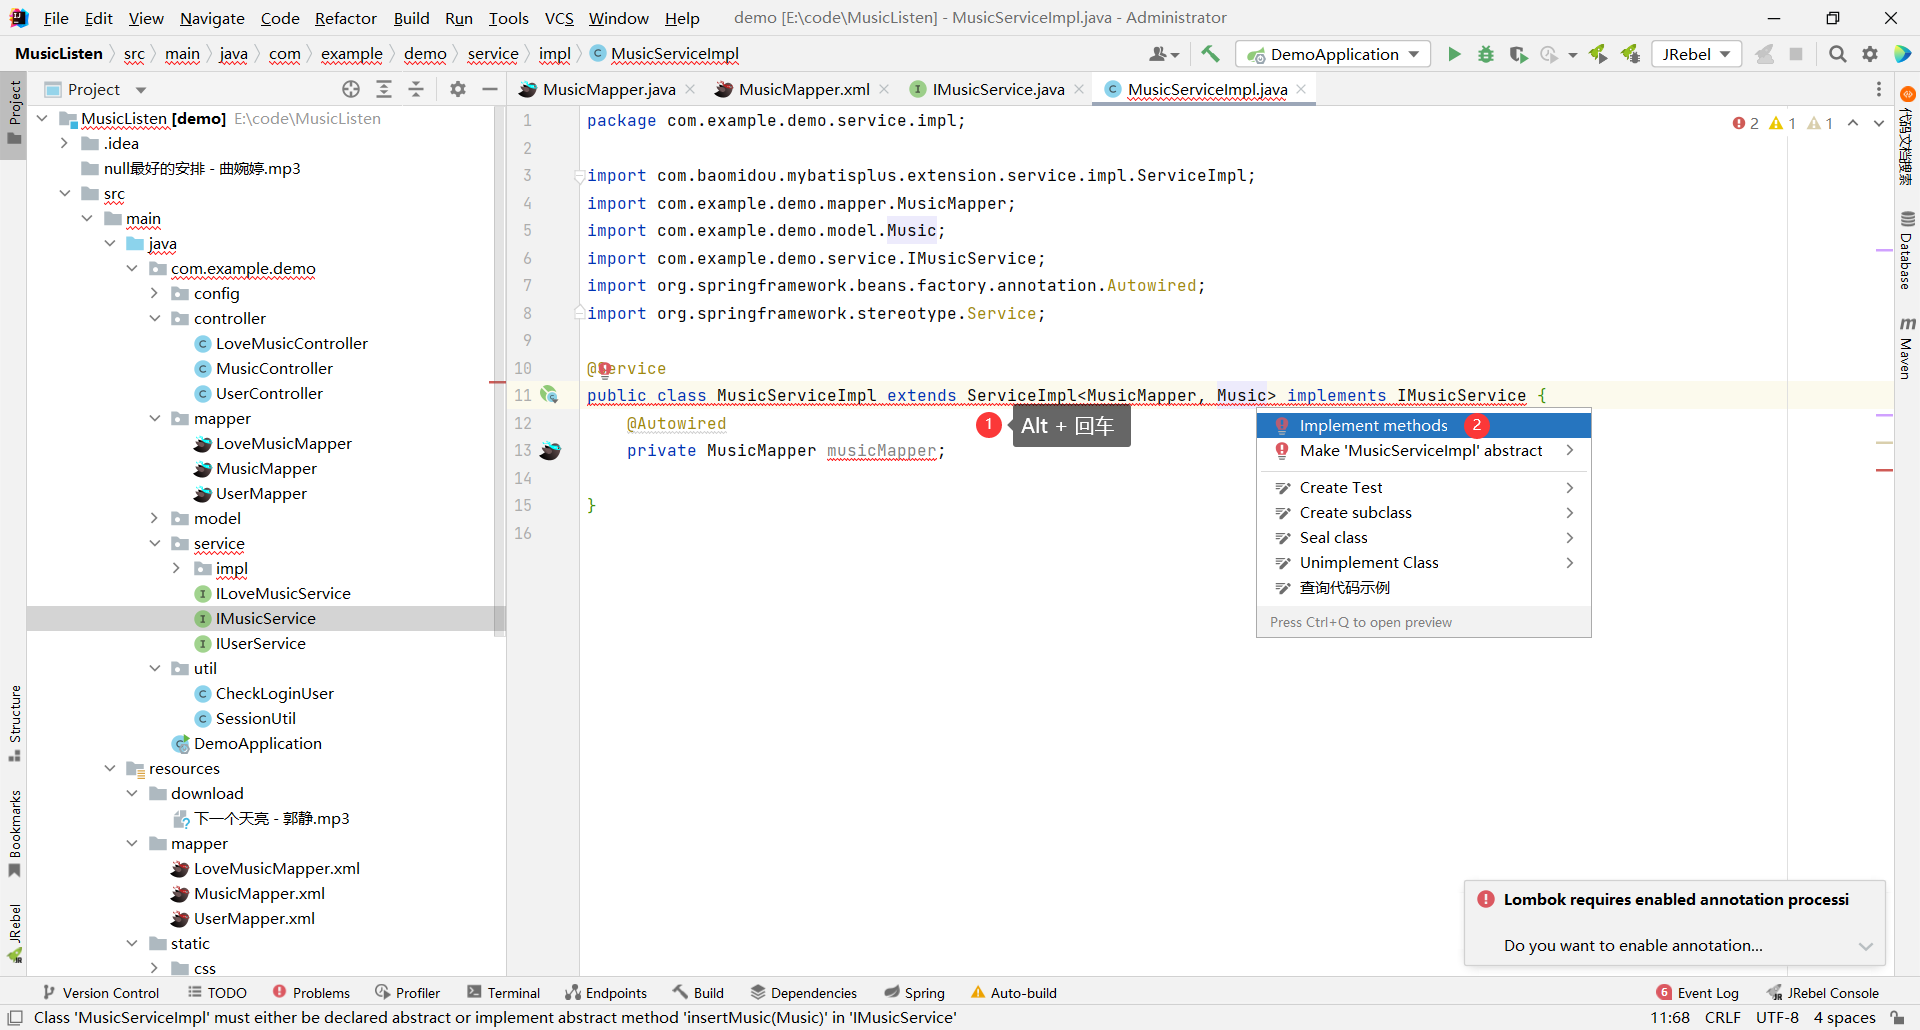
##### 接口
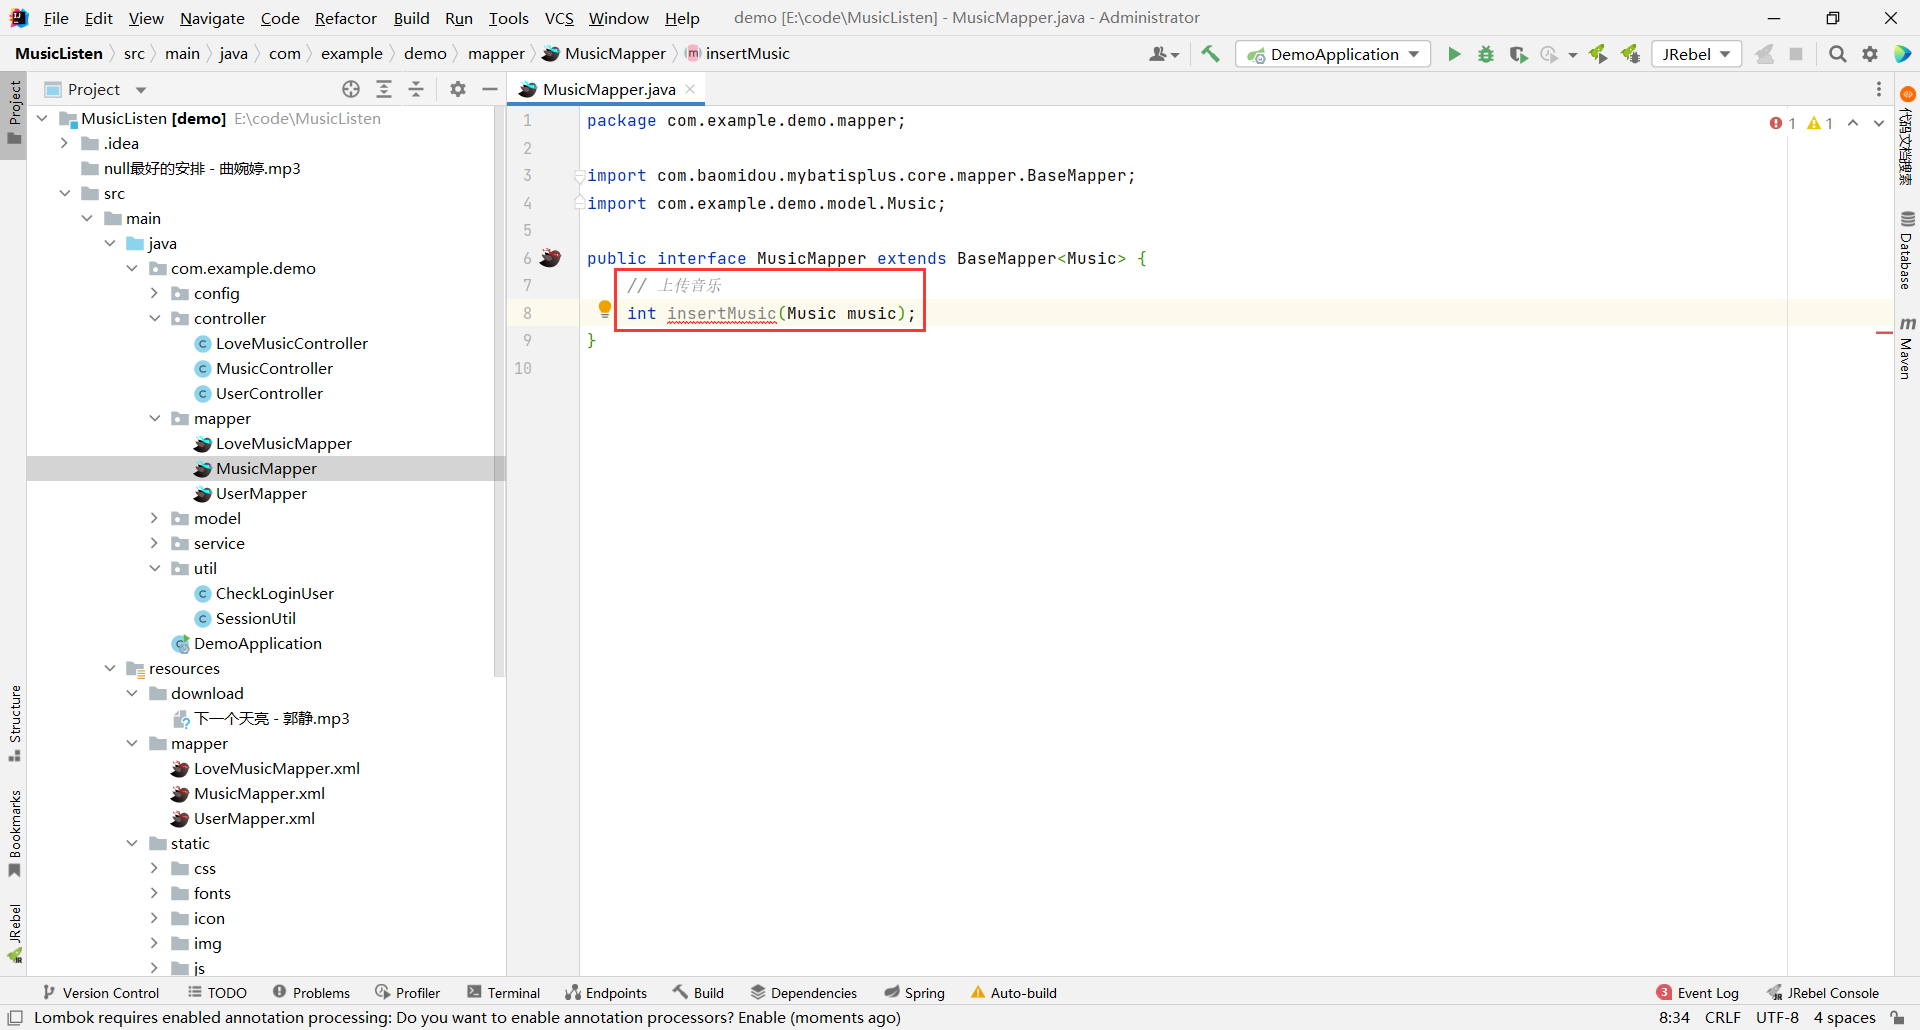
```java
package com.example.demo.mapper;
import com.baomidou.mybatisplus.core.mapper.BaseMapper;
import com.example.demo.model.Music;
public interface MusicMapper extends BaseMapper {
// 上传音乐
int insertMusic(Music music);
}
```
参数我们用 Music 对象来接收 , 他正好包含了 title、singer、url、userid 这几个字段
接下来我们去具体实现
##### MusicMapper.xml

```xml
insert into music (title, singer, url, userid)
values (#{title}, #{singer}, #{url}, #{userid})
```
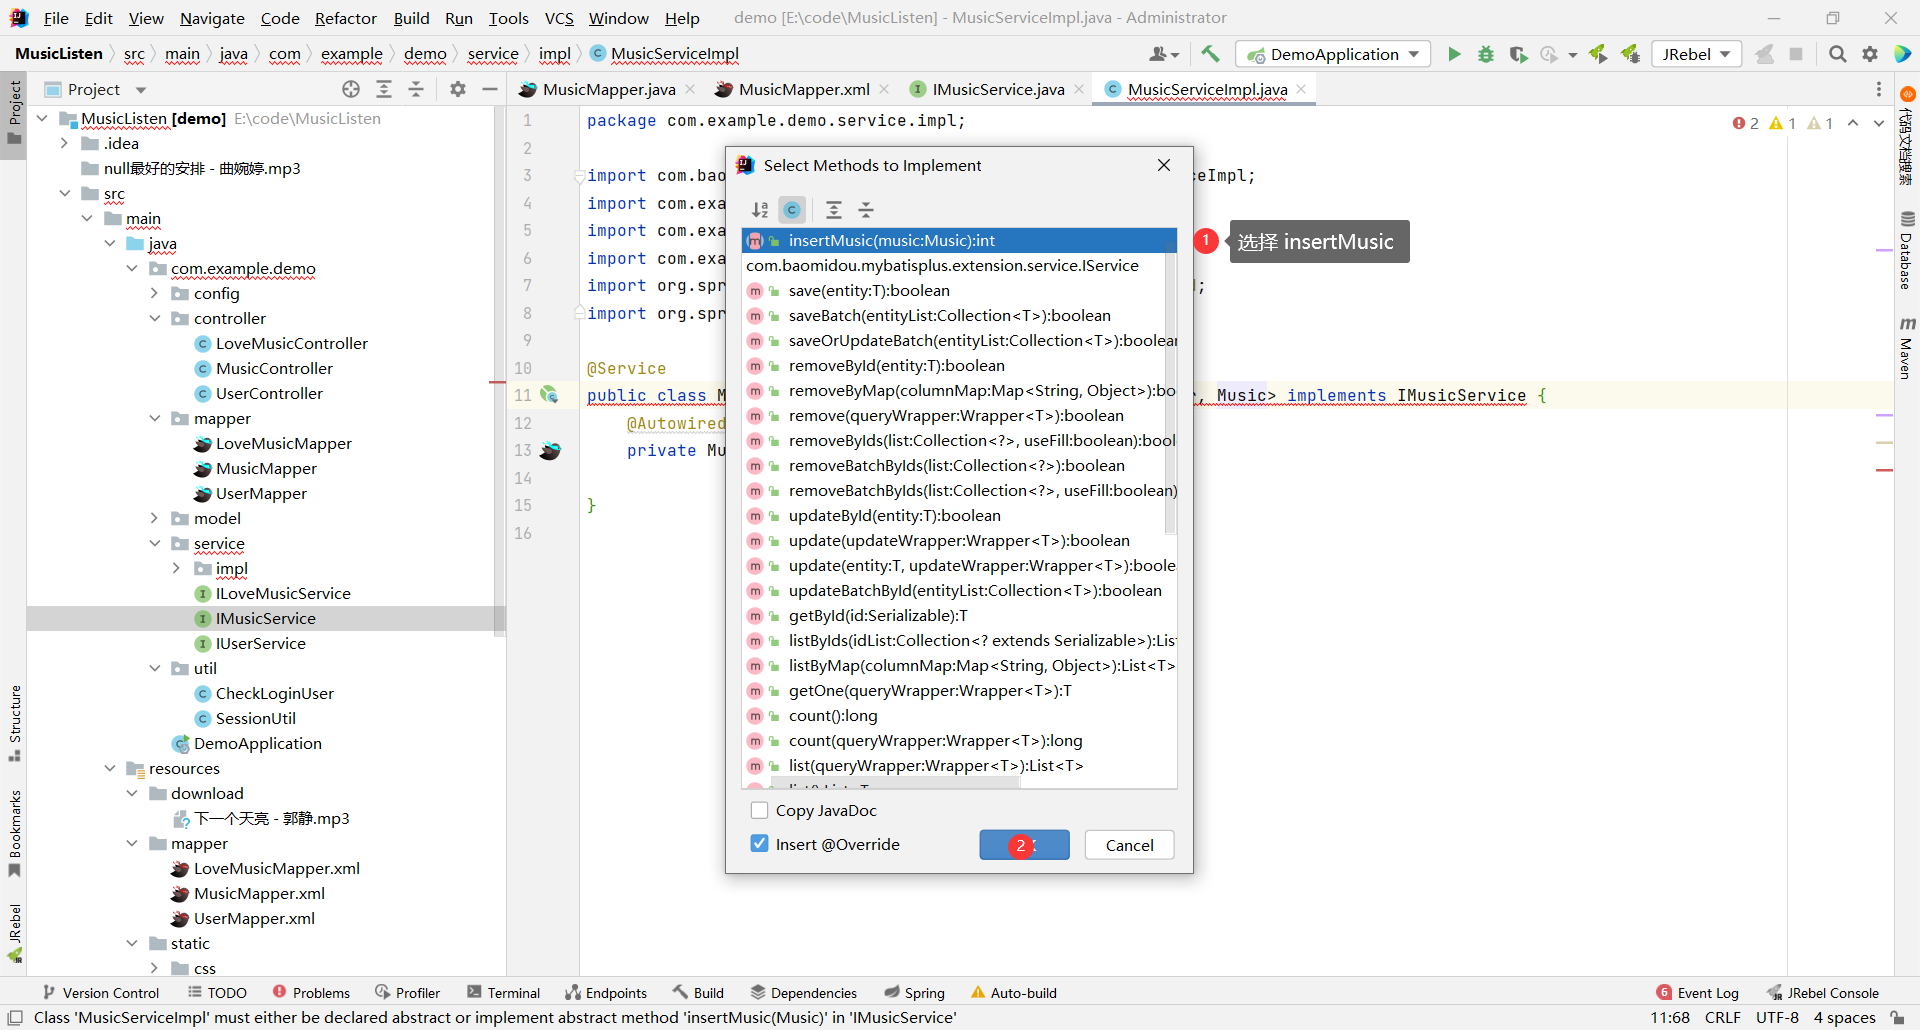
#### service 层
##### 接口
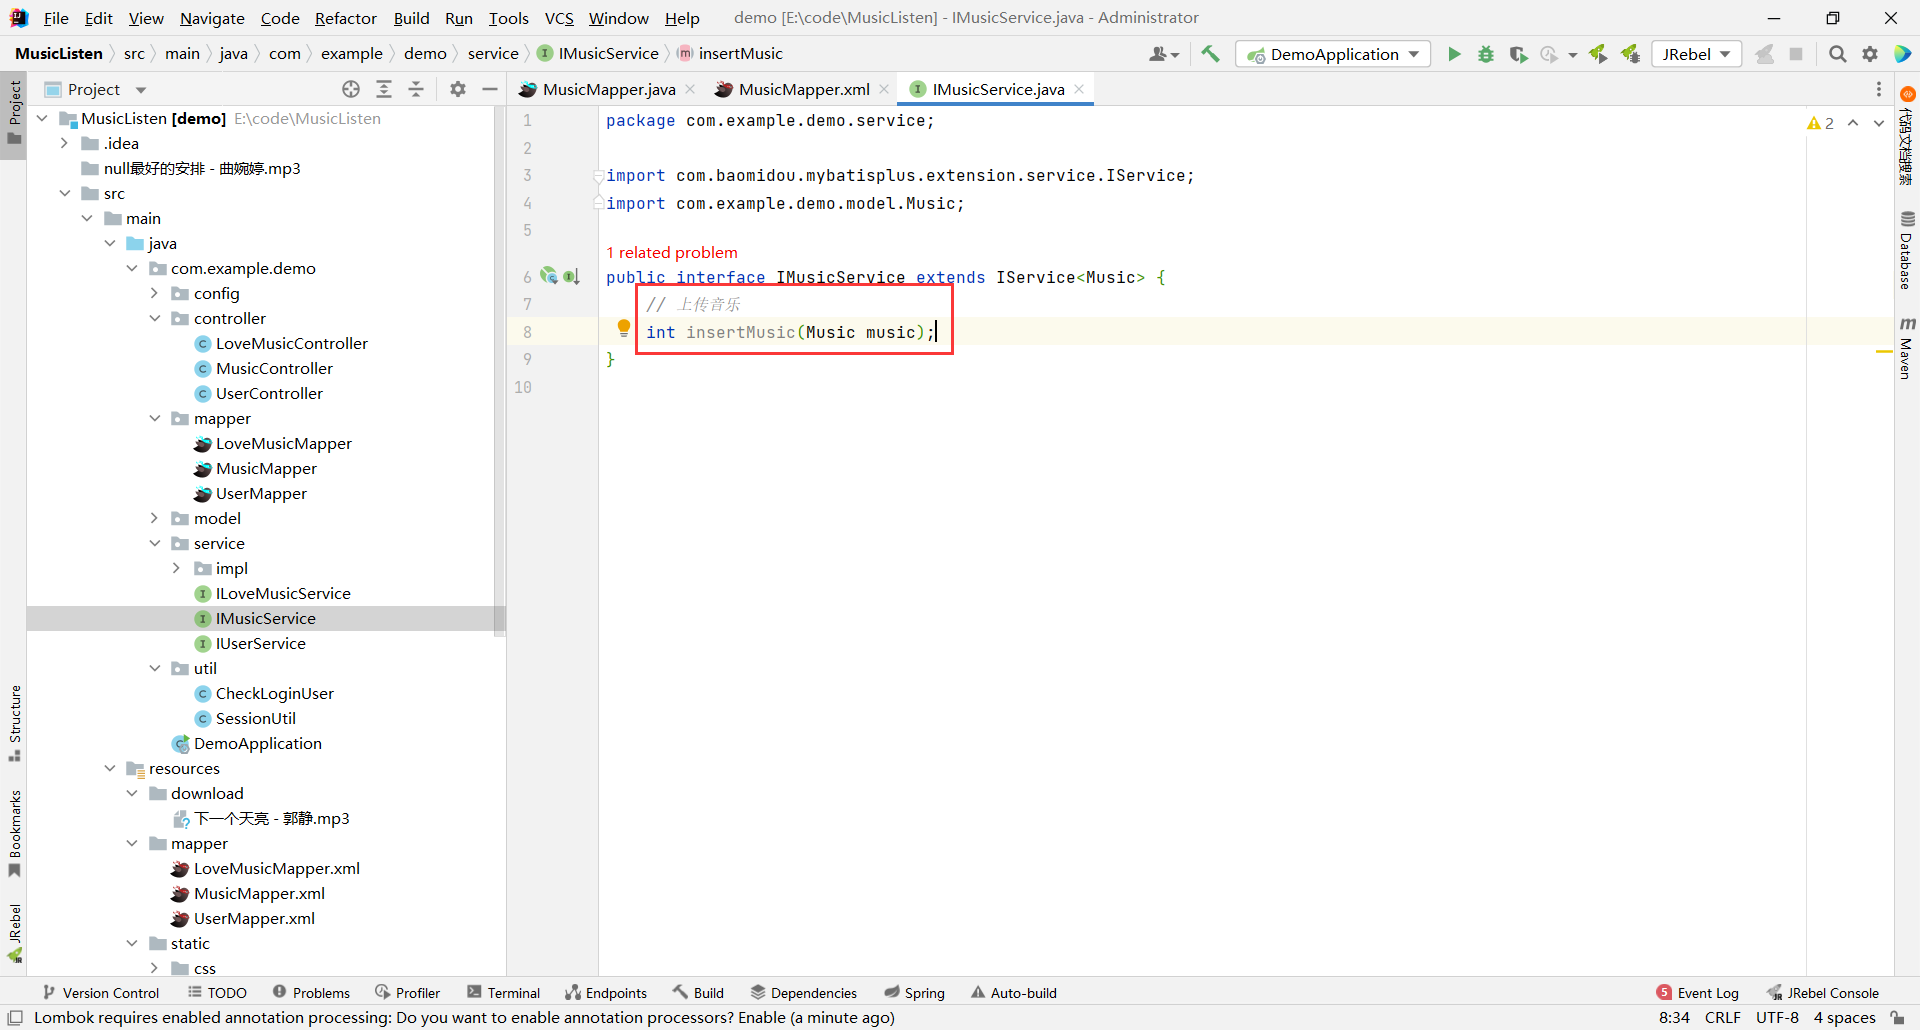
```java
package com.example.demo.service;
import com.baomidou.mybatisplus.extension.service.IService;
import com.example.demo.model.Music;
public interface IMusicService extends IService {
// 上传音乐
int insertMusic(Music music);
}
```
##### 实现
```java
package com.example.demo.service.impl;
import com.baomidou.mybatisplus.extension.service.impl.ServiceImpl;
import com.example.demo.mapper.MusicMapper;
import com.example.demo.model.Music;
import com.example.demo.service.IMusicService;
import org.springframework.beans.factory.annotation.Autowired;
import org.springframework.stereotype.Service;
@Service
public class MusicServiceImpl extends ServiceImpl implements IMusicService {
@Autowired
private MusicMapper musicMapper;
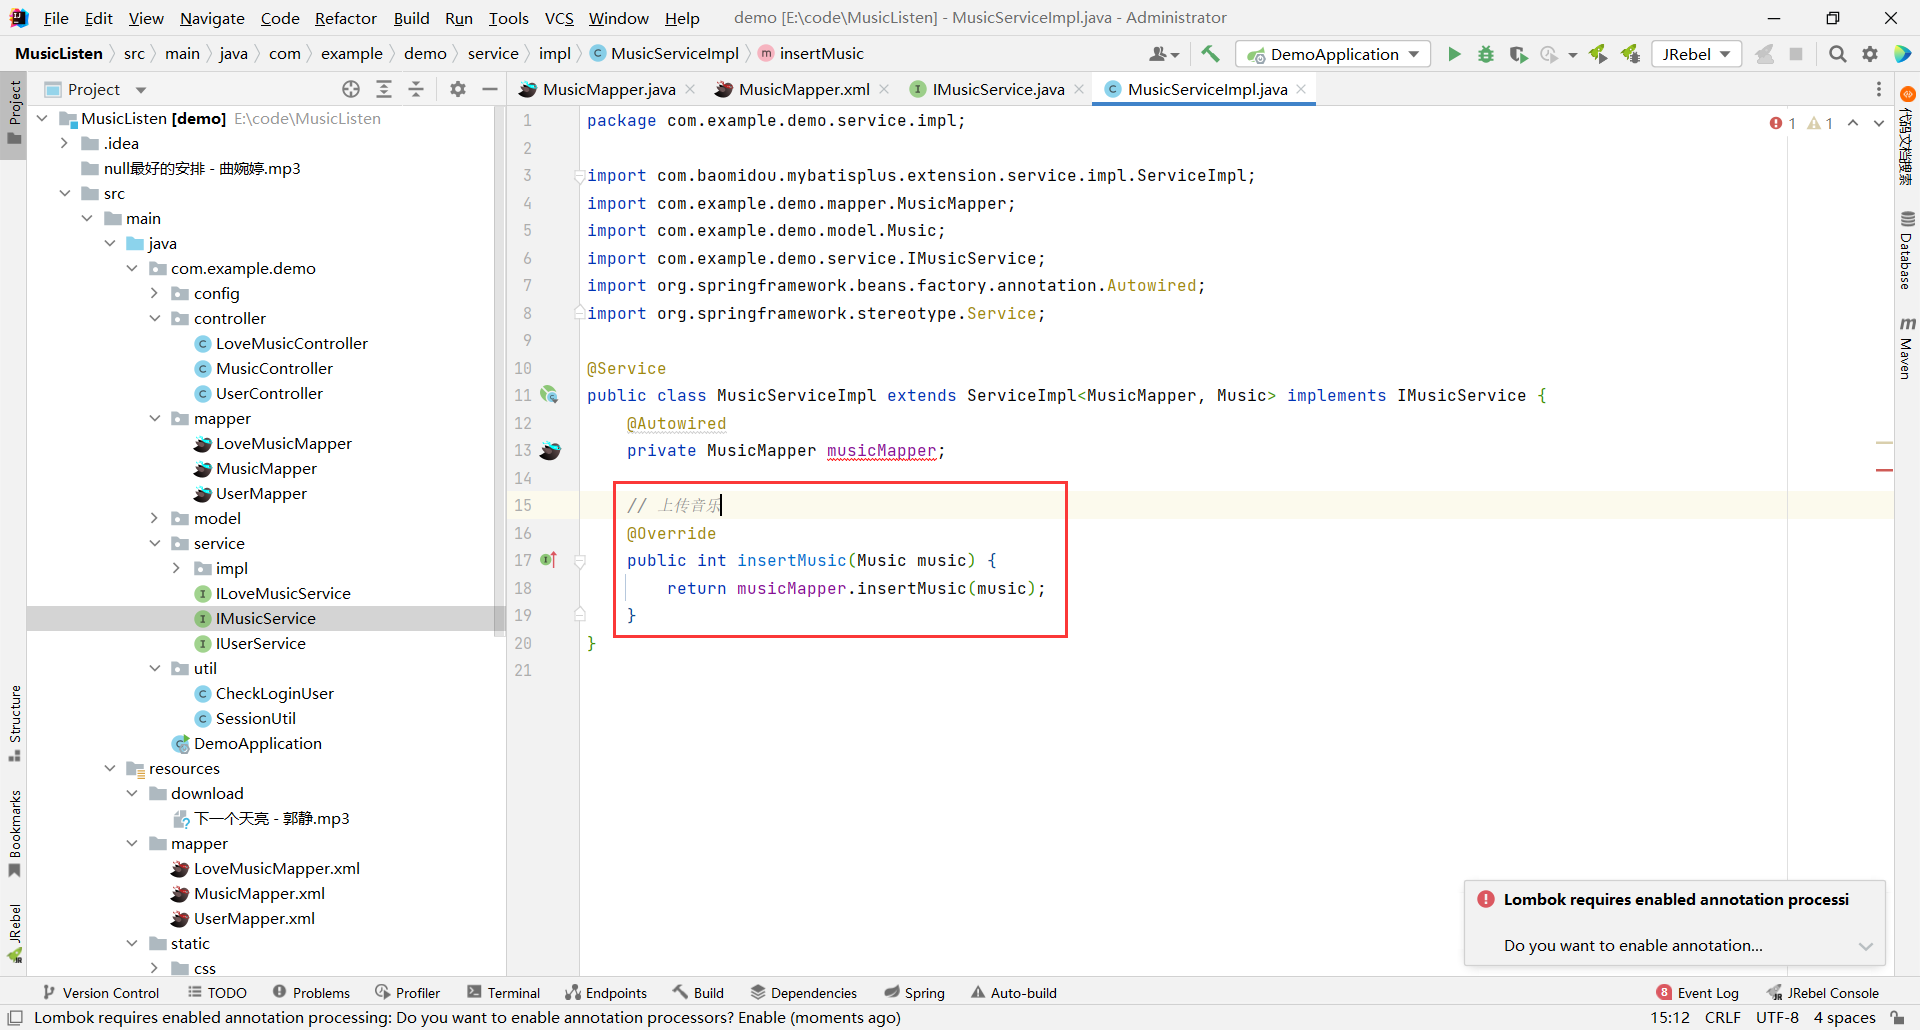
// 上传音乐
@Override
public int insertMusic(Music music) {
return musicMapper.insertMusic(music);
}
}
```
#### 继续实现 controller 层
那么我们已经完成了 service 层以及 mapper 层 , 那接下来我们就直接来实现插入到数据库剩余的步骤
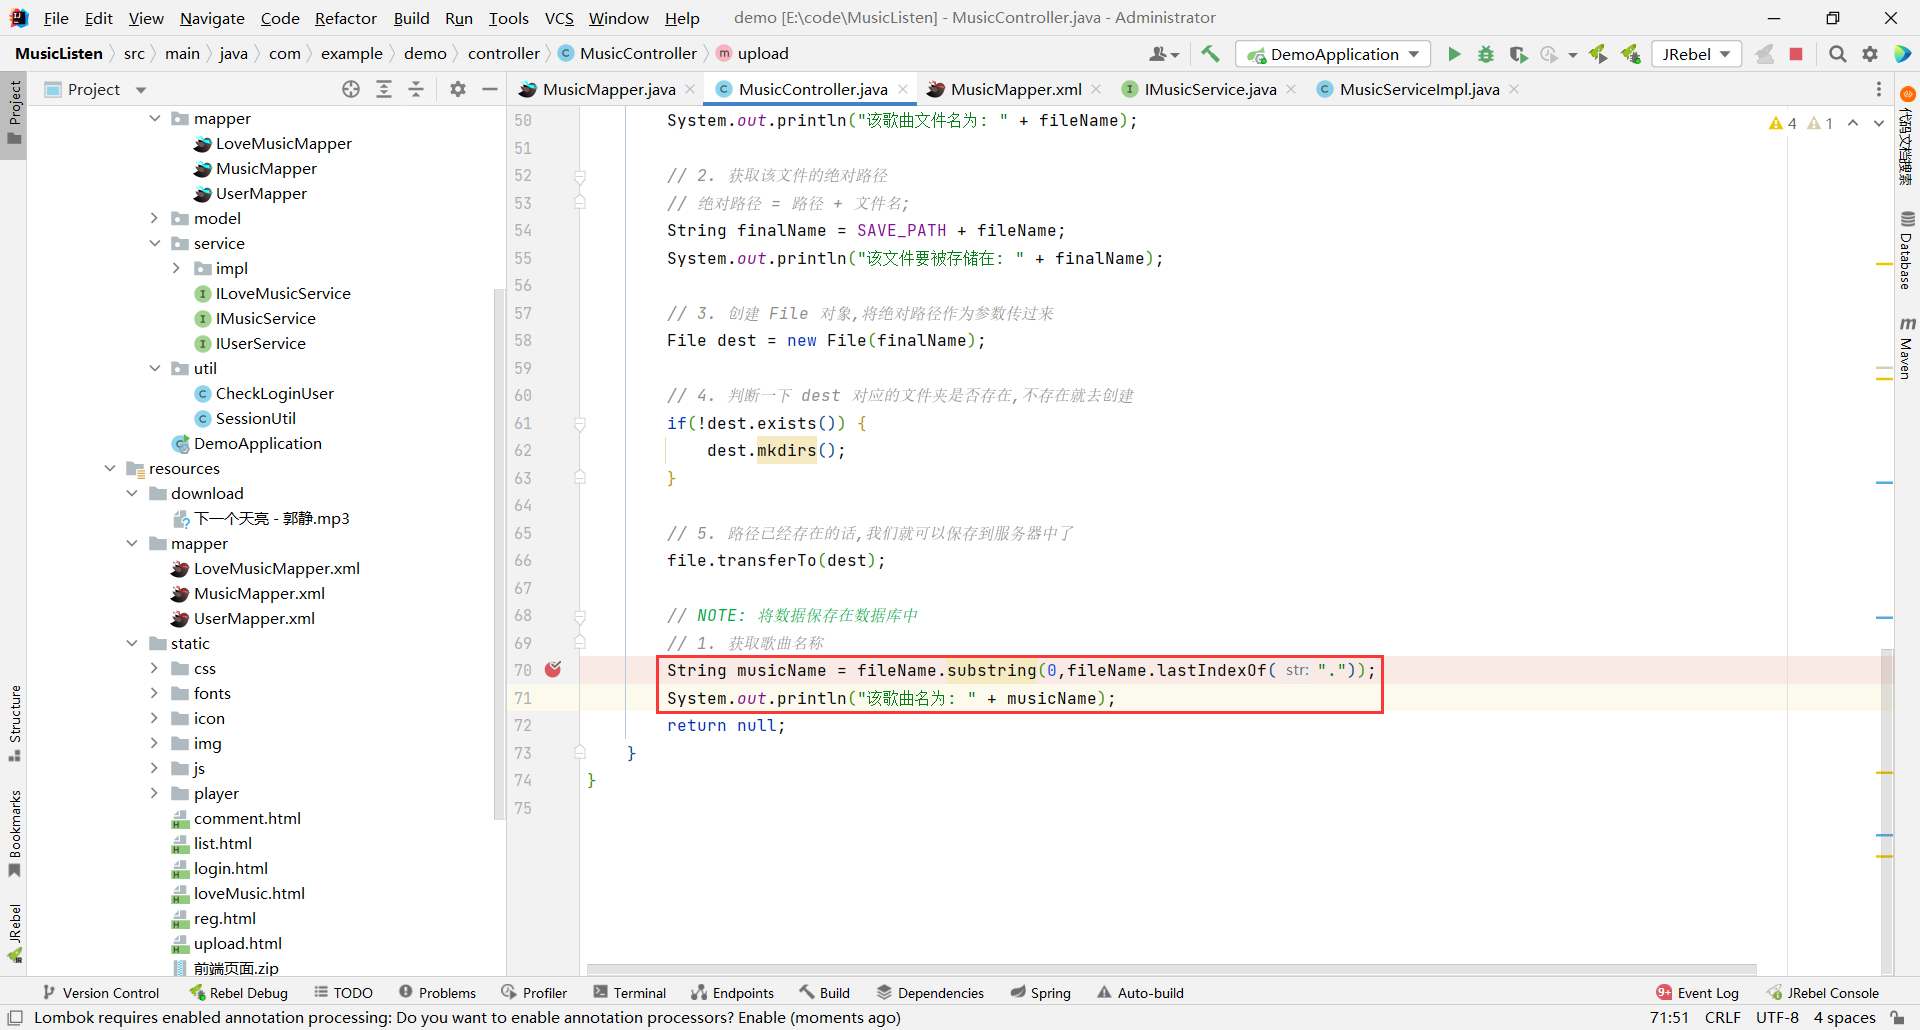
**将数据保存到服务器上**
7. 获取歌曲名称
8. 模拟 URL 路径
8. 上传到数据库(歌曲名 歌手名 路径)
那我们先获取歌曲的名称
我们直接截取掉后面的 .mp3 即可
然后模拟一下 URL 的路径
我们想要模拟出类似于 127.0.0.1:8080/music/get?path=下一个天亮 - 郭静.mp3 这样的形式
那 127.0.0.1:8080 是访问这个系统就会有的 URL , 我们只需要构造 /music/get?path= 这样的路径即可
那我们把这一部分当做前缀
那目前 , 我们的 title 已经获取到了 , 就是 musicName
singer 也通过参数传递过来了
url 也已经构造完成
用户对象我们在最开始判断用户是否登录的时候就已经获取到用户对象了 , 我们直接 user.getId() 即可
那我们就构造出一个 Music 对象将这些属性都传入到 Music 对象中 , 然后我们调用 musicService , 参数传 Music 对象
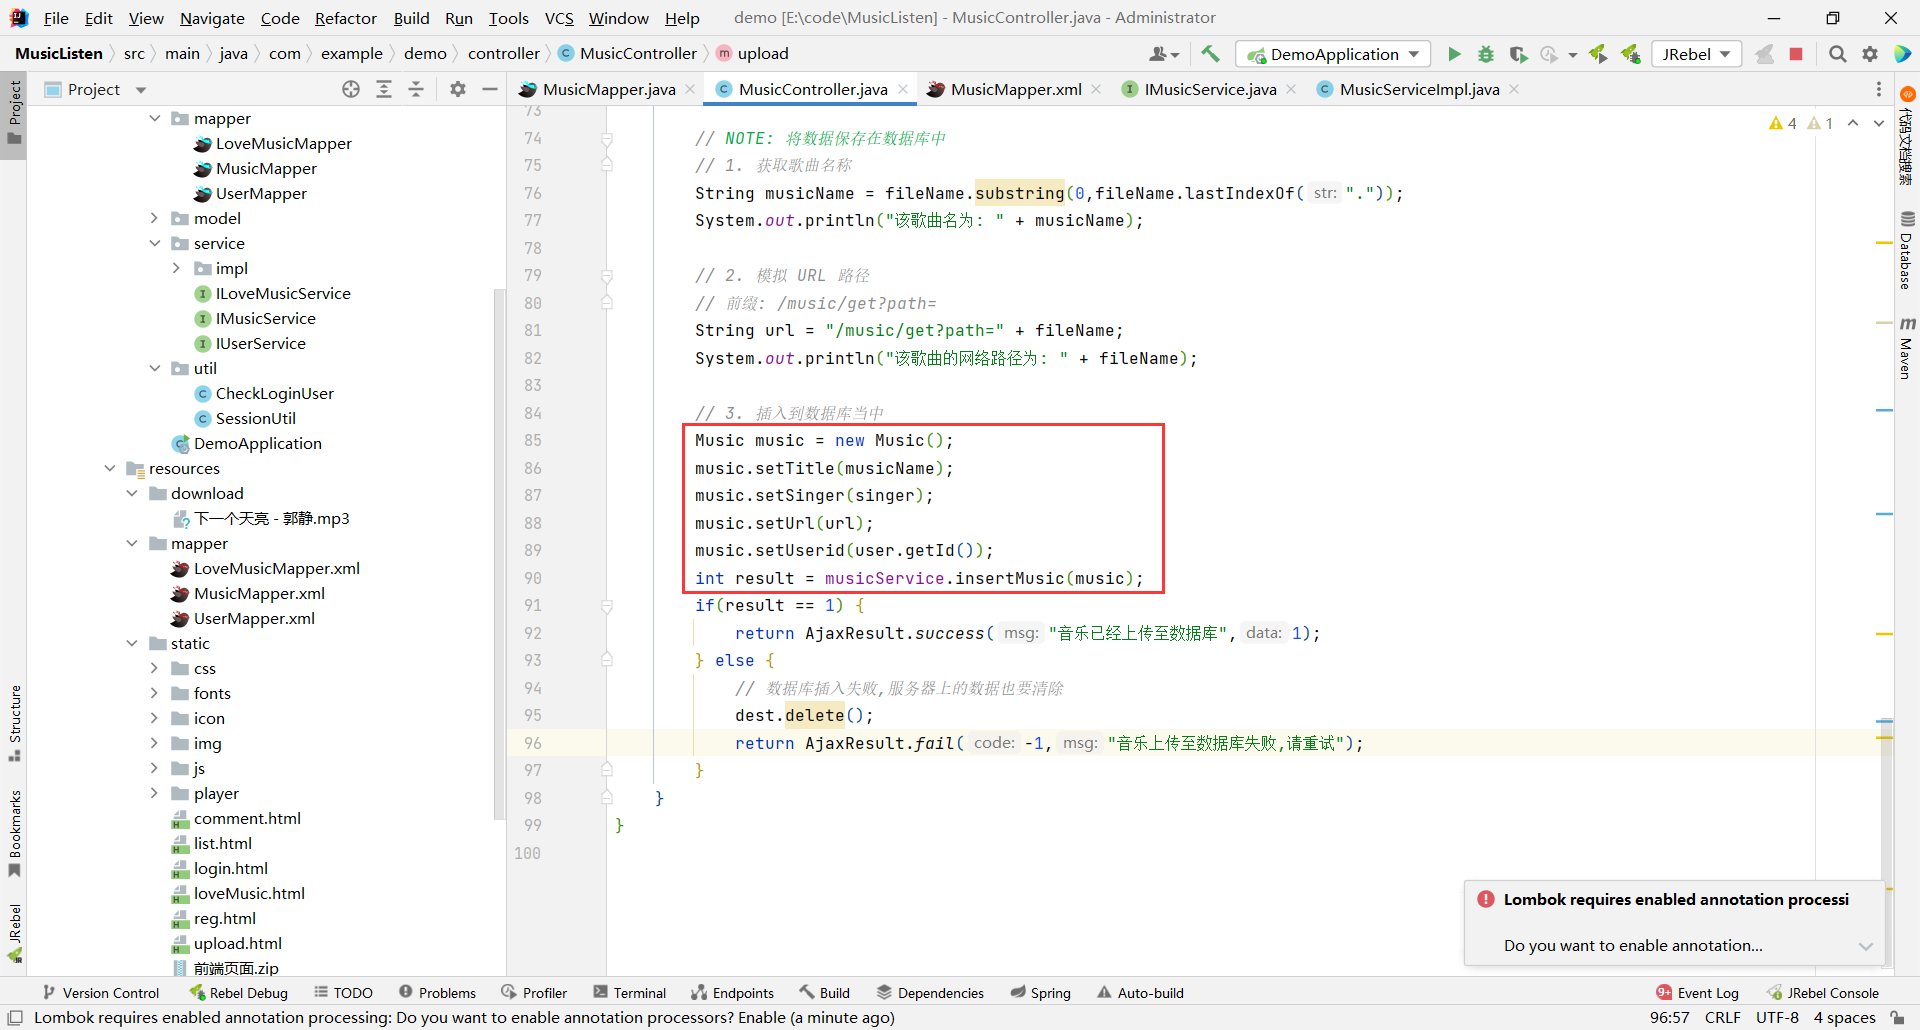
最后要根据返回值来判断是否插入成功 , 如果插入成功 , 我们给前端返回成功提示
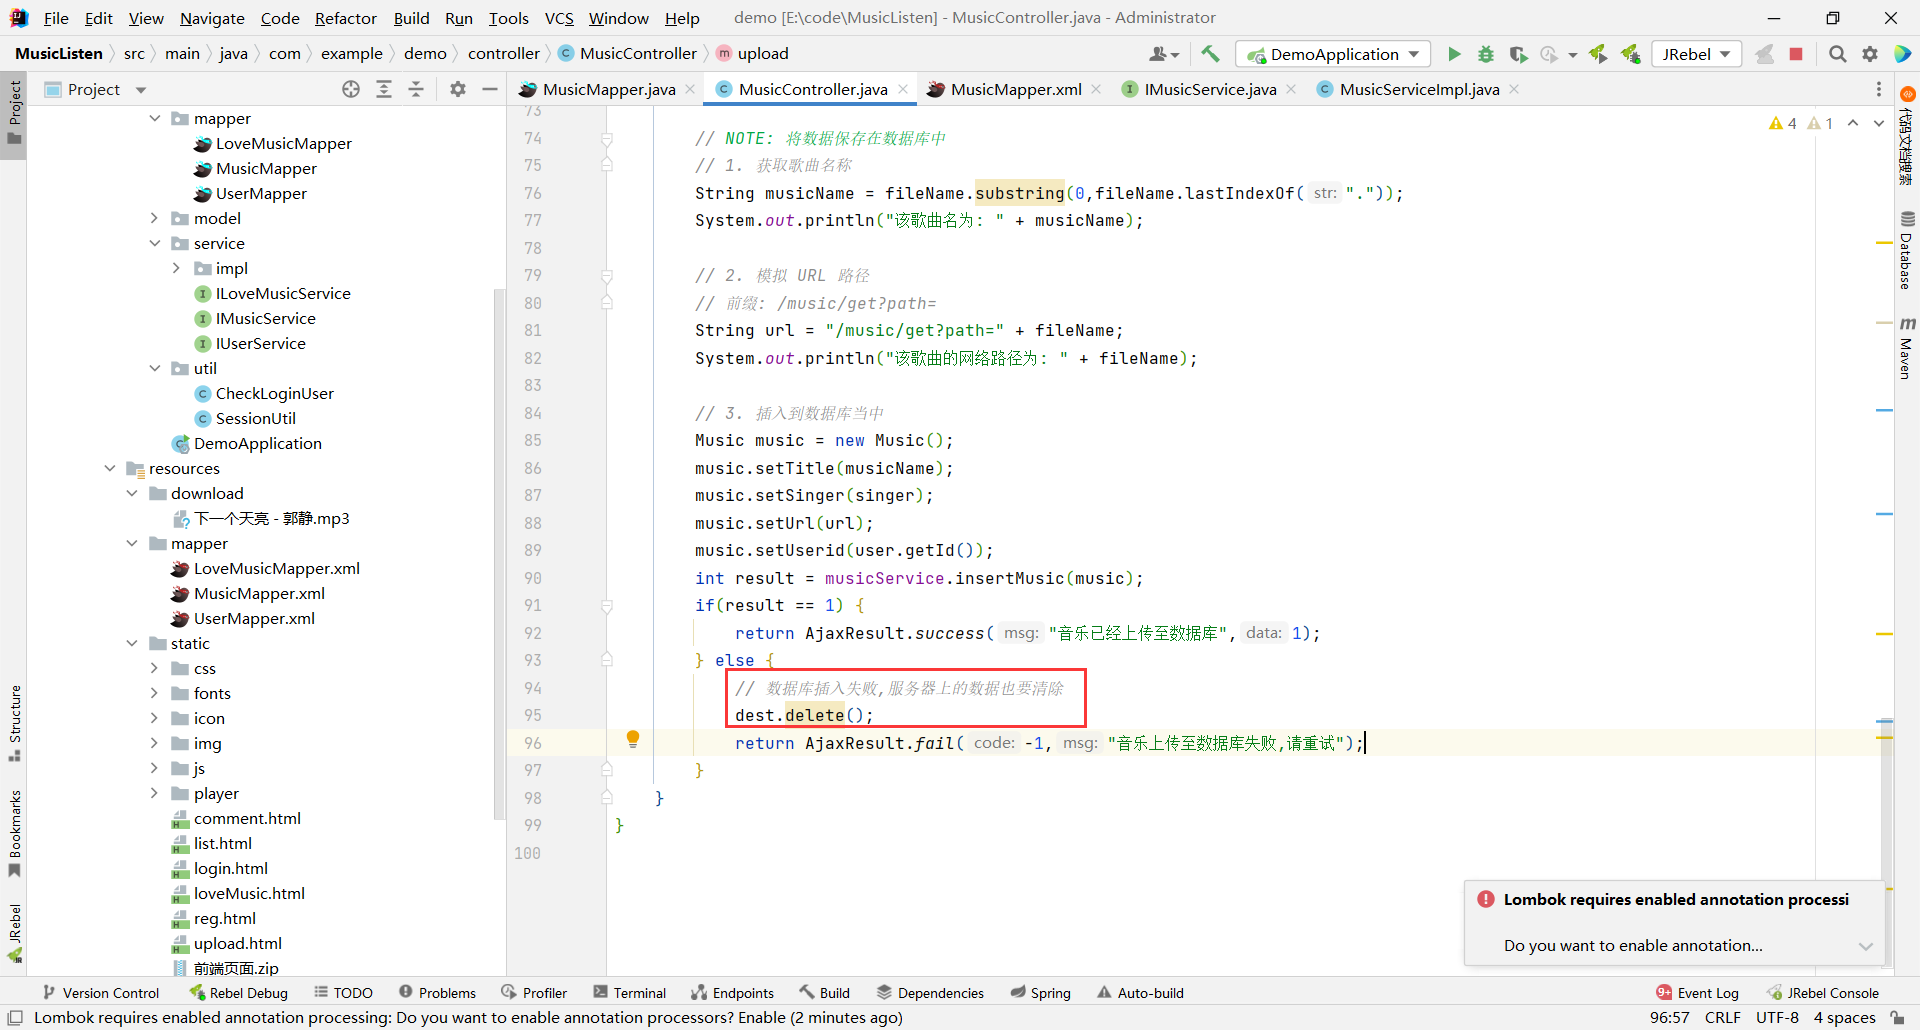
如果数据库插入失败 , 那么我们服务器上的文件也需要删除掉 , 数据库中的文件必须要和服务器中的文件保持统一
```java
package com.example.demo.controller;
import com.example.demo.config.AjaxResult;
import com.example.demo.model.Music;
import com.example.demo.model.User;
import com.example.demo.service.IMusicService;
import com.example.demo.util.CheckLoginUser;
import jakarta.servlet.http.HttpServletRequest;
import org.springframework.beans.factory.annotation.Autowired;
import org.springframework.beans.factory.annotation.Value;
import org.springframework.util.StringUtils;
import org.springframework.web.bind.annotation.RequestMapping;
import org.springframework.web.bind.annotation.RequestParam;
import org.springframework.web.bind.annotation.RequestPart;
import org.springframework.web.bind.annotation.RestController;
import org.springframework.web.multipart.MultipartFile;
import java.io.File;
import java.io.IOException;
@RestController
@RequestMapping("/music")
public class MusicController {
@Autowired
private IMusicService musicService;
// 服务器保存音乐的地址
// 注意最后面要手动加上一个 /
@Value("${music.local.path}")
private String SAVE_PATH;
// 上传音乐
@RequestMapping("/upload")
public AjaxResult upload(@RequestParam("filename") MultipartFile file, String singer, HttpServletRequest request) {
// NOTE: 前置操作
// 1. 检查用户是否登录
User user = CheckLoginUser.getLoginUser(request);
// 如果查询到的用户为空或者用户 ID 不合法,就返回给后端错误信息
if (user == null || user.getId() <= 0) {
return AjaxResult.fail(-1, "当前用户未登录");
}
// 2. 检查传过来的文件是否正确
if (file == null || !StringUtils.hasLength(singer)) {
return AjaxResult.fail(-1, "参数错误");
}
// NOTE: 将数据保存到服务器
// 1. 获取一下文件名
String fileName = file.getOriginalFilename();
System.out.println("该歌曲文件名为: " + fileName);
// 2. 获取该文件的绝对路径
// 绝对路径 = 路径 + 文件名;
String finalName = SAVE_PATH + fileName;
System.out.println("该文件要被存储在: " + finalName);
// 3. 创建 File 对象,将绝对路径作为参数传过来
File dest = new File(finalName);
// 4. 判断一下 dest 对应的文件夹是否存在,不存在就去创建
if (!dest.exists()) {
dest.mkdirs();
}
// 5. 路径已经存在的话,我们就可以保存到服务器中了
try {
file.transferTo(dest);
} catch (IOException e) {
e.printStackTrace();
return AjaxResult.fail(-1, "上传至服务器失败");
}
// NOTE: 将数据保存在数据库中
// 1. 获取歌曲名称
String musicName = fileName.substring(0, fileName.lastIndexOf("."));
System.out.println("该歌曲名为: " + musicName);
// 2. 模拟 URL 路径
// 前缀: /music/get?path=
String url = "/music/get?path=" + fileName;
System.out.println("该歌曲的网络路径为: " + fileName);
// 3. 插入到数据库当中
Music music = new Music();
music.setTitle(musicName);
music.setSinger(singer);
music.setUrl(url);
music.setUserid(user.getId());
int result = musicService.insertMusic(music);
if (result == 1) {
return AjaxResult.success("音乐已经上传至数据库", 1);
} else {
// 数据库插入失败,服务器上的数据也要清除
dest.delete();
return AjaxResult.fail(-1, "音乐上传至数据库失败,请重试");
}
}
}
```
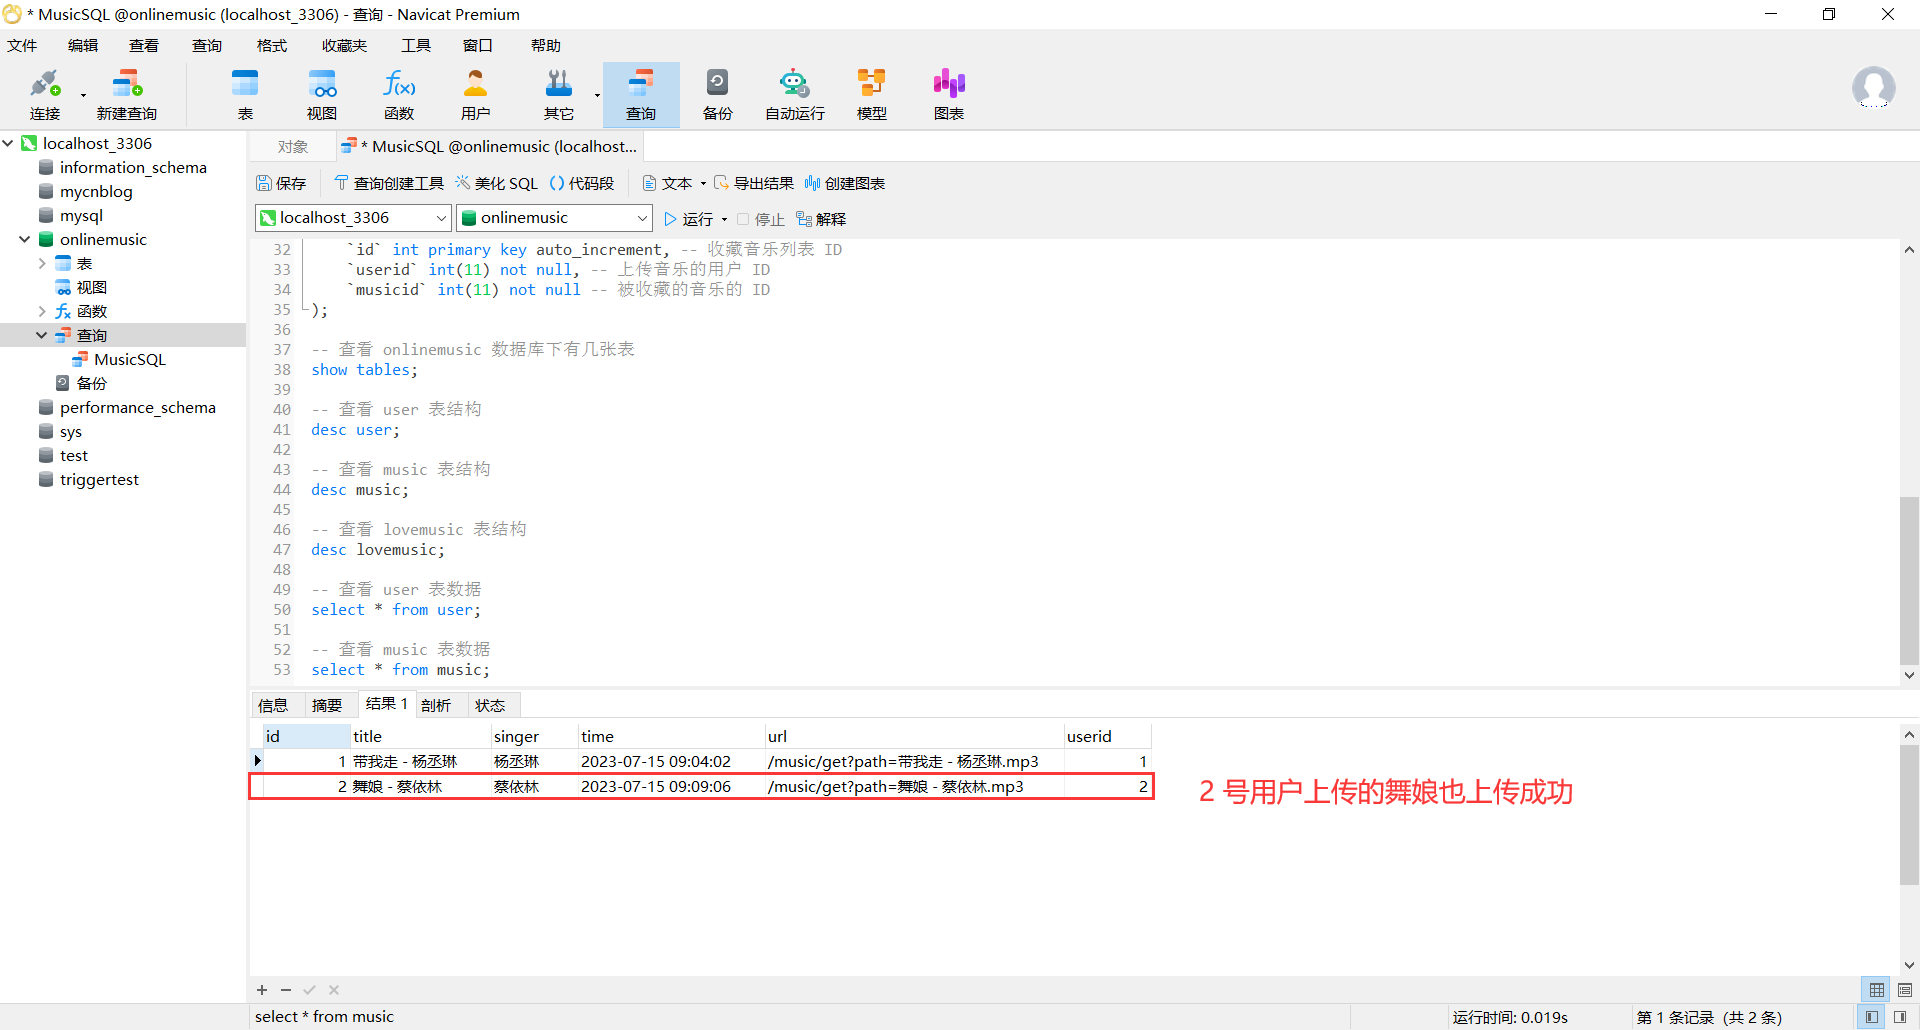
我们来测试一下
> 首先要保证登录状态
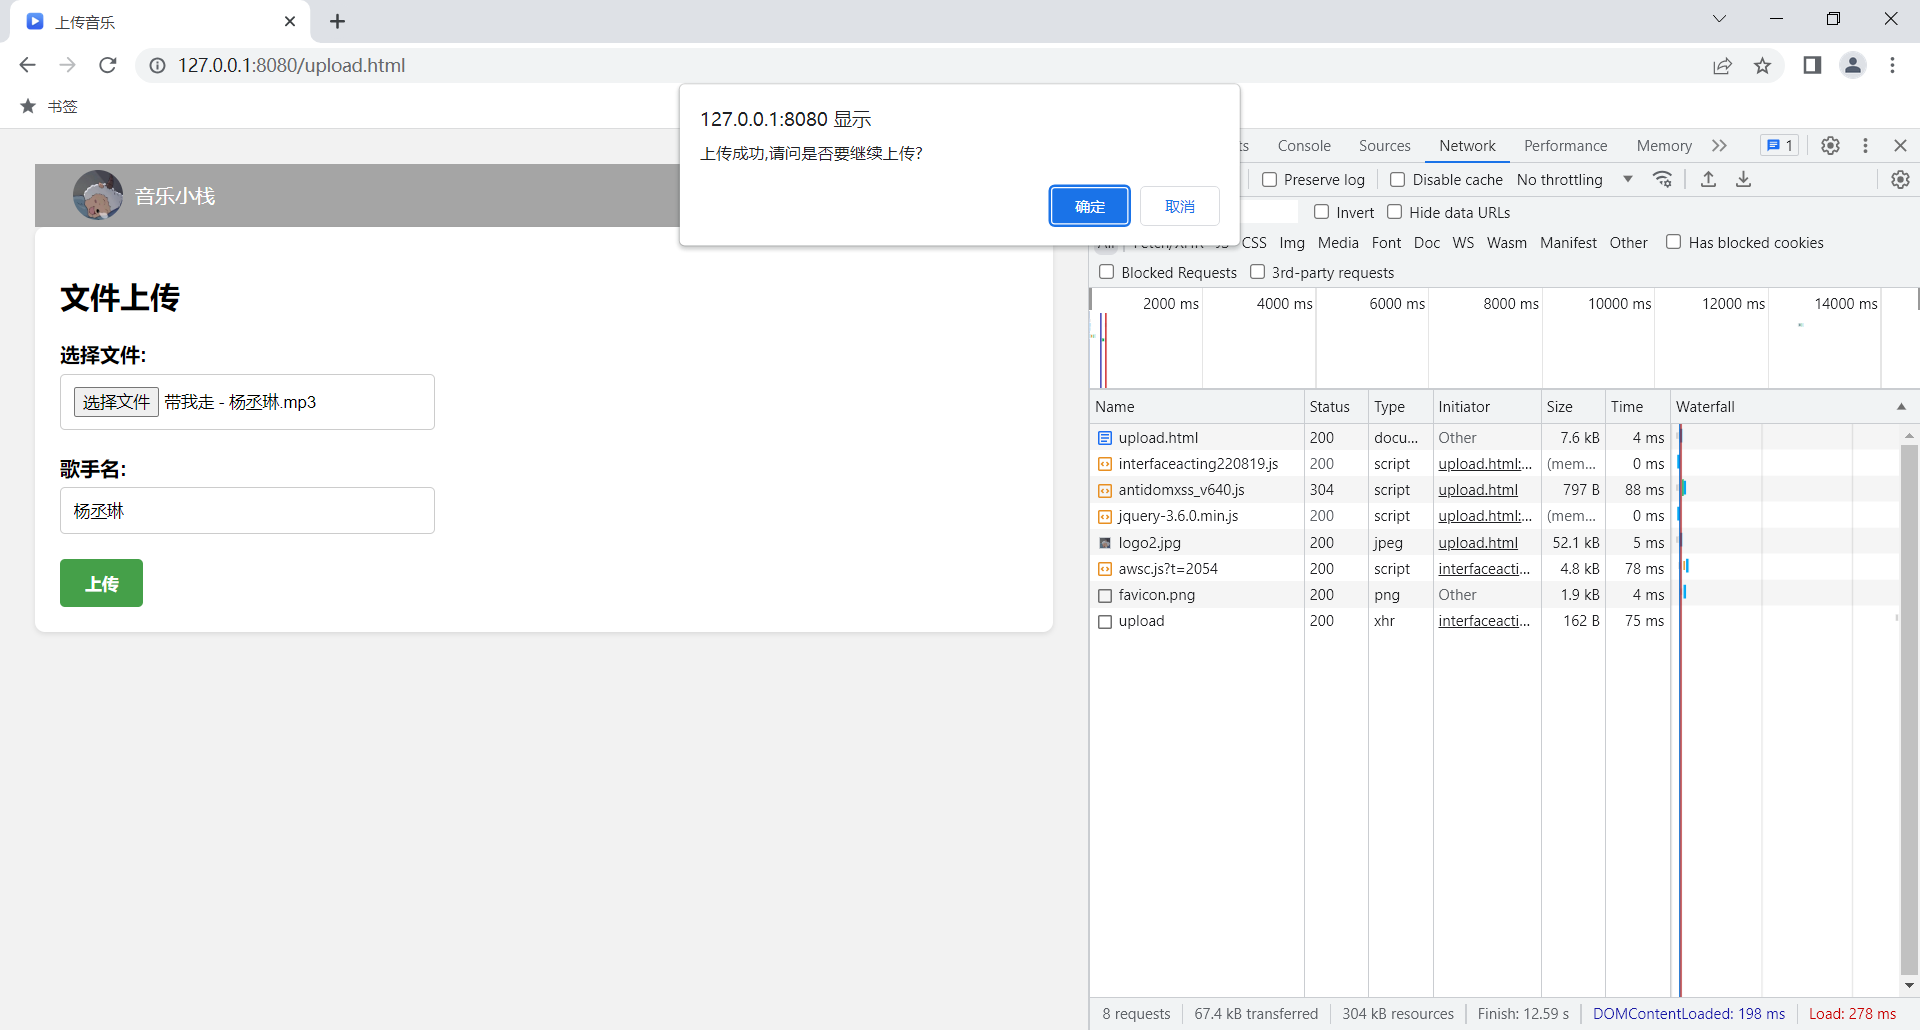
不同用户去上传音乐 , userid 也能够对应上
## 2.4 获取所有歌曲
约定前后端交互接口
在这里比较特殊的是 , 我们前端获取所有歌曲以及获取指定歌曲使用的是同一个 ajax 函数
如果用户没输入搜索词 , 那么 input 就为空
如果用户输入了关键词 , 那么 input 就是用户输入的搜索词
后端就会根据搜索词是否为空来进行不同的操作
1. 搜索词为空 - 检索全部歌曲
2. 搜索词不为空 - 按照搜索词匹配歌曲
```json
请求 :
[
url: "/music/findmusic",
type: "GET",
data: {
input - 用户输入的关键字
}
]
响应 :
[
code: 200,
msg: "查询音乐成功",
data: 音乐信息
]
```
### 2.4.1 前端
在我们页面刚开始加载的时候 , 就需要向后端发送 ajax 请求获取数据库中存在的歌曲
我们在这个
