# chartbrew
**Repository Path**: mirrors_chartbrew/chartbrew
## Basic Information
- **Project Name**: chartbrew
- **Description**: Open-source web platform used to create live reporting dashboards from APIs, MongoDB, Firestore, MySQL, PostgreSQL, and more 📈📊
- **Primary Language**: Unknown
- **License**: Not specified
- **Default Branch**: master
- **Homepage**: None
- **GVP Project**: No
## Statistics
- **Stars**: 1
- **Forks**: 0
- **Created**: 2023-02-27
- **Last Updated**: 2026-02-26
## Categories & Tags
**Categories**: Uncategorized
**Tags**: None
## README


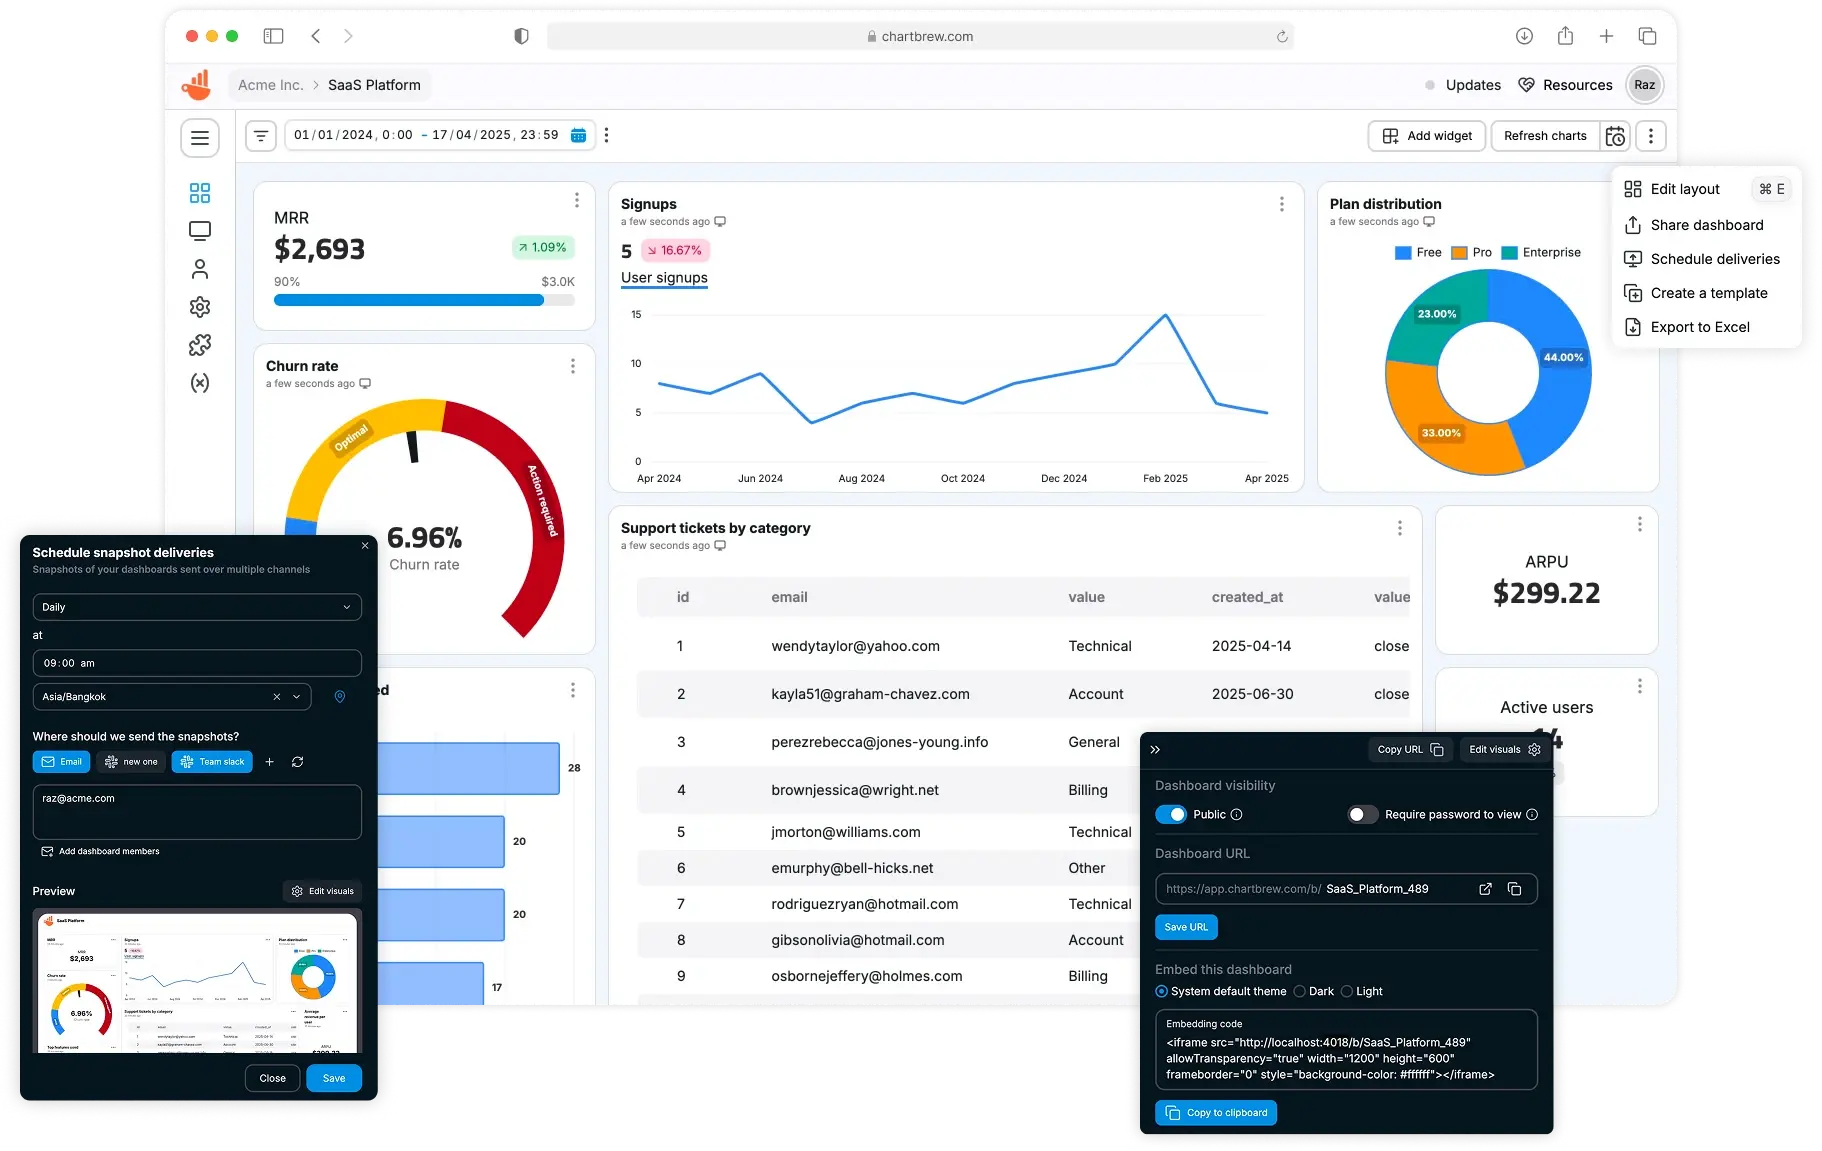
Chartbrew is an open-source web application that can connect directly to databases and APIs and use the data to create beautiful charts. It features a chart builder, editable dashboards, embedable charts, query & requests editor, and team capabilities.
Chartbrew as a service is available here
📚 [**Read the full docs here**](https://docs.chartbrew.com)
💡 [**Have any ideas or discussion topics?**](https://github.com/chartbrew/chartbrew/discussions)
💬 [**Join our Discord**](https://discord.gg/KwGEbFk)
## Data sources
[Check Chartbrew's website for the latest list of supported data sources](https://chartbrew.com)
## Prerequisites
* NodeJS v20
* MySQL (5+) or PostgreSQL (12.5+)
* Redis (v6+)
## Start
It is recommended you head over to the more detailed documentation to find out how to set up Chartbrew
[📚 You can find it here](https://docs.chartbrew.com/quickstart)
## Set up Chartbrew locally
### Create a new database
Chartbrew can run on MySQL or PostgreSQL. Create an empty database that Chartbrew can use.
### Clone and setup
```sh
git clone https://github.com/chartbrew/chartbrew.git
cd chartbrew && npm run setup
```
Complete the required environmental variables in `chartbrew/.env`. [Check out which need to be set here.](https://docs.chartbrew.com/quickstart#environmental-variables)
### Run the project in Development
Open two terminals, one for front-end and the other for back-end.
```sh
# frontend
cd client/
npm run start
# backend
cd server/
npm run start-dev
```
Head over to `http://localhost:4018` to see the app running and create your first user account.
## Deploy Chartbrew on DigitalOcean
Chartbrew can be deployed on DigitalOcean using the 1-click droplet from the marketplace. This allows you to quickly set up and run Chartbrew with minimal configuration.

## Run with Docker
[Check the full guide in the docs.](https://docs.chartbrew.com/deployment/run-on-docker)
### Quickstart
A [Chartbrew docker image](https://hub.docker.com/r/razvanilin/chartbrew) is built whenever a new version is released.
Before running the commands below, make sure you have a MySQL server already running and an empty database that Chartbrew can use. The database name should match the value of the `CB_DB_NAME` variable.
You will need a 32 bytes AES encryption key for the `CB_ENCRYPTION_KEY` variable. Run the following command to generate one:
```sh
node -e "console.log(require('crypto').randomBytes(32).toString('hex'))"
```
```sh
docker pull razvanilin/chartbrew
docker run -p 4019:4019 -p 4018:4018 \
-e CB_ENCRYPTION_KEY=your_32_bytes_key \
-e CB_API_HOST=0.0.0.0 \
-e CB_API_PORT=4019 \
-e CB_DB_HOST=host.docker.internal \
-e CB_DB_PORT=3306 \
-e CB_DB_NAME=chartbrew \
-e CB_DB_USERNAME=root \
-e CB_DB_PASSWORD=password \
-e CB_REDIS_HOST=host.docker.internal \
-e CB_REDIS_PORT=6379 \
-e CB_REDIS_PASSWORD=password \
-e VITE_APP_CLIENT_HOST=http://localhost:4018 \
-e VITE_APP_CLIENT_PORT=4018 \
-e VITE_APP_API_HOST=http://localhost:4019 \
razvanilin/chartbrew
```
## Acknowledgements
Many thanks to [everybody that contributed](https://github.com/chartbrew/chartbrew/graphs/contributors) to this open-source project 🙏
[Start here if you want to become a contributor](https://github.com/chartbrew/chartbrew/blob/master/CONTRIBUTING.md)