AIMedia 🤖




简体中文 | English

Automatically capture trending topics, auto-generate news, and automatically publish to major platforms. Fully automated AI-powered media software
 ## Video Demonstration 📺
Bilibili video link:https://www.bilibili.com/video/BV1oYSVYaEaa/?share_source=copy_web&vd_source=998582dcaa6c1a862619086e9dda59cb
## Requirements 📦
- Minimum recommended: CPU with 4 cores or more, 8GB of RAM or more, GPU is not required
- Windows 10 or above
## Quick Start 🚀
Download the one-click startup package, extract, and use directly (avoid paths with **Chinese characters**, **special characters**, or **spaces**).
### Windows
- Baidu Drive: https://pan.baidu.com/s/1YIV2avc_i5V8IcltWoFh1g Code: 99k1
After downloading, first extract `venv.tar.gz` to the `venv` folder in the current directory. The structure should look like this:
```
AIMedia
├─venv
├─main.py
├─chrome
├─...
```
It is recommended to **double-click** `update.bat` first to update to the **latest code** (requires Git). Then right-click to **run as administrator** `webui.bat` to start.
After startup, the browser will open automatically (if a blank page opens, try using **Chrome** or **Edge**).
### Other Systems
Not supported; only Windows is supported.
## Installation & Deployment 📥
### Prerequisites
- Avoid using **paths with Chinese characters** to prevent unforeseen issues.
- Make sure your **network** is stable; VPN should be in "global traffic" mode.
#### ① Clone the Code
```shell
git clone https://github.com/Anning01/AIMedia.git
```
#### ② Edit the Configuration File
- Copy the `config.py` file and name it `local_config.py`.
- Configure `zhipu_aip_key` as specified in `config.py`. Enable the Stable Diffusion API if you need AI-generated images.
### Manual Deployment 📦
> Video Tutorial
- Full usage demonstration: Bilibili video link:https://www.bilibili.com/video/BV1oYSVYaEaa/?share_source=copy_web&vd_source=998582dcaa6c1a862619086e9dda59cb
- How to deploy on Windows: In progress `(*>﹏<*)′~
#### ① Create a Virtual Environment (Conda)
It is recommended to use [conda](https://www.anaconda.com/download/success) to create a Python virtual environment.
```shell
git clone https://github.com/Anning01/AIMedia.git
cd AIMedia
conda create -n AIMedia python=3.12.4
conda activate AIMedia
pip install -r requirements.txt
```
#### ② Start the Web Interface 🌐
Be sure to execute the following command in the AIMedia project `root directory`.
###### Windows
```bat
conda activate AIMedia
streamlit run main.py
```
#### ① Using venv (Ensure Python version 3.12.4)
```shell
git clone https://github.com/Anning01/AIMedia.git
cd AIMedia
python -m venv venv
.\venv\Scripts\activate
pip install -r requirements.txt
```
#### ② Start the Web Interface 🌐
Be sure to execute the following command in the AIMedia project `root directory`.
###### Windows
```bat
streamlit run main.py
Or
.\webui.bat(not supported with Conda)
```
> Note:Our auto-publish feature depends on the Chrome beta version, which must be downloaded manually.
Download link::
- Baidu Drive: Link::https://pan.baidu.com/s/1x6J3K4KdWrI9vOG8yvSSBw Code:7jyw
After downloading and extracting the model, place the entire directory in `.\AIMedia`,
so the final file path should look like this: `.\AIMedia\chrome`.
## Feedback & Suggestions 📢
- You can submit an [issue](https://github.com/Anning01/AIMedia/issues)
or a [pull request](https://github.com/Anning01/AIMedia/pulls).
## License 📝
Click to view the [`LICENSE`](LICENSE) file.
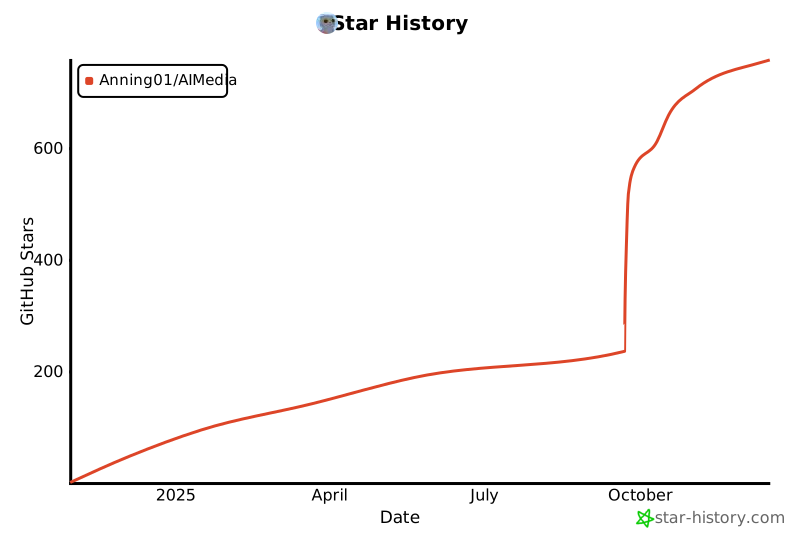
## Star History
[](https://star-history.com/#Anning01/AIMedia&Date)
## Video Demonstration 📺
Bilibili video link:https://www.bilibili.com/video/BV1oYSVYaEaa/?share_source=copy_web&vd_source=998582dcaa6c1a862619086e9dda59cb
## Requirements 📦
- Minimum recommended: CPU with 4 cores or more, 8GB of RAM or more, GPU is not required
- Windows 10 or above
## Quick Start 🚀
Download the one-click startup package, extract, and use directly (avoid paths with **Chinese characters**, **special characters**, or **spaces**).
### Windows
- Baidu Drive: https://pan.baidu.com/s/1YIV2avc_i5V8IcltWoFh1g Code: 99k1
After downloading, first extract `venv.tar.gz` to the `venv` folder in the current directory. The structure should look like this:
```
AIMedia
├─venv
├─main.py
├─chrome
├─...
```
It is recommended to **double-click** `update.bat` first to update to the **latest code** (requires Git). Then right-click to **run as administrator** `webui.bat` to start.
After startup, the browser will open automatically (if a blank page opens, try using **Chrome** or **Edge**).
### Other Systems
Not supported; only Windows is supported.
## Installation & Deployment 📥
### Prerequisites
- Avoid using **paths with Chinese characters** to prevent unforeseen issues.
- Make sure your **network** is stable; VPN should be in "global traffic" mode.
#### ① Clone the Code
```shell
git clone https://github.com/Anning01/AIMedia.git
```
#### ② Edit the Configuration File
- Copy the `config.py` file and name it `local_config.py`.
- Configure `zhipu_aip_key` as specified in `config.py`. Enable the Stable Diffusion API if you need AI-generated images.
### Manual Deployment 📦
> Video Tutorial
- Full usage demonstration: Bilibili video link:https://www.bilibili.com/video/BV1oYSVYaEaa/?share_source=copy_web&vd_source=998582dcaa6c1a862619086e9dda59cb
- How to deploy on Windows: In progress `(*>﹏<*)′~
#### ① Create a Virtual Environment (Conda)
It is recommended to use [conda](https://www.anaconda.com/download/success) to create a Python virtual environment.
```shell
git clone https://github.com/Anning01/AIMedia.git
cd AIMedia
conda create -n AIMedia python=3.12.4
conda activate AIMedia
pip install -r requirements.txt
```
#### ② Start the Web Interface 🌐
Be sure to execute the following command in the AIMedia project `root directory`.
###### Windows
```bat
conda activate AIMedia
streamlit run main.py
```
#### ① Using venv (Ensure Python version 3.12.4)
```shell
git clone https://github.com/Anning01/AIMedia.git
cd AIMedia
python -m venv venv
.\venv\Scripts\activate
pip install -r requirements.txt
```
#### ② Start the Web Interface 🌐
Be sure to execute the following command in the AIMedia project `root directory`.
###### Windows
```bat
streamlit run main.py
Or
.\webui.bat(not supported with Conda)
```
> Note:Our auto-publish feature depends on the Chrome beta version, which must be downloaded manually.
Download link::
- Baidu Drive: Link::https://pan.baidu.com/s/1x6J3K4KdWrI9vOG8yvSSBw Code:7jyw
After downloading and extracting the model, place the entire directory in `.\AIMedia`,
so the final file path should look like this: `.\AIMedia\chrome`.
## Feedback & Suggestions 📢
- You can submit an [issue](https://github.com/Anning01/AIMedia/issues)
or a [pull request](https://github.com/Anning01/AIMedia/pulls).
## License 📝
Click to view the [`LICENSE`](LICENSE) file.
## Star History
[](https://star-history.com/#Anning01/AIMedia&Date)