# Bot-for-Alist
**Repository Path**: wfcode/bot-for-alist
## Basic Information
- **Project Name**: Bot-for-Alist
- **Description**: No description available
- **Primary Language**: Unknown
- **License**: Not specified
- **Default Branch**: master
- **Homepage**: None
- **GVP Project**: No
## Statistics
- **Stars**: 0
- **Forks**: 0
- **Created**: 2024-01-02
- **Last Updated**: 2024-01-02
## Categories & Tags
**Categories**: Uncategorized
**Tags**: None
## README
# Telegram-AList bot
[](https://github.com/alist-org/alist)
**主要功能:**
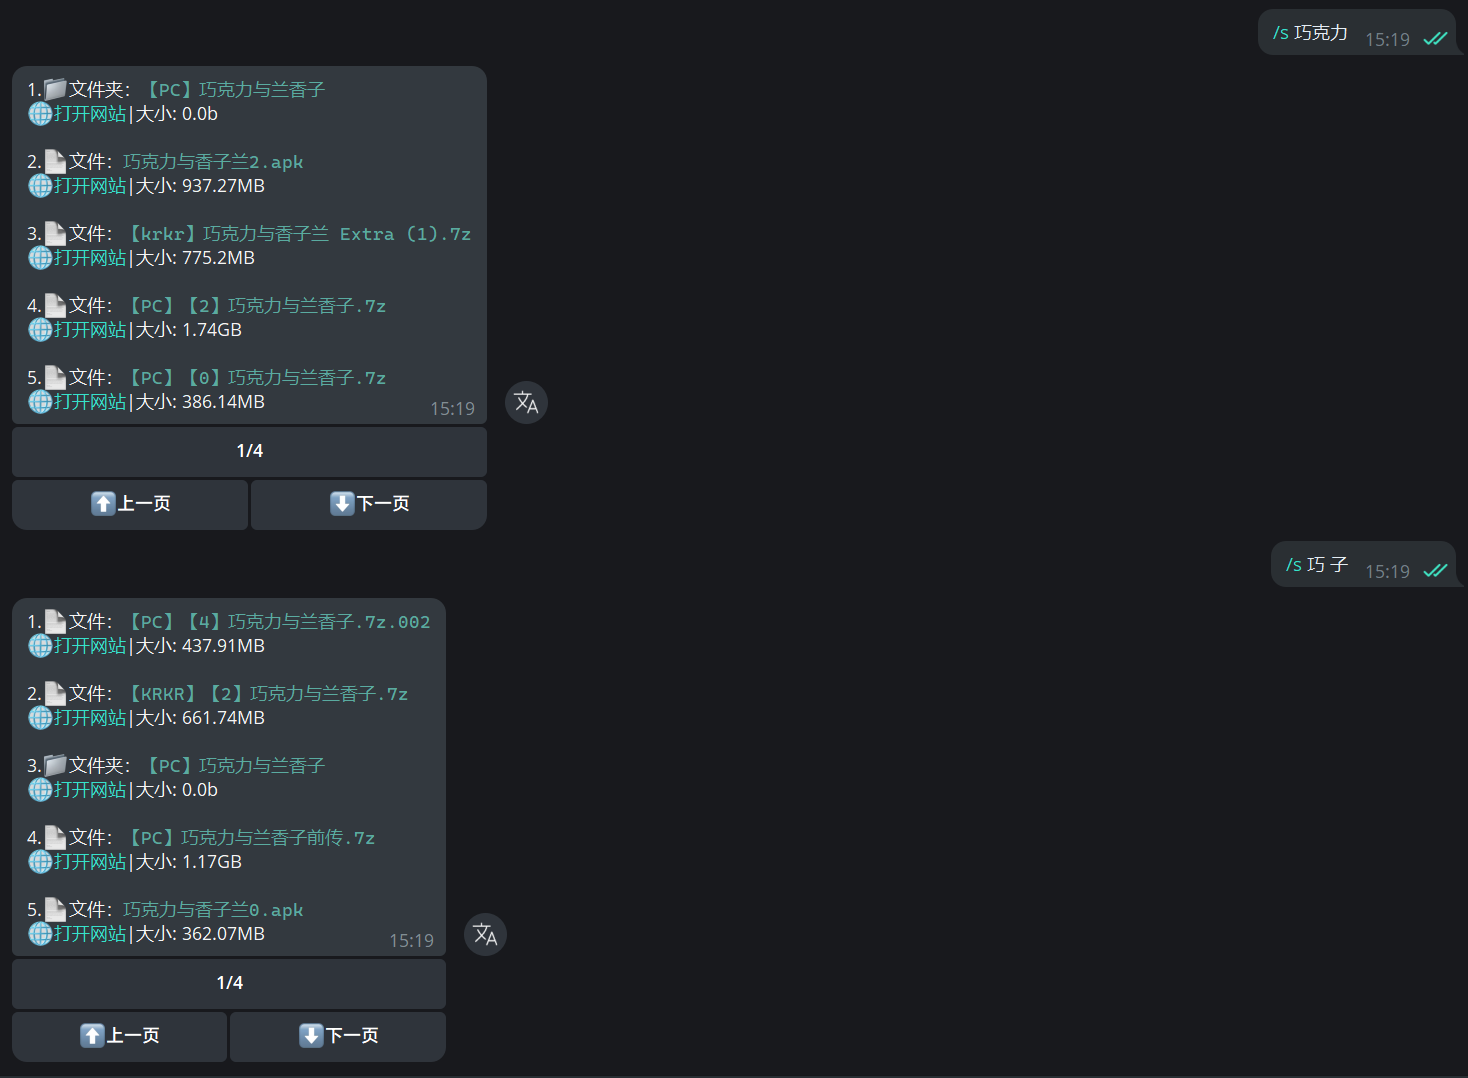
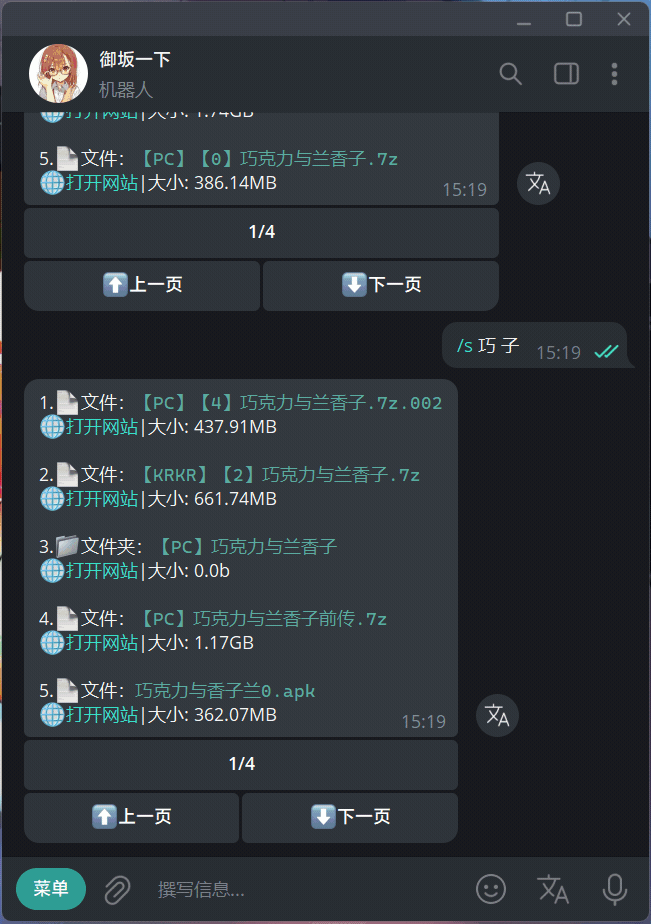
- [x] 搜索
- [x] 文件基本信息
- [x] 自定义结果数量
- [x] 文件直链
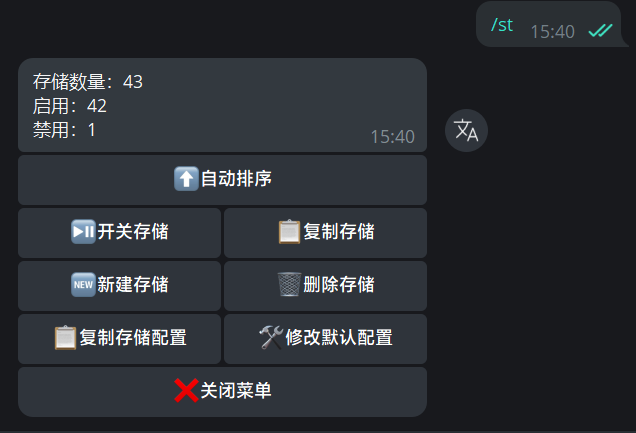
- [x] 存储
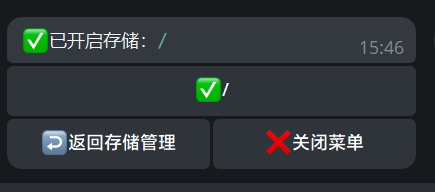
- [x] 开关存储
- [x] 删除存储
- [x] 复制存储
- [x] 新建存储
- [x] 自动排序
- [x] 批量新建存储
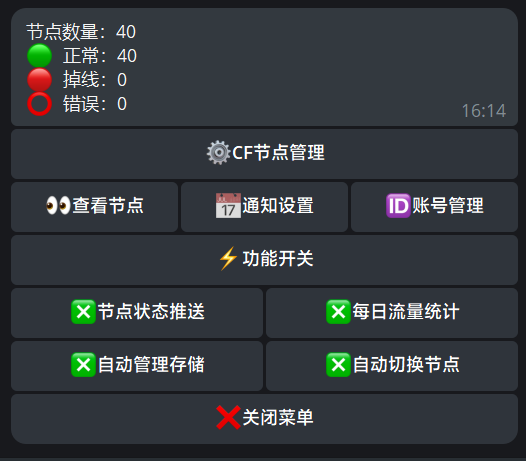
- [x] Cloudflare节点管理
- [x] 节点监控
- [x] 通知
- [x] 节点状态
- [x] 每日流量统计
- [x] 自动管理存储
- [x] 自动切换节点
- [x] cf账号管理
- [x] Alist配置备份&定时备份
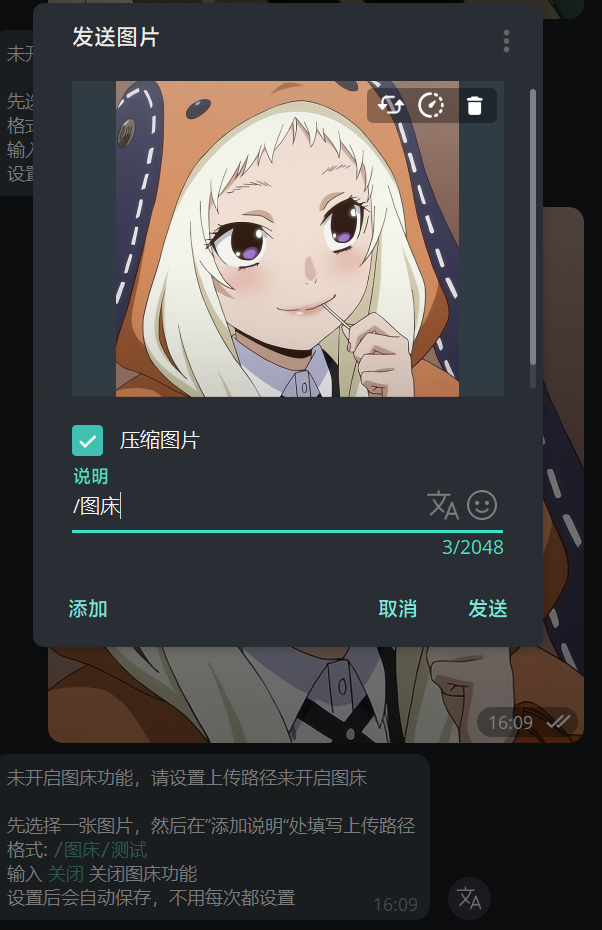
- [x] Alist图床
- [x] 随机推荐
### 功能预览&说明:
点击展开
搜索
配置备份
可以回复消息来添加备注,可以重复修改
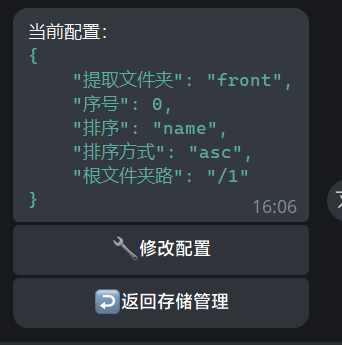
存储管理菜单
开关存储
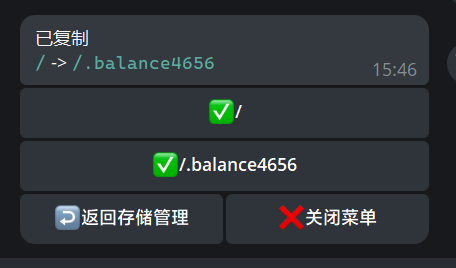
复制存储
自动复制存储为负载均衡,存储排序会自动加1
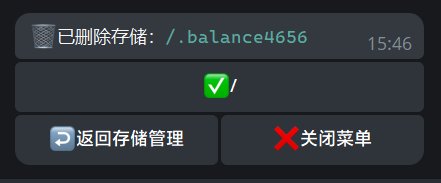
删除存储
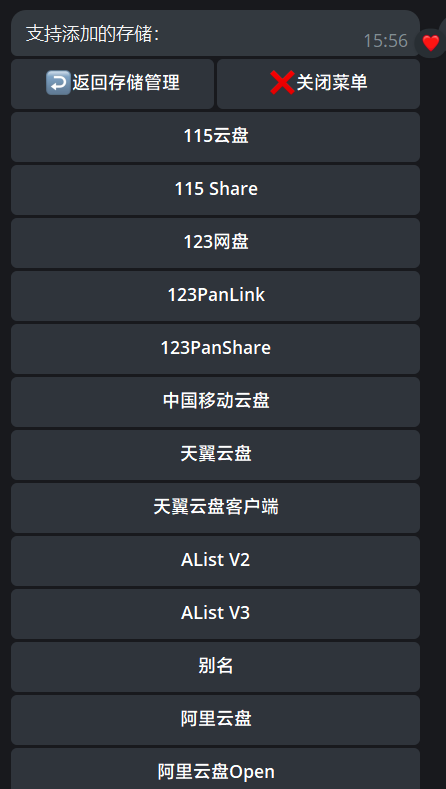
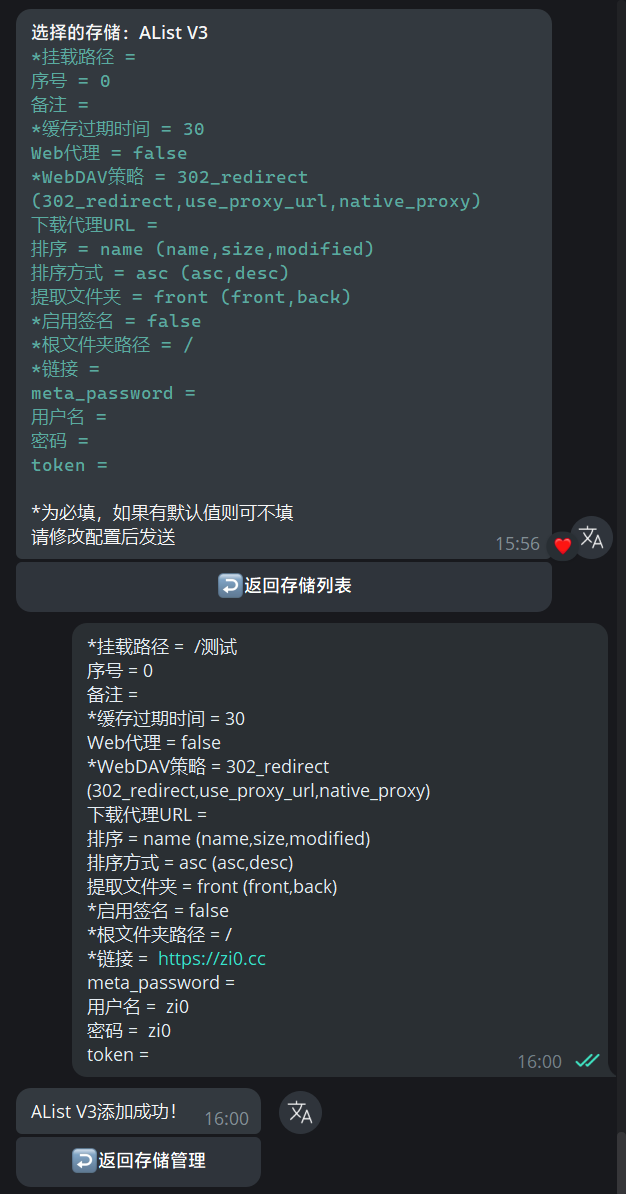
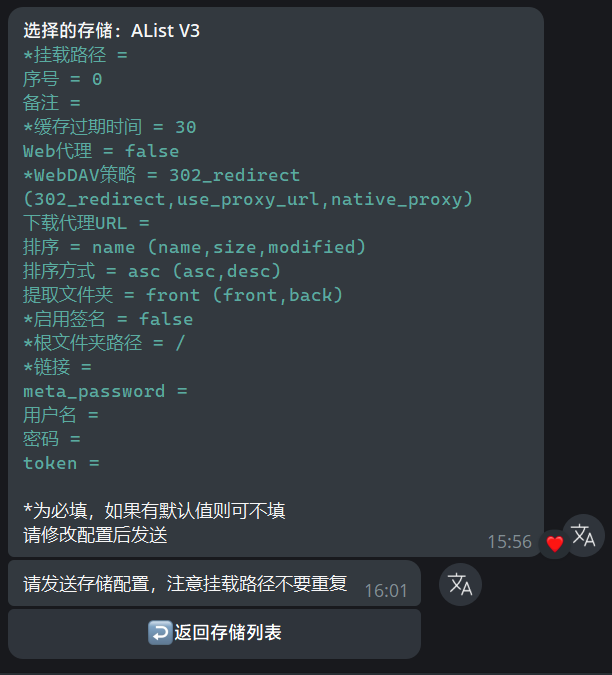
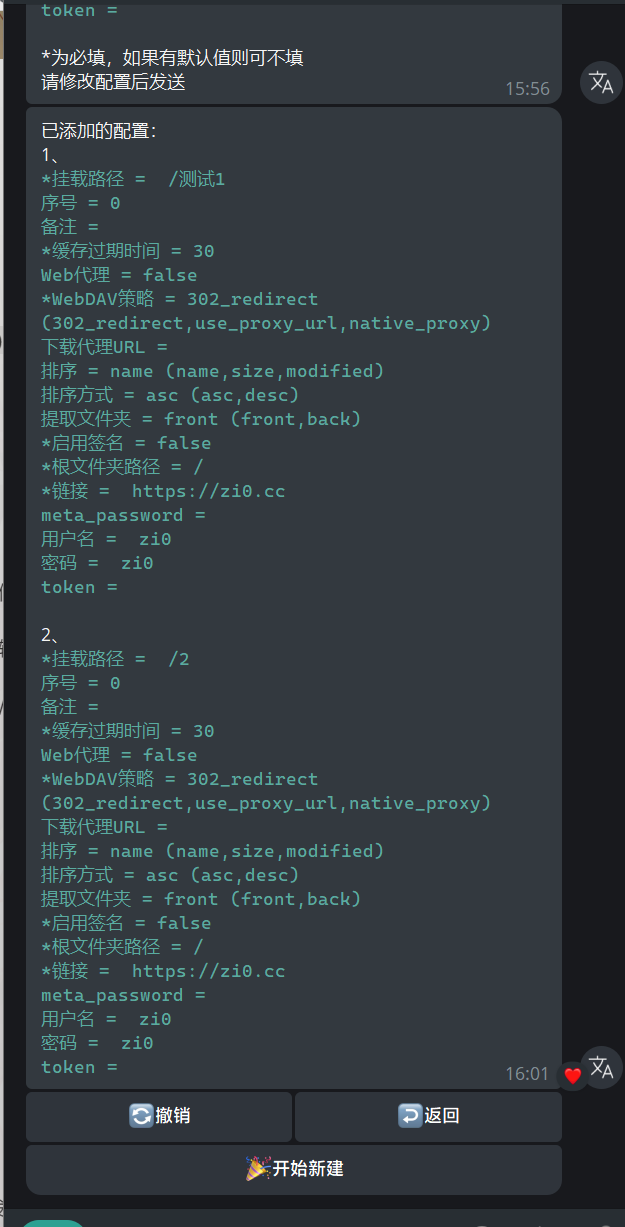
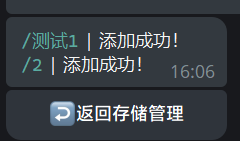
新建&批量新建&默认配置
- 新建&批量新建
支持添加所有 AList 支持的存储
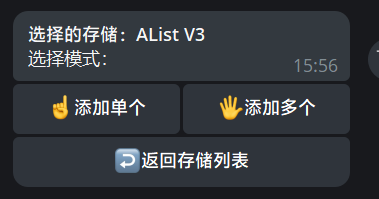
**添加单个**
**批量添加**
- 默认配置
可以设置默认配置,新建存储会优先使用默认配置。所有参数都可以设置默认值
比如设置了PikPak的`用户名`和`密码`,新建的时候就不需要输入了,只需要输入`挂载路径`和`分享ID`
图床

Cloudflare节点管理
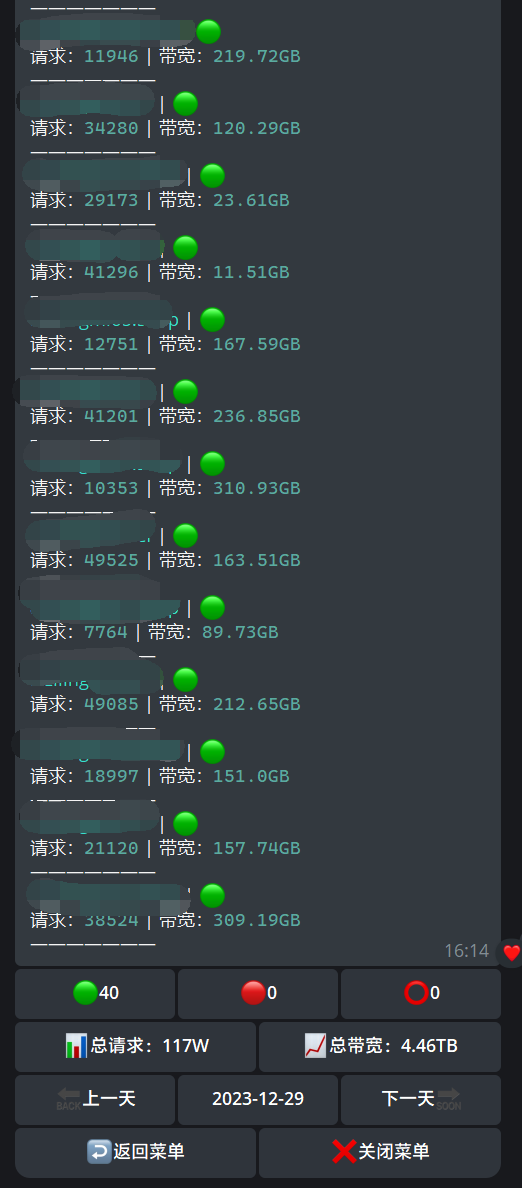
**节点状态监控**:每 60 秒检测一次节点状态,如果节点`掉线`或`故障`会发送通知
**每日流量统计**:每天定时发送当天使用的流量
**自动管理存储**:检测到节点掉线,会自动关闭存储,节点恢复后自动开启存储
**自动切换节点**:检测到节点掉线,会自动切换其他未使用的可用节点,每天早上8点自动恢复原来的节点
如果`自动管理存储`和`自动切换节点`同时启用,那么当节点失效时会优先切换节点,如果节点全部不可用,才会关闭存储
注:添加cf账号默认使用第一个域名的第一个Workers路由
**如果你cf账号里面有多个域名,域名下面有多个Workers路由,建议手动添加账号**
手动添加账号
打开`cloudflare_cfg.yaml`配置文件,将账号添加到`node`列表,格式如下:
``` yaml
node:
- account_id:
email:
global_api_key:
url:
zone_id:
- account_id:
email:
global_api_key:
url:
zone_id:
```
**account_id:`cf主页` --> `域名` --> `右下角` --> `帐户 ID`**
**zone_id: `cf主页` --> `域名` --> `右下角` --> `区域 ID`**
**email:cf账号的邮箱**
**global_api_key:`cf主页` --> `右上角头像` --> `我的个人资料` --> `API 令牌` --> `Global API Key`**
**url:填workers路由里面添加的,用来做代理的域名就行,只填域名,不要加https和后面的/*,例:a.ziling.cf**
随机推荐
该功能会随机发送一个资源,并支持自定义路径和关键词。
**支持的命令**
**/sr**
随机推荐设置菜单
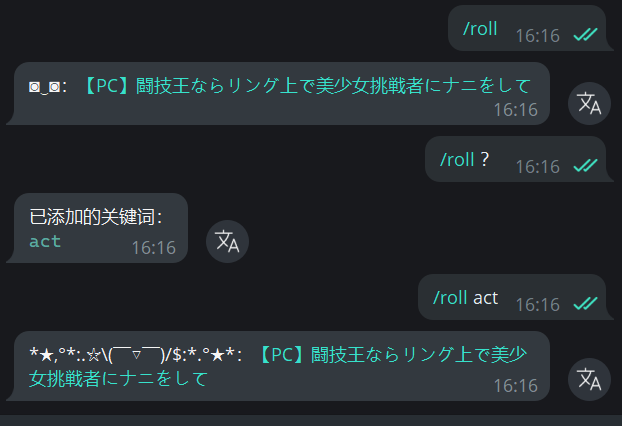
**/roll**
使用/roll命令,系统将从所有路径中随机选择一个资源并发送。
**/roll 关键词**
使用/roll命令后加上一个关键词,系统将从对应的路径中随机选择一个资源并发送。
您可以自定义路径和关键词,以便根据需求发送不同的资源。每个关键词可以对应多个路径,如下:
``` yaml
path:
关键词: 路径 # 路径前面需要加上斜杠
act: /,【ACT-动作游戏】
adv: /,【ADV-冒险游戏】
rpg: /,【RPG-角色扮演游戏】
slg: /,【SLG-策略游戏】
gd:
- /%60【归%20档】/【KRKR合集】/1
- /%60【归%20档】/【KRKR合集】/2
- /%60【归%20档】/【ONS合集】
```
---
## 安装
### 一、Docker 安装
**1.新建 bot 配置文件目录**
```shell
mkdir -p /root/alist-bot/config
```
**2.编写 `config.yaml` 放至你创建的路径下 `/root/alist-bot/config`**
```yaml
bot:
backup_time: '0'
search:
per_page: 5
z_url: false
user:
admin: 123456789 # 管理员用户id,可通过@get_id_bot获取id
alist_host: http://127.0.0.1:5244 # alist ip:port或alist域名,一般填域名即可
alist_web: "https://" # 你的alist域名
alist_token: "" # alist token
bot_token: "" # bot的api token,从 @BotFather 获取
api_id: "" # api_id、api_hash在 https://my.telegram.org/apps 获取
api_hash: ""
proxy:
scheme: # 支持“socks4”、“socks5”和“http”,不填则不使用代理,例:http
hostname: #例:127.0.0.1
port: #例:7890
```
**3.拉取镜像运行即可**
```shell
docker run -d \
--name alist-bot \
--restart=always \
-v /root/alist-bot/config/config.yaml:/usr/src/app/config/config.yaml \ # 将配置文件路径改成你上面设置的
ghcr.io/z-mio/Alist-bot:latest
```
### 二、正常安装
**1.安装 python3-pip**
```
apt install python3-pip
```
**2.将项目克隆到本地**
```
git clone https://github.com/z-mio/Alist-bot.git && cd Alist-bot && pip3 install -r requirements.txt
```
**3.修改 config.yaml 里的配置信息**
``` yaml
bot:
backup_time: '0'
search:
per_page: 5
z_url: false
user:
admin: 123456789 # 管理员用户id,可通过@get_id_bot获取id
alist_host: http://127.0.0.1:5244 # alist ip:port或alist域名,一般填域名即可
alist_web: "https://" # 你的alist域名
alist_token: "" # alist token
bot_token: "" # bot的api token,从 @BotFather 获取
api_id: "" # api_id、api_hash在 https://my.telegram.org/apps 获取
api_hash: ""
proxy:
scheme: # 支持“socks4”、“socks5”和“http”,不填则不使用代理,例:http
hostname: #例:127.0.0.1
port: #例:7890
```
**4.启动bot**
**前台启动bot**
```
python3 bot.py
```
**设置开机自启**
以下是一整条命令,一起复制到SSH客户端运行
```
cat > /etc/systemd/system/alist-bot.service < /dev/null 2>&1 &
Restart=always
[Install]
WantedBy=multi-user.target
EOF
```
然后,执行 `systemctl daemon-reload` 重载配置,现在你可以使用这些命令来管理程序:
启动:`systemctl start alist-bot`
停止:`systemctl stop alist-bot`
开启开机自启:`systemctl enable alist-bot`
关闭开机自启:`systemctl disable alist-bot`
重启:`systemctl restart alist-bot`
状态:`systemctl status alist-bot`
## 开始使用
私聊或群组里发送指令
第一次使用可以发送`/menu`自动设置Bot菜单
**指令列表:**
```
/start 开始
/s + 文件名 进行搜索
/roll 随机推荐
/vb 查看下载节点信息
管理员命令:
/sl - 设置搜索结果数量
/zl - 开启/关闭直链
/st - 存储管理
/sf - Cloudflare节点管理
/cf - 查看当前配置
/bc - 备份Alist配置
/sbt - 设置定时备份
/sr - 随机推荐设置
/help - 查看帮助
```