# PlotNeuralNet
**Repository Path**: x_c9311/PlotNeuralNet
## Basic Information
- **Project Name**: PlotNeuralNet
- **Description**: 结构可视化工具PlotNeuralNet
- **Primary Language**: Unknown
- **License**: MIT
- **Default Branch**: master
- **Homepage**: None
- **GVP Project**: No
## Statistics
- **Stars**: 0
- **Forks**: 3
- **Created**: 2023-02-27
- **Last Updated**: 2023-02-27
## Categories & Tags
**Categories**: Uncategorized
**Tags**: None
## README
# PlotNeuralNet
[](https://doi.org/10.5281/zenodo.2526396)
Latex code for drawing neural networks for reports and presentation. Have a look into examples to see how they are made. Additionally, lets consolidate any improvements that you make and fix any bugs to help more people with this code.
## Examples
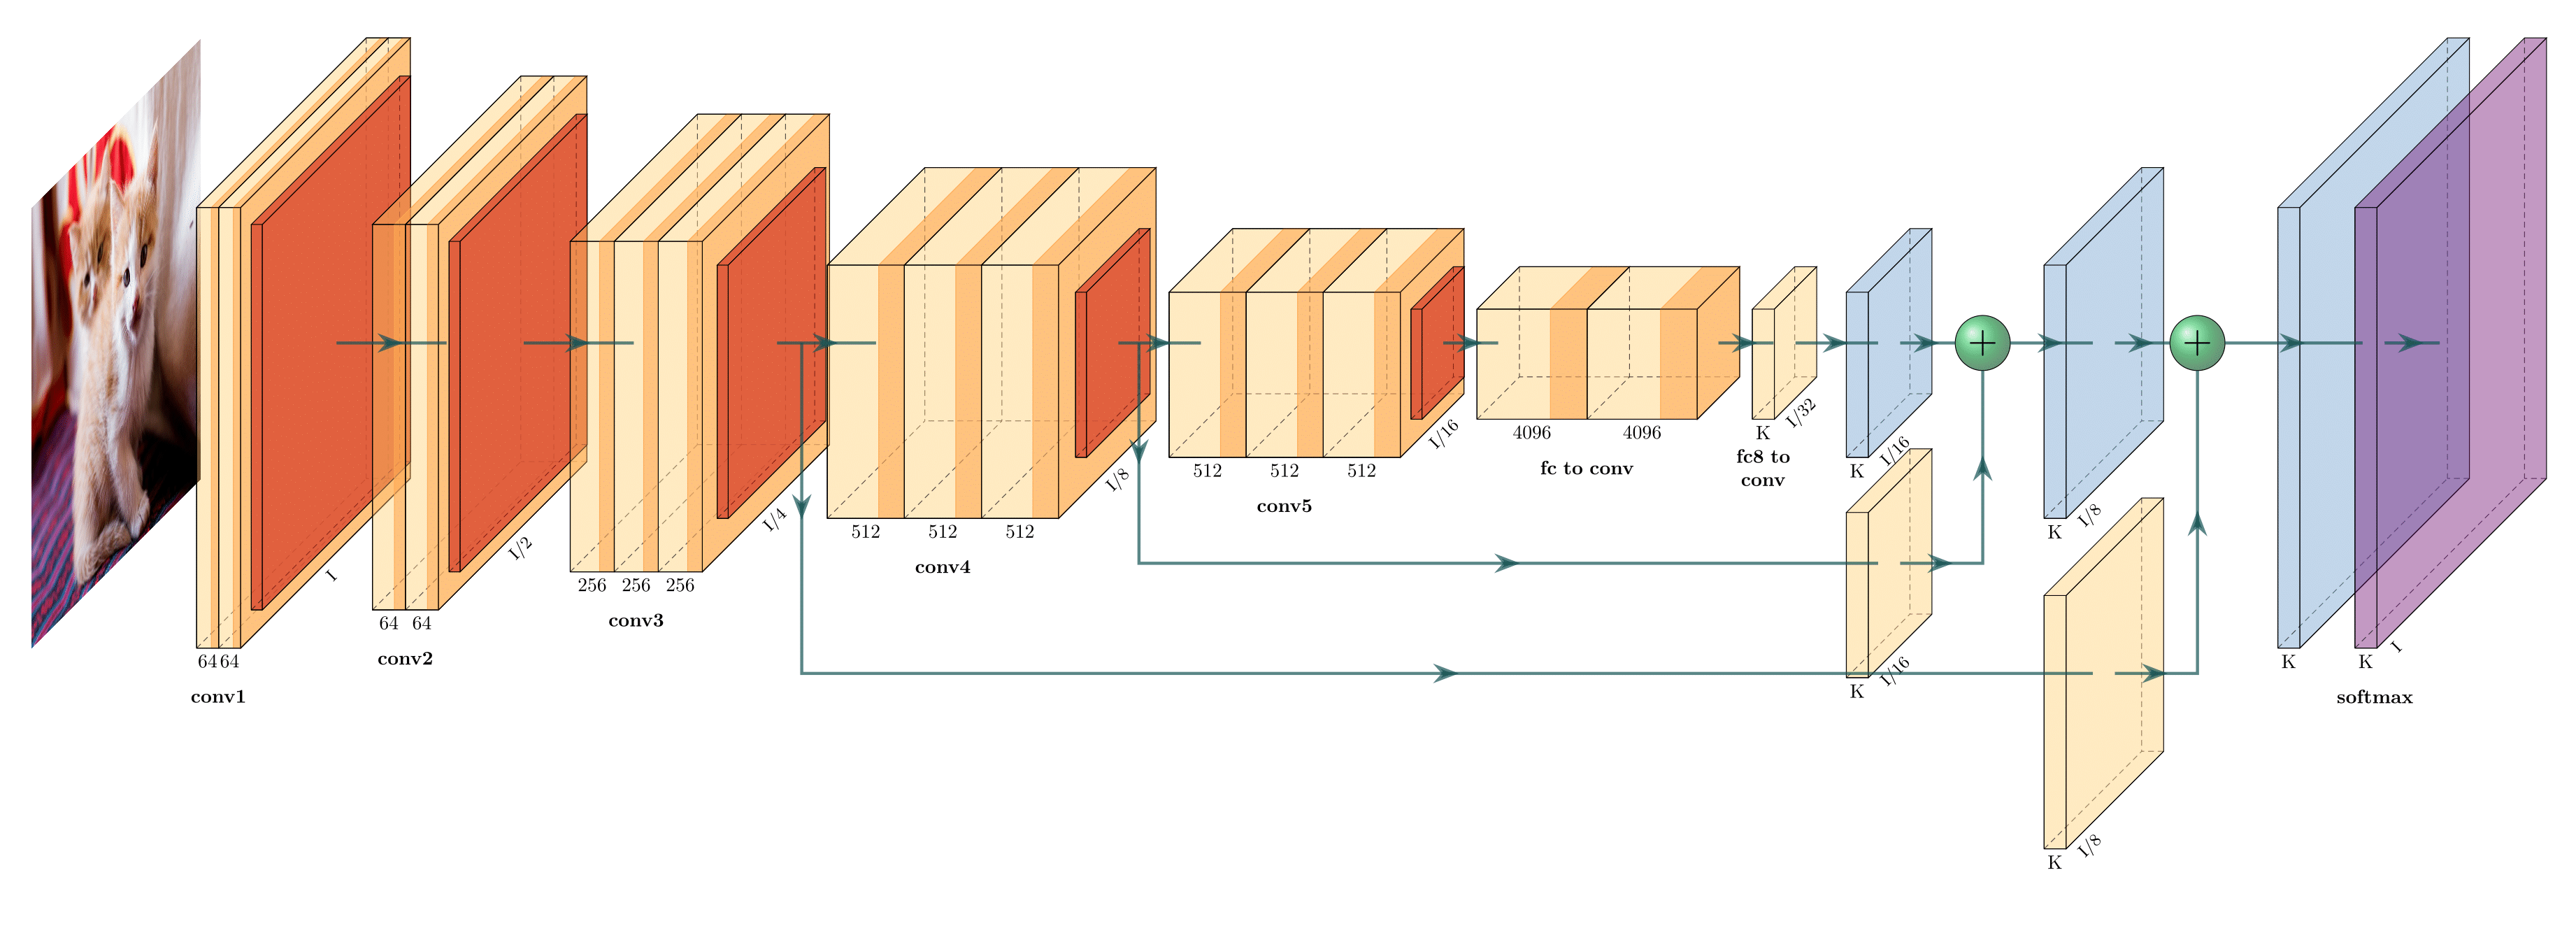
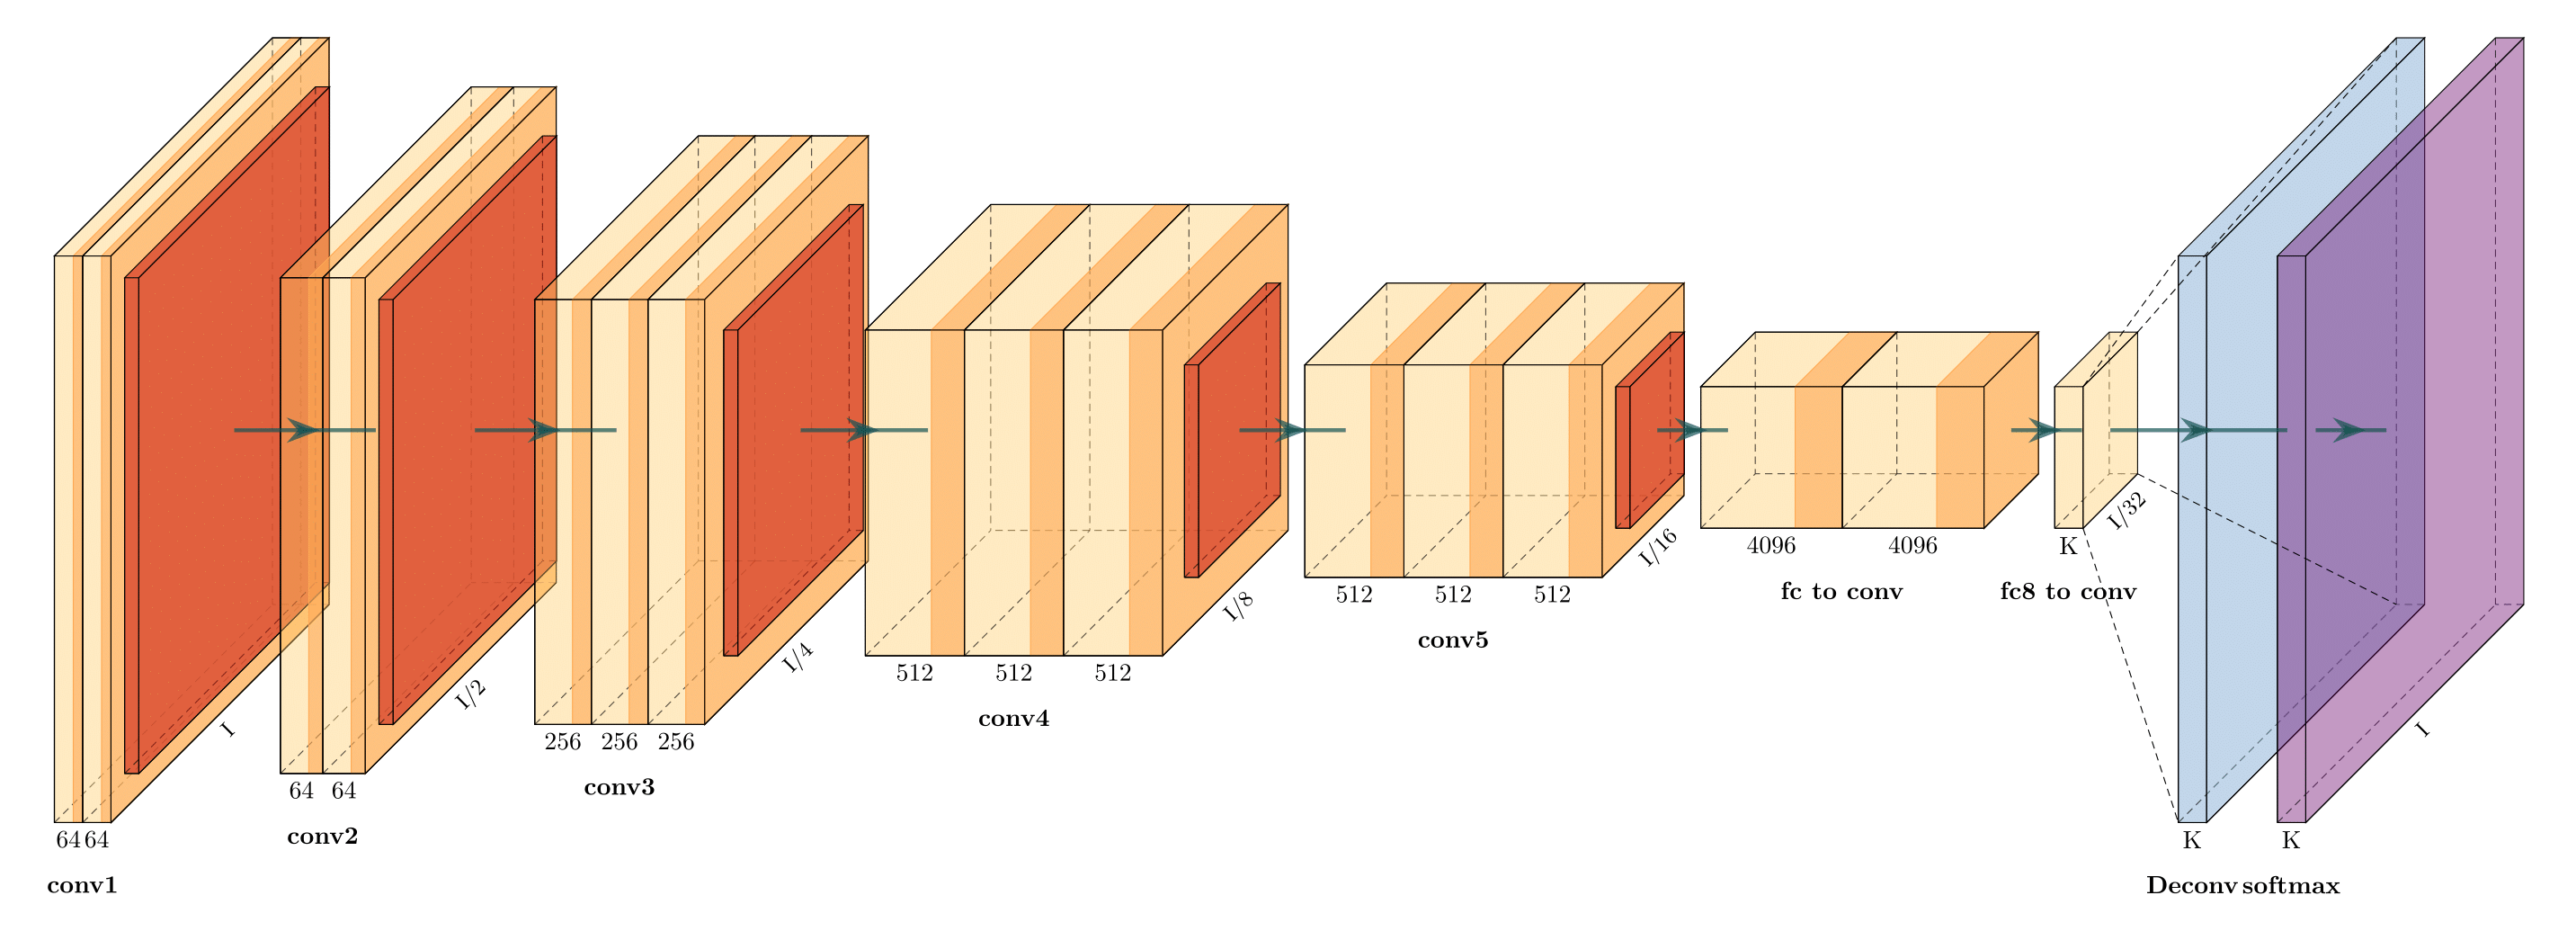
Following are some network representations:


Holistically-Nested Edge Detection (view on Overleaf)
## Getting Started
1. Install the following packages on Ubuntu.
* Ubuntu 16.04
```
sudo apt-get install texlive-latex-extra
```
* Ubuntu 18.04.2
Base on this [website](https://gist.github.com/rain1024/98dd5e2c6c8c28f9ea9d), please install the following packages.
```
sudo apt-get install texlive-latex-base
sudo apt-get install texlive-fonts-recommended
sudo apt-get install texlive-fonts-extra
sudo apt-get install texlive-latex-extra
```
* Windows
1. Download and install [MikTeX](https://miktex.org/download).
2. Download and install bash runner on Windows, recommends [Git bash](https://git-scm.com/download/win) or Cygwin(https://www.cygwin.com/)
2. Execute the example as followed.
```
cd pyexamples/
bash ../tikzmake.sh test_simple
```
## TODO
- [X] Python interface
- [ ] Add easy legend functionality
- [ ] Add more layer shapes like TruncatedPyramid, 2DSheet etc
- [ ] Add examples for RNN and likes.
## Latex usage
See [`examples`](examples) directory for usage.
## Python usage
First, create a new directory and a new Python file:
$ mkdir my_project
$ cd my_project
vim my_arch.py
Add the following code to your new file:
```python
import sys
sys.path.append('../')
from pycore.tikzeng import *
# defined your arch
arch = [
to_head( '..' ),
to_cor(),
to_begin(),
to_Conv("conv1", 512, 64, offset="(0,0,0)", to="(0,0,0)", height=64, depth=64, width=2 ),
to_Pool("pool1", offset="(0,0,0)", to="(conv1-east)"),
to_Conv("conv2", 128, 64, offset="(1,0,0)", to="(pool1-east)", height=32, depth=32, width=2 ),
to_connection( "pool1", "conv2"),
to_Pool("pool2", offset="(0,0,0)", to="(conv2-east)", height=28, depth=28, width=1),
to_SoftMax("soft1", 10 ,"(3,0,0)", "(pool1-east)", caption="SOFT" ),
to_connection("pool2", "soft1"),
to_end()
]
def main():
namefile = str(sys.argv[0]).split('.')[0]
to_generate(arch, namefile + '.tex' )
if __name__ == '__main__':
main()
```
Now, run the program as follows:
bash ../tikzmake.sh my_arch


