# Milink
**Repository Path**: super_li_yu/milink
## Basic Information
- **Project Name**: Milink
- **Description**: milink银行后端管理系统:基于vue2/Element-ui/echarts/node.js(express)/mysql搭建/echarts
- **Primary Language**: Unknown
- **License**: MulanPSL-2.0
- **Default Branch**: master
- **Homepage**: None
- **GVP Project**: No
## Statistics
- **Stars**: 6
- **Forks**: 0
- **Created**: 2022-08-12
- **Last Updated**: 2024-10-19
## Categories & Tags
**Categories**: Uncategorized
**Tags**: None
## README
# milinks后台资金管理系统
## 启动
```bash
npm run dev
```
## 使用技术
- express.js:搭建服务器
- node.js:整个项目的基础
- mysql2:实现数据库连接
- passport:生成token
- passport-jwt:验证token
- jsonwebtoken:生成token
- crypto.js:密码的加密和解密
- concurrently:实现前后端连载
- element-UI:前台搭建页面的UI框架
- Vue:前台框架
- axios:数据请求第三方包
- jwt-decode:解析后台传过来的token
- echar:数据可视化
## 项目展示
1. 登陆

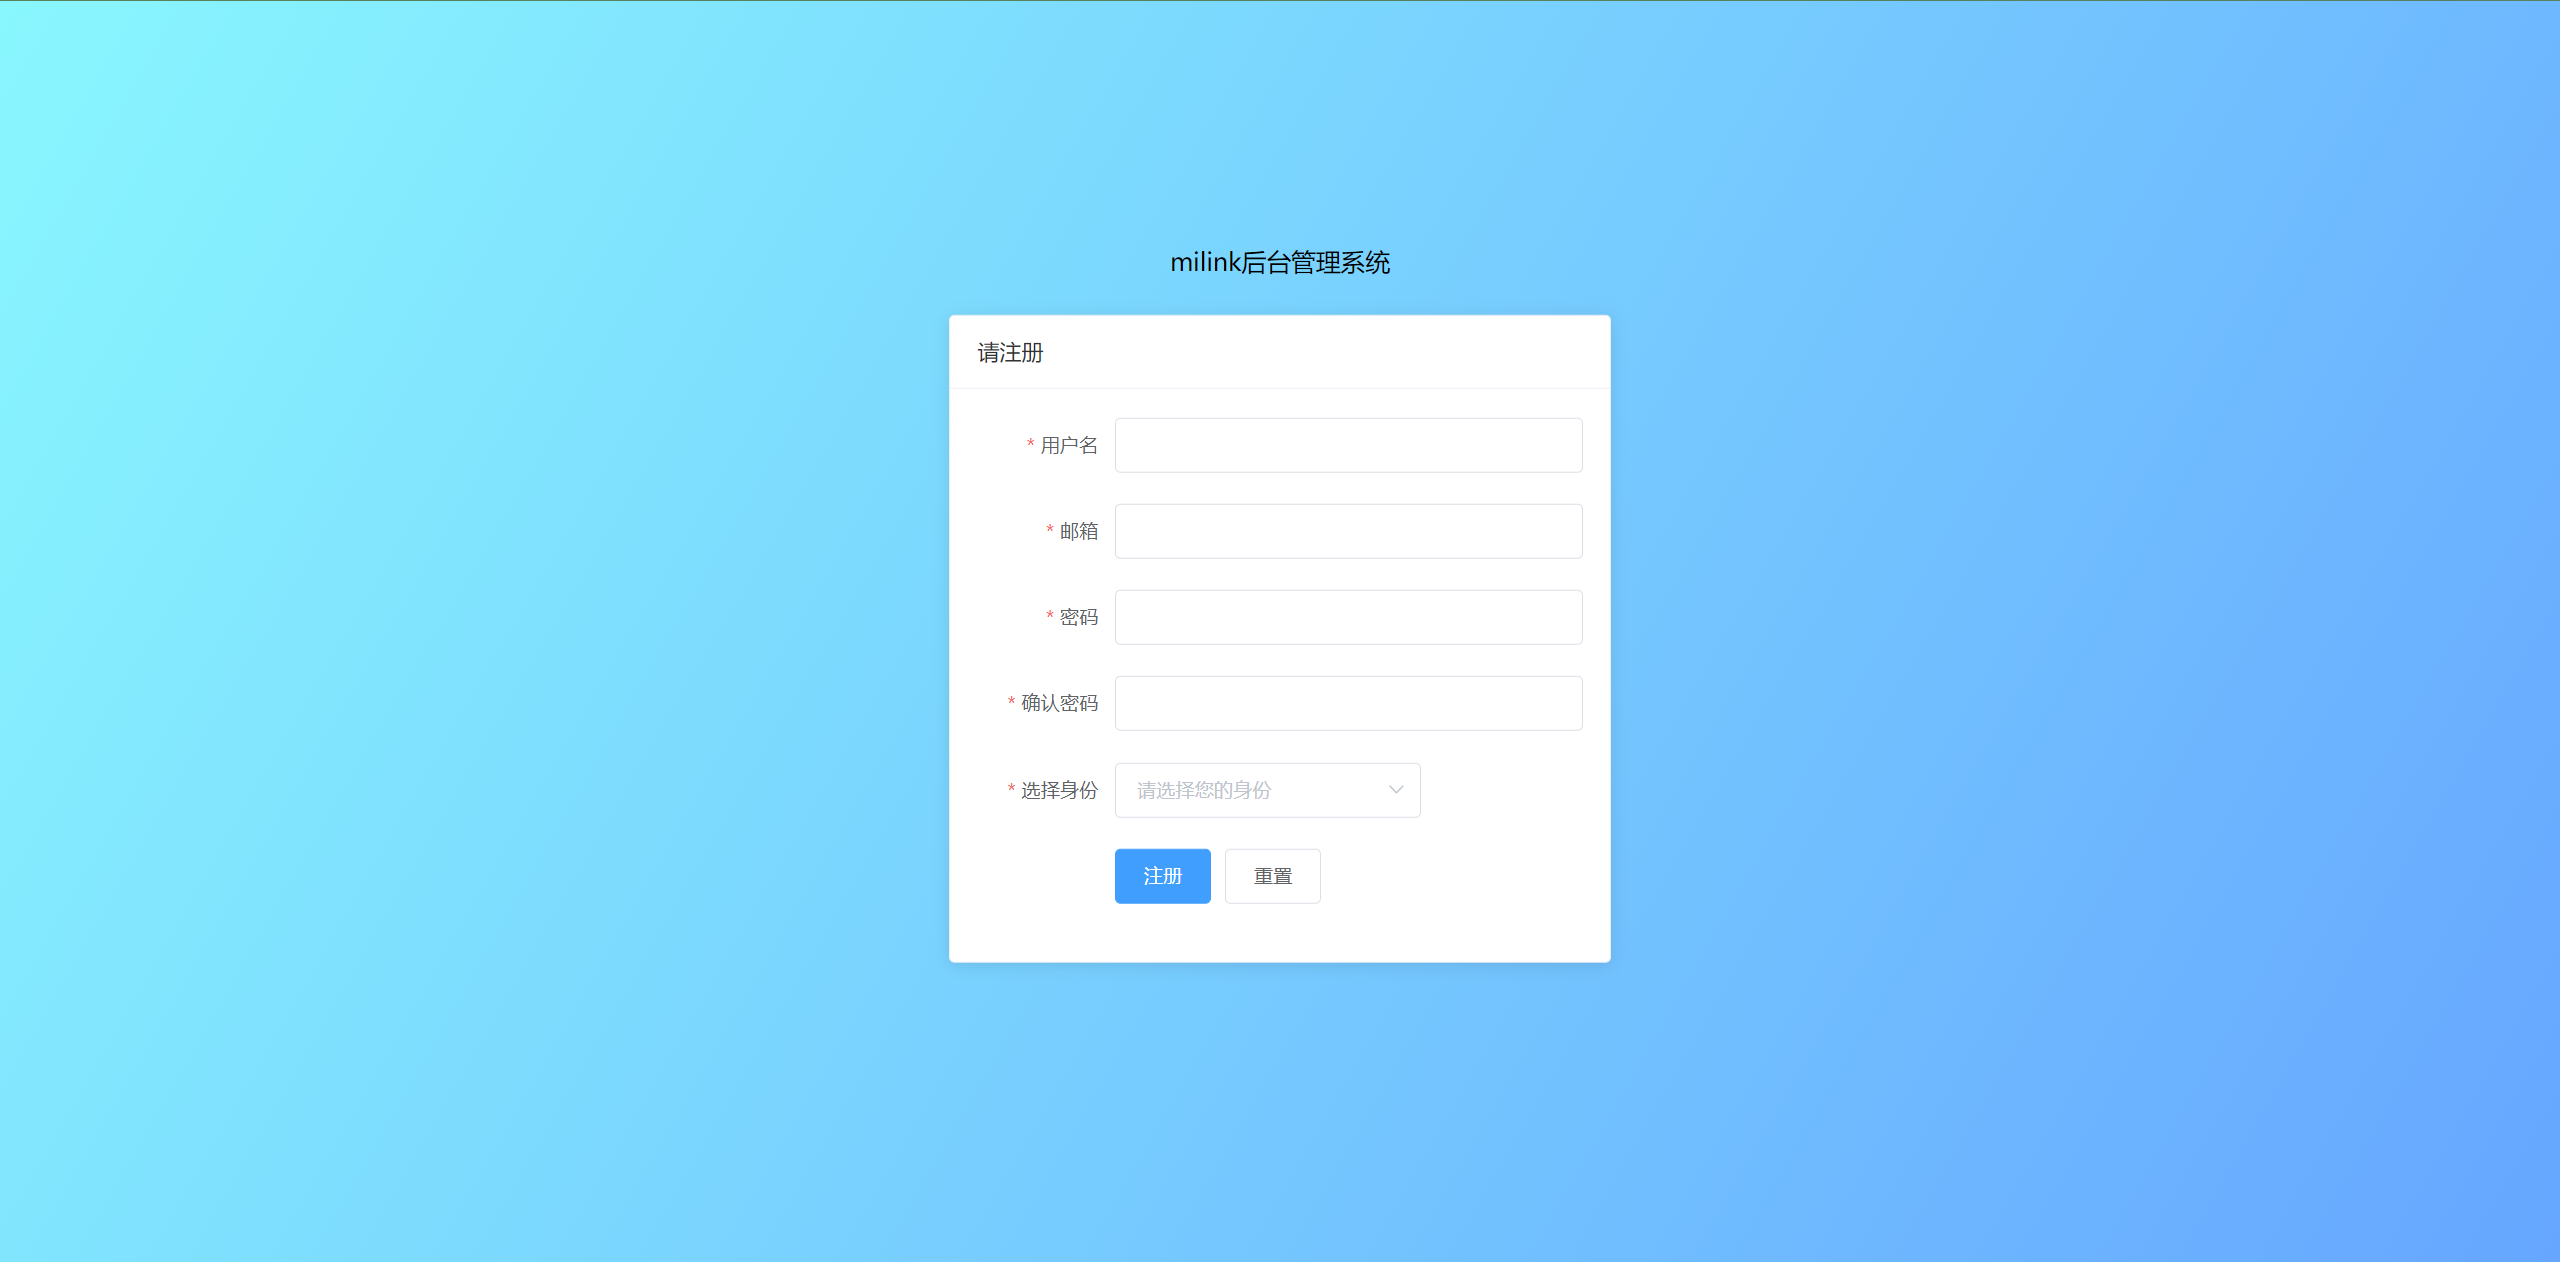
2. 注册
3. 后台首页数据面板

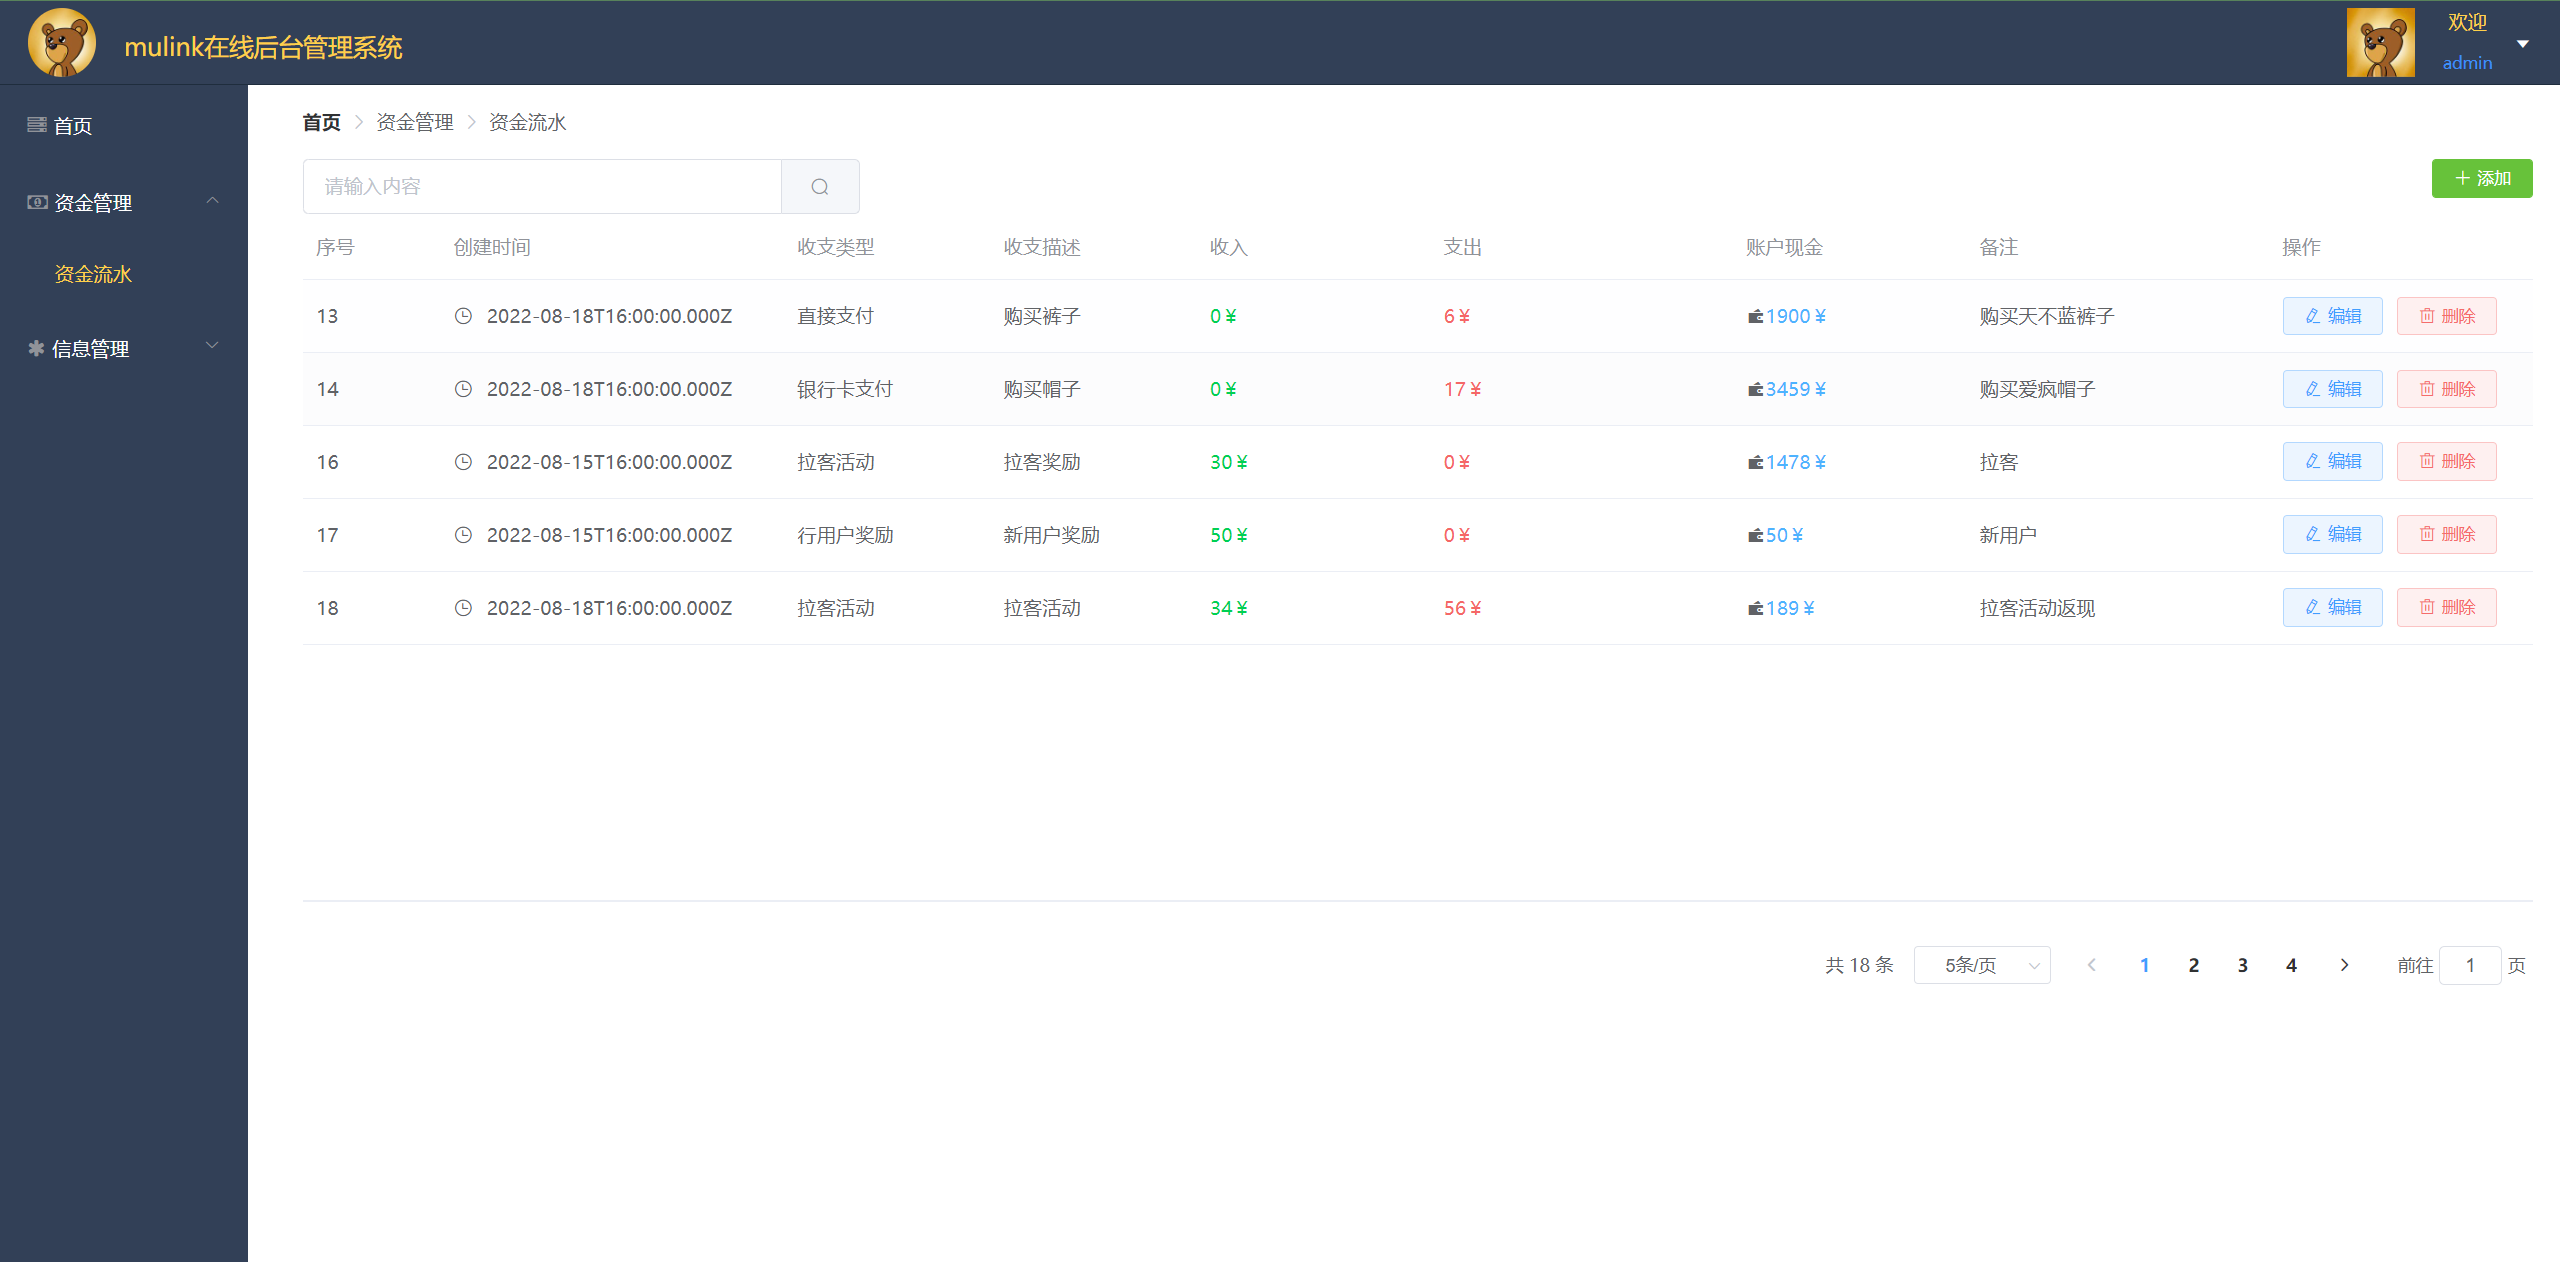
4. 资金详情
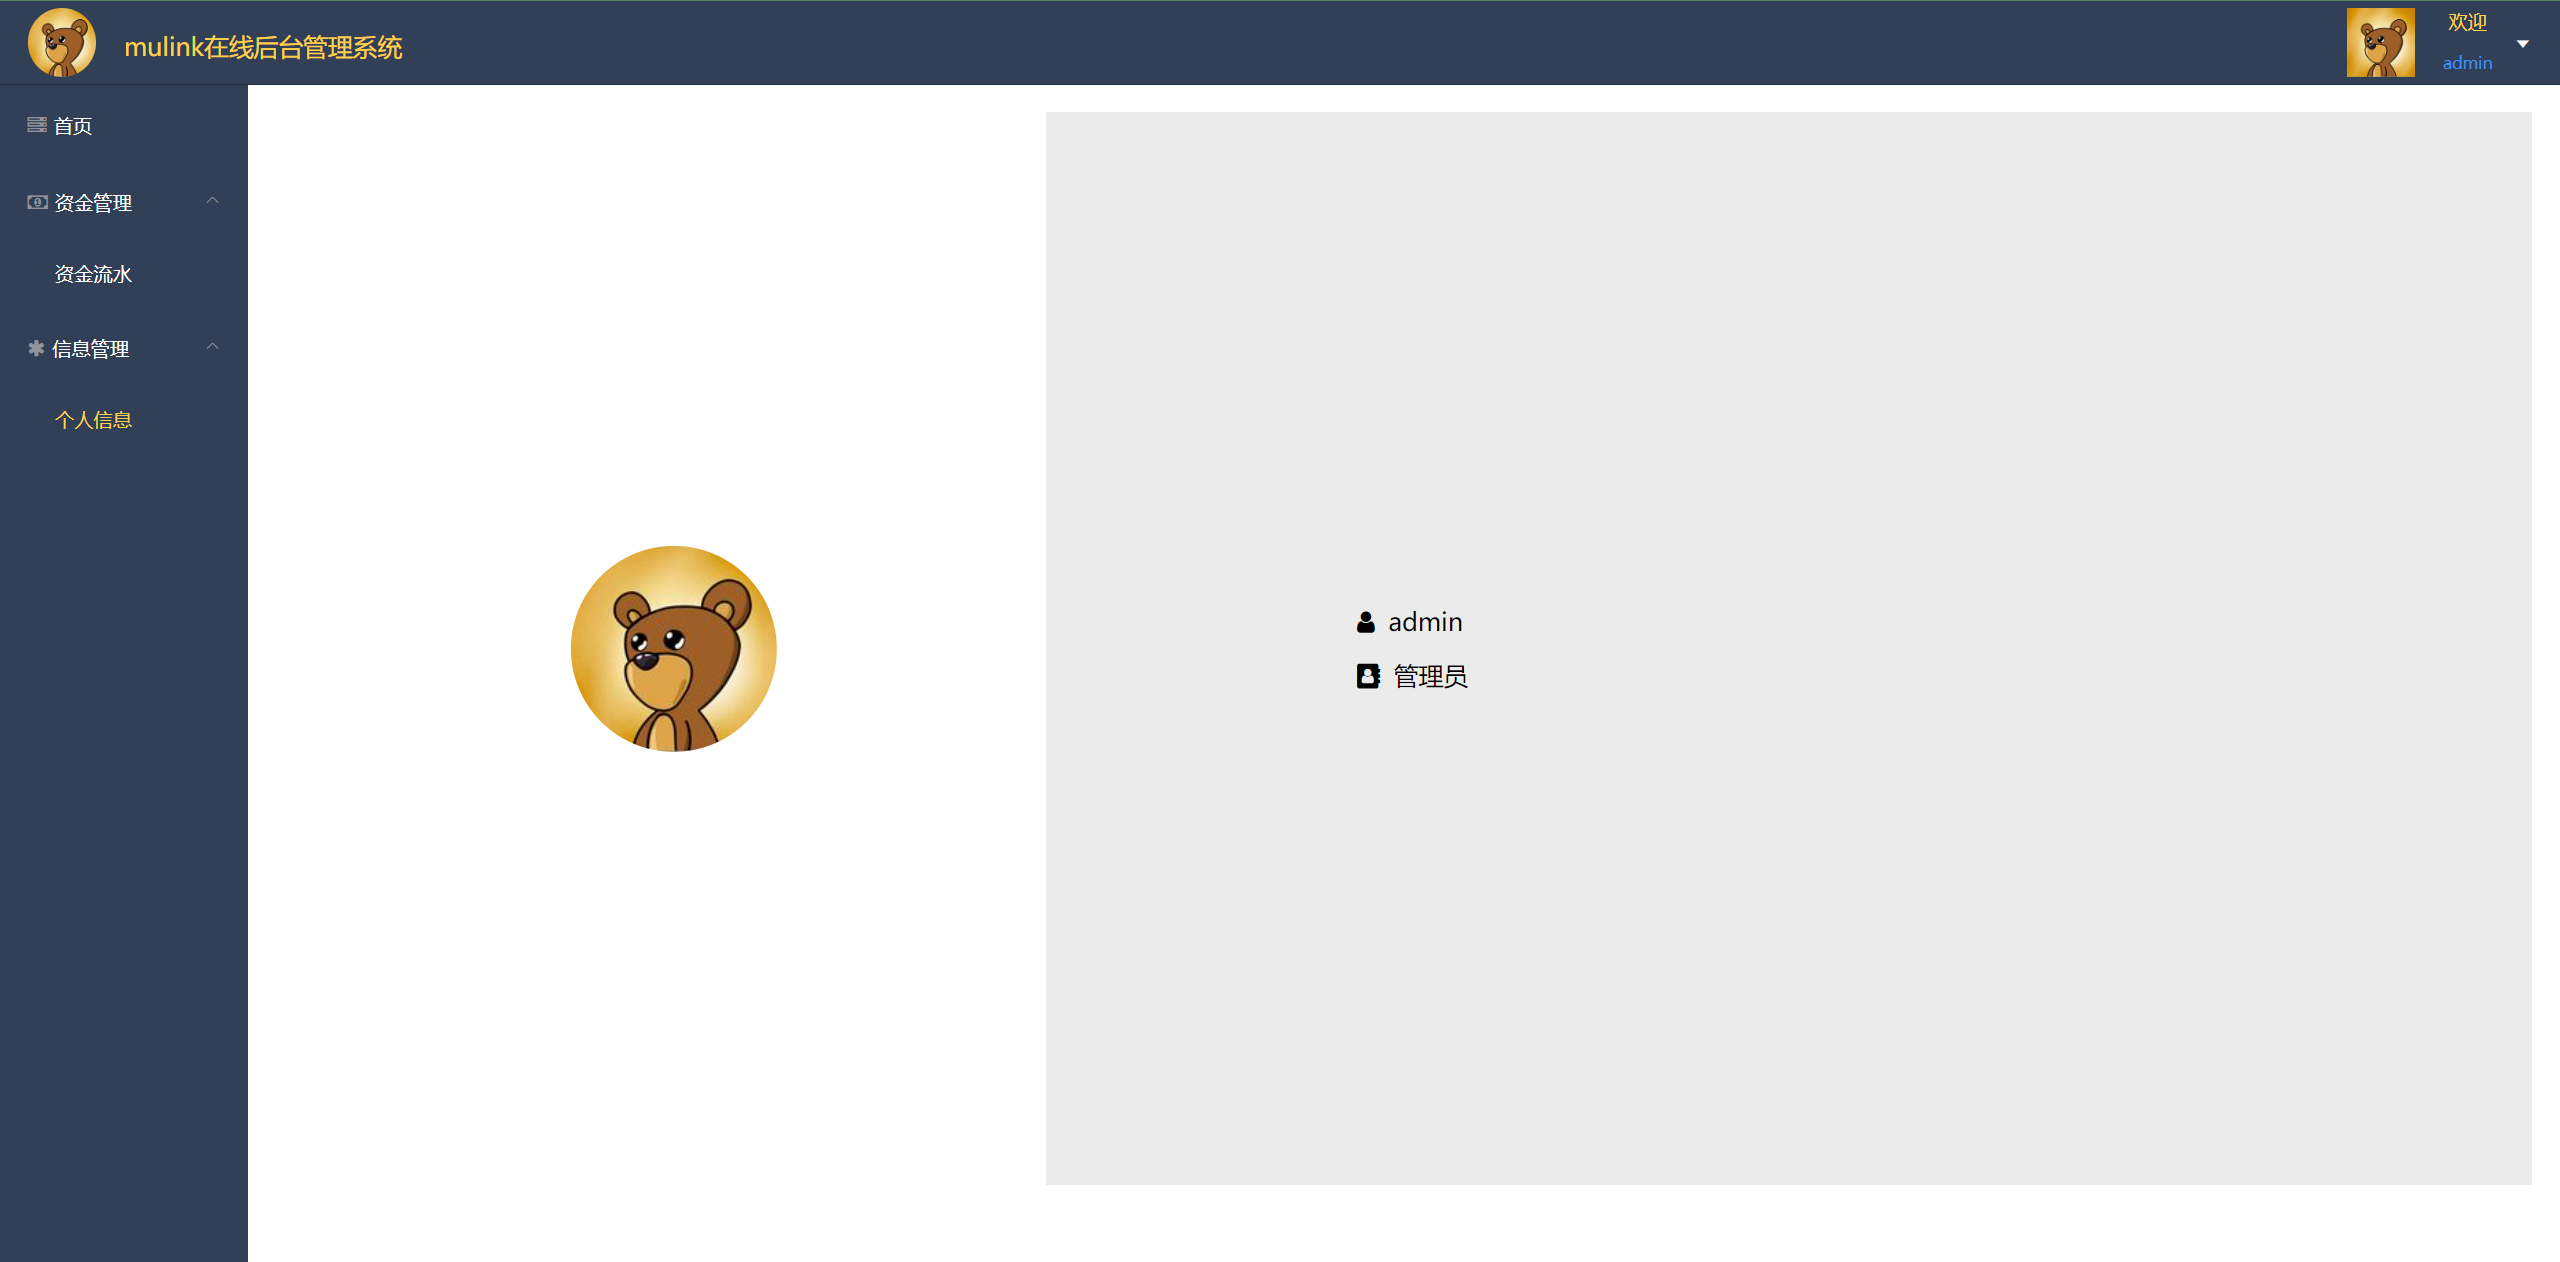
5. 个人主页
## 项目日志
### 2022/8/12
搭建node.js服务器,引入express.js,配置package.json
#### 1.安装express.js,搭建服务器
```bash
npm i express
```
搭建项目入口文件
```js
const express = require('express')
const app = express()
app.listen(5100, () => {
console.log('express is running at http://127.0.0.1:5100');
})
```
#### 2. 配置package.json,根据不同的开发环境配置对应的启动命令
```js
"scripts": {
"start": "node index.js",
"serve": "nodemon index.js",
"test": "echo \"Error: no test specified\" && exit 1"
},
```
```bash
npm run serve
npm run start
```
#### 3.安装body-parser
```
npm i body-parser
```
使用body-parser获取前端传送过来的数据 首先第一步引入
```js
const bodyParser = require('body-parser');
//对body-parser进行配置
app.use( bodyParser.urlencoded({extended: true}) )
//设置完毕之后,会在req对象上面新增一个req.body的一个对象
```
再来说说node后台对这两种请求格式的处理:
首先是最新express版本4.7.2:
4.7.2版本的express没有了bodyParser方法,需要另外安装body-parser模板:于是另外安装了body-parser模板1.5.2版本
使用代码如下:
```js
var express = require('express');
var bodyParser = require('body-parser');
var app = express();
// parse application/x-www-form-urlencoded
app.use(bodyParser.urlencoded({ extended: false }));
// parse application/json
app.use(bodyParser.json());
```
使用bodyParser.urlencoded(),使node后台支持了第一种请求体.
使用bodyParser.json(),使node后台支持了第二种请求体.
后定义的不会覆盖先定义的… 也就是说,这段代码同时支持了这两种请求体. 另外,虽然请求体的格式不同,但是经过node解析后,他们最终得到的都是json格式的对象.
> express4.18.1版本不需要使用这样的方法获取post请求的数据了。 req.body
#### 4.密码加密 bcrypt
1. 安装
```bash
npm i bcrypt
```
相关参数
```js
const bcrypt = require('bcrypt');
const saltRounds = 10;
const myPlaintextPassword = 's0/\/\P4$$w0rD';
const someOtherPlaintextPassword = 'not_bacon';
```
使用
```js
const bcrypt = require('bcrypt');
bcrypt.genSalt(saltRounds, function(err, salt) {
bcrypt.hash(myPlaintextPassword, salt, function(err, hash) {
// Store hash in your password DB.
});
});
```
> 这块不适用于mysql,如果是mysql加密可以使用crypto
#### 5.头像上传gravatar
1. 安装
```bash
npm i gravatar
```
2. 再哪里使用
```js
var gravatar = require('gravatar');
gravatar.url(email);
gravatar.url(email, options);
gravatar.url(email, options, protocol);
gravatar.profile_url(email);
gravatar.profile_url(email, options);
gravatar.profile_url(email, options, protocol);
```
4. 例子
```js
var gravatar = require('gravatar');
var url = gravatar.url('emerleite@gmail.com', {s: '200', r: 'pg', d: 'mm'});
//returns //www.gravatar.com/avatar/93e9084aa289b7f1f5e4ab6716a56c3b?s=200&r=pg&d=404
var unsecureUrl = gravatar.url('emerleite@gmail.com', {s: '100', r: 'x', d: 'retro'}, false);
//returns http://www.gravatar.com/avatar/93e9084aa289b7f1f5e4ab6716a56c3b?s=100&r=x&d=retro
var secureUrl = gravatar.url('emerleite@gmail.com', {s: '100', r: 'x', d: 'retro'}, true);
//returns https://s.gravatar.com/avatar/93e9084aa289b7f1f5e4ab6716a56c3b?s=100&r=x&d=retro
var httpUrl = gravatar.url('emerleite@gmail.com', {protocol: 'http', s: '100'});
//returns http://www.gravatar.com/avatar/93e9084aa289b7f1f5e4ab6716a56c3b?s=100
var httpsUrl = gravatar.url('emerleite@gmail.com', {protocol: 'https', s: '100'});
//returns https://s.gravatar.com/avatar/93e9084aa289b7f1f5e4ab6716a56c3b?s=100
var profile1 = gravatar.profile_url('emerleite@gmail.com', {protocol: 'https'});
//returns https://secure.gravatar.com/93e9084aa289b7f1f5e4ab6716a56c3b.json
var profile2 = gravatar.profile_url('emerleite@gmail.com', {protocol: 'http', format:'qr'});
//returns http://www.gravatar.com/93e9084aa289b7f1f5e4ab6716a56c3b.qr
```
5. 如何再项目中使用
```js
const gravatar = require('gravatar');
var avatars = gravatar.url(req.body.email, { s: '200', r: 'pg', d: 'mm' });
```
> 这样的话它会生成一个网址,只要你的邮箱在www.gravatar.com里注册过的化就会有一个头像
#### 6. 生成Token jwt passport
[**jsonwebtoken**](https://www.npmjs.com/package/jsonwebtoken)
1. 安装
```bash
npm i jsonwebtoken
```
2. 引入
```js
const jwt = require('jsonwebtoken')s
```
3. 定义规则
```js
const rule = { id: result[0].id, name: result[0].name }
```
> 由于id,和name都是通过数据库获取过来的,所以用的这种方式
4. 设置jwt.sign方法/生成token
```js
jwt.sign("规则", "加密名字", "过期时间", "箭头函数")
```
```js
jwt.sign(rule, key.secretOrkey, { expiresIn: 3600 }, (err, token) => {
if (err) return err.message
return res.send({
code: 1,
msg: `Bearer ${token}`
})
})
```
> 这里的rule就是上面所说的校验规则,key.secretOrkey就是加密名字,只不过封装到了外部,expiresIn:3600,就说明是3600秒,msg返回的就是生成的Token
5. 验证token
```js
// $router get api/user/current
// @desc return current user
// @access private
router.get("/current", "验证Token", (req, res) => {
res.send({
code: 1,
msg: '验证成功'
})
})
```
> 我们需要在"验证Token"那里对Token进行验证
#### 7. 使用passpport-jwt||passport验证Token
[passport](https://www.npmjs.com/package/passport)
[passport-jwt](https://www.npmjs.com/package/passport-jwt)
1. 安装
```js
npm install passport-jwt
npm i passport
```
2. 使用
**passport**
```
passport.use(new LocalStrategy(
function(username, password, done) {
User.findOne({ username: username }, function (err, user) {
if (err) { return done(err); }
if (!user) { return done(null, false); }
if (!user.verifyPassword(password)) { return done(null, false); }
return done(null, user);
});
}
));
```
> 这个方法中的User.findOne方法可以删除,写上自己的业务逻辑,我用的是mysql,所以没有用User.findeOne方法
**初始化passport**
```
app.use(passport.initialize());
```
**passport-jwt**
```js
new JwtStrategy(options, verify)
```
3. 实际使用
index.js(项目入口文件)
```js
const passport = require("passport")
//在入口文件中配置和引用
//初始化passport
app.use(passport.initialize());
require("./config/passport")(passport)
```
> 这里单独抽离了passport配置文件,同时将上面引入的passprot进行引入
config/passport.js
```js
const db = require("../db/index")
const JwtStrategy = require('passport-jwt').Strategy
const ExtractJwt = require('passport-jwt').ExtractJwt
const key = require("../config/key")
const opts = {}
opts.jwtFromRequest = ExtractJwt.fromAuthHeaderAsBearerToken();
opts.secretOrKey = key.secretOrkey;
module.exports = passport => {
passport.use(new JwtStrategy(opts, (jwt_payload, done) => {
// { id: 1, name: 'wz', iat: 1660299838, exp: 1660303438 }
console.log(jwt_payload);
sqlcc = `SELECT * FROM user WHERE id=${jwt_payload.id};`
db.query(sqlcc, (err, result) => {
console.log(result[0]);
if (err) {
return done(null, err.message)
}
if (result.length != 0) {
return done(null, result[0])
} else {
return done(null, false)
}
})
}));
}
```
> 注意,生成的token应该带有统一的格式。一个正确的token应该是这样的`Bearer ${token}`,注意Bearer和生成的Token之间的空格。
接下来在需要校验的地方验证Token
```
// $router get api/user/current
// @desc return current user
// @access private
router.get("/current", passport.authenticate("jwt", { session: false }), (req, res) => {
res.send({
code: 1,
msg: req.user
})
})
```
> 注意,在需要使用的路由中,添加第二个参数`passport.authenticate("jwt", { session: false })`
> 验证token如果通过,就会执行`passport.use`里的方法,同时jwt_jpayload会输出结果,得到结果后,我们在用id在User表中查询数据,然后通过req.user(数据库表名)拿到。
>
> // { id: 1, name: 'wz', iat: 1660299838, exp: 1660303438 }
> console.log(jwt_payload);
#### 8. express-jwt || jsonwebtoken生成Token验证Token
1. 安装
```bash
npm install jsonwebtoken express-jwt
```
> ### 注意
>
> jsonwebtoken用于生成JWT字符串
>
> express-jwt用于将Jwt字符串解析为JSON对象
2. 新建文件夹config/key.js
```js
module.exports = {
keyOringe: "secret"
}
```
> 将设置的key值暴露出去
3. 在需要的地方引入
```js
const jwt = require("jsonwebtoken")
```
```diff
if (password == tools.setPassword(results[0].password)) {
//如果成功,传1,页面跳转交给vue
+ const rule = {
+ id: results[0].id,
+ adminname: results[0].adminname
+ }
+ const tokenstr = jwt.sign(rule, key.keyOringe, { expiresIn: 3600 })
+ res.send({
code: 1,
msg: '登陆成功',
+ token: tokenstr
})
}
```
> 1. 调用 jwt.sign() 方法生成JWT字符串 并通过 token 属性发送给客户端
> 2. 参数1: 用户的信息对象
> 3. 参数2: 加密的密钥
> 4. 参数3: 配置对象 可以配置当前 token 的有效期
> 5. rule只是抽离出去,其实直接写也没问题
在中间件中使用
```js
const { expressjwt: jwt } = require("express-jwt")
const key = require('../config/key')
router.use(jwt({
secret: key.keyOringe,
algorithms: ["HS256"],
}).unless({ path: ["/admin/login", "/admin/register"] })
)
```
之后使用私有接口去访问
```js
//$route GET admin/banner/
//@desc 修改轮播图接口
router.get('/', (req, res) => {
console.log(req);
res.send({
code: 1,
msg: '获取用户信息成功',
data: req.auth
})
})
```
> 这样就会返回带有用户信息的Token了!
捕获解析JWT失败后产生的错误
当使用express-jwt解析Token字符串时,如果客户端发送的Token字符串**过期**或**不合法**,会产生一个**解析失败**的错误,影响项目的正常运行,可以通过**Express的错误中间件**,捕获这个错误并且进行相关的处理,示例代码如下:
```js
//在所有路由后面定义错误中间件
//使用全局错误处理中间件 捕获解析 JWT 失败后产生的错误
app.use((err, req, res, next) => {
//判断是否由 Token 解析失败导致的
if (err.name == 'UnauthorizedError') {
return res.send({
status: 401,
message: '无效的Token'
})
}
res.send({
status: 500,
message: '未知的错误'
})
})
```
### 2022/8/13
#### 1. 完成查询所有profile接口和查询单个profile接口信息
传递单个接口信息使用动态路由传递id,使用req.params获取值
```js
router.get("/query/:id", (req, res) => {
console.log(req.params);
const { id } = req.params
const sqlcc = 'xxx'
db.query(sqlcc, (err, result) => {
if (err) {
return res.send({
code: 0,
msg: err.message
})
}
if (result.length == 0) {
res.send({
code: 0,
msg: "查询失败"
})
} else {
res.send({
code: 1,
msg: "查询成功",
data: result
})
}
})
})
```
#### 2. profile的增加删除和修改
#### 3. 搭建Vue项目
```
vue create milinku
```
#### 4. 使用concurrently实现前后端连载
1. 安装concurrently模块
```
npm i concurrently
```
2. 给Vue项目起一个名字
```json
"scripts": {
"serve": "vue-cli-service serve",
"build": "vue-cli-service build",
"start": "npm run serve"
},
```
3. 返回到服务端pack.json文件
```diff
"scripts": {
+ "milinku-install": "npm install --prefix milinku",
+ "mulinku": "npm start --prefix milinku",
"start": "node index.js",
"serve": "nodemon index.js",
"test": "echo \"Error: no test specified\" && exit 1",
+ "dev": "concurrently \"npm run serve\" \"npm run mulinku\""
},
```
```bash
npm install --prefix milinku
```
> 这行命令是指定安装依赖包到milinku目录下
```bash
npm start --prefix milinku
```
> 这行命令是启动指定目录的目录,由于之前在mulinku/package.json中设置了`"start": "npm run serve"`,所以这里其实就是启动了mulinku项目.
使用currently实现连载
```js
"dev": "concurrently \"npm run serve\" \"npm run mulinku\""
```
其中`npm run serve`是启动前台,`npm run mulinku`是启动后台
4. 目录结构

### 2022/8/13
#### 1. vue-router配置404页面
在项目中添加相关样式和相关代码和组件后,引入到vue-router
```js
import NotFound from '@/views/404'
{
path: '*',
name: '/404',
component: NotFound
},
```
> 这样在匹配不到任何路由的时候就会找到当前的404组件
#### 2. 利用钩子函数自动生成时间
```js
mounted() {
let data = new Date();
Datestr = `${data.getFullYear()}-${data.getMonth() + 1}-${data.getDate()}`;
this._data.registerUser.date = Datestr;
},
```
#### 3.表单提交
```js
submitForm(formName) {
this.$refs[formName].validate((valid) => {
if (valid) {
alert("submit!");
} else {
console.log("error submit!!");
return false;
}
});
},
```
> 注意这里的forName就是表单的ref:`ref="ruleForm"`,这个方法会对表单进行校验.
#### 4.学习Loading动画,在使用axios请求数据时,调用对应的方法添加加载动画
1. 安装axiox
```bash
npm i axios
```
2. 在项目入口文件中进行配置
```js
import axios from './config/axios'
Vue.prototype.$axios = axios
```
3. 在项目中添加配置文件,添加element-ui的loading插件和Message插件
@/config/axios.js
在该文件中编写代码
```js
import axios from 'axios'
import { Loading,Message } from 'element-ui';
let loading;
function startLoading() {
loading = Loading.service(
{
lock: true,
text: '拼命加载中...',
background: 'rgba(0,0,0,.7)'
}
);
}
function endLoading() {
loading.close();
}
//请求拦截
//响应拦截
export default axios
```
> 引入加载插件,定义了两个方法,一个用来开启动画,一个用来结束动画,`lock`:true是锁定页面,用户无法操作.`text`:加载动画时,显示的文本.`background`:加载动画时的背景.
4. 设置动画启动的配置
```js
//请求拦截
axios.interceptors.request.use(config => {
//加载动画
startLoading();
return config;
}, error => {
return Promise.reject(error);
})
```
```js
//响应拦截
axios.interceptors.response.use(response => {
//结束加载动画
endLoading();
return response;
}, error => {
//错误提醒
endLoading();
Message.error(error.response.data)
return Promise.reject(error)
})
```
> 这里使用了element-ui的Message模块,用来给用户反馈请求结果
#### 5.Vue前端配置跨域
在vue.config.js里进行配置
```js
devServer: {
proxy: {
//配置跨域
'/api': {
target: 'http://127.0.0.1:5100/api/',
ws: true,
changOrigin: true,
pathRewrite: {
'^/api': ''
}
}
}
}
```
#### 6.处理token
拿到后台传过来的token,就先保存到`localStorage`里
```js
localStorage.setItem("milink", msg);
```
> msg里的就是token信息
#### 7.Vue中路由守卫以及token的过期处理
使用`localStorage.milink`获取token,milink是我们之前设置过的
在router/index.js里进行配置全局路由守卫
```js
//路由守卫
router.beforeEach((to, from, next) => {
const isLogin = localStorage.milink ? true : false
if (to.path == '/login' || to.path == '/register') {
next();
} else {
isLogin ? next() : next("/login")
}
})
```
> 这时,如果有名称为milink的token,就可以通过,否则就会重新定向到"/login"路由.
#### 8. 在请求拦截和响应拦截部分进行设置
1. 在请求拦截这里,我们给设置一下统一的请求头
```diff
//请求拦截
axios.interceptors.request.use(config => {
//加载动画
startLoading();
+ if (localStorage.milink) {
+ //设置统一的请求头
+ config.headers.Authorization = localStorage.milink
}
return config;
}, error => {
return Promise.reject(error);
})
```
2. 在响应拦截里,我们可以对返回的状态码进行判断,如果是401,就说明Token失效了,这时候,我们就可以将token进行清除,同时跳转到登陆页面.
```diff
//获取错误状态码
const { status } = error.response;
+ if (status == 401) {
+ //token失效
+ Message.error("Token失效,请重新登陆")
+ //清除token
+ localStorage.removeItem('milink');
+ //跳转到登陆页面
+ router.push('/login')
}
```
> 注意:使用router的前提是引入router
#### 9. 解析token,获取用户数据(jwt-decode)
1. 使用jwt-decode解析token
```js
npm i jwt-decode
```
2. 在login.vue里,引入`jwt-decode`
```js
import jwt from "jwt-decode";
```
3. 在存储token后,解析token
```js
const decode = jwt(msg);
```
输出msg
```json
{
avatar: "//www.gravatar.com/avatar/bf58432148b643a8b4c41c3901b81d1b?s=200&r=pg&d=mm"
exp: 1660471454 //生成时间
iat: 1660467854 //失效时间
id: 11
identity: "employee"
name: "test"
}
```
#### 10.将解析的数据保存到Vux中
这里设计到了数据的校验,所以可能不太一样.
可以去store/index.js里去看代码
1. 判断状态值为空的方法
```js
isEmpty(value) {
return (
value == undefined ||
value == null ||
(typeof value == "object" && Object.keys(value).length === 0) ||
(typeof value == "string" && value.trim().length === 0)
);
},
```
> 这些小方法可以复用,挺灵活
2.将解析出来的值添加到Vuex中
```js
this.$store.dispatch("setAuthenticated", !this.isEmpty(decode));
this.$store.dispatch("setUser", decode);
```
3. 解决刷新后vuex里的保存的值丢失的问题
在app.vue里进行判断,如果有这个token,我们就解析,并添加到vuex里.
```js
created() {
if (localStorage.milink) {
const decode = jwt(localStorage.milink);
this.$store.dispatch("setAuthenticated", !isEmpty(decodethis));
this.$store.dispatch("setUser", decode);
}
},
```
> 将该方法挂载到create函数中.
### 2022/8/15
#### 1. 学习下拉菜单(element-ui)Dropdown
[官方文档](https://element.eleme.cn/#/zh-CN/component/dropdown)
#### 2. 完成退出登陆功能
```js
logout() {
//清除token
localStorage.removeItem("milink");
//设置store
this.$store.dispatch("clearCurrentState");
//跳转
this.$router.push("/login");
},
```
> 清除token,然后设置store,将状态值设置为空。
- 状态值设置为空的方法,在actions配置清除方法
```js
clearCurrentState: ({ commit }) => {
commit(types.SET_AUTHENTICATED, false);
commit(types.SET_USER, null)
}
```
> 在前台将vuex里的数据清除
#### 3. 学习element-ui的导航栏`Navigation`
[导航栏](https://element.eleme.cn/#/zh-CN/component/menu)
导航栏中的数据使用v-for指令渲染到页面上。
### 2022/8/16
#### 1. 学习表单(element-ui)Dropdown
[表单](https://element.eleme.cn/#/zh-CN/component/table)
使用模板表单
1. 首先要有
2. 配置表格的列
```js
```
> 注意这里prop属性,对应的是请求回来数据的属性名,这样才能显示出来。
3. 从后台接口拿数据,使用axios,由于在main.js对该axios进行了封装,所有每个vue组件都可以使用this.$axios发起请求。
```js
getProfile() {
this.$axios
.get("/api/profile/query")
.then((res) => {
this.tableData = res.data.data;
console.log(res);
})
.catch((err) => {
console.log(err);
});
},
```
将数据保存到`tableData[]`里
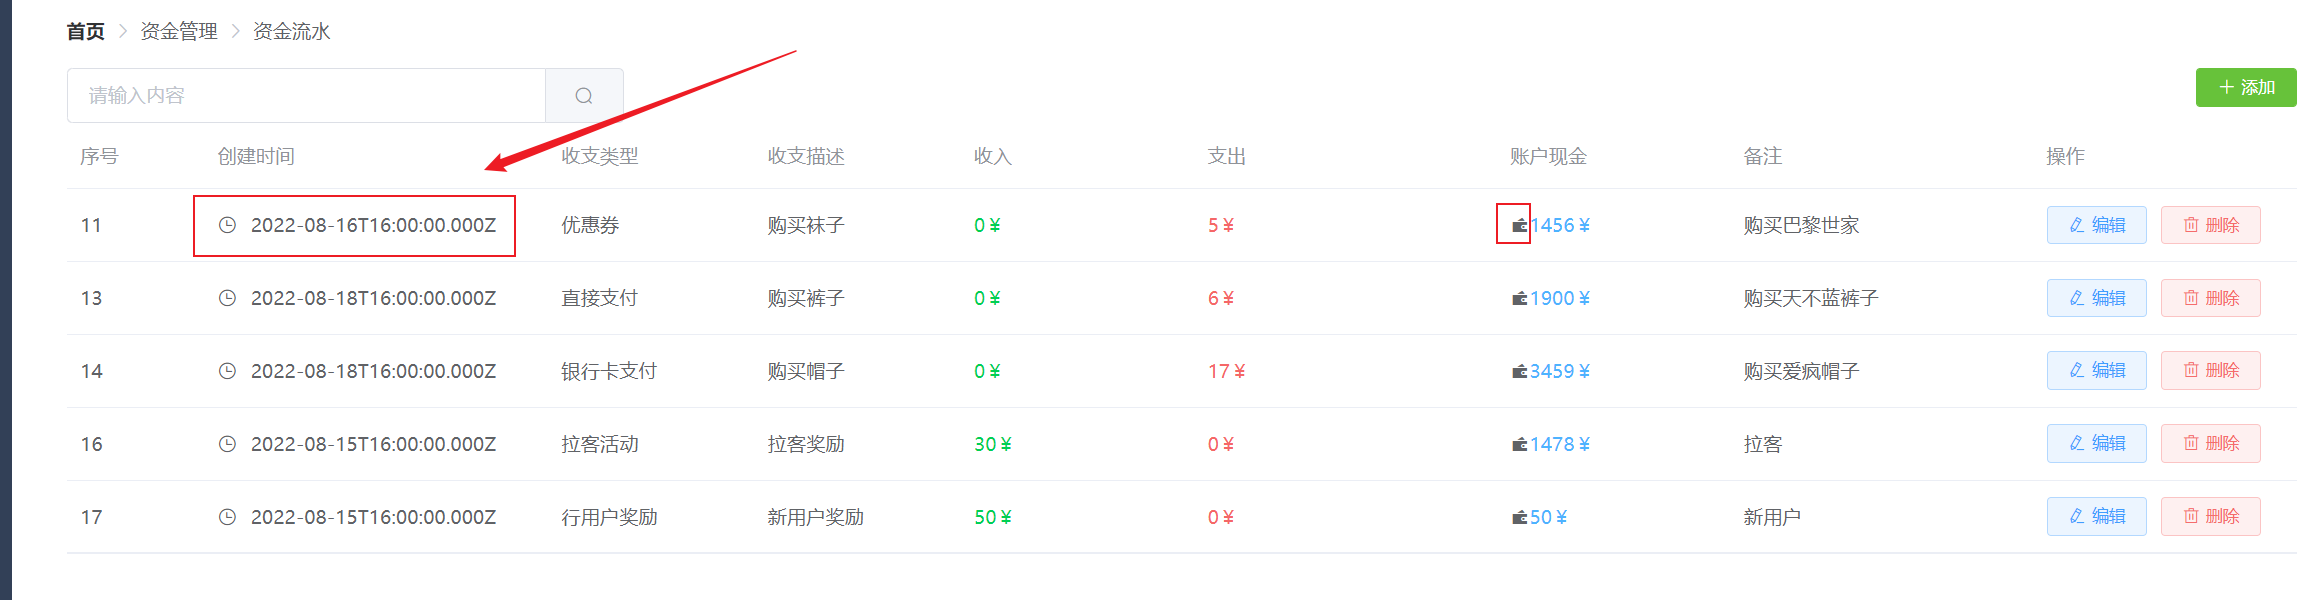
#### 2. 学会了如何在表格中使用模板
1. 例子
```js
{{ scope.row.date }}
```
> 在该案例中,我们可以根据自己的需要指定相关模板,这里就设置了字体图标,同时通过style可以设置对应的颜色。
- 效果
#### 3. 学会使用面包屑来美化页面
```js
首页
资金管理
资金流水
```
> 同时可以配置跳转路由,都可以去element-ui上去找到这些配置
#### 4. 学习使用Dialog 对话框在点击添加按钮时触发
[dialog](https://element.eleme.cn/#/zh-CN/component/dialog)
```js
//表单内容
props: {
dialogVisible: Object,
},
```
> 参数的话我们定义为Object类型,同时在父组件Fundlist.vue中,将其引入并注册,同时将值传入当前组件中,从而达到显示于隐藏效果。
- Fundlist.vue
```js
data() {
return {
dialog: {
show: false,
},
};
},
```
#### 5. 学习如何让表格重载
> 描述,也就是说在添加成功后,让表单自动刷新一次。
子组件中使用自定义事件,让父组件中的方法去执行.
- 子组件
```js
//自定义事件,让表单重新刷新
this.$emit("update");
```
- 父组件
```vue
```
> 执行指定方法,从而让表单刷新。
#### 5. 要学会组件复用,就比如添加和修改组件
这里在父组件中传递过相关参数后,子组件根据不同的选项进行渲染,主要体现在两方面。
1. 标题
2. axios发起路径的请求
#### 6. 学会表格分页
[element](https://element.eleme.cn/#/zh-CN/component/pagination)
```html
```
> 这里的写死的参数都可以在data里定义后传上去的。有两个方法:`handleSizeChange`,`handleCurrentChange`
- 思路
这里定义了一个变量用来保存分页数据`allTableData`,我们在allTableData中使用filter方法过滤数据后,赋给`TableData`在表格中渲染出来。
### 2022/8/17
#### 1. 添加数据可视化,美化页面
> 想要让数据显示出来,1.设置盒子宽度高度.2.给数据。